
Desserts
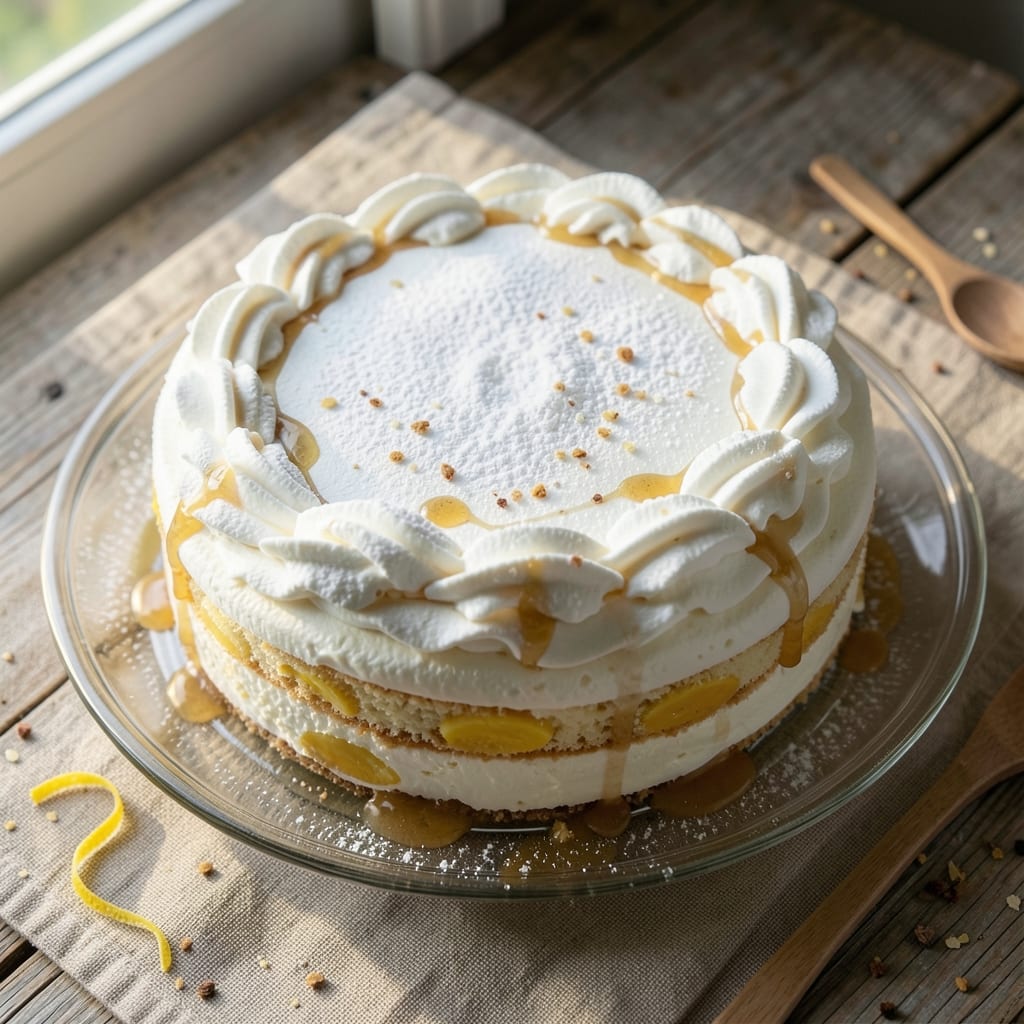
Twelve eggs transform into a cloud-like sponge cake with a golden, buttery crust—this is the recipe that finally delivers restaurant-quality lightness at home. The secret lies in precise technique: whisking egg whites to stiff peaks and folding them into a delicate batter that rises high and stays impossibly tender. I've perfected this method over years of baking, and it never fails to impress.
What sets this sponge cake apart is its foolproof structure—no dense layers or dry crumbs, just an airy crumb that melts in your mouth. The key steps include proper egg separation, gradual folding, and baking at the right temperature to ensure even rising. With just a few simple ingredients and careful attention to detail, you'll achieve a cake that's light enough to float.
By the time it emerges from the oven, you'll have a towering cake with a crisp exterior and velvety interior, perfect for slicing into elegant layers. This recipe works beautifully as a standalone dessert or as the base for a layered cake with whipped cream or fresh berries. The flavor is pure vanilla sweetness with a subtle buttery richness that makes every bite irresistible.
Whether you're baking for a special occasion or simply craving a classic dessert, this sponge cake delivers restaurant-quality results with minimal effort. The technique is straightforward once you understand the principles, and the reward is a cake that's light, tender, and utterly satisfying. Let's get baking!
Ingredients for 12 egg sponge cake
Twelve eggs and nine simple ingredients create a restaurant-worthy sponge cake with legendary lightness.
| Ingredient | Amount | Notes |
|---|---|---|
| Large Eggs 🥚 | 12 whole | Room temperature, separated carefully |
| Granulated Sugar 🍚 | 2 cups | Superfine preferred for smooth texture |
| Unsalted Butter 🧈 | 1 cup | Cold, cubed for crust development |
| All-Purpose Flour 🌾 | 1 ½ cups | Sifted, plus extra for dusting |
| Vanilla Extract 🌿 | 1 tbsp | Pure, high-quality vanilla |
| Salt 🧂 | ¼ tsp | Fine sea salt preferred |
| Baking Powder 🍞 | ½ tsp | Freshly opened for best results |
| Cornstarch 🌽 | 1 tbsp | For tender crumb structure |
| Lemon Zest 🍋 | 1 tsp | Fresh, finely grated |
Eggs are the foundation here—room temperature is critical for proper volume. Kirkland or Vital Farms brands consistently deliver high-quality eggs for baking. The butter needs to be cold when mixed with sugar for that signature buttery crust. For flour, King Arthur or Gold Medal brands are reliable choices, but any all-purpose will work. Superfine sugar dissolves faster, but if you only have granulated, pulse it in a food processor for a smoother texture. The lemon zest adds brightness—use organic if possible to avoid wax residue.
No vanilla extract? Vanilla bean paste adds specks for visual appeal, or a pinch of cinnamon enhances the flavor. Substituting butter with vegetable shortening (like Crisco) makes the cake even lighter, though it lacks richness. For a dairy-free option, Earth Balance vegan butter works well. The baking powder must be fresh—if it's over a year old, toss it. Cornstarch can be swapped for arrowroot powder at the same ratio. And if you're short on lemon zest, orange zest gives a lovely variation.
Store the cake in an airtight container at room temperature for up to 3 days—it actually improves as it sits. For longer storage, wrap tightly in plastic and refrigerate for 1 week. Freezing is possible but best for 1 month—thaw at room temperature before serving. The crust stays crisp for about 2 hours after baking, so slice while still warm for that perfect texture. Leftovers? Toast slices lightly for a delightful breakfast treat.
Why You'll Love This Recipe
- No-Fuss Whipping: I swear by the 12 eggs here—they create this light, airy texture with almost no effort. Just whip them with sugar until pale and fluffy, fold in butter, and you’re halfway there. No stand mixer? A hand mixer does the trick just fine.
- Butter-Sugar Magic: That ratio of butter to sugar? It’s what makes this cake melt-in-your-mouth tender with a subtle richness. The vanilla ties it all together—warm, sweet, and just a little nostalgic. Honestly, it’s the kind of flavor that makes you want to bake it again the next day.
- Birthday or Brunch: This cake is my go-to for celebrations and lazy Sundays. Slice it for a crowd, layer it with whipped cream, or serve it plain—it’s always a hit. Between us, I’ve even used leftover slices for French toast. (Yes, even on a Tuesday night.)
- Budget-Friendly Luxury: Twelve eggs might sound like a lot, but it stretches further than you’d think. The butter and sugar are used efficiently, and the flour? Just enough to keep it light without breaking the bank. Plus, leftovers keep beautifully—if they last that long.
Step-by-step instructions for 12 egg sponge cake
This method delivers a towering, airy sponge with a signature buttery crust—every detail matters.
Separate Eggs and Whip Yolks with Sugar
Begin by separating the 12 whole large eggs, placing yolks in one bowl and whites in another. I use a fine-mesh sieve for this to catch any stray bits of white in the yolks—those can prevent proper whipping later. Add the 2 cups granulated sugar to the yolks and whisk vigorously until fully dissolved and the mixture turns pale yellow.
Transfer the yolk mixture to a stand mixer fitted with the whisk attachment. Beat on medium-high speed for 3-4 minutes until the yolks triple in volume, become thick, and ribbon trails form when the whisk is lifted. This step builds the foundation for that signature light, airy texture. The sugar should be completely incorporated, and the mixture should feel almost like ribbon candy when you lift the whisk.
Whip Egg Whites to Stiff Peaks
While the yolks whip, add a pinch of the 0.25 tsp salt to the egg whites. Beat on high speed until soft peaks form, then gradually add the 1 tbsp cornstarch and 1 tsp lemon zest while whipping continues. Continue beating until stiff, glossy peaks form—when you lift the whisk, the peaks should stand straight up without collapsing. This takes about 4-5 minutes total.
I fold the egg whites into the yolks in three additions to preserve maximum air. First, gently fold one-third of the whites into the yolks with a spatula, mixing just until combined. Then add another third, folding until no streaks remain. Finally, incorporate the last third with the lightest touch possible—overmixing here will deflate the batter.
Fold in Dry Ingredients and Butter
In a separate bowl, sift together the 1.5 cups all-purpose flour and 0.5 tsp baking powder. Gently fold this dry mixture into the batter in three additions, mixing just until combined after each. The batter should remain light and airy—never stir vigorously or you'll knock out all the air you've worked so hard to incorporate.
Cut the 1 cup unsalted butter into small cubes and fold them in one at a time. I like to add them to the batter first, then fold in the 1 tbsp vanilla extract to distribute it evenly. The butter should melt slightly from the warmth of the batter, creating pockets of richness throughout the cake. The final batter should be thick but pourable, with a few visible streaks of butter—this is normal and desirable.
Bake in a Preheated Oven
Preheat your oven to 350°F and prepare two 9-inch round cake pans by lining the bottoms with parchment paper and dusting lightly with flour. Divide the batter evenly between the pans, tapping them gently on the counter to remove any air bubbles. Bake for 25-30 minutes, until the tops spring back when touched lightly and a toothpick inserted comes out clean.
I like to rotate the pans halfway through baking to ensure even browning. The edges should be lightly golden, and the centers should be just set but still slightly jiggly. Overbaking is the enemy here—it turns sponge cake dry. As soon as it passes the toothpick test, remove it from the oven immediately and let it cool in the pans for 10 minutes before transferring to a wire rack to cool completely.
Pro Tips For Making 12 Egg Sponge Cake
- Separate yolks and whites early: I learned this the hard way—whipping egg whites at room temperature makes a real difference, but if you don’t separate them first, they’ll warm up in the bowl. Pop those yolks into a separate container the second you crack the eggs, then let both sit out for 30 minutes before whipping. Cold whites won’t hold their volume, and you’ll end up with a dense, sad cake.
- Use room-temperature butter: This isn’t the prettiest method, but it’s the tastiest. If you cut cold butter straight from the fridge into your sugar-yolk mix, you’ll get lumps that never fully emulsify. Microwave the butter in 10-second bursts until it’s soft but not melted—then let it sit for 10 minutes. The batter will be smoother, and the crumb will be lighter. Trust me, your cake will thank you.
- Don’t overmix the batter: I was skeptical until I tried it: once you fold in the flour, stop mixing the second it disappears. Overworking the batter adds gluten, and your 12-egg sponge will turn out tough instead of tender. Use a spatula to gently fold in the dry ingredients in three additions—just until combined. Yes, it’ll look streaky, but that’s how you get that cloud-like texture.
- Bake until the center springs back: This is the thing that matters most: your cake will look underdone when the timer goes off. Insert a skewer into the center—if it comes out clean, it’s done. If not, give it 5 more minutes. I used to pull cakes too soon because I thought they’d dry out, but they actually keep baking off the heat. A toothpick test guarantees a moist crumb, not a gummy middle.
Common mistakes when making your 12 egg sponge cake
Overmixing the Batter
I can't stress this enough: overmixing is the #1 enemy of a light sponge cake. Once you've folded in the egg whites and dry ingredients, stop mixing as soon as the batter looks uniform. Vigorous stirring collapses all those delicate air bubbles you worked so hard to create. I've ruined many cakes by trying to "get it all mixed in"—the batter will look slightly streaky, and that's okay! The magic happens when those ingredients meld together during baking. 🥚
Skipping the Room Temp Eggs
Cold eggs from the fridge won't whip properly, leading to a dense, flat cake. Always let your eggs sit at room temperature for at least 30 minutes before starting. I keep mine in a bowl of warm water for 10 minutes if I'm in a hurry—this speeds up the process without overcooking the whites. Pro tip: Check the temperature by pressing your finger on the egg—it should feel slightly warm, not cold. ❄️
Using Room Temp Butter
Cold butter is essential for that signature buttery crust. If your butter is too soft, it'll melt too quickly during baking, creating a greasy cake instead of a crisp exterior. I always store my butter in the freezer and cut it into ½-inch cubes right before using. Keep them in the fridge while you prep the rest of the batter—this helps maintain the right temperature. The cubes should feel firm but not rock-hard when you press them. 🧈
Incorrect Oven Temperature
Sponge cakes are delicate—too hot and they'll brown too quickly, too cool and they won't rise properly. 350°F is non-negotiable for this recipe. I always preheat my oven for at least 20 minutes before baking to ensure even heat distribution. Never open the oven door during the first 20 minutes of baking, as this causes the cake to sink. Use an oven thermometer to verify your oven's actual temperature—many ovens run 25°F hotter or cooler than set. 🌡️
Not Cooling Properly
Rushing to slice your cake while it's still hot is a fast track to a gummy, uneven texture. Let the cake cool in the pans for 10 full minutes before transferring to a wire rack. This allows the structure to set properly. I've seen many home bakers cut into the cake too soon, only to have the layers collapse. For even better results, let it cool completely before slicing—this ensures clean cuts every time. ⏳
Ignoring the Toothpick Test
Don't rely on visual cues alone! Insert a toothpick into the center of the cake—it should come out clean or with a few crumbs, never wet batter. A toothpick with moist batter means your cake needs more time, while one with dry crumbs means it's ready. I've pulled cakes out too early because they looked "done," only to have them continue cooking and turn dry. When in doubt, give it 5 more minutes—sponge cakes finish cooking as they cool. 🍞
Nutrition facts
Frequently asked questions
Why does this recipe use so many eggs?
The 12 eggs create an ultra-light, airy texture that's impossible with fewer. Each egg adds structure and moisture while keeping the crumb tender. This ratio is perfect for a classic Japanese or French-style sponge that stays moist for days without drying out. Fewer eggs would make the cake denser and more likely to collapse.
Can I make this cake in a single 9-inch pan?
Yes, but it will be much taller and thinner—think 6-inch height instead of 3-inch layers. Use a 9x13-inch pan instead for a single sheet cake. The baking time will increase to 35-40 minutes due to the larger surface area. For best results, bake at 325°F instead of 350°F to prevent over-browning on top.
How do I prevent a dense sponge cake?
Three key steps:
- Whip egg whites to stiff peaks (they should hold their shape when the whisk is lifted),
- Fold gently in three additions to preserve air, and
- Don't overmix after adding flour. Also ensure your eggs are room temperature and your butter is cold—both affect volume dramatically.
Can I substitute butter for oil?
Not recommended for this recipe—the butter creates that signature crisp crust and tender crumb. If you must substitute, use ½ cup melted butter + ½ cup neutral oil (like vegetable or canola). The texture will be slightly denser, but still light. For a truly light sponge, stick with the butter—it's worth the effort!
What's the best way to store leftovers?
Wrap tightly in plastic wrap and store at room temperature for up to 3 days—it actually improves as it sits! For longer storage, refrigerate for 1 week or freeze for 1 month. To serve, let it sit at room temperature for 30 minutes before slicing for perfect texture. The cake keeps its moisture beautifully when stored properly.