
Desserts
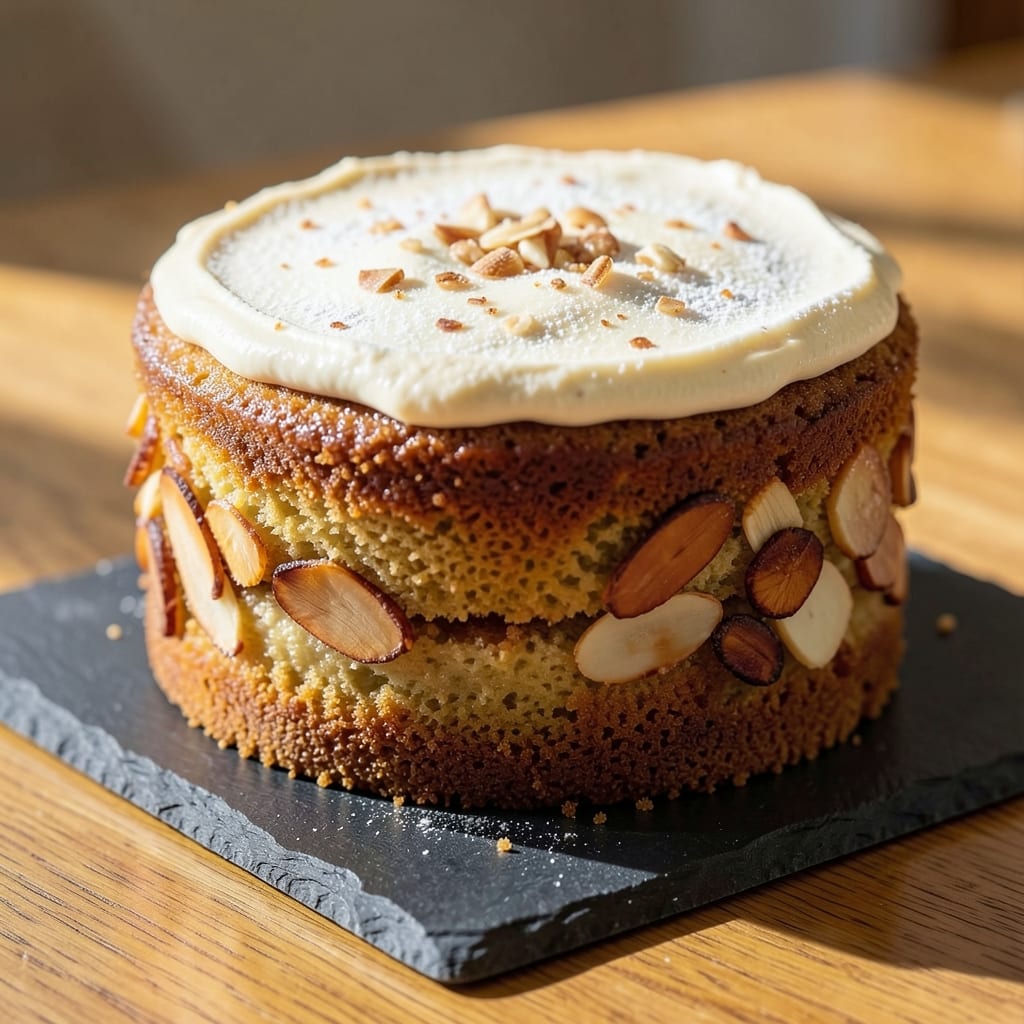
This 12-egg-yolk pound cake delivers unmatched moisture that lasts for days—no dry crumbs in sight. 💛 The secret lies in the perfect balance of butter, sugar, and yolks, creamed together until light and fluffy. I've baked this recipe countless times, and it never disappoints, whether served at brunch or as an after-dinner treat.
The foundation of this cake is the classic creaming method, where butter and sugar are beaten until pale and airy, then gradually combined with egg yolks. This technique incorporates air, creating a tender crumb that stays moist long after baking. The addition of a full dozen yolks adds richness without making the cake overly dense.
What sets this pound cake apart is its ability to stay fresh for days, with a velvety texture that melts in your mouth. The cake bakes up golden brown with a slight crack on top, signaling perfect doneness. It's the kind of dessert that feels indulgent yet balances perfectly with fruit compotes or a dusting of powdered sugar.
Whether you're baking for a special occasion or simply craving a slice of pure comfort, this recipe delivers. The method is straightforward, but the results are anything but ordinary. Let's get started on creating your moistest pound cake yet.
Ingredients for 12 egg yolk pound cake
Twelve rich yolks meet perfectly creamed butter and sugar for a pound cake with legendary moisture.
| Ingredient | Amount | Notes |
|---|---|---|
| Unsalted Butter 🧈 | 1 ½ cups | Cold, cubed for creaming |
| Granulated Sugar 🍚 | 2 ½ cups | Superfine preferred for smoothness |
| Large Egg Yolks 🥚 | 12 whole | Room temperature preferred |
| All-Purpose Flour 🌾 | 3 ½ cups | Sifted, spooned lightly |
| Baking Powder 🧂 | 1 ½ tsp | Aluminum-free for best results |
| Salt 🧂 | ½ tsp | Fine sea salt preferred |
| Vanilla Extract 🌿 | 2 tsp | Pure Madagascar bourbon |
| Whole Milk 🥛 | ¾ cup | Room temperature |
| Powdered Sugar 🍚 | ¼ cup | For dusting, optional |
The butter is non-negotiable here—European-style unsalted like Plugrá or Bergère gives the best flavor. Grab it from specialty stores or the bakery section. Room temperature yolks are ideal, but if they're cold, let them sit out for 30 minutes. The flour? King Arthur or Gold Medal are my go-tos—they're consistent and reliable. Sift it before measuring to avoid dense pockets. For the sugar, superfine dissolves faster, but granulated works if that's what you've got (just pulse it briefly in a food processor).
No superfine sugar? Granulated works fine—just pulse it in a food processor for 10 seconds to break up the grains. Vanilla extract can be imitation, but Madagascar bourbon or Tahitian takes this cake to the next level. The milk can be any kind, but whole milk adds richness—skip the skim if you want that ultra-moist texture. For the powdered sugar, if you're dusting the cake, use confectioners' sugar (not the same as superfine). The baking powder? Diamond Crystal is double-acting, so use half the amount if your brand isn't—check the package.
This cake keeps beautifully for 5 days at room temperature wrapped in parchment, or 3 months in the freezer. For serving, dust with powdered sugar right before slicing—it adds that restaurant-quality finish. The butter should be stored in the fridge, but take it out 1 hour before creaming to soften. Flour and sugar can be stored in airtight containers for 6 months in a cool, dark place. The yolks? Use them within 3 days of cracking for best flavor.
Why You'll Love This Recipe
- No Mixer Needed: I swear by this recipe when I’m in a rush—just cream the butter and sugar by hand, fold in yolks, then stir dry ingredients right into the bowl. No sifting, no extra steps, just a smooth batter that comes together faster than I can make coffee.
- Rich Without Overpowering: Twelve yolks? Yes, please. The butter and sugar meld into something decadent but not cloying, thanks to that flour and baking powder keeping it light. It’s the kind of cake that tastes like a treat but doesn’t leave you in a sugar fog—honestly, my husband asks for seconds without batting an eye.
- Weeknight Dinner Side: Slice it warm with breakfast or serve it cold alongside soup—this cake adapts like a chameleon. (Yes, even on a Tuesday night.) The texture holds up for days, so it’s my go-to when I need something reliable that doesn’t scream “dessert.”
- Budget-Friendly Luxury: Butter and eggs are the stars here, but they stretch further than you’d think. A single batch feeds a crowd or lasts me three lunches, and the leftovers? Still moist and delicious. Between us, this is the kind of recipe that makes frugal baking feel indulgent.
Step-by-step instructions for ultra-rich pound cake
This method delivers legendary moistness using all 12 yolks—no dry crumbs in sight.
🍳 Step 1: Cream Butter and Sugar to Peak Volume
In a stand mixer fitted with the paddle attachment, beat the 1.5 cups unsalted butter (cold, cubed) and 2.5 cups granulated sugar on medium-high speed for 4-5 minutes. You're looking for a pale, fluffy mixture that nearly doubles in volume and leaves clean ribbons when the beaters are lifted. This thorough creaming incorporates maximum air, which creates that signature tender crumb.
Here's the thing—don't rush this step. The butter needs to emulsify completely with the sugar to prevent dense pockets in your cake. I press down on the paddle occasionally to ensure the butter melts evenly. When the mixture is light and airy with a slight sheen, it's ready for the next step.
👨🍳 Step 2: Add Egg Yolks Gradually for Maximum Richness
Add the 12 whole large egg yolks one at a time, mixing on low speed for 30 seconds after each addition. This gradual incorporation prevents the eggs from scrambling and ensures each yolk blends smoothly into the batter. The mixture will thicken noticeably as you go.
After all yolks are incorporated, add the 2 tsp vanilla extract and mix for another 10 seconds until fully combined. The batter should be thick, smooth, and ribbon-like. If it looks slightly curdled at first, don't worry—the flour will smooth it out completely in the next step. This is where the cake gets its signature richness and moisture.
🥘 Step 3: Combine Dry Ingredients and Milk
In a separate bowl, whisk together the 3.5 cups all-purpose flour, 1.5 tsp baking powder, and 0.5 tsp salt. Sift the flour mixture directly into the wet ingredients while mixing on low speed for 30 seconds until just combined. You should still see small streaks of flour—overmixing develops gluten and makes the cake tough.
With the mixer running on low speed, gradually add the 0.75 cup whole milk until fully incorporated. The batter will be thick and smooth, almost like a pound cake batter should be. At this point, I like to give it one final scrape down with a silicone spatula to ensure no dry ingredients remain on the sides of the bowl.
⏰ Step 4: Bake at Low Temperature for Even Cooking
Preheat your oven to 325°F. Grease and flour two 9-inch round cake pans (or one 9x5-inch loaf pan if preferred) thoroughly. Divide the batter evenly between the prepared pans. Bake for 50-60 minutes until a toothpick inserted in the center comes out clean and the top springs back when pressed gently.
The lower temperature ensures even cooking without a dry crust. I like to tent the pans with aluminum foil after 30 minutes to prevent over-browning. The cake is done when the edges pull away from the pan and the center is just set. Remove from the oven immediately and let cool in the pans for 10 minutes before transferring to a wire rack to cool completely.
🍽️ Step 5: Dust and Serve for Perfect Presentation
Once completely cooled, dust the top of the cake generously with the 0.25 cup powdered sugar using a fine-mesh sieve. This step is optional but adds that professional finish that makes all the difference. The cake should be moist with a tender crumb—no dryness, no gummy texture, just perfect pound cake texture throughout.
Slice with a serrated knife that's been dipped in hot water and wiped dry for clean cuts. Serve at room temperature with fresh berries or a dollop of whipped cream. The flavor will continue to develop over the next 24 hours, making it even more delicious the next day.
Pro Tips For Making 12 Egg Yolk Pound Cake
- Cream Butter Slowly: Beat the butter and sugar together until it’s pale and fluffy—this takes longer than you’d think. I used to rush it, and the cake turned out dense; now I let it go for at least 5-7 minutes with a stand mixer, scraping the bowl every 30 seconds. That light color? That’s what makes the crumb tender.
- Separate Yolks with Care: Don’t just crack eggs over a bowl—tap them gently on a flat surface first, then slide the yolk into a separate container. I’ve lost count of how many times a stray bit of white sneaked in, making the cake gummy. A fine-mesh sieve helps if you’re nervous, but even just a quick flick of the wrist works.
- Sift Flour Twice: Measure the flour, sift it into the bowl, then sift it again right before folding it in. The first sift removes lumps, but the second ensures no clumps form when you add the baking powder. I learned this after a cake collapsed in the middle—turns out, baking powder needs room to work.
- Test Doneness with a Toothpick: Skip the timer and check at 45 minutes—insert a toothpick into the center. If it comes out clean but the cake still jiggles slightly, it’s done. Overbaking dries out the yolks, and underbaking leaves it gummy. I’ve ruined cakes both ways, so trust the toothpick, not the recipe’s suggested time.
Essential equipment for 12 egg yolk pound cake
Stand Mixer Essentials
The heart of this recipe is your stand mixer—I swear by my KitchenAid Artisan Series with the paddle attachment. This is non-negotiable for proper creaming. The paddle creates the right texture by incorporating air efficiently. If you don't have a stand mixer, a hand mixer works, but you'll need to work in 2-minute bursts to avoid overheating the butter. 💛
Precision Measuring Tools
Accurate measurements are everything here. Use a digital kitchen scale for the butter and sugar to ensure consistency—1.5 cups butter should weigh 340 grams (don't eyeball it!). For the flour, use the spoon-and-level method with a lightweight measuring cup (like OXO Good Grips) to avoid packing. A fine-mesh sieve for the powdered sugar ensures an even dusting.
Baking Pans That Matter
Invest in two 9-inch round cake pans with non-stick coating (I love Wilton Perfect Results) or a 9x5-inch loaf pan for single-serving slices. These pans distribute heat evenly and prevent sticking. If using round pans, make sure they're at least 2 inches tall to accommodate the thick batter. For the loaf pan, choose one with fluted edges for a professional finish.
Temperature Control
A thermometer is your best friend for both the oven and butter. Your oven should hit 325°F (±5°F) for even baking. For the butter, use an instant-read thermometer to confirm it's 65-68°F before creaming—too cold and it won't emulsify properly. I also recommend a oven thermometer to verify your oven's accuracy (most run hot!).
Mixing Tools for Perfection
Beyond the mixer, grab a silicone spatula for scraping down the bowl and a whisk for combining dry ingredients. A bench scraper helps divide the batter evenly between pans. For dusting, a fine-mesh sieve (like Norpro) ensures powdered sugar distributes smoothly. Don't skip these—they make all the difference in texture and presentation.
Optional Upgrades
For flavor infusions, a mortar and pestle works great for crushing spices or citrus zest. If you're making a vanilla bean version, a microplane helps extract seeds easily. A wire cooling rack prevents soggy bottoms, and parchment paper makes storing wrapped cakes effortless. These aren't must-haves, but they elevate the process. ✨
Nutrition facts
Frequently asked questions
Why does this recipe use 12 egg yolks instead of whole eggs?
Using just yolks creates a richer, more tender cake without adding extra liquid from egg whites. The yolks provide natural fat and emulsifiers that keep the texture ultra-moist for days. This technique also prevents a dense crumb that can happen with whole eggs in pound cakes.
Can I substitute whole eggs for the yolks?
You can try, but expect a slightly different texture. For every 3 yolks, use 2 whole eggs (keeping the total yolks at 12). The cake will still be moist, but the egg whites may make it slightly lighter. For true richness, stick with the yolk-only version.
How do I know when the cake is fully baked?
Look for three signs: the toothpick comes out clean, the edges pull away from the pan, and the top springs back when pressed gently. The cake should also have a slight crack on top. Baking time varies by oven—start checking at 50 minutes for round pans or 60 minutes for loaf pans.
Why does my cake turn out dry even though I followed the recipe?
Overbaking is the #1 cause of dryness. Remove the cake when the center is just set (toothpick may have a few moist crumbs). Another common mistake is using cold butter—it doesn't cream properly. Always let butter soften to 65-68°F before starting. Also check your oven temperature with a thermometer—many run hot!
Can I make this cake in a bundt pan?
Technically yes, but the batter is very thick for bundt pans. Grease the pan thoroughly and reduce baking time by 10-15 minutes. The cake may have a denser texture in the center due to the pan's shape. For best results, stick with round or loaf pans designed for pound cake batters.