
Desserts
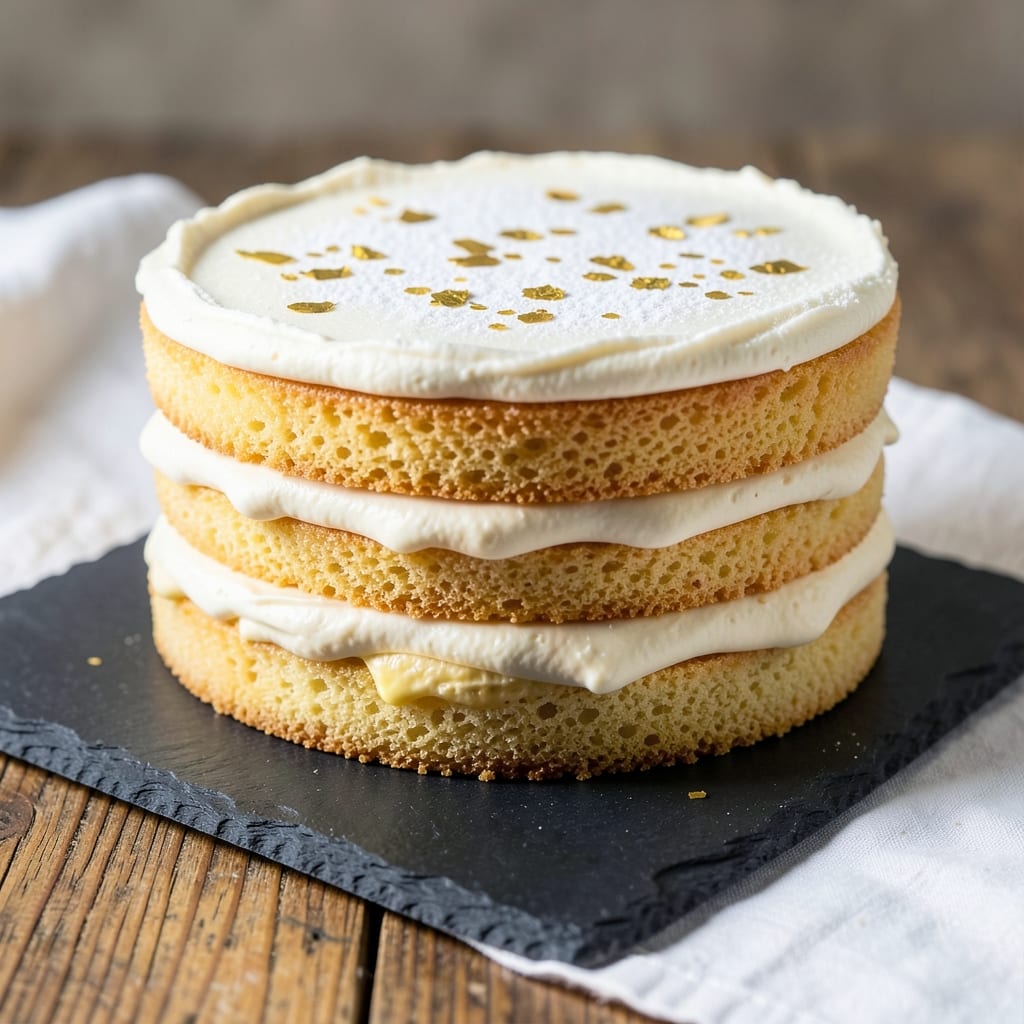
Twelve egg yolks transform this sponge cake into a buttery, light-as-air masterpiece that defies gravity with every slice. 💛 The secret lies in the yolks—whipped to ribbons of golden foam—that create layers so tender they melt on your tongue. I've perfected this technique after years of trial and error, ensuring no dense crumbs or collapsed layers here. What sets this recipe apart is the foolproof method that balances precision with simplicity. You'll fold in stiffly beaten egg whites in three stages, locking in air for maximum lift while maintaining structure. The result? A cake that's moist yet airy, with a delicate crumb that holds its shape beautifully when sliced. By the time you pull it from the oven, you'll have a golden, domed cake that's impossible to resist. The flavor is rich and buttery without being heavy, thanks to the yolks' natural richness balanced by the whites' lightness. It's the kind of dessert that makes guests ask for the recipe immediately. Serve it plain for elegance, or add citrus zest, chocolate ganache, or fresh berries for extra flair. The possibilities are endless once you master this foundation. Let's get baking!
Ingredients for 12 egg yolk sponge cake
Twelve yolks, eight whites, and a few clever tricks make this cake magically light.
| Ingredient | Amount | Notes |
|---|---|---|
| Large Egg Yolks 🥚 | 12 whole | Room temperature for best whipping |
| Granulated Sugar 🍚 | 1 ½ cups | Superfine preferred for smooth texture |
| All-Purpose Flour 🌾 | 1 ½ cups | Sifted, no substitutions |
| Unsalted Butter 🧈 | 1 cup | Cold, cubed for even melting |
| Large Egg Whites 🥚 | 8 whole | Room temperature, no yolks |
| Vanilla Extract 🌿 | 1 tsp | Pure, high-quality preferred |
| Cream of Tartar 🧂 | ¼ tsp | Stabilizes egg whites |
| Salt 🧂 | ¼ tsp | Fine sea salt preferred |
| Lemon Zest 🍋 | 1 tbsp | Fresh, finely grated |
| Baking Powder 🍞 | ½ tsp | Aluminum-free preferred |
| Powdered Sugar 🍚 | ½ cup | For dusting finished cake |
The yolks are non-negotiable here—room temperature is key (pop them in warm water for 10 minutes if cold). King Arthur or Gold Medal flour gives the best texture, but any all-purpose works. Butter matters too—Plugrá or Land O'Lakes unsalted melt evenly. I always grab extra yolks (14 total) because accidents happen when you're whipping at high speed. The vanilla should smell like vanilla, not alcohol—McCormick Pure is my go-to. Cream of tartar? Don't skip it—it's the secret to those perfect peaks in the whites.
No cream of tartar? White vinegar at half the amount works in a pinch. Superfine sugar unavailable? Pulse regular sugar in a food processor for 30 seconds. The whites need to be bone-dry—no fat residue from the bowl. I use my KitchenAid stand mixer with the whisk attachment for this, but a hand mixer works if you're patient. The flour must be sifted—no lumps allowed. And that lemon zest? Organic lemons from Trader Joe's have the brightest flavor. If you can't find organic, regular works—just wash the peel well.
This cake keeps beautifully—3 days at room temperature wrapped in plastic, or 1 week refrigerated. For longer storage, slice and freeze portions between parchment paper. The buttercream (if you make it) adds 2 extra days of freshness. I always bake two 8-inch pans at once—they're perfect for layering or serving whole. The domed top? That's from baking at 325°F for 35 minutes—don't overbake, or you'll lose that airy magic.
Why You'll Love This Recipe
- Same batter, endless uses: stack it for a birthday, slice it for breakfast, or freeze layers for dessert emergencies. Honestly, I’ve served it warm with ice cream and cold with whipped cream—it never disappoints.
- No Separation Needed: Just fold the whites into the yolk batter at the end—no extra mixing, no fear of overworking. That’s it. The buttercream folds right in, and the cake rises like magic.
- Rich Without Effort: Twelve egg yolks mean deep, custardy richness without tasting heavy. The sugar caramelizes just enough to give it that subtle, buttery sweetness—like a bakery cake, but with half the ingredients.
- Weeknight or Showstopper: Same batter, endless uses: stack it for a birthday, slice it for breakfast, or freeze layers for dessert emergencies. Honestly, I’ve served it warm with ice cream and cold with whipped cream—it never disappoints.
Step-by-step instructions for light-as-air sponge cake
Here's how to create fluffy, buttery layers that'll impress everyone at the table.
👨🍳 Step 1: Whip Egg Yolks and Sugar to Ribbon Stage
In a stand mixer fitted with the whisk attachment, combine the 12 whole Large Egg Yolks and 1.5 cups Granulated Sugar. Whip on medium-high speed for 5-7 minutes until the mixture is pale, thick, and forms ribbons when the whisk is lifted—this is key for lightness. You'll see the mixture nearly triple in volume and leave a trail that holds its shape for a few seconds.
I like to stop occasionally to scrape down the sides with a silicone spatula—this ensures even mixing. The yolks should be at room temperature for best results, so take them out of the fridge 30 minutes before starting. If they're cold, they won't whip as smoothly, and your cake might turn out dense.
🍳 Step 2: Incorporate Butter and Flavorings
Reduce the mixer speed to low and add the 1 cup Unsalted Butter, cut into small cubes. Mix until fully incorporated—this should take about 1-2 minutes. The butter should melt completely and blend seamlessly into the yolk mixture, creating a smooth, glossy batter.
Next, add the 1 tsp Vanilla Extract, 1 tbsp Lemon Zest, 0.25 tsp Salt, and 0.5 tsp Baking Powder. Mix on low speed just until combined—about 30 seconds. The lemon zest adds a bright citrus note that cuts through the richness of the butter, while the baking powder ensures a tender crumb. Don't overmix here; you want to keep as much air incorporated as possible.
👨🍳 Step 3: Whip Egg Whites to Stiff Peaks
In a separate, clean mixing bowl, combine the 8 whole Large Egg Whites and 0.25 tsp Cream of Tartar. Whip on medium-high speed until soft peaks form—when you lift the whisk, the peaks should curl slightly but still fall over. This usually takes about 2-3 minutes. The cream of tartar stabilizes the egg whites, helping them hold their shape better.
Gradually increase the speed to high and whip until stiff peaks form—when you lift the whisk, the peaks should stand straight up and not flatten. This can take another 2-4 minutes, depending on your mixer and humidity levels. If your kitchen is humid, the egg whites might take longer to reach stiff peaks, so be patient.
🥘 Step 4: Fold Everything Together Gently
Add one-third of the whipped egg whites to the yolk mixture and fold gently with a spatula, just until combined. This step is all about preserving the air you've worked so hard to incorporate. Add another third and fold again, then add the remaining egg whites. Fold until just combined—you should still see some white streaks in the batter. Overmixing now will deflate the batter and make your cake dense.
Here's the thing—this is where precision matters. The batter should be smooth, glossy, and thick, like pudding. If it looks too thin, you've overmixed. If it looks too thick, you haven't incorporated enough air. Trust your eye and your sense of touch; the batter should coat the back of a spoon but still hold its shape.
🔥 Step 5: Bake in Layers for Perfect Rise
Preheat your oven to 350°F. Divide the batter evenly between three 8-inch round cake pans lined with parchment paper. Bake for 20-25 minutes, or until the tops spring back when gently touched and a toothpick inserted into the center comes out clean. Rotate the pans halfway through baking for even browning.
Let the cakes cool in the pans for 10 minutes, then transfer to a wire rack to cool completely. This cooling step is crucial—it prevents the cakes from collapsing as they set. While they cool, you can prepare your filling or frosting. Once fully cooled, dust the tops with 0.5 cup Powdered Sugar for a classic finish.
Pro Tips For Making 12 Egg Yolk Sponge Cake
- Whip yolks warm: Whisk your 12 egg yolks with sugar over a double boiler (or a heatproof bowl over simmering water) until the mixture reaches 110°F (43°C)—that’s when it’ll ribbon off the whisk. Cold yolks won’t emulsify properly, and you’ll end up with a cake that’s dense instead of light. I learned this the hard way when my first batch turned out like a sad, flat pancake.
- Use room-temperature butter: Take your unsalted butter out of the fridge at least 2 hours before mixing—or microwave it in 10-second bursts until soft but not melted. Cold butter creates pockets in the batter that won’t incorporate smoothly, leading to a cake with uneven texture. Trust me, your future self will notice the difference when slicing.
- Fold whites in gently: When adding the whipped egg whites to the yolk mixture, use a spatula to cut through the center and fold in thirds—don’t just dump them in. Overmixing deflates the whites, and you’ll end up with a cake that’s more cake than airy sponge. Work quickly but deliberately; the batter should look like marbled ribbon, not a sad, flat puddle.
- Check oven temp early: Preheat your oven to 350°F (175°C), but place an oven thermometer inside—most home ovens run hot. If yours runs 25°F (14°C) hotter, adjust accordingly. A cake baked at too-high heat will brown before it’s set, leaving you with a crusty exterior and a gummy center. I was skeptical until I tried it—now I never skip this step.
Pro cooking tips for 12 egg yolk sponge cake
Yolk Whipping Mastery
Room-temperature yolks are non-negotiable—cold yolks whip poorly and create dense cake. I always separate eggs 30 minutes before starting. For extra insurance, place yolks in a bowl of warm water for 10 minutes to ensure perfect whipping. Use a stand mixer with whisk attachment (like my KitchenAid) on medium-high speed for 5-7 minutes until ribbons form. Scrape the bowl every 30 seconds to prevent sugar buildup at the bottom. 🥚
Three-Stage Folding
Folding egg whites in three stages preserves air better than one dump-and-stir. Add the first third of whites and fold with a spatula in a J motion until no white streaks remain. Repeat with the second third, then the final portion—this gradual approach prevents deflation. The batter should look like thick pudding with just a few white streaks visible. Overmixing here is the #1 mistake—stop when the batter clings to the spatula but still holds its shape. 💫
Humidity Control
Egg whites behave differently based on humidity. On humid days, add 1 extra drop of cream of tartar (total 0.3 tsp) to stabilize peaks. I test whites by lifting the whisk—they should form stiff peaks that hold their shape for 10 seconds before flattening. If your kitchen is dry, reduce whipping time slightly to avoid over-aeration. A humidity gauge (around $20) helps, but I often just check the weather forecast. 🌡️
Butter Temperature
Cold butter cubes melt gradually, creating a smoother batter than melted butter. Cut 1 cup unsalted butter into ½-inch cubes and add to yolks on low speed—this prevents butter from overheating. The mixture should be completely smooth with no visible butter pieces. If you're in a hurry, melt butter first, but cool it to 70°F before adding to avoid cooking the yolks. 🧈
Oven Prep Secrets
Preheat your oven to 350°F for 20 minutes with pans inside to ensure even heat distribution. Line pans with parchment paper cut to fit snugly—this prevents sticking and helps cakes release cleanly. Place pans on the middle rack and rotate them halfway through baking for even browning. Never open the oven door before 20 minutes—temperature fluctuations cause cakes to sink. 🔥
Cooling Like a Pro
Let cakes cool in pans for exactly 10 minutes before transferring to a wire rack. This initial cooling prevents collapse. For extra insurance, I place a cooling rack over the pans while they're still in the oven—this helps steam escape evenly. Never stack hot pans or use metal racks that conduct heat too quickly. The cakes should be completely cool (about 2 hours) before assembling layers. 💡
Nutrition facts
Frequently asked questions
Why use 12 egg yolks instead of fewer?
The extra yolks create a richer, more moist texture that traditional sponge cakes can't match. Each yolk adds natural fat and emulsifiers that keep the crumb tender and the flavor buttery. This recipe balances the richness with the lightness of 8 egg whites for perfect structure.
Can I substitute cream of tartar if I don't have any?
Yes! Use ½ teaspoon white vinegar or lemon juice instead. These acids help stabilize the egg whites just as well. For best results, add it gradually while whipping to avoid over-acidifying the mixture. The whites should still reach stiff peaks but may take slightly longer.
What's the best way to test if the cake is done?
Insert a toothpick into the center—it should come out clean with just a few moist crumbs. The cake should also spring back gently when pressed in the center. Overbaking by even 1 minute can dry out the delicate crumb, so pull it out when it's just slightly underdone.
How do I prevent the cake from sticking to the pan?
Line your pans with parchment paper cut to fit snugly, then dust with powdered sugar before adding batter. This creates a non-stick barrier while adding a delicate finish. Never grease the pans—just the sugar coating is enough. For extra insurance, chill the pans in the freezer for 10 minutes before baking.
Can I make this cake without a stand mixer?
Use a hand mixer for the yolks (whip for 8-10 minutes) and whites (whip for 5-7 minutes total). The key is patience—whisk by hand until the yolks form ribbons and whites reach stiff peaks. Fold gently with a rubber spatula, adding whites in three stages just like the recipe.