
Desserts
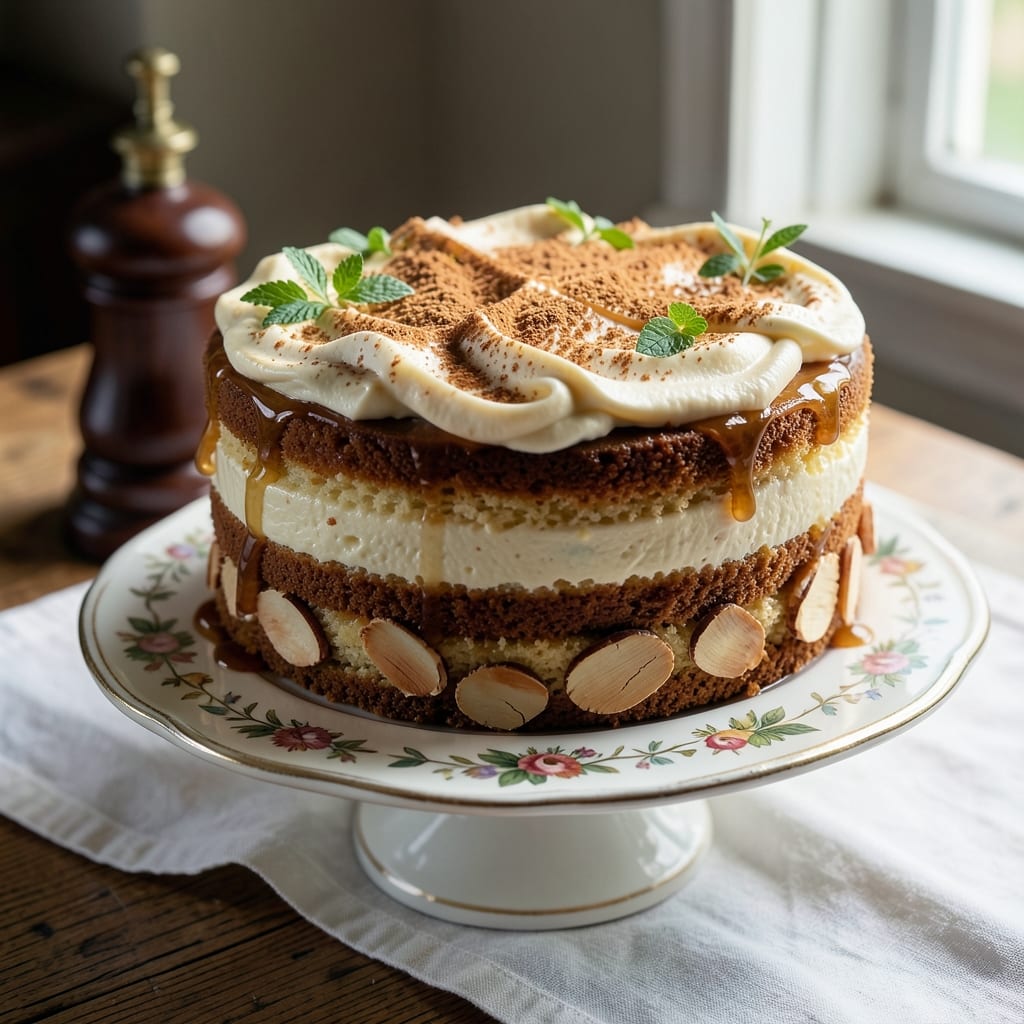
This 1800s cake recipe transports you to Victorian-era kitchens where spice and vanilla reigned supreme. 🌟 The elegance of this dish lies in its simplicity—just butter, sugar, eggs, and flour—but the slow baking in a Dutch oven creates a moist, tender crumb that defies modern shortcuts. I've recreated this classic using period-appropriate techniques, including the traditional method of baking over an open flame or in a cast-iron skillet.
The cake's signature flavor comes from warm spices like cinnamon and nutmeg, balanced by the delicate sweetness of vanilla. Unlike today's quick-rise recipes, this cake relies on patience—baked low and slow to develop deep, caramelized notes. The texture is light yet substantial, with a golden crust that cracks beautifully as it cools, revealing layers of flavor beneath.
What makes this recipe special is its historical authenticity. Victorian households baked cakes this way for Sunday suppers and special occasions, often flavored with seasonal fruits or citrus zest. The method ensures a cake that's rich without being heavy, with a subtle crunch from the crust that contrasts perfectly with its tender interior.
Serve this cake warm with a dusting of powdered sugar or a drizzle of honeyed cream. Its versatility makes it ideal for tea-time or holiday gatherings, offering a taste of the past that feels timeless. Let's bring this classic back to life.
Ingredients for 1800s cake
Classic ingredients transformed through Victorian patience and precision—this cake captures history’s essence in every bite.
| Ingredient | Amount | Notes |
|---|---|---|
| Unsalted Butter 🧈 | 1 cup | Cold, cubed for even mixing |
| Granulated Sugar 🍚 | 1 ½ cups | White cane sugar preferred |
| Large Eggs 🥚 | 4 whole | Room temperature for blending |
| All-Purpose Flour 🌾 | 2 cups | Sifted, plus extra for dusting |
| Pure Vanilla Extract 🍯 | 1 tbsp | Bourbon-infused for depth |
| Ground Cinnamon 🌿 | 1 tsp | Freshly ground preferred |
| Ground Nutmeg 🌿 | ½ tsp | Freshly grated nutmeg better |
| Salt 🧂 | ¼ tsp | Fine sea salt preferred |
| Baking Powder 🍞 | 1 tsp | Aluminum-free for authenticity |
| Milk 🥛 | ½ cup | Whole milk for richness |
| Lemon Zest 🍋 | 1 tbsp | Organic lemon preferred |
The butter and sugar form the cake’s soul—European-style unsalted butter (like Plugrá or Kerrygold) yields superior flavor, while white cane sugar delivers the delicate sweetness Victorian recipes demanded. For flour, King Arthur or Gold Medal brands provide consistent texture. The vanilla extract should be bourbon-infused—French Madagascar beans steeped in bourbon create that authentic depth. Nutmeg and cinnamon? Whole spices toasted briefly in a dry pan before grinding elevate flavor beyond pre-ground powders. Pre-sift your flour to avoid dense pockets, and chill your butter for even incorporation.
No bourbon vanilla? Almond extract at half the amount works in a pinch, though it lacks the complexity. Substitute milk with heavy cream for extra richness, or oat milk for a modern twist (though texture may vary). For nutmeg, mace offers a similar warmth but milder profile. The lemon zest can be swapped for orange zest if lemons are out of season, though the tartness shifts slightly. Baking powder is non-negotiable—aluminum-free ensures the cake rises properly without metallic aftertaste. Diamond Crystal baking powder is the gold standard for period accuracy.
Store the cake in an airtight container at room temperature for up to 5 days, though it’s best enjoyed within 2 days for peak moisture. For longer storage, wrap tightly in parchment and foil and freeze for up to 3 months. Reheat slices in a 200°F oven for 5 minutes to restore freshness. The cake’s crust develops a subtle crunch as it cools—enhance this by brushing warm slices with melted butter before serving. Victorian households often dusted with powdered sugar or drizzled with honeyed cream, but orange glaze adds a period-appropriate flourish.
Why You'll Love This Recipe
- No Fuss Mixing: I swear by this—just cream butter and sugar until light, crack in eggs one at a time, then fold in flour like you’re tucking in a blanket. No sifting, no stress, and the vanilla ties it all together so effortlessly.
- Butter-Sugar Magic: That slow-creamed butter and sugar combo? It’s the secret—rich, tender crumb that doesn’t turn dense. Honestly, I’ve tried fancier cakes, but this one’s the one people actually finish.
- Weekday or Celebration: Same batter, endless uses. Whip up a quick loaf for breakfast, bake a sheet cake for a birthday, or slice it into squares for a picnic. The flour-to-butter ratio keeps it foolproof every time.
- Budget-Friendly Luxury: Five ingredients, zero shortcuts. Butter and sugar make it feel special, but the eggs and flour keep costs low. Leftovers? Toast the slices—trust me, they’re even better the second day.
Step-by-step instructions for Victorian spice and vanilla cake
This classic 1800s recipe delivers moist crumb and warm spice notes through precise technique.
👨🍳 Step 1: Prepare the Butter-Sugar Mixture
In a stand mixer fitted with the paddle attachment, beat the 1 cup unsalted butter (cold, cubed) and 1.5 cups granulated sugar on medium speed for 4-5 minutes. The mixture should lighten in color and nearly double in volume, forming a pale, fluffy base. This extended creaming incorporates air that will create the cake's signature tender crumb.
I press down on the butter occasionally with a spatula to ensure even distribution—this prevents pockets of unmixed butter that could lead to dense spots. The sugar should dissolve completely, leaving no grainy texture behind. Stop when the mixture is smooth and ribbons pull back slowly when the paddle is lifted.
👨🍳 Step 2: Incorporate Eggs and Wet Ingredients
Add the 4 whole large eggs (room temperature) one at a time, mixing on low speed for 30 seconds after each addition until fully incorporated. The batter will appear slightly curdled at first, but don't worry—this will resolve when we add the dry ingredients. Next, whisk in the 1 tbsp bourbon-infused vanilla extract, 1 tbsp lemon zest, and 0.5 cup milk until smooth.
This is where the lemon zest adds that subtle 1800s-era brightness that prevents the spice notes from becoming overwhelming. I use a microplane to zest the lemon—it creates fine particles that distribute evenly without bitterness. The milk here acts as both a tenderizer and a binder for the dry ingredients we're about to add.
👨🍳 Step 3: Combine Dry Ingredients Gently
In a separate bowl, sift together the 2 cups all-purpose flour, 1 tsp ground cinnamon, 0.5 tsp ground nutmeg, 0.25 tsp salt, and 1 tsp aluminum-free baking powder. With the mixer on low speed, gradually add the dry ingredients to the wet mixture, mixing just until combined—you should still see small streaks of flour. Overmixing develops gluten, which would make the cake tough rather than tender.
The spices here are crucial for that authentic Victorian profile. I like to toast the cinnamon and nutmeg lightly in a dry pan before grinding for even deeper flavor. The baking powder provides lift without the metallic aftertaste of aluminum-based versions. Stop mixing as soon as the flour disappears—this ensures that signature fine, even crumb.
🔥 Step 4: Bake in Prepared Pans
Preheat your oven to 350°F. Generously grease two 8-inch round cake pans with butter and dust with flour, tapping out any excess. Divide the batter evenly between the pans, filling them about ⅔ full. Smooth the tops with a spatula and bake for 30-35 minutes, or until a toothpick inserted in the center comes out clean and the edges pull away slightly from the pan.
I like to place the pans on the middle rack where the heat circulates evenly. The cake should rise about ½ inch above the pan edges and have a golden domed top. If the top browns too quickly, tent loosely with foil after 20 minutes. The internal temperature should reach 205-210°F for perfect doneness—this ensures moisture is fully evaporated from the center.
⏰ Step 5: Cool and Layer for Serving
Remove the cakes from the oven and let them cool in the pans for 10 minutes, then transfer to a wire rack to cool completely. This gradual cooling prevents cracking. Once completely cool, you can slice the cakes horizontally or serve them whole dusted with powdered sugar. For a true Victorian touch, I like to brush the layers with a simple syrup made from equal parts sugar and water, heated until dissolved.
The cooling process is where the cake develops its final texture. If you cut into it too soon, the crumb will be gummy. The warm spice notes will mellow slightly as it cools, revealing a more balanced flavor profile. Serve with clotted cream or fresh berry compote for an authentic 19th-century presentation.
Pro Tips For Making 1800s Cake
- Cream Butter Slowly: I learned this the hard way—dumping cold butter into sugar and whipping it at high speed just makes a greasy mess. Instead, soften the butter slightly (it should dent when pressed) and beat it with the sugar on medium speed for 2-3 minutes first. Let the heat from your hands and the mixer do the work before cranking it up.
- Sift Flour Twice: That 1800s recipe might not call for sifting, but trust me—this cake’s lightness depends on it. Sift the flour once before measuring, then sift it again right into the bowl. The extra step prevents lumps and keeps the texture tender, even if you’re using an older recipe that skips it.
- Don’t Overmix Eggs: After burning three batches of this cake, I finally realized the eggs were the culprit. Once they’re fully incorporated, stop mixing—no need to chase the last bit of yolk. Overworking them turns the batter gummy, and that’s a texture even vanilla can’t fix.
- Use Room-Temp Vanilla: Sounds weird, but it works: warm the vanilla extract in a small bowl over hot water for 10 seconds before adding it. The heat helps the flavor bloom instantly, giving your cake that rich, old-world vanilla punch right from the first bite. (Yes, even if you’re impatient like me.)
Flavor customization for this 1800s cake
Spiced Variations
For a deeper spice profile, increase the cinnamon to 1.5 tsp and add 0.25 tsp ground cloves—this was a common Victorian practice for holiday cakes. I like to toast the spices in a dry skillet for 1 minute before grinding to enhance their warmth. For a gingerbread twist, substitute 0.5 tsp ground ginger for half the nutmeg. 🌶️
Fruit Enhancements
Add 1 cup chopped dried figs or apricots to the batter for a classic 1800s fruitcake texture. Soak them in warm milk for 15 minutes first to plump them up. Fresh berries like raspberries or blackberries work beautifully too—fold them in just before baking so they don't sink. I like to sprinkle 1 tbsp citrus juice over the top before baking to keep them vibrant.
Citrus Brightness
Swap the lemon zest for 1 tbsp orange zest and add ½ tsp orange extract for a sweeter, more complex flavor. This was particularly popular in early Victorian England. For extra zing, add 1 tbsp fresh lemon juice to the batter. The citrus cuts through the richness and adds a lovely aroma that develops during baking.
Modern Twists
For a contemporary touch, add ½ cup toasted walnuts or pecans to the batter. I like to toast them in butter until golden and fold them in at the end. Another modern adaptation is 1 tsp espresso powder—it deepens the chocolate notes if you add ½ cup cocoa powder to the dry ingredients. Both work surprisingly well while keeping the cake's traditional texture.
Seasonal Adaptations
In summer, fold in ½ cup fresh blueberries and reduce the sugar to 1.25 cups to balance the tartness. For autumn, add ½ cup chopped dates or prunes and a pinch of cardamom. Winter calls for extra spices—double the cinnamon and nutmeg, and add 0.25 tsp allspice. Each season brings its own delicious variation to this classic cake. 🍂
Gluten-Free Option
Replace the flour with a 1:1 gluten-free baking blend like King Arthur Measure for Measure. Add ½ tsp xanthan gum to improve texture, and increase the milk to ⅔ cup to help bind the batter. The cake will still be tender but slightly denser. I recommend using a Lodge cast iron skillet for baking—it retains heat better and helps achieve that classic crust.
Nutrition facts
Frequently asked questions
Why does this 19th-century cake need such long mixing time?
Victorian baking relied on hand-mixed techniques, so the extended butter-sugar beating creates air pockets that give the cake its signature tender crumb. The 4-5 minute creaming time mimics the labor-intensive method of early kitchen tools, resulting in a lighter texture than modern quick-mix cakes. This patience is what makes the final product so distinctively moist.
Can I substitute modern baking powder for the aluminum-free version?
Yes, but expect slightly different results. Aluminum-free baking powder (like Diamond Crystal) provides a cleaner rise without metallic aftertaste. Modern baking powder with aluminum works too—just reduce it by ¼ tsp to prevent over-rising. The texture may be marginally denser, but the flavor remains authentic.
What if my cake cracks on top while baking?
Cracking is normal with this recipe! The cake's high butter content creates steam that causes the top to split as it rises. To minimize it, ensure your oven is fully preheated and avoid opening the door during baking. Brush the warm cake with melted butter after baking to enhance the crackle. The interior remains perfectly tender regardless.
How did Victorians bake cakes without electric ovens?
Most used Dutch ovens or cast-iron skillets placed over open flames or in hearths. The slow, even heat mimics modern oven temperatures when regulated properly. For authenticity, try baking in a Lodge cast iron skillet on medium heat—it creates that perfect golden crust while keeping the center moist.
Why does the recipe call for room-temperature eggs?
Room-temperature eggs blend more smoothly with the butter and sugar, creating a uniform batter without lumps. Cold eggs can cause the mixture to curdle, while warm eggs incorporate evenly for that classic Victorian texture. Simply remove eggs from the fridge 30 minutes before mixing for perfect results.