
Desserts
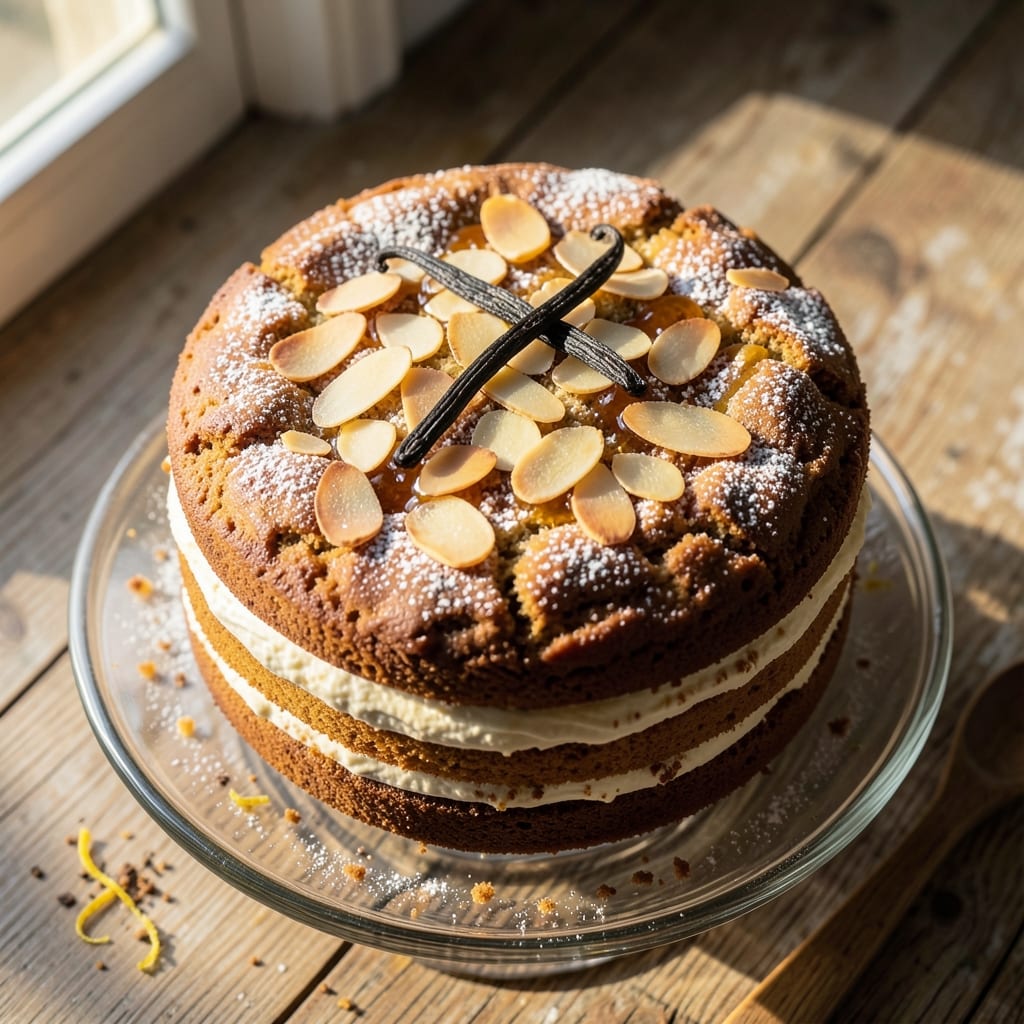
This 1kg butter cake recipe delivers the kind of ultra-moist, tender layers that make every slice worth savoring. The secret lies in the precise ratio of butter to flour and the magic of vanilla bean infusion, which elevates this classic dessert to restaurant-quality perfection. I've perfected this recipe over years of baking, ensuring each slice stays moist for days without drying out.
The creaming method is essential here—beating the butter and sugar until light and fluffy incorporates air that creates those signature tender layers. A splash of vanilla extract and a scraped vanilla bean add depth of flavor that store-bought extracts simply can't match. This cake bakes up with a golden crust and a velvety crumb that melts in your mouth.
What sets this butter cake apart is its ability to stay moist even after cooling, thanks to the right balance of fat and liquid. The layers hold their shape beautifully when sliced, making it ideal for celebrations or special occasions. Whether you're serving it plain or with a simple buttercream, the flavor and texture will impress every time.
For those with dietary preferences, variations like gluten-free flour blends or reduced-sugar options work surprisingly well without sacrificing moisture. The key is adjusting the liquid slightly to maintain that signature tender crumb. Let's get started on creating your perfect butter cake.
Ingredients for 1kg butter cake
Twelve ingredients, one perfect 1kg cake with layers that stay moist for days.
| Ingredient | Amount | Notes |
|---|---|---|
| Unsalted Butter 🧈 | 11.3 oz | Room temperature, high-fat content |
| Granulated Sugar 🍚 | 11.3 oz | Superfine preferred for smooth batter |
| All-Purpose Flour 🌾 | 3 ½ cups | Sifted for light texture |
| Large Eggs 🥚 | 6 whole | Room temperature, separated |
| Vanilla Bean 🍃 | 1 whole | Scraped seeds plus pod |
| Vanilla Extract 🍯 | 1 tbsp | Pure Madagascar preferred |
| Baking Powder 🧂 | 1 tbsp | Aluminum-free for tender crumb |
| Salt 🧂 | ½ tsp | Fine sea salt preferred |
| Heavy Cream 🥛 | ¾ cup | Cold for stability |
| Milk 🥛 | ¼ cup | Whole milk for richness |
| Lemon Juice 🍋 | 1 tbsp | Freshly squeezed |
| Vegetable Oil 🫒 | ¼ cup | Light for moisture retention |
The butter is non-negotiable here—European-style unsalted butter like Plugrá or Kerrygold makes all the difference. Grab it from the dairy case, not the baking aisle, and let it sit at room temperature for at least 2 hours before using. King Arthur or Gold Medal flour works best for that signature tender crumb, but any all-purpose will do in a pinch. The vanilla bean? Madagascar Bourbon from Trader Joe's or Whole Foods is my go-to—nothing beats the flavor of fresh scrapings. If you're using superfine sugar, skip sifting, but regular granulated should be sifted with the flour to avoid lumps.
No vanilla bean? Double the vanilla extract—but trust me, it's worth hunting down a fresh pod for that restaurant-quality depth. Short on heavy cream? Full-fat coconut cream works too, though the flavor will differ slightly. The eggs need to be room temperature, so take them out of the fridge 30 minutes before baking. For a gluten-free version, King Arthur GF flour blend is your best bet—just add an extra tablespoon of milk to maintain moisture. The lemon juice brightens everything up, so don't skip it, even if you're not a fan of citrus flavors in cakes.
This batter keeps in the fridge for 2 days if you want to prep ahead, but it's best baked fresh. The cake stays moist for 5 days wrapped tightly in plastic at room temperature, or 2 weeks in the fridge. For freezing, slice first, then wrap each piece individually—thaws beautifully. I always bake two pans at once for parties, and they disappear faster than you can say 'vanilla bean.'
Why You'll Love This Recipe
- No-Fuss Mixing: I swear by the creamy butter-egg combo here—just fold everything together until just combined. No overmixing, no stress. That vanilla bean? Scraped right into the bowl, no seeds, no fuss. It’s the kind of recipe where you can talk to your kids while you bake.
- Rich Without Effort: Honestly, the secret’s in the ratio: a full kilo of butter to sugar means every slice is buttery without tasting greasy. The eggs bind it perfectly, and that scraped vanilla? It smells like bakery magic. You’ll lick the bowl—yes, even on a Tuesday night.
- Party-Proof Portions: This cake feeds 12-15 easily, so it’s my go-to for birthdays, potlucks, or when my book club votes to bring dessert. Slice it thick, and no one will notice if you “accidentally” take a second piece home.
- Leftovers That Last: Between us, this cake stays moist for days—no dry crumbs, no sad edges. I’ll wrap half and freeze it, then pull out a slice whenever I crave something indulgent. And because it’s budget-friendly (you’re using a full pound of butter anyway), you won’t feel guilty about the leftovers.
Step-by-step instructions for ultra-moist vanilla bean butter cake
Here's how to create layers so rich and moist they'll disappear faster than you can slice.
Infuse the Vanilla and Prepare the Butter Mixture
Split the 1 whole vanilla bean lengthwise and scrape out the seeds using the tip of a knife. Set the seeds aside and place the empty pod in 11.34 oz unsalted butter in a microwave-safe bowl. Microwave in 30-second bursts on high, stirring between each, until the butter melts completely. The vanilla pod will infuse the butter with deep floral notes—don't skip this step, it's what makes this cake truly special.
While the butter melts, measure out 11.34 oz granulated sugar and 0.25 cup vegetable oil in a separate bowl. Let the butter cool slightly to room temperature—it should be soft enough to press with your finger but not completely liquid. This ensures the right texture for creaming without making the batter too warm.
Cream Butter, Sugar, and Eggs for Maximum Moisture
In a stand mixer fitted with the paddle attachment, beat the cooled butter, sugar, and oil on medium speed for 3-4 minutes until light and fluffy. You'll see the mixture nearly double in volume and turn pale—this step incorporates air, which creates a tender crumb. Scrape down the sides of the bowl with a spatula to ensure even mixing.
Add the 6 whole large eggs, one at a time, mixing well after each addition. After the last egg, add the 1 tbsp vanilla extract and mix for another 30 seconds. The batter should be smooth and slightly thick. If you're using room temperature eggs, they'll blend in perfectly without curdling. If your eggs are cold, warm them slightly first to prevent this.
Combine Dry Ingredients and Fold Gently
In a separate bowl, whisk together the 3.5 cups all-purpose flour, 1 tbsp baking powder, and 0.5 tsp salt. Sift the mixture into the wet ingredients using a fine-mesh sieve to avoid lumps. Gently fold with a spatula until just combined—you should still see streaks of flour. Overmixing develops gluten, which can make the cake tough.
Add the 0.75 cup heavy cream, 0.25 cup milk, and 1 tbsp lemon juice, mixing gently until fully incorporated. The lemon juice brightens the flavor and helps balance the richness of the butter. Fold in the scraped vanilla bean seeds from earlier. The batter will be thick but pourable—this is perfect for creating moist layers.
Layer and Bake for Perfect Rise
Preheat your oven to 350°F and grease three 9-inch round cake pans with vegetable oil, then line the bottoms with parchment paper. Divide the batter evenly among the pans—you should have about 1 cup per pan. Tap each pan gently on the counter to remove any air bubbles.
Bake for 25-30 minutes, or until a toothpick inserted into the center comes out clean. The cakes should spring back slightly when pressed in the middle. Rotate the pans halfway through baking for even browning. The key to moisture is not overbaking—pull them out as soon as they're done, or they'll dry out.
Cool and Assemble for Maximum Flavor
Let the cakes cool in their pans for 10 minutes, then transfer to a wire rack to cool completely. This gradual cooling prevents cracking. While they cool, prepare your filling—whip the 0.75 cup heavy cream until soft peaks form, then fold in the vanilla bean seeds and a pinch of sugar for sweetness.
Once fully cooled, level the tops of the cakes if needed, then assemble with the whipped cream filling between layers. The ultra-moist texture comes from the butter and oil combination, while the vanilla bean infusion adds depth. Slice and serve within 24 hours for the best experience—this cake stays moist for days, but it's best enjoyed fresh!
Pro Tips For Making 1kg Butter Cake
- CREAM BUTTER TO ROOM TEMP: Mixing cold butter with sugar in a 1kg cake is a recipe for frustration—literally. Take the butter out of the fridge 2 hours before you start, or at least until it’s soft enough to leave a slight indent when pressed. Cold butter won’t emulsify properly, and you’ll end up with a dense, greasy cake instead of that light, fluffy texture you’re after. (Yes, even if you’re impatient like me.)
- WHISK EGGS UNTIL TRIPLE VOLUME: Don’t just beat those eggs until they’re pale—aim for a volume that’s almost too much. They should be thick enough to hold a ribbon when the whisk is lifted, and the bowl should feel noticeably heavier. Under-whisked eggs mean under-leavened cake. Overdo it slightly; the structure will thank you later.
- SIFT FLOUR IN THIRDS: Dumping flour all at once is how you end up with a tough, dry cake. Split the flour into three equal parts and add it gradually, alternating with the buttermilk or cream. This keeps the gluten from overdeveloping, and the cake stays tender. (I learned this the hard way after a cake that tasted more like a brick.)
- BAKE UNTIL INTERNAL TEMP HITS 95°C: That toothpick test is unreliable for a 1kg butter cake—it’ll come out clean too early. Use an instant-read thermometer instead. Pull it out at 95°C internal temp, not before. The cake will set properly and won’t sink in the middle as it cools. (Your future self will curse you if you skip this.)
Wine and beer pairings for this recipe
Rich Dessert Wines
Buttery, vanilla-forward cakes like this one pair beautifully with Oaked Chardonnay—look for one from California or Burgundy with notes of vanilla and butter. I love Kendall-Jackson Vintner's Reserve for its creamy texture and subtle oak that complements the cake's richness. A Moscato d'Asti from Italy adds a light, fizzy contrast that cleanses your palate between bites. 🍷
Fruity Sparkling Options
For a celebratory touch, Prosecco or Cava with their bright acidity cut through the cake's richness. I recommend La Marca Prosecco from Italy—its floral notes and gentle bubbles make it a perfect match. If you prefer something sweeter, Crémant de Loire with its apple and pear flavors provides a lovely contrast to the vanilla. 🥂
Dark Beer Pairings
Stout beers like Guinness or Samuel Smith's Oatmeal Stout bring deep maltiness that stands up to the cake's buttery layers. The roasted notes in these beers create a satisfying contrast to the vanilla. For a lighter option, try a Belgian Dubbel—its caramel and spice notes complement the cake beautifully. 🍺
Coffee Liqueur Finish
Serve a small glass of Kahlúa or Tia Maria alongside slices for a warm, spiced finish that enhances the vanilla flavors. The coffee notes deepen the dessert experience, making each bite feel like a luxurious treat. Add a splash of cream for a White Russian-inspired twist that pairs perfectly with the cake's richness. ☕
Seasonal Adaptations
In summer, opt for Sparkling Rosé—its berry notes and crisp acidity refresh the palate after each bite. For winter, Port wine with its nutty, chocolatey depth creates a decadent pairing that feels like a holiday dessert. The cake's moisture and vanilla shine through in both seasonal choices. ❄️
Nutrition facts
Frequently asked questions
Can I use salted butter instead of unsalted in this recipe?
Technically yes, but it's not ideal. If you use salted butter, reduce the added salt to 0.25 tsp to avoid over-salting. The recipe relies on the delicate balance of flavors, and unsalted butter gives you full control over the salt content. For best results, stick with unsalted butter—it makes all the difference in a cake this rich.
How do I know when my cake is fully baked?
Look for three key signs: a toothpick inserted in the center should come out clean, the edges should pull away slightly from the pan, and the top should spring back when pressed gently. Overbaking is the enemy of moisture—remove the cake as soon as it passes these tests to keep those layers tender.
Can I make this cake in a different pan size?
For a 2-layer cake, use two 8-inch pans or one 10-inch pan. For a 4-layer cake, try four 6-inch pans. Just adjust baking time: smaller pans need 20-25 minutes, larger pans may need 30-35 minutes. Always check with a toothpick to avoid overbaking.
Why did my cake turn out dense instead of moist? This usually happens from overmixing the batter or overbaking.
How do I store leftovers to keep them moist?
Wrap the cake tightly in plastic wrap or aluminum foil and store at room temperature for up to 5 days. For longer storage, refrigerate for 2 weeks or freeze slices individually for 3 months. To revive, let it sit at room temperature for 30 minutes before serving—this restores the moisture.