
Desserts
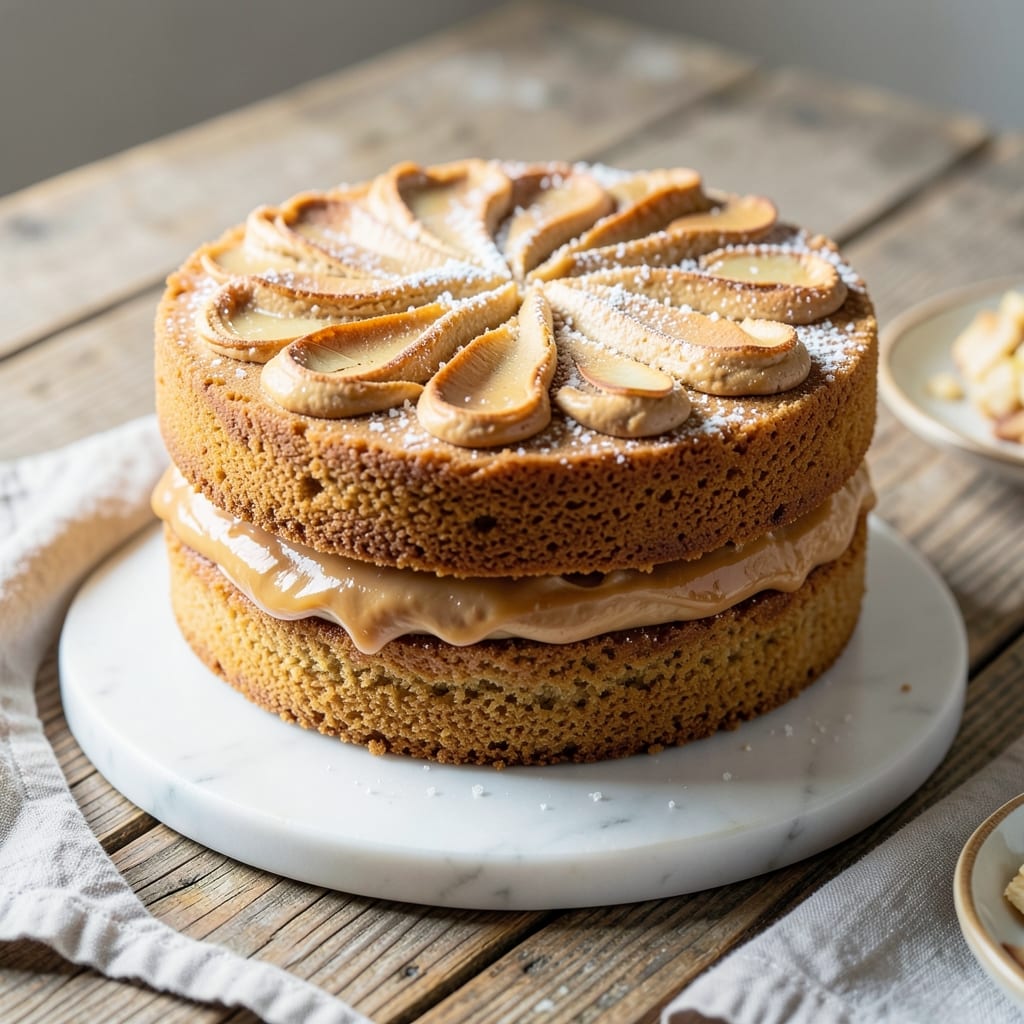
This 2 layer almond cake recipe delivers the perfect balance of nutty depth and vanilla-infused moisture that keeps slices tender for days. The secret lies in finely ground almond flour for structure while maintaining that signature almond flavor, combined with a vanilla bean-infused batter that ensures every bite stays moist. I developed this recipe after years of baking, finally cracking the code for layers that hold their shape without being dry.
The cake's magic comes from a precise technique: baking each layer separately at 350°F for 20-25 minutes, then assembling with a light vanilla buttercream that lets the almond flavor shine. The frosting isn't just decoration—it's the bridge that keeps the cake's moisture intact while adding that professional finish. This isn't your average almond cake; it's a showstopper that tastes as impressive as it looks.
What makes this recipe truly special is how it defies common almond cake pitfalls—no dry crumb, no dense texture, just perfectly moist layers with that signature nutty aroma. The vanilla infusion elevates the flavor profile, making each slice taste like a bakery creation. Whether you're baking for a celebration or treating yourself, this cake delivers restaurant-quality results with minimal fuss.
Once you try this version, you'll never go back to store-bought almond cakes. The layers stay tender for days, the frosting adds just the right amount of sweetness, and the almond flavor is rich without overpowering. Ready to bake a cake that impresses every time? Let's get started with the full recipe.
Ingredients for 2 layer almond cake
Finely ground almond flour and vanilla infusion create layers that stay moist and elegant for days.
| Ingredient | Amount | Notes |
|---|---|---|
| Almond Flour 🌰 | 2 ½ cups | Finely ground, not almond meal |
| All-Purpose Flour 🌾 | ½ cup | For structural balance |
| Granulated Sugar 🍚 | 1 ½ cups | Superfine preferred for smoothness |
| Unsalted Butter 🧈 | 1 ¼ cups | Room temperature, full-fat |
| Large Eggs 🥚 | 4 whole | Room temperature for even baking |
| Vanilla Extract 🌿 | 2 tsp | Pure, high-quality preferred |
| Vanilla Bean Seeds 🌿 | 1 whole | Scraped seeds from 1 pod |
| Baking Powder 🍳 | 1 tsp | Aluminum-free for best results |
| Salt 🧂 | ½ tsp | Fine sea salt preferred |
| Almond Extract 🌰 | 1 tsp | Pure, not imitation |
| Heavy Cream 🥛 | ½ cup | Cold, full-fat for buttercream |
| Powdered Sugar 🍚 | 3 cups | Sifted for smooth frosting |
| Vanilla Bean Paste 🌿 | 1 tbsp | For extra vanilla flavor |
The almond flour is non-negotiable here—Bob's Red Mill or Anthony's Goods are my go-tos for that ultra-fine grind that prevents grittiness. If you can't find vanilla bean seeds, high-quality pure extract works, but scraping a real bean adds depth. The butter should be room temperature—press it gently to test. If it leaves a dent, it's ready. For the almond extract, McCormick or Frontier brands are reliable. Superfine sugar dissolves better, but if you only have regular granulated, pulse it in a food processor for 10 seconds. The baking powder needs to be fresh—test it by mixing with water; if it bubbles, it's good.
No vanilla bean? Double the extract—just know it won't be as complex. Substituting almond flour? Almond meal works in a pinch, but the texture won't be as refined. For the buttercream, lightly sweetened cream cheese can replace half the butter if you prefer a tangier frosting. The powdered sugar should be sifted to avoid lumps—trust me, it makes a difference. If you're making this ahead, bake the layers 1 day in advance and store wrapped at room temperature. The frosting can be made 2 days ahead and stored in the fridge, just re-whip before assembling.
Baked layers keep 3 days at room temperature wrapped in plastic, or 1 week in the fridge. The frosting stays stable for 5 days refrigerated. For longer storage, freeze the unfrosted layers for 3 months—thaw at room temperature before frosting. The vanilla bean seeds can be saved and reused by storing them in a small jar with sugar in the fridge for up to 6 months. Assemble the cake just before serving to prevent sogginess—this isn't one of those 'make-ahead' desserts that improves overnight. If you're nervous about the layers staying moist, brush them with simple syrup before frosting.
Why You'll Love This Recipe
- No Mixer Needed: I swear by this—just cream butter and sugar, fold in eggs, then gently stir flours. The almond flour keeps it light without overworking, so even if you’re not a baker, the layers turn out tender and even.
- Rich Without Overpowering: That buttery crumb with just a hint of almond? It’s like a hug in cake form. The sugar caramelizes perfectly, giving it a subtle depth that’s addictive but not cloying—trust me, my coffee cake stash proves it.
- Weeknight or Celebration: Honestly, I make this for lazy Sundays and birthday parties. The two layers mean you can stack it high for special occasions, but it’s just as good sliced thin for breakfast. (Yes, even on a Tuesday night.)
- Leftovers That Last: The butter and eggs keep it moist for days, so I bake a whole pan and freeze slices. Pull one out for a quick dessert or breakfast—it reheats beautifully, and the almond flavor shines even better the next day.
Step-by-step instructions for 2 layer almond cake
This method delivers a perfectly balanced cake with tender crumb and nutty depth.
Prepare the Cake Layers
Preheat your oven to 350°F and grease two 6-inch round cake pans. Line the bottoms with parchment paper for easy release. In a medium bowl, whisk together the 2.5 cups almond flour, 0.5 cup all-purpose flour, 1.5 cups granulated sugar, 1 tsp baking powder, and 0.5 tsp salt. Sift the dry ingredients through a fine-mesh sieve to aerate the mixture and remove any lumps.
In a separate large bowl, cream the 1.25 cups unsalted butter until light and fluffy, about 3-4 minutes. Add the 4 whole large eggs one at a time, mixing well after each addition. Scrape down the sides of the bowl as needed. Stir in the 2 tsp vanilla extract and the seeds from 1 whole vanilla bean, along with the 1 tsp almond extract. Gradually fold in the sifted dry ingredients until just combined.
Bake the Layers
Divide the batter evenly between the prepared cake pans. Tap each pan gently on the counter to remove any air bubbles. Bake for 25-30 minutes or until a toothpick inserted into the center comes out clean. The cakes should be golden brown on top and slightly domed in the center.
Remove the cakes from the oven and let them cool in the pans for 10 minutes. Then transfer them to a wire rack to cool completely. This cooling step is crucial for level slicing and preventing crumbs when assembling the cake.
Make the Vanilla Buttercream
In a medium bowl, beat the 0.5 cup heavy cream with an electric mixer until soft peaks form. In a separate large bowl, combine the 3 cups powdered sugar and the 1 tbsp vanilla bean paste. Gradually add the powdered sugar mixture to the cream while mixing on low speed.
Increase the mixer speed to medium and beat for 2-3 minutes until the buttercream is light and fluffy. If needed, add a splash of cold water to thin the mixture slightly. This buttercream should be smooth and spreadable but still hold its shape when piped.
Assemble the Cake
Place one cake layer on a cake stand or plate. Spread a thin layer of buttercream over the top, leaving a ½-inch border uncovered. Place the second cake layer on top and press gently to create a level surface. Spread the remaining buttercream over the entire cake, creating a smooth finish.
For a polished look, use a spatula to create decorative swirls or smooth the frosting evenly. Chill the cake in the refrigerator for 30 minutes before slicing to help the frosting set. Serve at room temperature for the best texture and flavor.
Pro Tips For Making 2 Layer Almond Cake
- Whisk Eggs Cold: Pull eggs straight from the fridge—room temp eggs lose structure faster, and you’ll end up with a cake that collapses like a sad soufflé. Beat them for a solid 3 minutes until ribbons form; this aeration is what keeps those layers light.
- Butter Matters: Use butter that’s soft but not melted—press it gently, and it should leave a faint dent. I learned this the hard way when my cake turned out dense because I used melted butter (yes, even if the recipe says "softened"). Room temp butter = proper fluff.
- Sift the Flours: Skip this, and your cake might look like it’s fighting gravity. Sift the almond flour and all-purpose flour together—this removes lumps and ensures even distribution. Tap the bowl a few times to settle the flour; it makes all the difference in texture.
- Check at 12 Minutes: Almond cakes bake faster than regular cakes—start checking at 12 minutes. The edges should pull away slightly, but the center should still jiggle like Jell-O. Overbaking dries out the almond layer, and you don’t want that.
Storing and reheating your 2 layer almond cake
Room Temp Storage
Your freshly baked almond cake layers stay perfectly moist for 3 days at room temperature when wrapped tightly in plastic wrap. I like to place them in an airtight container with a paper towel underneath to absorb any excess moisture. The vanilla buttercream adds a protective barrier that helps maintain that tender crumb. Just
Fridge Preservation
For longer storage, refrigerate the fully assembled cake in an airtight container for up to 1 week. The cold temperature actually helps preserve the moisture in the almond layers. I recommend making the buttercream fresh if you're refrigerating—it's much better than trying to re-whip store-bought frosting. When ready to serve, let the cake sit at room temperature for 30 minutes to soften the frosting slightly. ❄️
Freezing Layers
You can freeze the unfrosted cake layers for up to 3 months for future baking projects. Wrap each layer individually in plastic wrap, then place them in a freezer bag with all the air squeezed out. When ready to use, thaw at room temperature for 2-3 hours before assembling with fresh buttercream. The texture will be just as moist as if you'd baked them fresh. 🧊
Buttercream Refresh
The vanilla buttercream can be made up to 5 days in advance and stored in the fridge. When ready to assemble, simply whip it with your mixer until light and fluffy again. For extra flavor, add ½ tsp more vanilla extract while re-whipping. If the frosting looks too thick, add 1 tsp cold water at a time until it reaches the perfect consistency. 💫
Reviving Dry Layers
If your cake layers start to dry out, don't toss them! Brush the tops with simple syrup (equal parts sugar and water, heated until dissolved) and let it absorb for 10 minutes before frosting. This trick works wonders for bringing back moisture without making the cake soggy. I keep a small bottle of simple syrup in my pantry specifically for cake emergencies. 💡
Serving Tips
Always serve this cake at room temperature for the best texture. If you've refrigerated it, let it sit for 30-45 minutes before slicing. For a restaurant-style presentation, dust the top with powdered sugar or sprinkle with toasted almond slivers. The vanilla bean seeds from your original bean make a beautiful garnish too. 🍽️
Nutrition facts
Frequently asked questions
Can I substitute almond flour with regular flour?
The almond flour is essential for that signature nutty flavor and tender crumb, but you can substitute 1 cup almond flour with 1 cup all-purpose flour plus ½ cup ground almonds for texture. Expect a denser cake—this recipe relies on almond flour for its signature moisture and delicate texture. For best results, stick with the original ratio.
Why does my almond cake turn out dry?
Overbaking is the #1 cause of dryness—check with a toothpick at 20 minutes (not 25-30). Also, ensure your butter is room temperature and don't overmix the batter. For extra moisture, brush cooled layers with simple syrup (equal parts sugar + water) before frosting. The vanilla bean infusion helps retain moisture too!
How do I make this cake gluten-free?
Replace the 0.5 cup all-purpose flour with 0.5 cup gluten-free 1:1 baking flour (like Bob's Red Mill). For the almond flour, choose a certified gluten-free brand. Add 1 tsp xanthan gum to help bind the layers. Test the cake immediately after baking—some gluten-free flours absorb moisture differently.
Can I use this recipe for a 3-layer cake?
Yes! Divide the batter into three 5-inch pans instead of two 6-inch pans. Bake each layer for 20-22 minutes (they'll be thinner). For assembly, add a third layer of buttercream between the middle and top layers. Chill for 45 minutes before slicing to prevent collapsing.
What's the secret to perfectly level layers?
Use a serrated knife and a leveling guide (or a piece of string + ruler) to trim the tops after cooling. Tap the knife gently but firmly—don't saw! For extra stability, chill the layers for 15 minutes before leveling. The secret is patience: let them cool completely first to prevent crumbling.