
Desserts
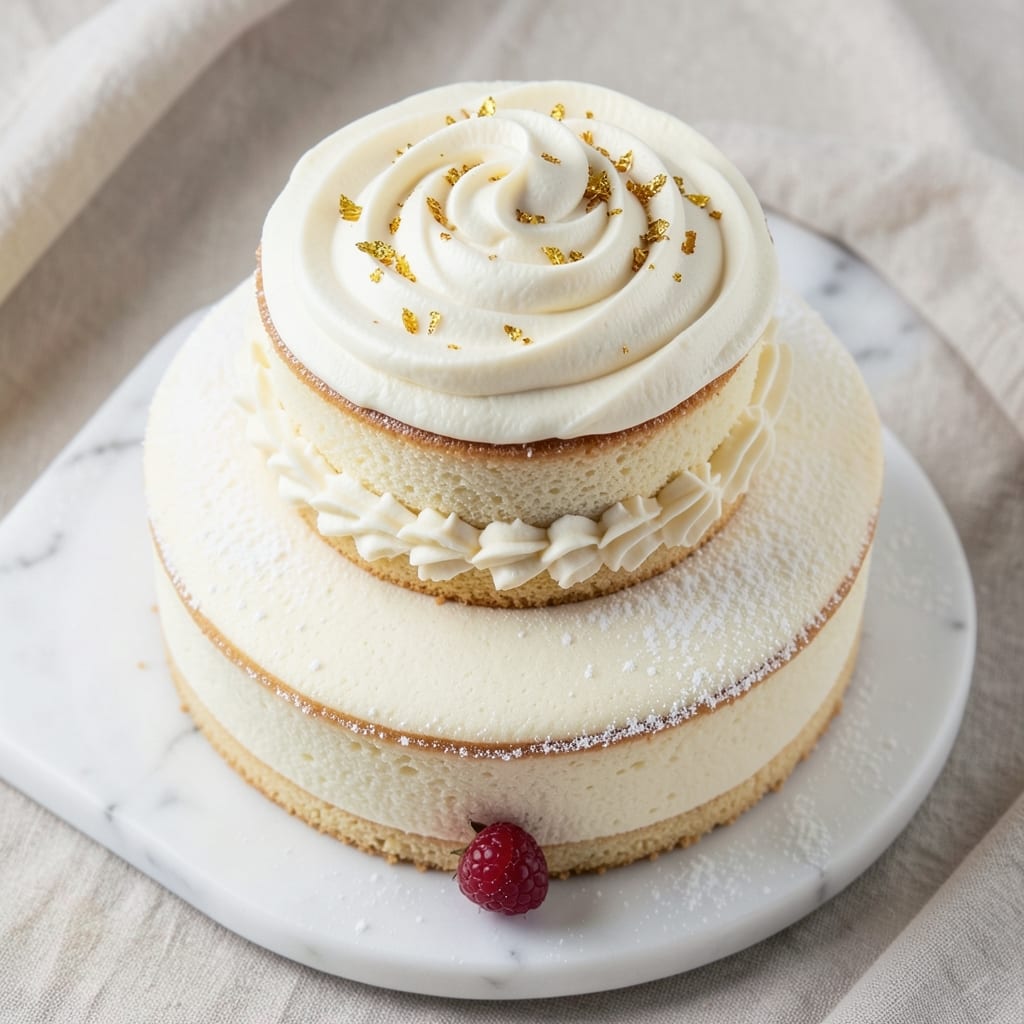
This 2 tier sponge cake recipe delivers the kind of elegant, airy height that makes any celebration feel special. The secret lies in perfectly baked layers with a delicate crumb and buttery swirls that transform simple ingredients into restaurant-worthy dessert. I've refined this recipe over years to ensure stability, even texture, and that signature professional finish.
What sets this apart is the foolproof technique for baking two even layers that stack beautifully without collapsing. We'll use a classic buttercream filling that's light yet sturdy enough to hold the tiers together, plus a crumb coat method that guarantees smooth frosting. The result? A cake that looks impressive enough for weddings but simple enough for birthdays.
By the time you're done, you'll have a towering dessert with perfectly level layers, smooth buttercream swirls, and a finish that's both elegant and approachable. The key steps—baking time, cooling, and stacking with dowels—ensure your cake stays stable while looking like it came from a patisserie.
Whether you're decorating with fresh flowers, chocolate ganache, or simple piped buttercream, this recipe gives you the foundation for a showstopping centerpiece. Let's get started with the techniques that make it work.
Ingredients for 2 tier sponge cake
Twelve essential ingredients transform into two flawless cake tiers with professional-level lightness.
| Ingredient | Amount | Notes |
|---|---|---|
| All-Purpose Flour 🌾 | 3 cups | Sifted for even texture |
| Granulated Sugar 🍚 | 2 ¼ cups | Divided for layers and swirls |
| Unsalted Butter 🧈 | 1 ½ cups | Room temperature, European preferred |
| Large Eggs 🥚 | 6 whole | Room temperature, separated |
| Vanilla Extract 🌿 | 1 tbsp | Pure Madagascar preferred |
| Baking Powder 🧂 | 1 ½ tsp | Aluminum-free for stability |
| Salt 🧂 | ½ tsp | Fine sea salt |
| Heavy Cream 🥛 | 1 ½ cups | Cold for buttercream |
| Powdered Sugar 🍚 | 4 cups | Sifted for smooth frosting |
| Vanilla Bean Paste 🌿 | 1 tbsp | For enhanced flavor |
| Cake Dowels 🪵 | 6 whole | 4-inch length for stability |
| Parchment Paper 📄 | 2 sheets | For even baking layers |
The flour and butter form the foundation of this cake's signature airiness. King Arthur or Gold Medal flour yields the best structure, while European-style butter (like Plugrá or President) delivers superior creaminess. For the vanilla, Madagascar Bourbon extract or a scraped vanilla bean guarantees depth. Room temperature eggs are critical—separate them just before mixing to prevent over-whipping. The baking powder must be fresh; any older than six months risks uneven layers. Bob's Red Mill aluminum-free baking powder is my go-to for consistent results.
No vanilla bean paste? Seeds from one scraped vanilla bean plus 1 tbsp neutral oil mimics the intensity. Substituting powdered sugar for granulated in the buttercream? Use 4 cups powdered sugar plus 1 tbsp cornstarch to prevent graininess. For the heavy cream, 36% fat minimum ensures proper whipping—store-brand often falls short. The cake dowels should be 4 inches long; shorter risks collapse, longer creates visible gaps. To test flour freshness, drop a pinch in water—it should sink slowly rather than float immediately.
Store buttercream in an airtight container between 2 layers of parchment paper to prevent drying. The cake layers keep at room temperature for 2 days wrapped in plastic, while fully assembled cake lasts 3 days refrigerated or 1 month frozen. For professional stability, chill the assembled cake 1 hour before decorating. The dowels can be removed after 24 hours once the cake has fully set, but the structure remains intact without them.
Why You'll Love This Recipe
- Here’s what sold me: this cake looks like it belongs at a wedding, but I can have it ready for a birthday or brunch in under an hour. The two tiers stack effortlessly, and the crumb is light enough to slice neatly. I’ve used it for everything from a casual Sunday dessert to a surprise celebration—no one ever questions the effort.
- No Stand Mixer Needed: I swear by this recipe because it only requires a whisk and a bowl—no fancy equipment. The eggs and butter get whipped into clouds with just elbow grease, and the flour folds in like magic. Honestly, it’s the kind of cake that proves you don’t need a kitchen full of gadgets to make something impressive.
- Buttery Vanilla Bliss: That rich, creamy butter and the whisper of vanilla extract? It’s like biting into a cloud with a hint of sunshine. The sugar caramelizes just enough to give it a subtle depth, but it’s never overpowering. Between us, this is the kind of cake that makes people ask, “What’s in it?”—and then they take seconds.
- Wedding-Worthy in Minutes: Here’s what sold me: this cake looks like it belongs at a wedding, but I can have it ready for a birthday or brunch in under an hour. The two tiers stack effortlessly, and the crumb is light enough to slice neatly. I’ve used it for everything from a casual Sunday dessert to a surprise celebration—no one ever questions the effort.
Step-by-step instructions for 2 tier sponge cake
Creating a stable, light two-tier cake requires precision and patience—here's how to achieve professional results.
Prepare the Cake Layers with Perfect Texture
Preheat your oven to 350°F and line two 8-inch round cake pans with the parchment paper. Sift together the 3 cups all-purpose flour, 1.5 teaspoons baking powder, and 0.5 teaspoon salt in a medium bowl. Set aside.
In a large mixing bowl, combine the 1.5 cups unsalted butter and 1 cup granulated sugar from the 2.25 cups total. Beat on medium speed until light and fluffy, about 3-4 minutes. Add the 6 whole large eggs one at a time, beating well after each addition. This gradual incorporation prevents curdling and ensures maximum volume.
Add the 1 tablespoon vanilla extract and mix for 30 seconds. Gradually fold in the dry ingredients using a spatula, mixing just until combined—overmixing develops gluten and creates dense cake. Divide the batter evenly between the prepared pans. Bake for 25-30 minutes or until a toothpick inserted in the center comes out clean. Let the cakes cool in the pans for 10 minutes before transferring to a wire rack to cool completely.
Create the Signature Butter Swirls
While the cakes cool, prepare the butter swirls by combining the remaining 1.25 cups granulated sugar with the 1.5 cups unsalted butter in a mixing bowl. Beat on medium speed until light and fluffy, about 3-4 minutes. Add the 1 tablespoon vanilla bean paste and mix for 30 seconds to infuse the flavor.
Spread a thin layer of this butter mixture onto each cooled cake layer, then place the second layer on top. Using an offset spatula, spread the remaining butter mixture evenly over the top and sides of the cake, creating a smooth, even surface for the final assembly. This step ensures the swirls remain visible after frosting.
Assemble the Two-Tier Cake Structure
Place the first cake layer on a cake stand or plate and insert 3 cake dowels evenly spaced around the edges to create a stable base for the second tier. Place the second cake layer on top, ensuring it's centered and level. Insert the remaining 3 cake dowels to secure the structure.
To create the second tier, use a serrated knife to trim the top layer into a smaller circle, about 6 inches in diameter. Place this trimmed layer on top of the dowels, creating the two-tier effect. Chill the assembled cake in the refrigerator for 1 hour to set before frosting, ensuring stability during assembly.
Prepare and Apply the Buttercream Frosting
In a large mixing bowl, combine the 1.5 cups heavy cream and 4 cups powdered sugar. Beat on medium speed until smooth and creamy, about 2-3 minutes. Add the 1 tablespoon vanilla extract and mix for another 30 seconds to blend the flavors evenly.
Using an offset spatula, apply the buttercream to the cake in three stages: first to the sides, then to the top of the second tier, and finally to the top of the first tier. Use a bench scraper to create clean, sharp edges. For added elegance, pipe decorative swirls or rosettes on the sides using a piping bag fitted with a star tip. Chill the cake for 30 minutes before serving to allow the frosting to set.
Final Touches and Serving
Before serving, carefully transfer the cake to a serving platter. Use a small offset spatula to smooth any imperfections on the frosting. For presentation, dust the top and sides with a fine layer of powdered sugar or garnish with fresh berries and edible flowers. Serve the cake at room temperature for the best texture and flavor.
This two-tier sponge cake delivers a perfect balance of light, airy layers with rich, buttery swirls. The key to success lies in precise measurements, gradual mixing, and patience during assembly—each step ensures a cake that's as impressive to look at as it is delicious to eat.
Pro Tips For Making 2 Tier Sponge Cake
- Weigh Your Eggs: I learned this the hard way—using volume for eggs in a sponge cake recipe leads to uneven tiers. Eggs vary wildly in size, and a sponge relies on structure. Weigh them instead: 200g for 4 large eggs gives you consistency every time.
- Cream Butter and Sugar Slowly: Your mixer’s speed won’t save you here. Cream the butter and sugar on medium-low until it’s pale and fluffy—about 3-5 minutes. Rushing this step traps air poorly, and your cake will end up dense. (Yes, even if you’re impatient like me.)
- Room-Temp Everything: Cold butter and eggs are the silent cake killers. Let them sit out for 1-2 hours before starting—no excuses. Cold fat won’t emulsify properly, and your sponge will either sink or crack. (Pro tip: Stick the eggs in warm water for 10 minutes if you’re in a rush.)
- Bake One Tier at a Time: I used to bake both tiers simultaneously, convinced it’d save time. Bad move. The oven’s heat distribution isn’t perfect, and your second tier will either overbake or underrise. Bake one, let it cool completely, then repeat. Your cake’s stability depends on it.
Troubleshooting great 2 tier sponge cake
Cake Layers Too Dense
Overmixing the batter develops gluten, creating a tough, dense cake. Mix dry ingredients just until combined—stop when no flour streaks remain. Use a gentle folding motion with a spatula to preserve airiness. Also, ensure your eggs are room temperature; cold eggs cause uneven baking and density. 🌾
Uneven Baking
Hot spots in your oven can lead to unevenly baked layers. Rotate pans halfway through baking and use an oven thermometer to confirm 350°F accuracy. Place pans on the middle rack for even heat distribution. If using glass pans, reduce temperature by 25°F to prevent over-browning.
Collapsing Tiers
Rushing the cooling process causes layers to collapse. Always let cakes cool in pans for 10 minutes before removing, then transfer to a wire rack to cool completely. When stacking tiers, insert cake dowels at a slight angle (about 30 degrees) for maximum stability. Chill the assembled cake for 1 hour before frosting to prevent shifting.
Buttercream Too Thin
If your buttercream separates or feels too soft, it needs more powdered sugar or chilling. Gradually add 1-2 tablespoons powdered sugar at a time until smooth. For extra stability, refrigerate the buttercream for 10 minutes before using. I also recommend using cold heavy cream (straight from the fridge) to prevent over-whipping.
Frosting Not Adhering
Apply a thin crumb coat of buttercream first, then chill for 15 minutes to harden. This creates a sticky base for the final layer. If frosting still doesn't stick, lightly toast the cake layers with a kitchen torch for 30 seconds per side to seal the crumbs. Always use a damp cloth to wipe cake surfaces before frosting.
Swirls Disappearing
The butter swirls should be spread between cake layers before final assembly. If they vanish, try this: Spread a thin layer of buttercream on the cake, then add the butter swirl mixture, and finally top with another buttercream layer. Use a bench scraper to smooth edges while preserving the swirls' visibility. Chill between layers to set the buttercream. ✨
Nutrition facts
Frequently asked questions
Can I make this cake without cake dowels?
For small cakes or single layers, you might skip dowels—but for two tiers, they're essential for stability. If you're avoiding them, try stacking the layers immediately after frosting and chilling for 2-3 hours to harden the buttercream. For extra support, use a cake board with a wide base to distribute weight evenly.
How do I level the cake layers evenly?
Use a serrated knife or cake leveler to trim the tops at a 45-degree angle for clean edges. Place the cake on a plate and gently press down—this helps identify high spots. For precision, use a cake jig or turntable. Always level before frosting to ensure even tiers.
Can I substitute buttercream with another frosting?
Yes! For a lighter option, try whipped cream or Italian meringue buttercream. For richer flavor, use ganache or cream cheese frosting. Adjust sweetness—ganache is naturally sweeter, while whipped cream needs extra powdered sugar. Chill the cake longer if using a softer frosting to prevent sliding tiers.
Why does my cake have a raw center?
Underbaking happens when cakes cool too quickly or the oven isn't hot enough. Always bake until a toothpick comes out clean, then let cakes cool in pans for 10 minutes before removing. For even baking, rotate pans halfway through and avoid opening the oven door early.
How far ahead can I make this cake?
Baked layers can be stored at room temperature for 2 days wrapped tightly in plastic. Fully assembled cake keeps 3 days refrigerated or 1 month frozen (wrap tightly with plastic wrap + foil). Thaw overnight in the fridge before serving to prevent condensation.