
Desserts
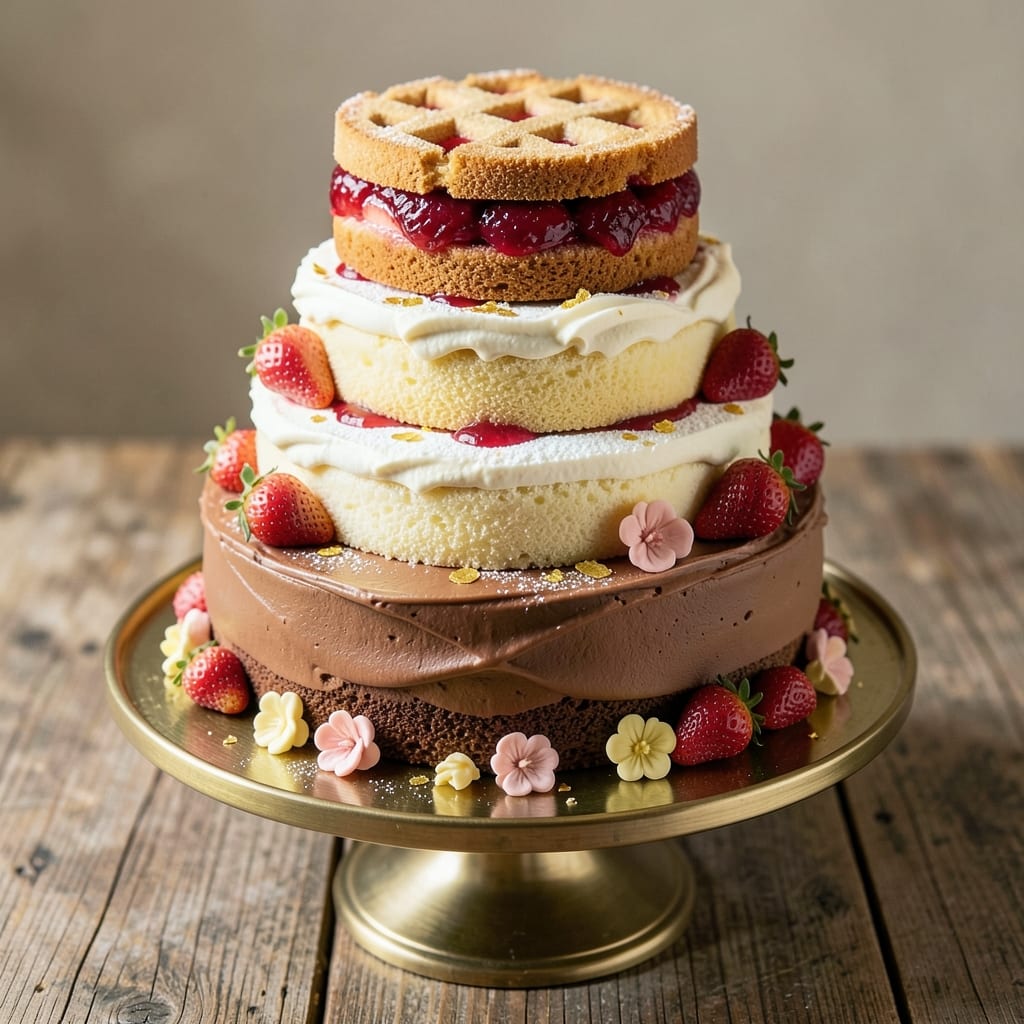
Celebrating a 2nd birthday calls for something special—and these mini vanilla cake stacks with swirled buttercream deliver exactly that. 💛 Designed for little hands and big smiles, this recipe balances simplicity with show-stopping decor, using foolproof techniques that even first-time bakers can master. The secret? Layering moist vanilla cake with fluffy buttercream swirls, creating bite-sized treats that feel like a celebration in every bite.
What makes this recipe perfect for toddlers is the easy assembly—no intricate piping required. Each stack features soft vanilla cake, creamy buttercream swirls, and optional sprinkles or edible glitter for extra sparkle. The recipe includes dietary adjustments (like vegan buttercream) so every child can enjoy the fun. Plus, the mini size means less waste and more smiles around the table.
By the time you're done, you'll have a cake that's as adorable as it is delicious—easy to serve, easy to eat, and impossible to resist. The vanilla buttercream swirls add a touch of elegance without the fuss, while the cake's tender crumb ensures every bite is a hit. This is the kind of cake that makes birthdays memorable, not just for the child, but for the whole family.
Whether you're baking for a party or a quiet celebration at home, these mini stacks are the perfect way to mark the occasion. Let's get started—your little one's second birthday deserves this much joy!
Ingredients for 2nd birthday cake
These ingredients create magical mini cake stacks perfect for tiny hands and big celebrations.
| Ingredient | Amount | Notes |
|---|---|---|
| All-Purpose Flour 🌾 | 3 cups | Sifted for light texture |
| Granulated Sugar 🍚 | 1 ½ cups | White or light brown |
| Unsalted Butter 🧈 | 1 cup | Room temperature, full-fat |
| Large Eggs 🥚 | 2 whole | Room temperature |
| Vanilla Extract 🌿 | 2 tsp | Pure vanilla extract |
| Baking Powder 🧂 | 1 ½ tsp | Diamond Crystal preferred |
| Salt 🧂 | ½ tsp | Fine sea salt |
| Whole Milk 🥛 | ½ cup | Room temperature |
| Unsalted Butter 🧈 | 1 cup | Room temperature, for buttercream |
| Powdered Sugar 🍚 | 3 cups | Sifted for smooth texture |
| Vanilla Extract 🌿 | 1 tbsp | Pure vanilla extract |
| Heavy Cream 🥛 | ½ cup | Cold, for stability |
| Rainbow Sprinkles 🎨 | ½ cup | Optional for decoration |
| Edible Glitter ✨ | 1 tbsp | Optional for sparkle |
The flour is your foundation—King Arthur or Gold Medal brands work best for that tender crumb. Butter matters here: use full-fat, unsalted, and let it sit at room temperature for 1 hour before mixing. Eggs should be room temp too—crack them gently into a small bowl first to check for freshness (no weird floaters!). Vanilla extract: pure Madagascar bourbon is worth the splurge for that rich flavor. For the buttercream, powdered sugar needs sifting—clumps make for grainy frosting. Pro tip: measure your powdered sugar into a fine-mesh strainer over a bowl before sifting to catch any stray lumps.
No vanilla extract? Almond extract at half the amount works in a pinch, but the flavor is different. Short on butter? Coconut oil can replace it in the cake (not buttercream), but texture will be slightly denser. For the buttercream, vegan butter (like Miyoko's) works perfectly if you need a dairy-free option—just add 1 tsp lemon juice for stability. Sprinkles? Wilton or Sugarfina are the gold standard, but any brand will do. Edible glitter? Amazon or baking supply stores carry it—just make sure it's food-grade. The heavy cream in the buttercream adds stability, but if you're short, Greek yogurt at half the amount can work (though texture will be slightly softer).
Store cake layers wrapped tightly in plastic wrap at room temperature for up to 2 days, or in the fridge for 3 days. Buttercream can be made 2 days ahead and stored in the fridge—bring it to room temp and re-whip before assembling. For the sprinkles and glitter, keep them in airtight containers away from direct light to prevent fading. These stacks are perfect for birthday parties—assemble them right before serving so the buttercream stays fresh and the sprinkles stay vibrant. If you're making ahead, freeze the cake layers (without frosting) for up to 1 month—thaw at room temperature before decorating.
Why You'll Love This Recipe
- No Mixer Needed: I swear by this recipe when I’m too tired to haul out the stand mixer—just a bowl and a whisk. The butter-egg combo comes together smoother than you’d think, and the vanilla cuts through the richness without overpowering.
- Buttery Vanilla Magic: That first bite? Pure nostalgia. The sugar and butter create this tender crumb, while the vanilla extract (don’t skimp!) gives it a cozy, bakery-style warmth that tastes like childhood memories.
- Double-Duty Cake: Make it once, celebrate twice. The same batter works for a simple sheet cake and cupcakes—just divide it up. Honestly, I’ve used leftovers for cake pops or breakfast cake the next morning, and no one complains.
- Pantry Staple Power: You’re already using ingredients you own. Flour, sugar, butter—these are the basics that never let me down. The eggs add structure without fuss, and the vanilla? A little goes a long way. Budget-friendly and foolproof.
Step-by-step instructions for mini vanilla cake stacks with swirls
Let's create these adorable mini cake stacks—perfect for little hands and big smiles.
👨🍳 Step 1: Whisk Dry Ingredients for Light, Airy Texture
In a medium bowl, sift together the 3 cups All-Purpose Flour, 1.5 tsp Baking Powder, and 0.5 tsp Salt. I like to use a fine-mesh sieve for this step—it prevents lumps and ensures even baking. Give everything a gentle whisk to break up any remaining clumps, then set aside. This pre-mixing keeps your cake tender rather than dense.
In a separate small bowl, combine the 1.5 cups Granulated Sugar and 2 tsp Vanilla Extract. This pre-mixing ensures the vanilla flavor is evenly distributed throughout the batter. The sugar will help create that signature tender crumb we're after—don't skip this step!
🍳 Step 2: Cream Butter and Eggs for Maximum Fluffiness
In a stand mixer fitted with the paddle attachment, beat the 1 cup Unsalted Butter and 2 whole Large Eggs on medium speed for 3-4 minutes until light and fluffy. You're looking for a texture that nearly doubles in volume and becomes pale in color—this incorporates air that will make your cakes rise beautifully. I always use room temperature butter and eggs for this step.
Gradually add the dry ingredient mixture in 3 additions, mixing on low speed just until combined after each addition. This slow incorporation prevents overmixing which can make cakes tough. After the final addition, mix for another 30 seconds until just smooth. The batter should be thick but pourable.
🥘 Step 3: Fold in Milk for Perfect Moisture Balance
Add the 0.5 cup Whole Milk to the batter and mix on low speed for 15-20 seconds until just combined. This step ensures your cakes stay moist without being too wet. I like to scrape down the sides of the bowl with a silicone spatula to make sure all the batter gets incorporated evenly.
Divide the batter evenly among 24 greased and lined mini cake pans (about 1 tablespoon per pan). I use a small ice cream scoop for this—it makes portioning quick and consistent. Tap the pans gently on the counter to release any air bubbles that might have formed during pouring.
🔥 Step 4: Bake Until Golden and Springy
Preheat your oven to 350°F and bake the mini cakes for 12-14 minutes, or until a toothpick inserted into the center comes out clean and the tops are golden brown. I always check at the 12-minute mark—every oven runs slightly differently, so don't be afraid to start checking early.
Let the cakes cool in the pans for 5 minutes, then transfer them to a wire rack to cool completely. This cooling step is crucial—it prevents the buttercream from melting when you assemble the stacks. While they're cooling, you can make a start on the buttercream so everything's ready when the cakes are done.
🍳 Step 5: Whip Vanilla Buttercream to Pipeable Perfection
In a stand mixer fitted with the paddle attachment, beat the 1 cup Unsalted Butter on medium speed until smooth and creamy. Gradually add the 3 cups Powdered Sugar, mixing on low speed until combined. Add the 1 tbsp Vanilla Extract and 0.5 cup Heavy Cream, then increase speed to medium-high and beat for 3-4 minutes until light and fluffy.
Spread about 1 tablespoon of buttercream on the flat side of each cooled cake layer. Then pipe a swirl of buttercream on top of each layer—this creates that adorable stacked look. I use a small star tip for this, but a plain round tip works too if you prefer a smoother finish. Assemble the stacks immediately after spreading to prevent the buttercream from drying out.
🥘 Step 6: Decorate with Sparkle and Sprinkles
Once all the stacks are assembled, dust the top of each with the 0.5 cup Rainbow Sprinkles and sprinkle the 1 tbsp Edible Glitter evenly over the entire batch. I like to tap the cake tray gently on the counter to help the sprinkles and glitter settle into place. Let the cakes sit for 10 minutes before serving to allow the decorations to adhere.
These mini stacks are perfect for little hands—each one is just the right size for a toddler to hold and enjoy. The vanilla buttercream swirls add that special touch that makes birthdays extra magical. Serve immediately for the freshest, most delicious experience!
Pro Tips For Making 2nd Birthday Cake
- Mix Butter and Sugar Slowly: I learned this the hard way—dumping cold butter into sugar and whipping it all at once just makes a greasy mess. Instead, add the butter one pat at a time while mixing on medium-high. Let each piece soften and blend before adding the next, or you’ll end up with lumps that ruin the texture.
- Weigh Your Flour (Seriously): That "scoop and sweep" method? It’s your enemy here. Flour packed too tightly makes the cake dense, while too little leaves it dry. Use a kitchen scale for precision—stick to 1:1 ratio with the recipe’s weight, and sift it once before measuring.
- Don’t Overmix the Batter: The moment your batter turns from pale to slightly gray and stiff, stop. Overmixing develops gluten like you’re kneading dough, and that’s how you get a tough, chewy cake instead of a tender one. Drop the batter in the pan immediately—no waiting for it to "relax."
- Bake at 325°F, Not Hotter: I used to crank the oven to 350°F for speed, but the outside would burn before the center set. This recipe needs 325°F—the lower temp ensures even baking without a crust forming too fast. Insert a toothpick at the center; if it comes out clean after 30-35 minutes, you’re golden.
Flavor customization for this recipe
Sweet Vanilla Variations
Swap the classic vanilla for almond extract (½ tsp) or orange zest (1 tsp) for a floral or citrus twist. I love adding 1 tsp cinnamon to the batter for warm spice notes—it pairs beautifully with the buttercream. For a tropical vibe, replace the vanilla extract with 1 tbsp coconut extract (though the flavor is stronger, so use sparingly). 🌿
Chocolate Lover's Twist
Add ¼ cup cocoa powder to the dry ingredients for a subtle chocolate flavor that still keeps the cake light. For a bolder version, replace ½ cup of the granulated sugar with melted dark chocolate (60% cocoa). Top the stacks with chocolate shavings or mini chocolate chips instead of sprinkles. The contrast of chocolate with vanilla buttercream is irresistible!
Fruity Buttercream Swirls
Infuse the buttercream with 1 tsp strawberry or raspberry jam for a fruity kick. For a more elegant touch, add 1 tbsp lemon or lime zest to the buttercream and pipe a contrasting color swirl. I also love using freeze-dried fruit powder (like strawberry or mango) mixed into the powdered sugar for a vibrant, fruity flavor without altering the texture. 🍓
Nutty Crunch Addition
Fold ¼ cup crushed pistachios or pecans into the batter for added texture. For a crunchy topping, sprinkle toasted coconut flakes or chopped nuts between the cake layers. A light dusting of powdered sugar on top adds a sweet, snowy finish that kids adore. Just be mindful of allergies if serving to a group!
Seasonal Flavor Boosters
For a spring theme, add 1 tsp lemon extract to the buttercream and decorate with pastel sprinkles or edible flower petals. In fall, swap vanilla for pumpkin spice (½ tsp) and top with caramel drizzle. Winter calls for cinnamon and nutmeg (¼ tsp each) with peppermint chocolate shavings for a festive touch. Each season brings a fresh, magical twist! ❄️
Nutrition facts
Frequently asked questions
Can I make these mini cake stacks gluten-free?
Yes! Replace the all-purpose flour with a 1:1 gluten-free flour blend like Bob's Red Mill or King Arthur. You may need to add 1 extra tablespoon of flour or 1 extra egg white for structure. Also, use a gluten-free baking powder and let the cakes cool completely before assembling to prevent crumbling.
How do I prevent the buttercream from melting in warm weather?
Chill the assembled stacks in the fridge for 30 minutes before serving if temperatures exceed 75°F. For extra stability, add 1 extra tablespoon of powdered sugar to the buttercream or replace the heavy cream with 1 tablespoon of marshmallow fluff. Always keep your buttercream refrigerated until 10 minutes before decorating.
What's the best way to transport these to a party?
Assemble the stacks on a tray, then wrap each individual stack in plastic wrap or place them in a cake carrier box with parchment paper between layers. Keep them in a cool, shaded area of the car and transport them upright to maintain the swirls. For long trips, freeze the unfrosted cakes and assemble with chilled buttercream upon arrival.
Can I make this cake ahead of time?
Bake the cake layers 1 day ahead and store them in an airtight container at room temperature. Make the buttercream 2 days ahead and refrigerate—whip it again before assembling. Assemble the stacks 4 hours before serving so the buttercream sets properly. The decorations (sprinkles/glitter) should always be added fresh.
What if my mini cakes don't rise properly?
Check these common issues: Oven temperature (use an oven thermometer—it should read 350°F), baking powder freshness (test with vinegar—it should bubble), and batter consistency (it should be thick but pourable). If they're still flat, try baking 2-3 minutes longer or check for under-mixed batter—whisk the dry ingredients thoroughly next time.