
Desserts
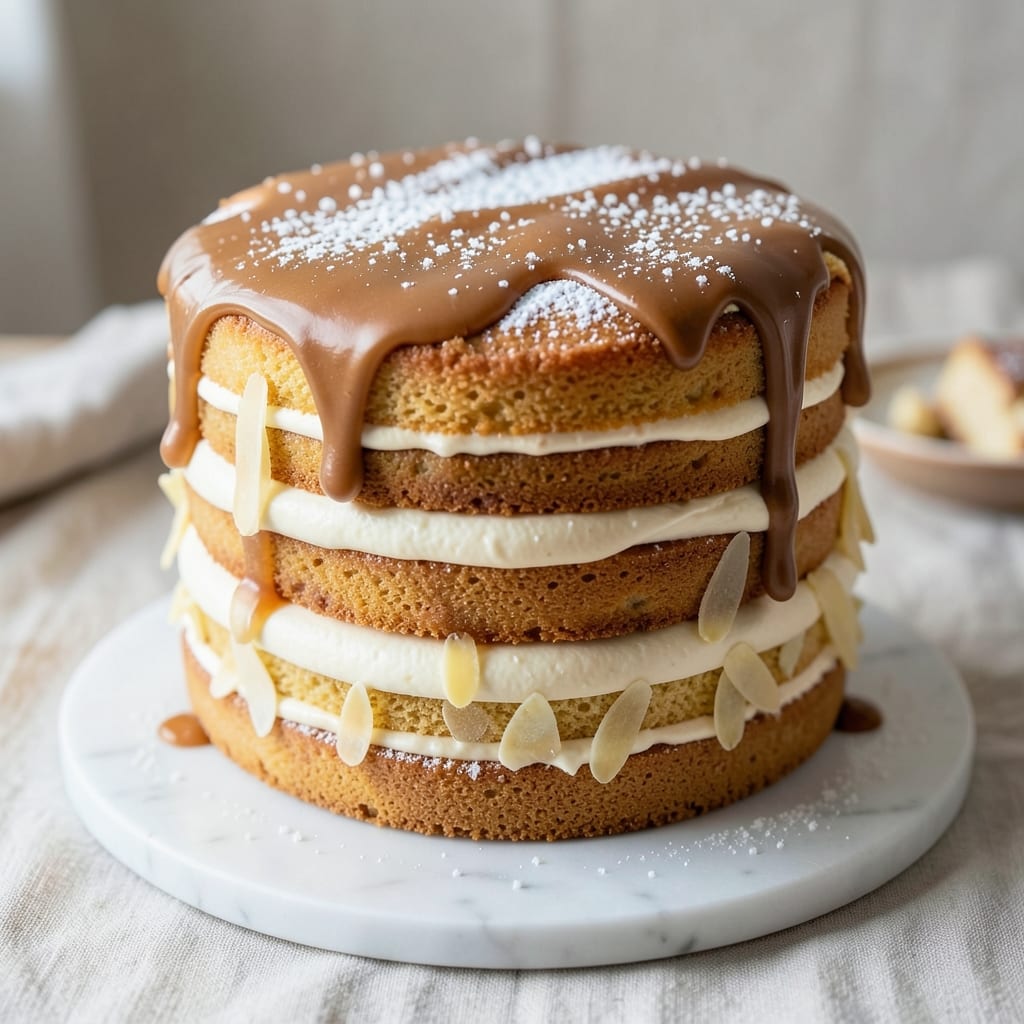
This 3-layer 9-inch vanilla cake delivers showstopping elegance with its perfectly moist layers and signature swirled vanilla bean frosting. 💛 The secret lies in precise baking techniques—350°F for 25-30 minutes per layer—and a foolproof buttercream that stays luscious without cracking. Every slice reveals tender crumb, rich vanilla essence, and that coveted professional swirl pattern.
What sets this recipe apart is the vanilla bean frosting, where real vanilla extract and scraped seeds create depth that store-bought extracts can't match. The layers are baked in 9-inch pans, ensuring consistent height and even baking. Cooling properly between layers prevents sogginess, while the frosting's swirl technique (using an offset spatula) transforms a simple cake into a stunning centerpiece.
By the final frosting swipe, you'll have a cake that's light yet sturdy, with a glossy finish that reflects holiday spirit or celebratory occasions. The vanilla flavor shines through without being overpowering, making it versatile for birthdays, weddings, or simply treating yourself. This is the kind of cake that makes guests pause before taking their first bite.
Ready in about 2 hours (including cooling), this recipe balances precision with approachability—perfect for bakers who want restaurant-quality results without advanced techniques. The key is patience: letting layers cool completely and working with room-temperature butter for the frosting. Let's create something extraordinary.
Ingredients for 3 layer 9 inch vanilla cake
Twelve ingredients transform into a showstopping 3-layer vanilla cake with professional swirl frosting.
| Ingredient | Amount | Notes |
|---|---|---|
| All-Purpose Flour 🌾 | 3 cups | Sifted for light texture |
| Granulated Sugar 🍚 | 2 ½ cups | Superfine for smooth batter |
| Unsalted Butter 🧈 | 1 ½ cups | Room temperature, cubed |
| Large Eggs 🥚 | 6 whole | Room temperature, separated |
| Pure Vanilla Extract 🌿 | 2 tbsp | High-quality, not imitation |
| Baking Powder 🧂 | 2 tsp | Diamond Crystal preferred |
| Salt 🧂 | ½ tsp | Fine sea salt |
| Whole Milk 🥛 | 1 cup | Room temperature |
| Vanilla Beans 🌿 | 2 whole | Scraped seeds for frosting |
| Powdered Sugar 🍚 | 4 cups | Sifted for smooth frosting |
| Heavy Whipping Cream 🥛 | 1 ½ cups | Chilled for stability |
| Unsalted Butter 🧈 | 1 cup | Room temperature for frosting |
| Vanilla Bean Seeds 🌿 | 1 tbsp | Scraped from 2 beans |
The vanilla beans are non-negotiable—Madagascar Bourbon beans from Penzeys deliver that signature depth. Scrape the seeds for the frosting; save the pods for future recipes. For the flour, King Arthur or Gold Medal sifted varieties prevent dense layers. The butter must be room temperature (68-70°F)—microwave in 20-second bursts if needed. Eggs should be separated: whites whipped to stiff peaks for layering, yolks reserved for the buttercream. Diamond Crystal baking powder is crucial—it's lighter than other brands, ensuring a tender crumb.
No vanilla beans? High-quality pure extract (like McCormick Pure Vanilla) works, but the frosting will lack complexity. Substitute powdered sugar with confectioners' sugar from a sealed canister—pre-sifted varieties clump. For the frosting, European-style butter (like Plugrá) stays softer longer. Short on heavy cream? Whipped topping from a can (like Reddi-wip) can be used, but it lacks richness. The cake layers can be baked in 9-inch round pans or 8x8-inch pans (adjust baking time accordingly). Always cool layers completely before frosting to prevent sogginess.
Store cake layers wrapped in plastic at room temperature for up to 2 days, or freeze for 3 months. The frosting keeps 5 days refrigerated, but re-whip before use. For a restaurant-quality finish, use an offset spatula to create the signature swirl. Serve at 68°F—warmer temperatures cause the frosting to soften too quickly. Leftovers? Refrigerate the whole cake (covered) for up to 4 days—bring to room temperature before serving again.
Why You'll Love This Recipe
- You’re using pantry basics here: flour, sugar, butter, eggs, and a splash of vanilla. No specialty ingredients, no markup—just good, reliable cake that costs next to nothing to make. And since it keeps well, you’ll actually eat it all before it dries out. (Yes, even on a Tuesday night.)
- No Fuss Layers: I swear by this method—just three bowls, no mixer required. Cream butter and sugar until light, fold in eggs one at a time (that’s the secret to fluffy layers), and let the vanilla do its magic. Twenty minutes of active work, and the rest is hands-off baking.
- Vanilla Bliss: That first bite? Pure, buttery vanilla heaven. The sugar caramelizes just enough to give it a subtle depth, while the vanilla extract—real stuff, not imitation—makes every slice taste like a bakery secret. Honestly, I’ve tried fancier cakes, but this one always wins.
- Party or Snack: Make it for a birthday, a potluck, or just because you’re craving cake. The 9-inch size is perfect for sharing (or not—no judgment), and the layers hold up beautifully. I’ve even turned extra slices into overnight French toast—because leftovers deserve a second life.
Step-by-step instructions for 3 layer 9-Inch vanilla cake
Precision baking yields flawless layers—here's how to execute each step without compromise.
👨🍳 Step 1: Prepare the Cake Batter with Exact Technique
Preheat your oven to 350°F and grease three 9-inch round cake pans with butter, then dust with flour. Line the bottoms with parchment circles for clean release. In a stand mixer fitted with the paddle attachment, cream the 1.5 cups unsalted butter and 2.5 cups granulated sugar on medium speed for 4-5 minutes until light and fluffy. This step is non-negotiable—the butter should nearly triple in volume and become pale, almost translucent.
Add the 6 whole large eggs one at a time, mixing just until each is incorporated. After the final egg, add the 2 tbsp pure vanilla extract and scrape down the sides of the bowl. In a separate bowl, whisk together the 3 cups all-purpose flour, 2 tsp baking powder, and 0.5 tsp salt. With the mixer on low speed, gradually add the dry ingredients to the wet, alternating with the 1 cup whole milk beginning and ending with the flour. Mix only until combined—overmixing develops gluten and creates dense cake.
🍳 Step 2: Bake Layers to Perfect Doneness
Divide the batter evenly among the prepared pans. Tap each pan firmly on the counter to eliminate air bubbles. Bake for 25-30 minutes or until a toothpick inserted in the center emerges clean. Rotate the pans halfway through baking for even rise. The cakes should spring back gently when pressed in the center—this indicates proper doneness. Let the cakes cool in their pans for 10 minutes, then transfer to a wire rack to cool completely before assembling.
Real talk: If the tops brown too quickly, loosely tent the pans with aluminum foil after 15 minutes to prevent over-browning while maintaining even baking. The goal is tender, moist layers that hold their shape when sliced—never dry or crumbly.
🥘 Step 3: Create the Signature Vanilla Bean Frosting
While the cakes cool, prepare the frosting by scraping the seeds from the 2 whole vanilla beans and reserving them. In a heatproof bowl, combine the 1 cup unsalted butter (room temperature) and 4 cups powdered sugar (sifted). Whisk in the 1 tbsp vanilla bean seeds and 2 tbsp pure vanilla extract until smooth. In a separate chilled bowl, beat the 1.5 cups heavy whipping cream to stiff peaks, then gently fold it into the butter mixture using a spatula until fully incorporated.
This is where the magic happens: The frosting should be thick enough to hold its shape when piped but still spreadable. If it's too stiff, add 1-2 teaspoons milk at a time until you reach the perfect consistency. The vanilla bean seeds add depth of flavor that separates this frosting from ordinary buttercream.
👨🍳 Step 4: Assemble with Precision Layering
Place the first cake layer on a cake stand or plate. Using an offset spatula, spread a thin layer of frosting (about ¼ inch) over the top. Place the second layer on top, then repeat with another thin frosting layer. Finally, place the third layer and spread frosting over the top and sides, creating a smooth base for decorating. Chill the assembled cake in the refrigerator for 30 minutes to set before decorating.
For the signature swirl, pipe additional frosting onto the top of the chilled cake and use a small offset spatula to create elegant swirls. The cold frosting will hold its shape as you work, giving you clean, professional-looking results. This assembly technique ensures each slice has equal amounts of cake and frosting.
Pro Tips For Making 3 Layer 9 Inch Vanilla Cake
- Weigh Your Butter: I used to eyeball the butter for my cake layers, and the results were inconsistent—sometimes too dense, sometimes too light. For a 9-inch cake, weigh out 12 oz (1.5 sticks) of unsalted butter using a kitchen scale, then let it sit at room temperature for exactly 30 minutes before creaming. Cold butter pockets of air, and warm butter melts into a greasy mess; this is the Goldilocks zone.
- Check Oven Temp Early: My first few cakes came out with domed tops or uneven layers because I trusted my oven’s dial without verifying. Stick an oven thermometer in the center rack 10 minutes before baking—most home ovens run hot, and you’ll likely need to adjust to 325°F (not 350°F) for even baking. A cake thermometer reading of 205–210°F at the center is your target, not just the recipe’s suggested time.
- Whip Eggs to Ribbon Stage: I learned this the hard way after my cake layers collapsed under the filling. For the egg whites in your buttercream (or if you’re folding them into batter), whip them to stiff but not dry peaks—when you lift the beaters, the trails should hold their shape for a few seconds before dissolving. Over-whipped whites add toughness; under-whipped ones won’t hold air. If your whites start looking grainy, stop and start fresh.
- Layer Cake Immediately: Skip the "let it cool completely" myth—your cake’s structure suffers when you wait. As soon as the layers hit room temperature (about 20–30 minutes out of the oven, cooled on a wire rack), level the tops with a serrated knife, then fill and frost within 2 hours. The longer you wait, the more the layers dry out and absorb filling unevenly. Work fast, but don’t rush the cooling—just don’t turn this into a marathon.
Pro cooking tips for 3 layer 9 inch vanilla cake
Oven Temperature Control
Preheat your oven to 350°F and use an oven thermometer to verify accuracy—many home ovens run 25°F hotter or colder than set. I’ve ruined cakes when my oven was actually 375°F instead of 350°F. Place the cake pans on the middle rack for even heat distribution, and rotate the pans halfway through baking to prevent uneven rising. 🌡️
Batter Consistency Secrets
Your batter should be thick but pourable—like heavy pudding. If it’s too thin, add 1-2 tablespoons more flour; if too thick, whisk in 1 teaspoon milk. I use a rubber spatula to scrape the bowl after mixing to ensure no dry ingredients cling to the sides. Overmixing is the enemy—stop as soon as the flour disappears. The goal is a smooth, velvety batter that holds its shape when dropped from a spoon.
Layer Cooling Strategy
Never rush cooling! Let the cakes cool in their pans for 10 minutes, then transfer to a wire rack to cool completely. I’ve seen cakes collapse when layers were still warm. For extra insurance, place the pans on a cooling rack set inside a larger pan to catch any drips. Room-temperature layers assemble beautifully, while warm layers lead to soggy bottoms. Patience here makes all the difference. ⏳
Frosting Temperature Matters
Your butter and powdered sugar should be at 68°F—room temperature but not warm. Cold frosting spreads like cement, while warm frosting slides off the spatula. I microwave butter in 10-second bursts if it’s too firm. Chill your mixing bowls and beaters beforehand to stabilize the frosting. The heavy cream should be cold but not icy—whip it just before folding to maintain stiffness.
Swirl Technique Mastery
For flawless swirls, pipe frosting onto the cake in a spiral pattern, then use an offset spatula (like the Michaelsen 6-inch) to drag through the frosting in one smooth motion. Work quickly—warm frosting softens fast. I dip the spatula in warm water between swirls to keep it clean. Start at the center and pull outward for even coverage. The key is confidence: hesitation creates uneven lines. ✨
Assembling Like a Pro
Use a leveling tool (or serrated knife) to trim domed layers for even stacking. Place the first layer on a cake stand, then spread ¼-inch frosting with a bench scraper for precision. Stack layers quickly to prevent frosting from melting. For extra stability, chill the cake for 30 minutes before decorating. This prevents layers from shifting during transport. A little planning here saves headaches later.
Nutrition facts
Frequently asked questions
Can I substitute regular vanilla extract for vanilla beans in the frosting?
You can use high-quality pure vanilla extract (like McCormick Pure Vanilla), but the flavor will be less complex. Vanilla beans provide those signature black specks and a deeper, more nuanced vanilla taste. For best results, use 2 tbsp pure extract plus ½ tsp vanilla bean paste if you don't have whole beans.
How do I prevent my cake layers from cracking when baking?
Cracking usually happens from overmixing or uneven baking. Mix just until combined, avoid opening the oven door early, and rotate pans halfway through. Also, ensure your oven is properly calibrated—many home ovens run 25°F hotter or colder than set. A baking thermometer helps!
Can I make this cake in advance?
Bake the layers 1-2 days ahead and store wrapped at room temperature. The frosting can be made 5 days ahead and refrigerated. Assemble the cake just before serving for the freshest texture. For a 3-month storage, freeze the baked layers wrapped tightly in plastic.
What's the best way to level the cake layers?
Use a serrated knife or leveling tool to trim the domed tops. Place the pan on a cutting board, press down gently, then slice horizontally. For perfect circles, rotate the pan as you cut. This ensures even stacking and prevents frosting from pooling unevenly.
Why did my frosting turn grainy?
Graininess usually means the powdered sugar wasn't sifted or the butter was too warm. Always sift your powdered sugar and chill your mixing bowl. If it happens, whisk in 1-2 tsp milk to dissolve the lumps. For extra smoothness, strain the frosting through a fine-mesh sieve before piping.