
Desserts
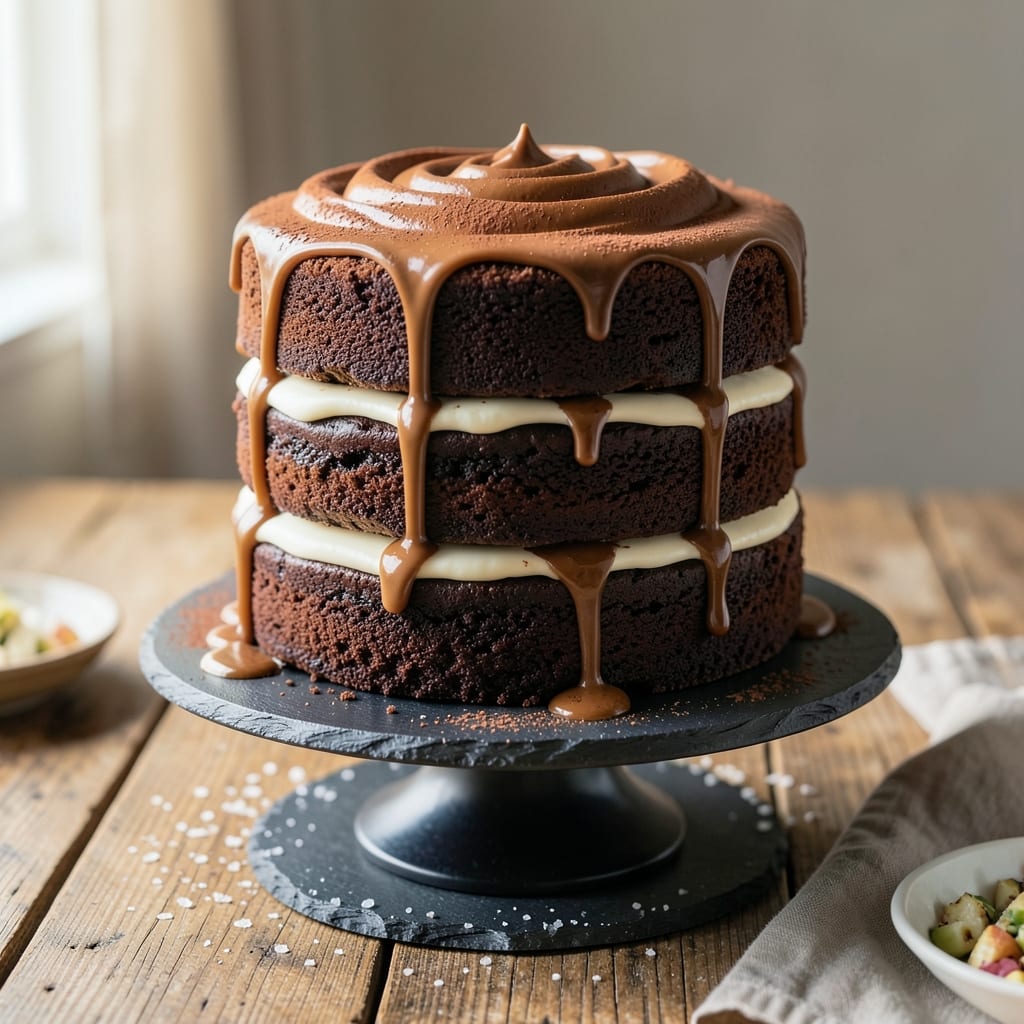
This 3-layer chocolate fudge cake recipe delivers the ultimate indulgence—moist, rich cocoa layers swirled with velvety fudge and crowned with luscious cream cheese frosting. 💛 After years of perfecting the balance between dense cake and smooth fillings, I’ve created a recipe that’s foolproof yet impressive enough for special occasions. The secret lies in precise baking times and cooling techniques that prevent crumbling, ensuring each slice holds its structure beautifully.
The foundation starts with a foolproof chocolate cake batter that bakes to a tender yet sturdy texture, ready to support the weight of the fudge layer. Between each layer, a silky chocolate fudge—made with just cocoa, butter, and sugar—adds decadent pockets of flavor, while the cream cheese frosting ties everything together with its tangy-sweet balance. Every step is designed to minimize effort while maximizing results, so you can focus on the rewarding part: assembling and decorating.
By the time you’re done, you’ll have a stunning dessert with layers that practically melt in your mouth—rich chocolate, creamy fudge, and velvety frosting in perfect harmony. The cake stays moist for days, making it ideal for meal prep or gifting. Serve it warm with vanilla ice cream for a restaurant-worthy experience, or let it cool for elegant slices that impress any crowd.
Whether you’re baking for a celebration or simply craving a treat, this recipe delivers restaurant-quality results with minimal fuss. The key is patience—letting the cake cool completely before adding fillings and frosting ensures clean layers and a stable structure. Ready to create a showstopper? Let’s get started!
Ingredients for 3 layer chocolate fudge cake
Rich cocoa layers, velvety fudge swirls, and velvety cream cheese frosting—just 14 ingredients for restaurant-quality decadence.
| Ingredient | Amount | Notes |
|---|---|---|
| All-Purpose Flour 🌾 | 3 ½ cups | Sifted for light texture |
| Unsalted Butter 🧈 | 2 ¼ cups | Room temperature, European preferred |
| Granulated Sugar 🍚 | 2 ½ cups | Superfine for smoother batter |
| Cocoa Powder 🍫 | 1 cup | Natural or Dutch-processed |
| Large Eggs 🥚 | 6 whole | Room temperature, separated |
| Baking Powder 🍞 | 1 ½ tsp | Aluminum-free preferred |
| Salt 🧂 | ½ tsp | Fine sea salt |
| Vanilla Extract 🌿 | 2 tsp | Pure Madagascar bourbon |
| Whole Milk 🥛 | 1 ½ cups | Room temperature |
| Dark Chocolate Chips 🍫 | 1 ½ cups | 70% cacao minimum |
| Heavy Cream 🥛 | 1 ½ cups | Cold, full-fat |
| Cream Cheese 🧀 | 16 oz | Full-fat, room temperature |
| Powdered Sugar 🍚 | 4 cups | Confectioners' sugar |
| Lemon Juice 🍋 | 1 tbsp | Freshly squeezed |
The cocoa powder and butter are your flavor anchors—Valrhona or Guittard make all the difference here. European-style butter has higher fat content, giving that ultra-moist texture. For the chocolate chips, Ghirardelli or Lindt are worth the splurge—they melt beautifully into the fudge layer. If you're using Dutch-process cocoa, add an extra pinch of baking soda to the batter for proper leavening. The cream cheese? Philadelphia brand is the gold standard, but any full-fat block works if it's chilled overnight for easier handling.
No European butter? Plugrá or Land O'Lakes will work in a pinch, but expect slightly denser layers. Running short on vanilla? Almond extract at half the amount adds depth, though it changes the profile. For the powdered sugar, sift it yourself—Domino or C&H work fine, but pre-sifted versions often contain anti-caking agents that make frosting grainy. The lemon juice brightens the frosting; if you're out, a pinch of cream of tartar does the trick. And for the fudge layer, microwave the chocolate chips in 30-second bursts to avoid burning.
Store the fully assembled cake in an airtight container at room temperature for up to 5 days, or refrigerate for 1 week—though it's best enjoyed fresh. The frosting can be made 2 days ahead and kept chilled, whipped back to fluffiness before use. For gifting, slice and wrap layers individually in parchment, stacking them only when ready to serve. Freeze unfrosted layers for 3 months—thaw at room temp before assembling.
Why You'll Love This Recipe
- No Mixer Needed: I swear by this—just cream butter and sugar by hand until light and fluffy. The eggs and cocoa blend in like magic, and the layers stay rich without overmixing. (Yes, even if your arms are tired.)
- Rich Without Overpowering: That perfect balance of melted butter and cocoa? It’s velvety, not bitter. The sugar caramelizes just enough to give it that deep, fudgy satisfaction, but the flour keeps it from being too heavy. My husband licks the bowl clean—every single time.
- Birthday Party Ready: Layer it with whipped cream and berries for a crowd, or keep it simple with a dusting of powdered sugar for a quiet night in. The cake holds up beautifully, so you’re not stuck with a soggy mess. (Trust me, I’ve tried.)
- Budget-Friendly Indulgence: You’re using pantry staples—flour, butter, sugar—so it’s cheap to make but feels like a treat. A single batch feeds six, and leftovers? They disappear faster than I can say “second slice.”
Step-by-step instructions for 3 layer chocolate fudge cake
Here's how to create layers of velvety chocolate cake with luscious cream cheese filling and rich chocolate ganache.
👨🍳 Step 1: Prepare the Cake Batter with Perfect Texture
Preheat your oven to 350°F and grease three 8-inch round cake pans, lining the bottoms with parchment paper. In a large mixing bowl, combine the 3.5 cups all-purpose flour, 1 cup cocoa powder, 1.5 tsp baking powder, and 0.5 tsp salt. Sift this mixture together to remove any lumps and create a light, airy base for your cake.
In a separate large bowl, beat the 2.25 cups unsalted butter and 2.5 cups granulated sugar on medium speed until light and fluffy—this should take about 3-4 minutes. Add the 6 whole large eggs one at a time, mixing well after each addition. The mixture should nearly double in volume and become pale in color. This creaming process is crucial for a tender, moist cake.
Gradually add the dry ingredients to the wet mixture, alternating with the 1.5 cups whole milk, beginning and ending with the flour mixture. Mix on low speed just until combined—overmixing develops gluten and makes the cake dense. Fold in the 1.5 cups dark chocolate chips and 2 tsp vanilla extract by hand using a spatula. The batter should be thick but pourable.
🔥 Step 2: Bake the Layers to Golden Perfection
Divide the batter evenly among your prepared cake pans, filling each about ⅔ full. Tap the pans gently on the counter to remove any air bubbles. Bake for 30-35 minutes or until a toothpick inserted into the center comes out clean. The edges should be set but the tops should still look slightly soft.
Here's the thing—don't overbake. The cake will continue cooking as it cools, and overbaking leads to dryness. As soon as the toothpick test passes, remove the cakes from the oven and let them cool in their pans for 10 minutes before transferring to a wire rack to cool completely. This gradual cooling prevents cracking and helps the layers set properly for slicing.
🥘 Step 3: Whip the Cream Cheese Filling
While the cakes cool, prepare the filling by beating the 16 oz cream cheese at room temperature with the 4 cups powdered sugar and 1 tbsp lemon juice until smooth and creamy. In a separate bowl, whip the 1.5 cups heavy cream to stiff peaks. Gently fold the whipped cream into the cream cheese mixture until fully combined and light.
This filling is where the magic happens. The lemon juice brightens the rich cream cheese, and the whipped cream adds airiness to balance the dense cake layers. If the mixture seems too thick, you can add 1-2 tablespoons whole milk to achieve a smooth, spreadable consistency. The filling should be thick enough to hold its shape when piped but still easy to spread between layers.
🍳 Step 4: Assemble with Swirls and Ganache
Once the cakes are completely cool, level the tops if needed using a serrated knife. Place the first cake layer on a cake stand or plate. Spread about ½ cup of the cream cheese filling evenly over the top, leaving a ½-inch border uncovered. Repeat with the second layer, then place the third layer on top.
For the signature swirls, pipe the remaining cream cheese filling around the edges of the cake, then use a long knife or offset spatula to create decorative swirls across the top. This not only looks stunning but also ensures every bite has that creamy filling. In a separate bowl, heat the 1.5 cups heavy cream until it just begins to simmer, then pour it over the 1.5 cups dark chocolate chips in a heatproof bowl. Let the mixture sit for 2 minutes, then stir until smooth. This chocolate ganache should be glossy and pourable.
⏰ Step 5: Chill and Serve with Decadent Ganache
Pour the warm ganache over the cake, allowing it to drip down the sides for a professional finish. Refrigerate the cake for at least 4 hours or overnight—this chilling time is essential for the flavors to meld and the ganache to set properly. The cake will develop even more intense chocolate flavor and the filling will firm up slightly for cleaner slices.
When ready to serve, slice the cake into 12 equal wedges using a sharp, hot knife for clean cuts. Each slice should reveal layers of moist chocolate cake, creamy filling, and glossy ganache. The contrast of textures—tender cake, velvety filling, and rich ganache—makes this cake truly unforgettable. Store any leftovers in the refrigerator for up to 5 days, bringing to room temperature before serving.
Pro Tips For Making 3 Layer Chocolate Fudge Cake
- MELT BUTTER SLOW: I learned this the hard way—dumping cold butter into hot sugar makes lumps that never fully dissolve. Instead, melt the butter first, then let it cool to room temperature before mixing with the sugar. The batter will be smoother, and the cake layers won’t turn out dense.
- SIFT THE COCOA: That cheap cocoa powder clumps like a nightmare. Sift it with the flour before adding liquid—no lumps, no weird texture. (Yes, even if you’re impatient like me.) The layers stay light, not brick-like.
- BAKE UNTIL SPRINGY: The second a toothpick comes out clean, don’t pull the cake. Press the center gently—if it springs back, you’re good. If it’s still wet or gummy, you’ve got 3-5 more minutes. Overbaking dries out the fudge flavor.
- LAYER WITH A TWIST: Skip the messy frosting between layers—spread a thin layer of melted chocolate (equal parts butter + cocoa + sugar) instead. It’s faster, sticks better, and gives that professional "wow" look without extra effort. (Your future self will thank you.)
Make-ahead tips for this recipe
Prep Ahead Strategy
I recommend making the cream cheese frosting up to 2 days ahead—it actually tastes better after resting. Whip it as directed, then store it in an airtight container in the fridge. When ready to assemble, simply whip it back to fluffiness with a hand mixer for 1-2 minutes. This saves you time on baking day and ensures a perfectly smooth texture. 🍰
Layer Storage Tips
Bake the cake layers 1 day ahead if possible—they develop deeper flavor as they sit. Once completely cool, wrap each layer individually in plastic wrap and store them in a cool, dry place (not the fridge) for up to 24 hours. This prevents them from absorbing moisture and becoming soggy. When assembling, let the layers sit at room temperature for 30 minutes before adding filling.
Fudge Layer Prep
The chocolate fudge filling can be made 1 day in advance and stored in the fridge. Simply melt the 1.5 cups dark chocolate chips with 1.5 cups heavy cream (as in the ganache step), then spread it between cooled cake layers. Cover tightly with plastic wrap pressed directly against the surface to prevent drying. The fudge will firm up slightly but remain spreadable—just warm it gently in the microwave for 10-15 seconds if needed before assembling.
Full Assembly Timeline
For maximum efficiency, bake the cake layers morning or evening, let them cool completely, then refrigerate them overnight. The next day, whip the frosting, assemble the cake, and pour the ganache. Chill for 4 hours before serving—this schedule ensures you’re not rushed and the cake sets perfectly. Pro tip: Use a cake dowel (a wooden skewer) to support the layers if you’re serving it immediately after assembly.
Gift-Worthy Packaging
If you’re making this cake for a special occasion, slice it 1 day ahead and wrap individual portions in parchment paper, then stack them in a gift box lined with tissue paper. The layers will hold their shape beautifully, and the ganache won’t smudge. Store the box in the fridge until ready to serve—this keeps everything fresh and prevents the ganache from melting. For extra flair, dust the top with powdered sugar or add chocolate shavings before wrapping. ✨
Nutrition facts
Frequently asked questions
Why does my chocolate cake turn out dry?
Overbaking is the #1 culprit—remove cakes when a toothpick comes out with moist crumbs, not clean. Also, ensure your butter and eggs are room temperature (not cold) and don't overmix the batter. For extra moisture, brush warm layers with simple syrup before assembling.
Can I substitute cream cheese frosting with buttercream?
For a buttercream version, mix 1 cup softened butter, 4 cups powdered sugar, and 2 tbsp milk until smooth. The texture will be lighter, but you'll lose the tangy depth of cream cheese. Add 1 tsp vanilla and ½ cup cocoa powder for chocolate flavor.
How do I fix cracked cake layers?
Cracks usually happen from cooling too quickly. Prevent them by letting cakes cool in pans for 10 minutes before removing. For existing cracks, spread a thin layer of fudge or frosting over them before adding the next layer—it creates a seamless surface. If severe, level the tops with a serrated knife before assembling.
What's the best way to store leftovers?
Wrap individual slices in plastic wrap and store in an airtight container at room temperature for 2 days. For longer storage, refrigerate for up to 5 days—bring to room temperature before serving. The ganache may firm up in the fridge, so let it sit for 10 minutes to soften before eating.
Can I make this cake gluten-free?
Yes! Replace the all-purpose flour with a 1:1 gluten-free baking flour blend (like Bob's Red Mill) plus ½ tsp xanthan gum. Add 1 extra tbsp milk to the batter. Note that gluten-free cakes are more delicate—bake 2-3 minutes longer and let them cool completely before assembling to prevent crumbling.