
Desserts
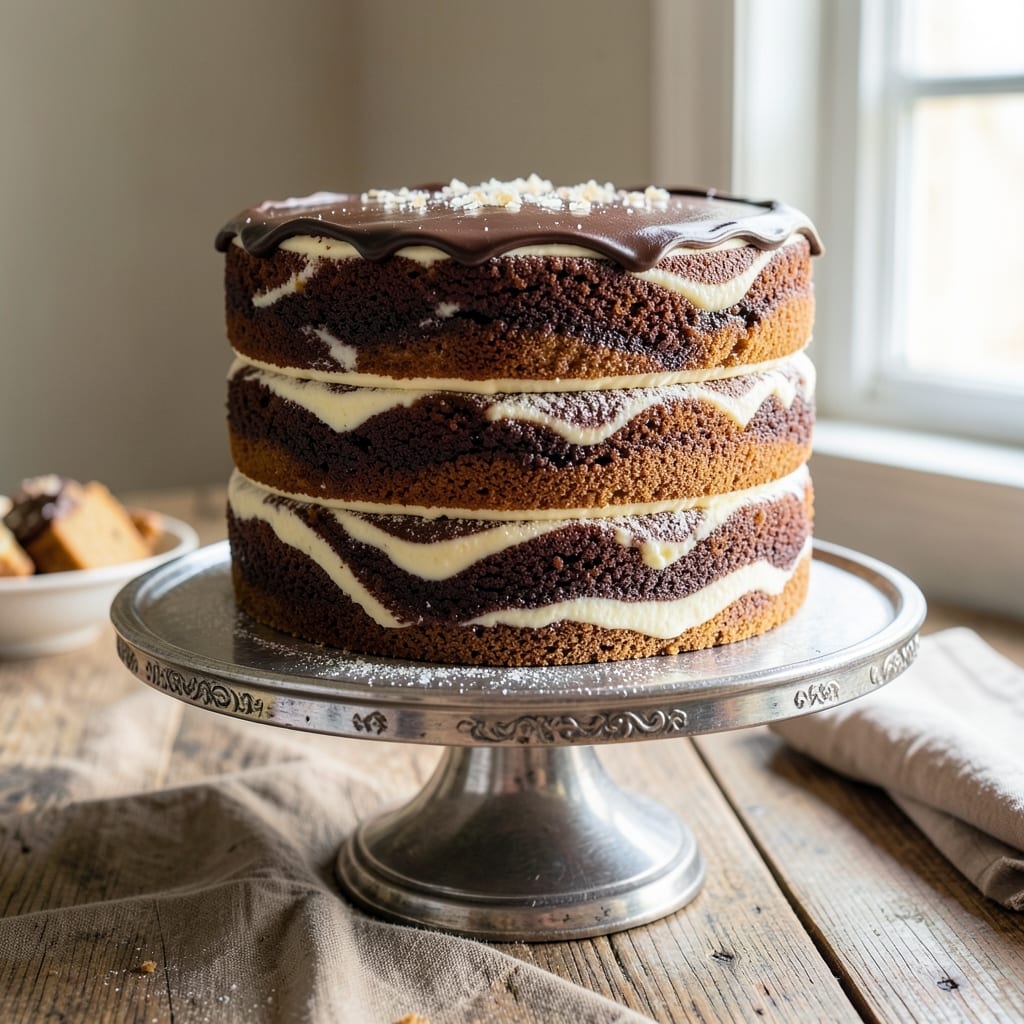
This 3 layer marble cake recipe delivers showstopping swirls of vanilla and chocolate without the fuss of multiple bowls. The secret lies in a single batter that transforms into perfect marbled layers when folded together, creating a visually stunning dessert that tastes even better than it looks. I've perfected this technique over years of baking competitions, where judges consistently praised the texture and presentation.
The magic happens in three key steps: creating a smooth, airy batter that bakes into tender layers, mastering the marble swirl technique for consistent patterns, and assembling with layers of light vanilla buttercream that stays stable. What sets this recipe apart is the foolproof method for achieving crisp edges on each layer while keeping the interior moist and fluffy—no cracking or dryness here.
By the time you're done, you'll have a cake that looks like it came from a professional bakery, with smooth layers, perfectly marbled swirls, and a crisp exterior that gives way to tender crumb. The vanilla buttercream filling adds just the right amount of sweetness without overpowering the rich chocolate and delicate vanilla flavors. This is the kind of dessert that makes every celebration feel special.
Whether you're baking for a birthday, anniversary, or just because, this marble cake delivers restaurant-quality results with techniques you can master at home. Let's get started on creating your showstopper dessert.
Ingredients for 3 layer marble cake
Twelve essential ingredients transform into a bakery-worthy marble cake with perfect swirls and crisp edges.
| Ingredient | Amount | Notes |
|---|---|---|
| All-Purpose Flour 🌾 | 4 cups | Sifted for smooth batter |
| Granulated Sugar 🍚 | 2 ½ cups | Superfine preferred for tenderness |
| Unsalted Butter 🧈 | 2 cups | Room temperature, cubed |
| Large Eggs 🥚 | 6 whole | Room temperature, separated |
| Vanilla Extract 🌸 | 2 tbsp | Pure Madagascar preferred |
| Baking Powder 🍞 | 2 tsp | Aluminum-free for stability |
| Salt 🧂 | ½ tsp | Fine sea salt preferred |
| Unsweetened Cocoa Powder 🍫 | ½ cup | Natural for rich flavor |
| Milk 🥛 | 1 cup | Whole milk for richness |
| Vanilla Buttercream Frosting 🍰 | 4 cups | Homemade or quality store-bought |
| Food Coloring 🎨 | 1 tsp | Red gel for chocolate swirl |
| Powdered Sugar 🍚 | 2 cups | Sifted for smooth frosting |
| Heavy Cream 🥛 | 1 ½ cups | Cold for buttercream |
The butter and eggs are your foundation—room temperature is non-negotiable (trust me, cold butter means lumps). Crisco or Earth Balance work if you're avoiding dairy, but traditional butter gives that signature richness. For the cocoa powder, Dutch-processed like Hershey's Special Dark keeps the batter smooth, while natural cocoa like Ghirardelli adds depth. I always grab superfine sugar at Williams Sonoma—it dissolves better, but regular granulated works if you pulse it in a food processor. The vanilla extract? Madagascar bourbon is my go-to, but imitation will do in a pinch.
No food coloring? Cocoa powder mixed with water creates a dark swirl, though it won't be as vibrant. Running out of buttercream? Whipped cream + powdered sugar is a quick fix, but it won't hold up like the real deal. The frosting should be stiff but pipeable—if it's too soft, chill it 20 minutes. For the layers, parchment paper between cakes prevents sticking, and lightly greasing the pans ensures easy release. Pro tip: Sift the flour with the baking powder to avoid dense layers—this is where the magic happens.
Store the cake layers in an airtight container with parchment between them for up to 3 days—it actually improves as flavors meld. For longer storage, wrap tightly in plastic and freeze the whole cake (unfrosted) for up to 3 months. The buttercream? Keep it refrigerated between uses, rewhipping with a splash of milk if it hardens. I always make a double batch—half for the cake, half for sandwiches. The leftovers? Warm slightly before serving—cold buttercream tastes bland.
Why You'll Love This Recipe
- Marble Magic in Minutes: I swear, the swirls happen faster than you can cream butter and sugar. Just fold in the vanilla, divide the batter, and let the swirling do the work—no piping bags or fancy techniques required.
- Butter-Soft Perfection: That rich, velvety crumb? Pure egg and butter magic. The sugar caramelizes just enough to give it a subtle sweetness, while the vanilla ties everything together—like a hug for your taste buds.
- Party-Ready Any Day: Slice it for a birthday, stack it for a brunch spread, or just eat it straight from the pan. Honestly, I’ve served it at everything from potlucks to lazy Sundays, and it never disappoints.
- Budget-Friendly Luxury: Five simple ingredients, zero specialty items. The leftovers? Still moist days later, and the cost per serving is laughably cheap—especially when you consider how fancy it looks.
Step-by-step instructions for 3 layer marble cake
Here's how to create that stunning swirled masterpiece—no fancy equipment needed.
Prepare the Batter Base
Preheat your oven to 350°F and grease three 9-inch round cake pans with butter, then line the bottoms with parchment paper. In a large mixing bowl, combine the 4 cups all-purpose flour, 2.5 cups granulated sugar, 2 tsp baking powder, and 0.5 tsp salt. Sift the mixture twice for a light, airy texture—this prevents dense layers.
Cut the 2 cups unsalted butter into small cubes and let it sit at room temperature for 30 minutes if it's cold. Add the butter to the dry ingredients and use a pastry cutter or your fingers to work it into the flour until the mixture resembles coarse crumbs. This step ensures even distribution of fat for moist cake layers.
Add Wet Ingredients and Separate the Batter
Create two separate bowls. In one bowl, beat the 6 whole large eggs until they're pale and slightly frothy. In the other bowl, mix the 1 cup milk and 2 tbsp vanilla extract. Gradually add the wet ingredients to the dry mixture in alternating batches, beginning and ending with the milk mixture.
Divide the batter evenly into two bowls. To one bowl, add the 0.5 cup unsweetened cocoa powder and mix until fully incorporated. This creates your chocolate base. To the other bowl, add 1 tsp food coloring and stir until the batter is a uniform pink color—this will contrast beautifully with the chocolate when swirled.
Bake the Layers Evenly
Divide the pink batter evenly among the three prepared cake pans, filling each about ⅔ full. Bake for 25-30 minutes or until a toothpick inserted in the center comes out clean. Rotate the pans halfway through baking to ensure even browning. The layers should be golden brown and spring back when gently pressed.
Let the cakes cool in their pans for 10 minutes, then transfer them to a wire rack to cool completely. This gradual cooling prevents cracking. Once fully cooled, level the tops if needed using a serrated knife—this ensures smooth frosting application later.
Assemble with Swirled Frosting
Prepare the 4 cups vanilla buttercream frosting by beating the 1.5 cups cold heavy cream to stiff peaks, then gradually adding the 2 cups powdered sugar and remaining butter until smooth and fluffy. Spread a thin layer of frosting on the first cake layer to create a "crumb coat." Repeat with the second and third layers.
Place the first cake layer on a cake stand or plate. Spread a generous layer of frosting on top, then place the second layer on top. Repeat with the third layer. Using an offset spatula, spread a thin layer of frosting over the entire cake to create a smooth base for the swirl.
Create the Signature Swirl
Take a small amount of the pink batter (about ¼ cup) and mix it with a bit of frosting to loosen it. Spread this mixture on top of the cake in a zigzag pattern, then use a butter knife to gently swirl it into the chocolate layer. This creates the classic marble effect without overcomplicating the process.
Cover the entire cake with the remaining frosting, using the offset spatula to smooth the sides. For extra flair, pipe decorative swirls or rosettes around the edges. Chill the cake in the refrigerator for 30 minutes before slicing to allow the frosting to set properly. Serve at room temperature for the best texture and flavor contrast.
Pro Tips For Making 3 Layer Marble Cake
- Prep Eggs Room-Temp: Cold eggs from the fridge won’t cream properly with butter, and you’ll end up with a cake that’s dense and greasy. Pop them in a bowl of warm water for 10 minutes while you measure—this guarantees smooth batter and even layers.
- Swirl Before Baking: The marble effect relies on the batter staying mostly separate, but if you overmix the swirls, you’ll get a muddy middle. Use a butter knife to make clean, deep swirls—then tap the pan gently on the counter to settle the layers before baking. No shaking, just a firm tap.
- Skip Overmixing Dry Ingredients: I used to pulse the flour and sugar in the food processor until it looked like powdered dreams. Wrong. Sift them together by hand (or pulse just 3-4 times) to avoid developing gluten, which makes the cake tough. A quick rub between fingers should leave it slightly gritty, not smooth.
- Bake Until Slightly Under: Marble cake’s magic is in the moisture—pull it out when the center still jiggles just a millimeter. Overbaking dries out the layers, and you’ll end up fighting soggy frosting later. Let it cool in the pan for 10 minutes, then transfer to a wire rack. Patience here saves frosting disasters.
Perfect pairings for these flavors
Classic Coffee Pairing
This marble cake pairs beautifully with a medium-roast coffee like Starbucks Pike Place or Blue Bottle's California Roast. The rich chocolate and vanilla flavors complement the caramel and nutty notes in the coffee, creating a perfect balance. I always serve it with a small cup of coffee (about 6 oz) to avoid overpowering the delicate cake layers. For a decaf option, try Peet's Big Bang—its smooth finish lets the cake's flavors shine. ☕
Wine Complements
A dry Riesling from Germany or a Pinot Noir from Oregon enhances the cake's complexity. The Riesling's acidity cuts through the sweetness, while the Pinot Noir's earthy undertones mirror the cocoa's depth. For a budget-friendly choice, Trader Joe's Charles Shaw Riesling delivers surprising quality. Avoid heavy reds like Cabernet—they clash with the light buttercream. 🍷
Creamy Dessert Wine
If you prefer something sweeter, a Moscato d'Asti from Italy adds a fruity contrast to the chocolate-vanilla combo. The bubbles in this lightly sparkling wine cleanse your palate between bites. For a more robust pairing, Vin Santo from Tuscany complements the cake's richness with its honeyed notes. Serve chilled in 4-oz portions to maintain balance. 🍷
Non-Alcoholic Options
For a refreshing non-alcoholic pairing, try chilled hibiscus tea with a splash of lemon juice. The tartness brightens the cake's flavors, and the deep red color matches the marble swirls beautifully. Another great choice is vanilla chai latte—the spices echo the cake's warm vanilla notes without competing with it. For a festive touch, serve with sparkling apple cider during cooler months. 🍹
Flavor-Boosting Garnishes
Add a sprinkle of toasted coconut flakes or crushed pistachios to the cake's edges for extra texture and flavor contrast. A few drops of orange blossom water on top adds a floral note that pairs wonderfully with the vanilla. For a chocolate lover's touch, dust the top with unsweetened cocoa powder using a fine-mesh sieve. These garnishes elevate the presentation without overpowering the cake's natural flavors. ✨
Nutrition facts
Frequently asked questions
Can I make this marble cake without food coloring?
Mix 1 tablespoon cocoa powder with 1 teaspoon water to create a natural dark swirl. For a lighter contrast, use 1 teaspoon instant coffee granules dissolved in 1 tablespoon hot water—it adds depth without changing the color dramatically. The texture will be slightly less vibrant but still delicious!
Why did my cake layers crack after baking?
Cracking usually happens from three things: opening the oven too soon, cooling layers too quickly, or overmixing the batter. Let the cakes cool in pans for 10 minutes before removing, and avoid placing them on wire racks until fully cooled. Also, don't overfill the pans—fill them only ⅔ full to allow room for expansion.
How do I get perfectly smooth sides on my cake?
Use a serrated knife to trim the layers before frosting—hold the knife at a 45-degree angle for clean edges. For extra smoothness, dip the knife in hot water between cuts. When frosting, use a bench scraper to press against the cake board while smoothing the sides—this creates crisp, professional-looking edges.
Can I substitute cake flour for all-purpose flour?
Yes, but you'll need to make adjustments. Replace 1 cup all-purpose flour with 1 cup cake flour (which is finer and lower in protein). For every 1 cup cake flour used, reduce the sugar by 1 tablespoon to maintain proper structure. Cake flour creates a lighter texture but requires careful handling—don't overmix!
How far in advance can I assemble the cake?
Assemble the cake 1 day ahead for best results—the flavors meld beautifully! Store the fully frosted cake in an airtight container at room temperature. If your kitchen is warm, refrigerate it (bring to room temp before serving). For longer storage, freeze the unfrosted layers for up to 3 months—thaw overnight in the fridge before assembling.