
Desserts
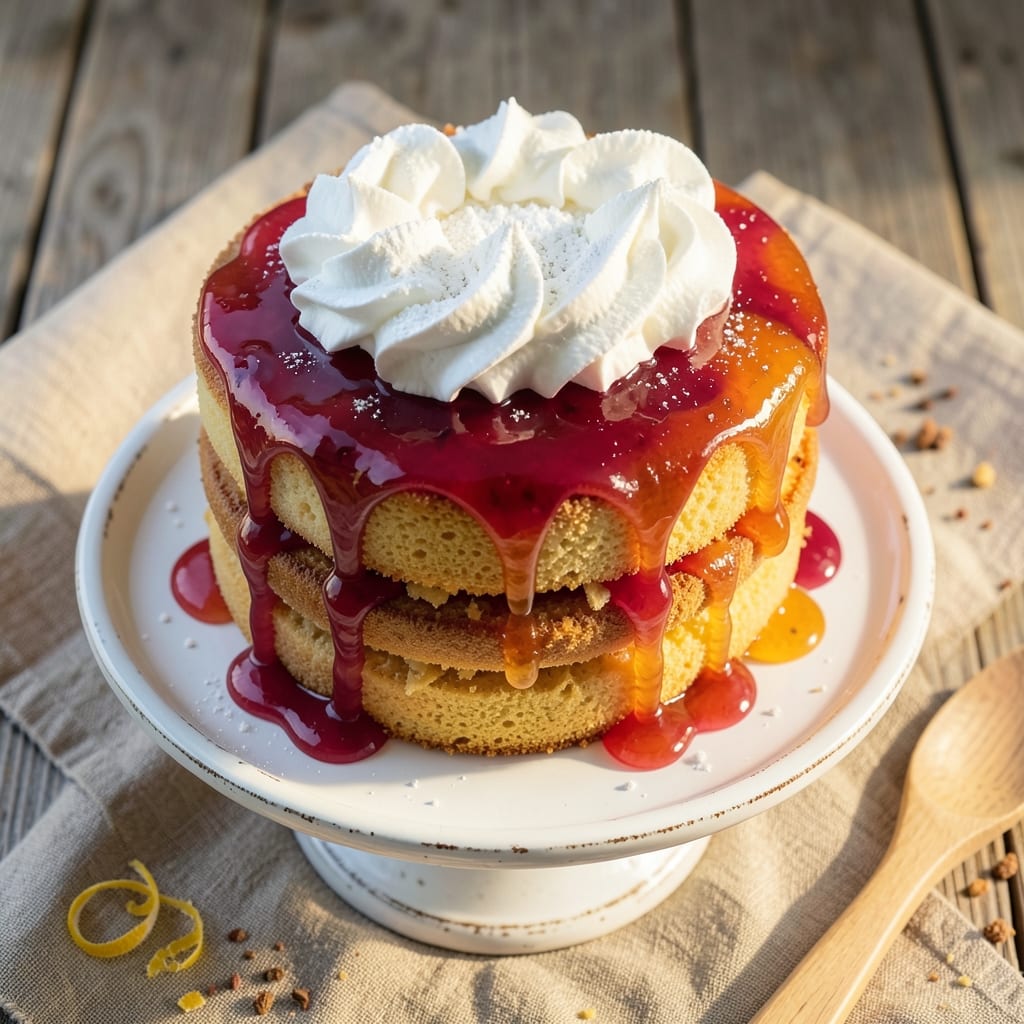
This 3D jelly cake recipe transforms simple ingredients into a showstopping dessert that looks as impressive as it tastes. The secret lies in alternating layers of moist sponge cake and vibrant jelly, separated by crispy cookie crumbs that add texture and stability—no wobbly layers here. I developed this technique after years of baking layered cakes, and the structural trick of cooling each layer properly ensures your cake stands tall and proud.
The foundation starts with a light, fluffy sponge cake that acts as the sturdy base for your jelly layers. While the cake bakes to golden perfection, you'll prepare the jelly filling using high-quality gelatin or agar-agar for a clean, set texture. The crispy cookies, baked until just golden, get crushed into fine crumbs that create a delicate barrier between each layer—this is what keeps your cake from collapsing when you slice it later.
What makes this recipe truly special is the assembly process. Each layer must be cooled completely before stacking, and I’ll show you how to use a simple support structure (like a cake stand or even a tall glass) to build your cake upward. The result? A stunning 3D dessert with alternating colors and textures that looks like it belongs in a bakery display case. The jelly layers stay firm yet tender, the cake remains moist, and the cookie crumbs add a satisfying crunch with every bite.
Perfect for celebrations, dinner parties, or even as a centerpiece for a special occasion, this cake is as impressive to look at as it is delicious to eat. The best part? You can customize the flavors—think raspberry and vanilla, lemon and chocolate, or even matcha and white chocolate. Let’s build this cake layer by layer.
Ingredients for 3d jelly cake
Simple pantry staples transform into a showstopping 3D cake with crispy cookie layers.
| Ingredient | Amount | Notes |
|---|---|---|
| All-Purpose Flour 🌾 | 2 ½ cups | Sifted for light texture |
| Granulated Sugar 🍚 | 2 cups | White or light brown |
| Unsalted Butter 🧈 | 1 cup | Room temperature, softened |
| Large Eggs 🥚 | 4 whole | Room temperature for even mixing |
| Baking Powder 🧂 | 1 tbsp | Aluminum-free preferred |
| Salt 🧂 | ½ tsp | Fine sea salt |
| Vanilla Extract 🌿 | 1 tbsp | Pure, high-quality extract |
| Milk 🥛 | ½ cup | Room temperature |
| Unflavored Gelatin 🍬 | 2 tbsp | High-quality for clean texture |
| Jelly or Jam 🍓 | 1 ½ cups | Vibrant color, seedless preferred |
| Butter Cookies 🍪 | 1 ½ cups | Crushed into fine crumbs |
| Powdered Sugar 🍚 | 1 cup | For dusting layers |
| Fresh Berries 🍓 | 1 cup | For garnish (optional) |
| Whipped Cream 🥛 | 1 cup | Stabilized with powdered sugar |
The butter and eggs are the backbone of this cake—room temperature is non-negotiable. I always grab Land O’Lakes unsalted butter from the grocery store, and the eggs should be at room temp for the fluffiest texture. The jelly matters too—high-quality, seedless jam from Welch’s or Bonne Maman gives that vibrant color and clean texture. For the cookies, Oreos or vanilla wafers work best—they crush into fine crumbs that won’t clump between layers. If you’re using store-bought cookies, pulse them in a food processor for even consistency.
No butter cookies? Graham crackers or digestive biscuits are great substitutes—just crush them extra fine. Running low on jelly? Use store-bought fruit preserves, but strain out any seeds or chunks for a smooth texture. The powdered sugar is for dusting between layers—Domino brand is my go-to because it’s fine and dissolves easily. For the jelly filling, if you’re using agar-agar instead of gelatin, reduce the amount by half since it’s more potent. Fresh berries for garnish? Strawberries or raspberries hold up best—they add color and a pop of freshness without getting soggy.
Store the cake layers separately in an airtight container with parchment between them for up to 3 days. The jelly filling can be prepped a day ahead and kept in the fridge. When assembling, work quickly—room temperature layers stack best. The whipped cream should be made fresh or stabilized with powdered sugar to keep it fluffy. For a showstopping presentation, dust the sides with powdered sugar and garnish with berries right before serving. This cake stays impressive for 2 days if stored properly.
Why You'll Love This Recipe
- No Mixer Needed: I swear by this recipe when my mixer’s on the fritz—just cream the butter and sugar by hand until it’s light and fluffy. The eggs and baking powder do the heavy lifting, so you’re not stuck with dense, heavy cake layers.
- Sweet But Not Cloying: That perfect balance of buttery richness from the flour and sugar, with just enough lift from the eggs, keeps it from being too heavy. Honestly, the way the jelly layers soak into the cake without making it soggy? It’s my go-to for when I want dessert that doesn’t leave me in a sugar coma.
- Party in a Box: Between us, this is the cake I pull out for birthdays, potlucks, or even a last-minute office celebration. The 3D effect makes it feel fancy, but the layers are simple to assemble—no piping skills required. Just stack, slice, and serve.
- Budget-Friendly Magic: Flour, sugar, butter, eggs—these are pantry staples that won’t break the bank. I’ve made this for over a dozen people for under $15, and it still looks and tastes like a bakery showstopper. Leftovers? They disappear just as fast as the first slice.
Step-by-step instructions for 3D jelly cake
Here's how to build this showstopping cake with crispy cookie layers and vibrant jelly filling.
Bake the Sponge Layers
Preheat your oven to 350°F and grease three 8-inch round cake pans. In a large mixing bowl, combine the 2.5 cups all-purpose flour, 2 cups granulated sugar, 1 cup softened unsalted butter, and 0.5 tsp salt. Beat on medium speed until light and fluffy, about 3-4 minutes. Add the 4 whole large eggs one at a time, mixing well after each addition.
In a separate bowl, whisk together the 1 tbsp baking powder, 1 tbsp vanilla extract, and 0.5 cup room-temperature milk. Gradually add this mixture to the butter mixture while mixing on low speed. Divide the batter evenly among the prepared pans. Bake for 25-30 minutes or until a toothpick inserted comes out clean. Cool in pans for 10 minutes, then transfer to a wire rack to cool completely.
Prepare the Jelly Filling
In a small saucepan, combine 1.5 cups jelly or jam with 2 tbsp unflavored gelatin and 0.5 cup water. Heat over medium heat, stirring constantly until the gelatin dissolves completely and the mixture is smooth. Remove from heat and let cool for 5 minutes, stirring occasionally to prevent skin formation. This will create a glossy, spreadable jelly that sets perfectly between layers.
While the jelly cools, crush the 1.5 cups butter cookies into fine crumbs using a food processor or rolling pin. Set aside for the next step. The cookie crumbs should be uniformly fine to create an even, crispy layer between each sponge cake layer.
Assemble the Cake Layers
Place one cooled sponge layer on a cake stand or plate. Spread a thin layer of the jelly mixture over the top, leaving about ½-inch border uncovered. Sprinkle ⅓ of the crushed butter cookie crumbs evenly over the jelly. Repeat this process with the second sponge layer, jelly, and another ⅓ of the cookie crumbs. Finish with the third sponge layer and the remaining jelly mixture.
Press down gently on each layer to ensure good adhesion. Dust the top and sides with 1 cup powdered sugar using a fine-mesh sieve for a snowy finish. Chill the assembled cake in the refrigerator for at least 4 hours or overnight to allow the jelly to set completely and the layers to firm up.
Decorate and Serve
Once the cake is fully chilled, remove it from the refrigerator and arrange 1 cup fresh berries on top for a vibrant, colorful presentation. Pipe or dollop 1 cup whipped cream around the base of the cake for an elegant touch. Serve immediately or store covered in the refrigerator for up to 3 days. The contrast of crispy cookies, soft sponge, and glossy jelly makes every bite exciting.
This cake is perfect for celebrations where you want to impress with both taste and visual appeal. The cookie crumbs between layers add a delightful crunch that complements the smooth jelly perfectly.
Pro Tips For Making 3d Jelly Cake
- Whisk Eggs Until Ribbon Stage: Stop when the egg mixture holds a slow ribbon—no need to overbeat. I used to whip them into stiff peaks, and the cake turned dense instead of light. That jelly layer needs room to shine, so keep it smooth and just thickened.
- Chill the Batter 30 Minutes: Pop the batter in the fridge while you prep the jelly layer—trust me, it’s worth the wait. I learned this after my first batch collapsed mid-bake; the butter stays more stable, and the layers separate cleaner.
- Sift Flour Twice: Yes, even if it looks fine. The first sift removes lumps, but the second ensures no hidden grit ruins the texture. I skipped this once and got a gritty bite that ruined the whole experience—don’t be lazy.
- Bake Jelly Layer First: Start with the jelly sponge alone for 8–10 minutes, then add the cake batter. This guarantees the jelly sets properly without getting soggy from the wet batter. I tried baking them together once—disaster.
Regional styles of 3d jelly cake
British Trifle Twist
Inspired by classic British trifle, this version swaps custard for jelly layers and adds a modern twist with crushed McVitie’s Digestives cookies instead of sponge. The British love their layered desserts, and this adaptation keeps the tradition alive while updating it with vibrant jelly colors. Serve with a dollop of clotted cream on top for that quintessential British touch. 🍓
Japanese Mochi Fusion
For a delicate yet sturdy 3D cake, replace the sponge layers with mochi cake (available in Asian grocery stores) and use red bean paste instead of jelly. The mochi’s chewy texture contrasts beautifully with the crisp cookie crumbs. Top with matcha whipped cream for an elegant, earthy finish. This version is perfect for tea ceremonies or festive celebrations. 🌸
Italian Panettone Layers
Swap the sponge cake for panettone (Italian Christmas cake) and use strawberry jam for the jelly filling. Crush amaretti cookies for the crumb layer—they add a subtle almond flavor that pairs perfectly with the sweetness. Dust with powdered sugar and garnish with orange zest for a festive Italian touch. This version is ideal for holiday gatherings. 🍊
French Macaron Stack
Replace the sponge layers with store-bought macarons (vanilla and raspberry flavors work best) and use raspberry jam for the jelly filling. Crush French butter cookies (like Luits) for the crumb layer. Stack the macarons carefully, alternating with jelly and cookie crumbs, then chill until firm. This version is light, airy, and perfect for a Parisian-inspired dessert table. 🥧
American Classic with Graham Crackers
For a nostalgic American twist, use graham crackers instead of butter cookies and strawberry jelly for the filling. The graham crackers add a nutty depth that balances the sweet jelly perfectly. Top with vanilla ice cream and fresh blueberries for a retro diner-style dessert that’s sure to impress. This version is a crowd-pleaser for family gatherings. 🍦
German Black Forest Adaptation
Infuse the jelly filling with black cherry jam and add a layer of chocolate shavings between the sponge layers for a German Black Forest vibe. Use butter cookies crushed into crumbs and top with whipped cream and fresh cherries. This rich, fruity version is perfect for celebratory occasions like birthdays or anniversaries. 🍒
Nutrition facts
Frequently asked questions
Can I make this 3D jelly cake without gelatin?
For a vegetarian or vegan version, replace gelatin with agar-agar powder (use 1 tbsp agar-agar per 2 tbsp water). Heat the jelly mixture with agar-agar until dissolved, then cool completely. The texture will be slightly firmer but still delicious.
How do I prevent my cake from collapsing when slicing?
Chill the cake for at least 4 hours before slicing to let the jelly set completely. Use a sharp, serrated knife and dip it in hot water between cuts to create clean slices. Also, ensure each cake layer is fully cooled before stacking to maintain structural integrity.
Can I make this cake ahead of time?
Yes! Bake the sponge layers 1 day ahead and store them wrapped in plastic. Prepare the jelly filling 24 hours in advance and refrigerate. Assemble the cake 4-6 hours before serving to allow the jelly to set properly. This makes it perfect for busy days.
What's the best way to decorate the sides of this cake?
Use a stencil and powdered sugar to create elegant patterns on the sides. For extra flair, pipe whipped cream around the base or add edible flowers. A dusting of matcha powder or cocoa powder adds beautiful color contrast.
Can I use store-bought sponge cake instead?
Yes, but choose a light, moist sponge cake (like angel food or pound cake) that's about 1-inch thick. Cut into three equal layers and level the tops before assembling. Store-bought cakes work well for shortcut versions, though homemade gives better texture control.