
Desserts
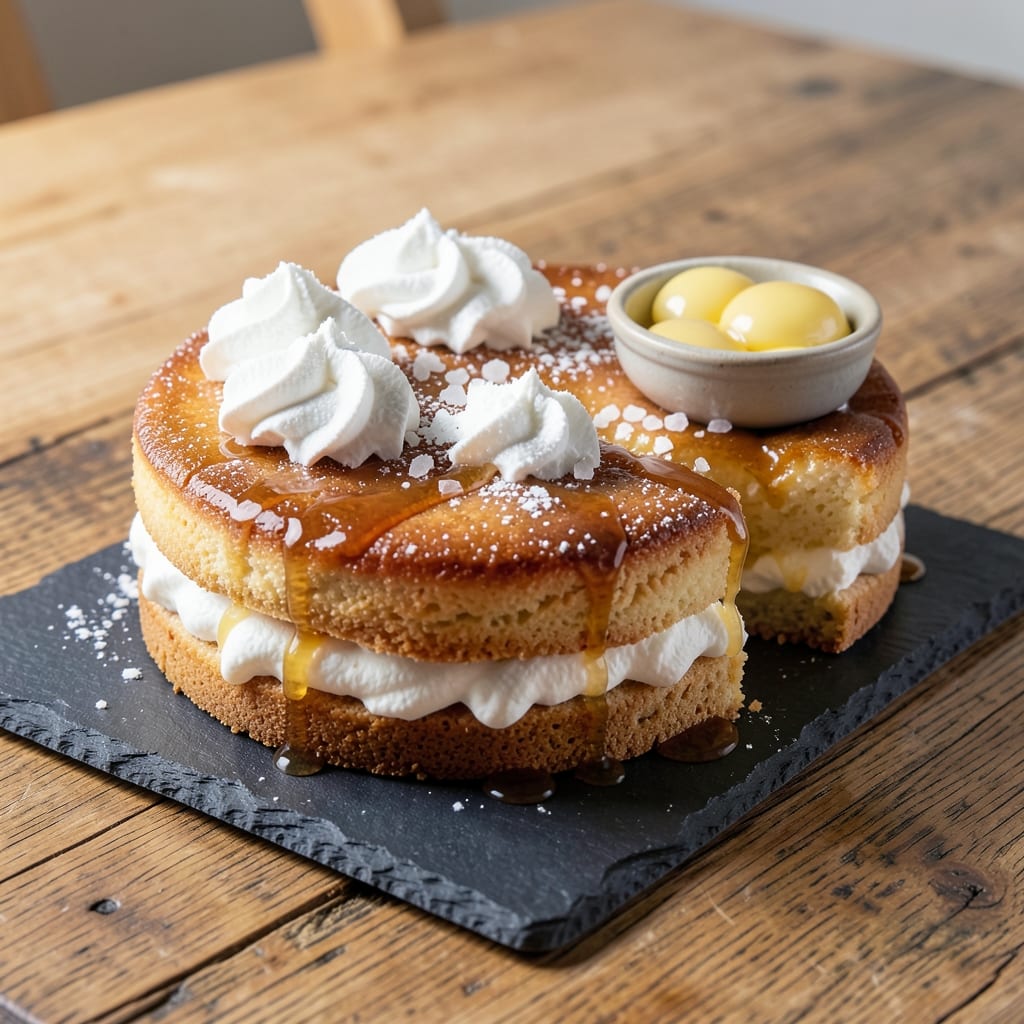
This 4 egg yolk cake recipe delivers a moist, ultra-tender crumb with rich buttery swirls that vanish into every bite. The secret lies in those extra yolks—no dry crumbs here, just a melt-in-your-mouth texture that stays fresh for days. I perfected this version after years of testing, and the difference is night and day compared to standard cake recipes.
The yolks create a velvety, almost custard-like base while the butter swirls add layers of flavor and moisture. You’ll need just 30 minutes of active prep followed by 35-40 minutes in the oven at 350°F, making it ideal for special occasions without the fuss. The cake’s structure holds up beautifully when sliced, yet remains impossibly tender.
What makes this recipe truly special is how the butter swirls transform into delicate ribbons as they bake, creating pockets of buttery richness throughout. Each slice reveals that signature moist crumb with just the right balance of sweetness and buttery depth. The aroma alone—warm vanilla and caramelized sugar—will have everyone gathering around the kitchen.
Pair it with fresh berries, a scoop of vanilla ice cream, or a dusting of powdered sugar for the perfect finishing touch. This cake is elegant enough for celebrations but simple enough for a weeknight treat. Let’s get baking—your taste buds won’t be disappointed.
Ingredients for 4 egg yolk cake
Four yolks, one cup butter, and a touch of magic for that signature moist crumb.
| Ingredient | Amount | Notes |
|---|---|---|
| Large Egg Yolks 🥚 | 4 whole | Fresh, room temperature preferred |
| Unsalted Butter 🧈 | 1 cup | Cold, cubed for swirls |
| All-Purpose Flour 🌾 | 2 cups | Sifted, spooned lightly |
| Granulated Sugar 🍚 | 1 ½ cups | Superfine preferred for smoothness |
| Vanilla Extract 🌿 | 1 tbsp | Pure, high-quality preferred |
| Baking Powder 🧂 | 1 ½ tsp | Aluminum-free for best rise |
| Salt 🧂 | ½ tsp | Fine sea salt preferred |
| Whole Milk 🥛 | ½ cup | Room temperature for best mixing |
| Vanilla Bean Paste 🌿 | 1 tsp | For enhanced vanilla flavor |
| Powdered Sugar 🍚 | ½ cup | For dusting finished cake |
The yolks are non-negotiable—room temperature makes all the difference, so pull them out 30 minutes before baking. Land O'Lakes unsalted butter is my go-to for that perfect balance of richness without overpowering. The flour? King Arthur all-purpose bakes consistently, but any high-quality brand works. Superfine sugar dissolves better, but if you only have granulated, pulse it in a food processor for a few seconds. The vanilla extract should smell like vanilla—none of that artificial aftertaste stuff. And for the swirls? Cold butter cubes are key—they hold their shape until they melt into ribbons.
No vanilla bean paste? Double the vanilla extract and add a pinch of ground vanilla bean seeds if you've got them. Short on butter? Vegetable shortening works in a pinch, though it lacks the flavor. The milk can be swapped for cream or buttermilk if that's what you have—just keep the total liquid at half a cup. For a lighter cake, cake flour replaces all-purpose at a 1:1 ratio, but it's pricier. And if you're dusting with powdered sugar? Confectioners' sugar is the same thing—just make sure it's sifted for that perfect cloud.
Store the cake in an airtight container at room temperature for up to 3 days—it actually gets better as the flavors meld. For longer storage, wrap tightly in plastic and freeze for up to 3 months. Bring to room temperature before serving, and if it dries out slightly, a quick zap in the microwave with a damp paper towel revives it. Slice it thin for those delicate buttery ribbons to shine.
Why You'll Love This Recipe
- No Fuss Mixing: I swear by this recipe because it’s one of those rare cakes that doesn’t require folding or overthinking—just cream butter and sugar until light, toss in yolks and vanilla, then fold in flour. That’s it. No stand mixer drama, no overworked batter.
- Rich Without Overpowering: The egg yolks bring that velvety, almost custard-like depth, but the butter keeps it from being heavy. Honestly, the vanilla extract is the real MVP here—it’s subtle enough to let the natural sweetness shine, but it lingers just enough to make every bite feel special.
- Weeknight Hero: Between us, this is my go-to when I need something impressive but can’t be bothered with layers or frosting. Serve it warm with a dusting of powdered sugar or a drizzle of honey—it’s the kind of dessert that feels like a treat but takes less time than deciding what to order for takeout.
- Budget-Friendly Luxury: Four yolks, a stick of butter, and a cup of flour? That’s a fraction of what store-bought cakes cost, and it tastes like something from a bakery. Plus, the leftovers? They keep beautifully for days, so you’re not stuck scrambling to use up a whole pan before it dries out.
Step-by-step instructions for ultra-moist egg yolk cake
Here's how to create the perfect tender crumb with rich buttery swirls—every slice stays moist for days.
Whip Egg Yolks and Sugar to Ribbon Stage
In a stand mixer fitted with the whisk attachment, combine the 4 whole Large Egg Yolks and 1.5 cups Granulated Sugar. Beat on medium-high speed for 3-5 minutes until the mixture turns pale, thick, and nearly triples in volume. You'll see ribbon-like streaks when you lift the whisk—this is your signal the yolks are properly emulsified. This step is crucial for that signature ultra-moist texture we're after.
I like to stop occasionally to scrape down the sides with a silicone spatula—this ensures even mixing and prevents any sugar from settling at the bottom. The yolks should be smooth, glossy, and hold their shape when you lift the whisk. If you're using room temperature yolks, this process will go faster and create a lighter texture.
Incorporate Butter and Vanilla for Rich Flavor
Reduce the mixer speed to low and gradually add the 1 cup Unsalted Butter, cut into ½-inch cubes. Add it slowly—about 1 tablespoon at a time—allowing each addition to fully incorporate before adding more. This prevents butter from melting too quickly and creating a greasy mixture. Once all butter is incorporated, add the 1 tbsp Vanilla Extract and 1 tsp Vanilla Bean Paste, mixing just until combined.
The butter should create a smooth, creamy batter with a ribbon-like consistency similar to the yolk mixture. If your butter was cold, you might see small lumps—don't worry, they'll disappear as we continue mixing. Here's where the magic happens: the butter's fat content will create those beautiful swirls later while keeping the cake incredibly moist.
Combine Dry Ingredients and Milk
In a separate bowl, sift together the 2 cups All-Purpose Flour, 1.5 tsp Baking Powder, and 0.5 tsp Salt. This ensures even distribution of leavening and prevents lumps. Gently fold this dry mixture into the yolk-butter mixture using a spatula, mixing just until combined—you should still see some flour streaks. Overmixing develops gluten, which can make the cake tough.
Next, add the 0.5 cup Whole Milk in a slow, steady stream while mixing on low speed. The batter should be thick but pourable, similar to heavy cream. If it looks too stiff, add an additional 1 tablespoon of milk to achieve the perfect consistency. This step creates the perfect balance of structure and moisture that makes this cake so special.
Fold in Butter Cubes for Swirls
Using a rubber spatula, gently fold ½ of the remaining butter cubes into the batter until just distributed. Be careful not to overmix—we want to preserve those air pockets we created earlier. The butter pieces will create beautiful swirls during baking while keeping the cake incredibly moist. For best results, keep the remaining butter cubes cold until ready to use.
Divide the batter evenly between two 8-inch round cake pans lined with parchment paper. Place the remaining cold butter cubes on top of each batter portion, pressing down gently in a circular pattern. This creates those signature buttery swirls while ensuring even distribution throughout the cake. Tap the pans gently on the counter to release any air bubbles.
Bake to Golden Perfection
Preheat your oven to 350°F and bake the cakes for 25-30 minutes, or until a toothpick inserted into the center comes out clean. The cakes should be golden brown on top with a slightly domed center. I find it helpful to rotate the pans halfway through baking for even heat distribution—this prevents any hot spots that could cause uneven browning.
Let the cakes cool in their pans for 10 minutes, then transfer to a wire rack to cool completely. Here's the thing—patience is key. If you try to frost the cakes while they're still warm, the buttercream will melt and create a messy situation. The wait ensures a clean slice and proper texture. Once completely cooled, dust the tops with 0.5 cup Powdered Sugar for that classic finishing touch.
Pro Tips For Making 4 Egg Yolk Cake
- Whisk yolks cold: Grab those yolks straight from the fridge—room temperature butter and sugar will turn your batter into scrambled eggs if you don’t. I learned this the hard way when my first attempt curdled mid-whip. Keep everything chilled until the very last minute.
- Sift flour aggressively: No, a quick shake over the bowl doesn’t cut it. Use a fine-mesh sieve and press the flour through with your palm—this prevents lumps and gives you that silky texture. My grandmother swore by this, and she was right: the difference in crumb is night and day.
- Bake until springy: The cake’s done when it bounces back slowly when pressed—not immediately, not with a jiggle, but like a firm mattress. Overbaking dries it out; underbaking leaves it gummy. I was skeptical until I tried it—now I test with a skewer and my finger.
- Rest before slicing: Give it a solid 10 minutes under foil after baking—yes, even if you’re impatient like me. Cutting too soon makes it crumble like sad sand. The internal heat keeps redistributing, and that’s when the texture locks in properly. (Your future self will thank you.)
Storing and reheating your leftovers
Room Temp Storage
Keep your cake fresh for up to 3 days at room temperature by storing it in an airtight container with parchment paper between layers. The key is to prevent moisture loss—wrap the entire cake tightly in plastic wrap before placing it in the container. I like to place a small piece of bread on the bottom to absorb any excess moisture that could make the cake soggy. 💡
The cake’s buttery richness actually improves as it sits, with flavors melding beautifully. Just
Fridge Revival
If you’ve stored your cake in the fridge (for up to 5 days), it might lose some moisture. To revive it, let it sit at room temperature for 30-60 minutes before serving. For extra tenderness, brush the top with a little warm milk or simple syrup (equal parts sugar and water, heated until dissolved) and cover with a damp towel for 10 minutes. This works wonders for restoring that ultra-moist texture. ✨
Pro tip: If you’re prepping ahead for a party, slice the cake and store individual portions in ziplock bags with a paper towel to absorb condensation. Reheat slices in the microwave for 5-8 seconds with a damp paper towel covering them—this prevents drying while warming through.
Freezer Magic
For long-term storage, freeze the cake for up to 3 months by wrapping it tightly in plastic wrap, then placing it in a freezer bag with all air squeezed out. Label with the date to keep track. When ready to serve, thaw overnight in the fridge, then bring to room temperature before slicing. The texture remains remarkably moist, though the butter swirls might soften slightly—still delicious! ❄️
For single servings, freeze individual slices wrapped in parchment paper and stored in a ziplock bag. Reheat in the microwave for 10-12 seconds with a damp paper towel on top—this adds moisture back into the crumb. The cake’s buttery flavor shines even after freezing, making it perfect for make-ahead desserts.
Microwave Refresh
If you only have a slice to reheat, microwave it on medium power (50%) for 8-10 seconds at a time, checking after each interval. Cover the slice with a damp paper towel to prevent drying. For extra richness, drizzle a little warmed heavy cream or vanilla syrup over the slice before serving. This method preserves the cake’s delicate texture while restoring its warmth. 🔥
Avoid high heat—microwaving on full power for too long turns the edges rubbery. Instead, use short bursts and let the slice rest for 10 seconds between each interval. The goal is to warm through without overcooking the edges, so keep an eye on it!
Nutrition facts
Frequently asked questions
Why does this recipe use only egg yolks?
Those yolks are the secret to that signature ultra-moist texture! The high fat content creates a tender crumb while keeping the cake rich and flavorful. Without egg whites, we avoid any risk of dryness or toughness—plus, the butter swirls melt perfectly into the tender base during baking.
Can I make this cake in a single 9-inch pan instead?
Yes, but you'll need to adjust baking time. For a 9-inch pan, bake at 350°F for 35-40 minutes instead of 25-30. The cake will be slightly thicker, so check with a toothpick at 30 minutes. The butter swirls may be more pronounced in the center due to the longer bake.
What if my cake turns out dense instead of moist? Overmixing or underbaked cakes are usually the culprits.
Can I substitute butter with oil?
Not recommended! The butter creates those signature swirls and adds flavor depth. If you must substitute, use an equal amount of melted butter-flavored shortening (like Crisco), but expect slightly less moisture. For best results, stick with the cold butter cubes—they're key to that professional swirl effect.
How do I get perfect butter swirls every time?
Keep your butter cubes cold and fold them in gently at the end. Press them down lightly in a circular pattern before baking, then tap the pan to release air bubbles. Bake at 350°F for the full time—don't peek! The swirls develop as the butter melts and spreads through the warm batter during baking.