
Desserts
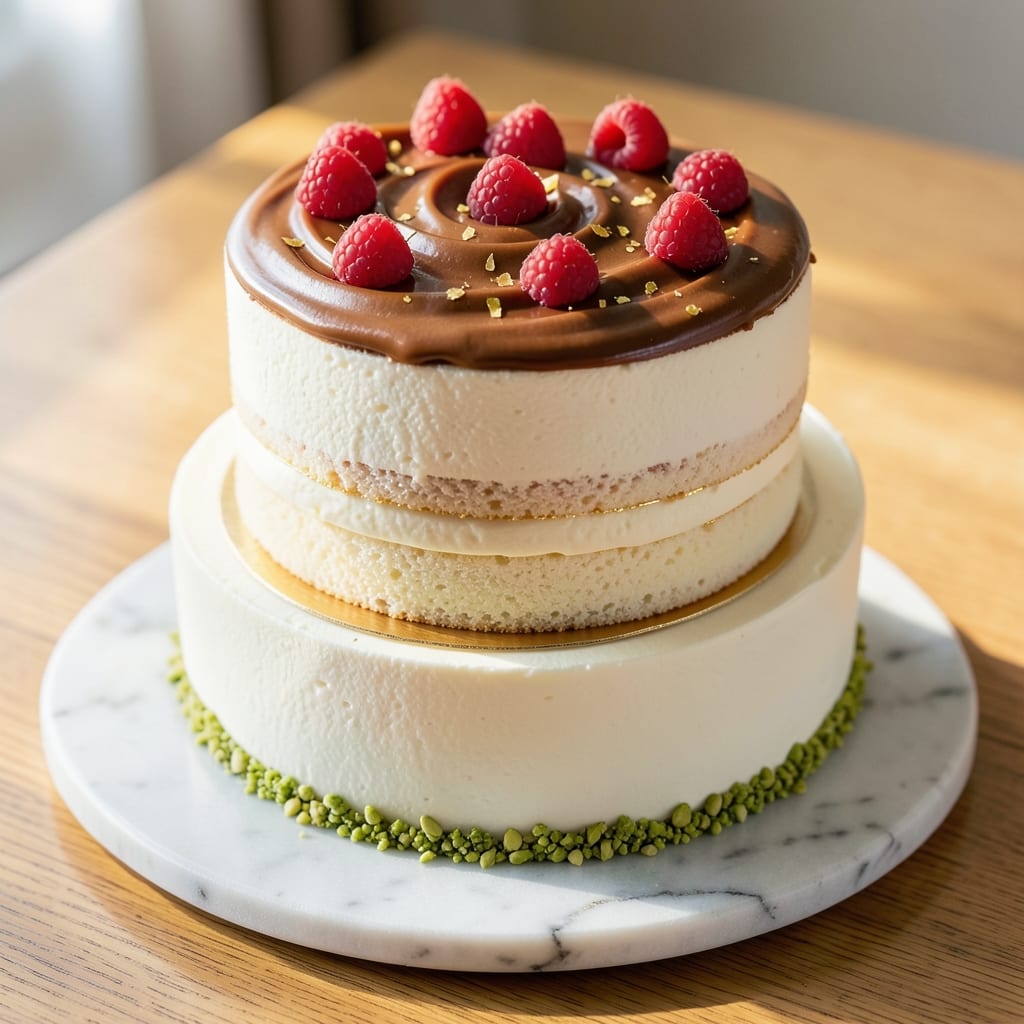
This 5-inch vanilla cake recipe delivers the perfect balance of tender layers and buttery frosting swirls that make every slice feel like a celebration. 💛 The secret lies in precise measurements and gentle folding to maintain that signature light, airy texture—no dense crumbs here. Whether it's for a birthday, brunch, or just because, this cake rises to the occasion with a golden dome and fluffy crumb that melts in your mouth.
What sets this recipe apart is the foolproof method for achieving even layers without overmixing, ensuring your cake bakes up perfectly every time. The two-step frosting technique—first a velvety buttercream, then delicate swirls—adds that restaurant-quality finish. No special equipment needed, just a standard 5-inch round pan and a few essential tools you likely already own.
By the time you're done, you'll have a cake that's taller than it is wide, with a crown of frosting swirls that looks impressive enough for any table. The vanilla flavor shines through without being overpowering, while the buttercream adds just the right amount of richness. This is the kind of cake that makes guests ask for seconds—and the recipe that makes them ask for your secret.
Perfect for feeding a small group or saving slices for later, this cake keeps beautifully for up to three days. The frosting stays smooth, the layers remain moist, and the flavor only gets better as it sits. Let's get baking!
Ingredients for 5 inch vanilla cake
Pantry staples plus a few key ingredients for that signature tall, swirled cake everyone loves.
| Ingredient | Amount | Notes |
|---|---|---|
| All-Purpose Flour 🌾 | 2 cups | Sifted for even texture |
| Granulated Sugar 🍬 | 1 ½ cups | Superfine for smooth batter |
| Unsalted Butter 🧈 | 1 cup | Room temperature, full-fat |
| Pure Vanilla Extract 🌿 | 2 tbsp | High-quality, not imitation |
| Large Eggs 🥚 | 3 whole | Room temperature for blending |
| Baking Powder 🧂 | 1 ½ tsp | Freshly opened for lift |
| Salt 🧂 | ½ tsp | Fine sea salt preferred |
| Whole Milk 🥛 | ¾ cup | Room temperature |
| Vanilla Bean Seeds 🌿 | 1 tsp | Scraped from 1 pod |
| Powdered Sugar 🍬 | 3 cups | For buttercream frosting |
| Heavy Whipping Cream 🥛 | 1 cup | Cold for stiff peaks |
| Vanilla Bean Paste 🌿 | 1 tbsp | For extra vanilla flavor |
| Food Coloring (optional) 🎨 | 1 tsp | For subtle swirl effect |
The flour and sugar are your foundation—King Arthur or Gold Medal brands make all the difference here. I always grab superfine sugar for that ultra-smooth batter (no gritty surprises), but regular granulated works in a pinch if you pulse it in a food processor. The butter? Full-fat, room temperature—none of that low-fat nonsense. Look for European-style butter if you want extra richness, but regular unsalted butter works too. The vanilla extract should be pure, not imitation—McCormick or Nielsen-Massey are solid choices. Pro tip: scrape those vanilla bean seeds for an extra layer of flavor that store-bought extract can't match.
No vanilla bean? Double the extract—just don't skimp. Running low on powdered sugar? Confectioners' sugar from a squeeze bottle (like Trader Joe's) is a game-changer—no clumping, and it lasts forever. Heavy whipping cream needs to be cold when you whip it, or you'll end up with butter instead of frosting. For the swirl effect, I use gel food coloring (like Wilton)—it's more vibrant than liquid and mixes right in. No food coloring? A tiny bit of cocoa powder gives a subtle contrast. And if you're feeling fancy, infuse the buttercream with a splash of rum or vanilla bean paste—trust me, it's worth it.
This cake keeps beautifully for up to 3 days at room temperature, wrapped tightly in plastic. The frosting stays smooth if you store it in an airtight container between layers. For longer storage, freeze the unfrosted layers for up to 3 months—just thaw at room temp before assembling. The buttercream? Make it a day ahead—it actually tastes better after the flavors meld. I always portion the frosting into a piping bag with a swirl tip for that restaurant-quality finish, but a spoon works too if you're in a hurry. Leftovers? Slice and freeze for up to 2 months—just let them sit at room temp for 10 minutes before serving.
Why You'll Love This Recipe
- No Mixer Needed: I swear by this recipe when my mixer’s broken—or when I’m just too lazy to pull it out. Creaming butter and sugar by hand takes five minutes, and the eggs blend right in with a fork. Honestly, it’s the kind of cake that lets you skip the fuss and still get that perfectly tender crumb.
- Vanilla Love: That deep, buttery vanilla flavor? It’s not just a whisper—it’s the star. The extract infuses into the warm butter and sugar while mixing, so every bite tastes like you slathered it in vanilla syrup. (Yes, even on a Tuesday night.)
- Layer Magic: This cake is my go-to for birthdays, potlucks, or just because. The 5-inch size is ideal for two layers with filling, or slice it thin for finger sandwiches. Between us, I’ve also used the leftovers for cake pops—no judgment.
- Budget-Friendly Luxury: You’re using pantry staples here: flour, sugar, butter, eggs. No specialty ingredients, no markup. The cost per serving is laughably low, but it tastes like you spent an hour decorating it. (Spoiler: I often do.)
Step-by-step instructions for layered vanilla cake with buttery frosting
Here's how to bake a perfectly moist cake with swirled frosting that looks like a bakery masterpiece.
👨🍳 Step 1: Whisk Dry Ingredients and Cream Butter
In a medium bowl, sift together the 2 cups All-Purpose Flour, 1.5 tsp Baking Powder, and 0.5 tsp Salt. Set aside—don't stir it yet. In a separate large bowl, beat the 1 cup Unsalted Butter and 1.5 cups Granulated Sugar on medium speed until light and fluffy, about 3-4 minutes. You'll know it's ready when the mixture nearly doubles in volume and looks pale.
This creaming step is what gives the cake its tender texture. I like to press down on the butter mixture with a spatula occasionally to help incorporate air. If your butter isn't room temperature, you'll end up with dense, cakey layers instead of that perfect crumb.
👨🍳 Step 2: Add Eggs and Vanilla for Rich Flavor
Add the 3 whole Large Eggs, one at a time, mixing just until each is fully incorporated. Then stir in the 2 tbsp Pure Vanilla Extract and 1 tsp Vanilla Bean Seeds. Scrape down the sides of the bowl to make sure everything's well combined. The batter should be smooth and thick—almost like pudding at this stage.
Here's where the magic happens: the vanilla bean seeds add that extra depth of flavor that regular extract can't match. If you're using optional food coloring, add it now and mix until evenly distributed. The batter should be a pale yellow color with no streaks of flour.
🍳 Step 3: Combine Wet and Dry Ingredients Gently
With the mixer on low speed, gradually add about ⅓ of the dry ingredients to the wet mixture. Mix just until combined, then add another ⅓ and mix again. Finish by adding the remaining dry ingredients. Alternate adding the 0.75 cup Whole Milk, starting and ending with flour, mixing just until combined after each addition.
This alternating method prevents dense layers by ensuring even distribution of ingredients. Overmixing at this stage develops gluten, which leads to tough cake. Stop mixing as soon as you see no more flour streaks—your batter should be smooth and slightly thick.
🔥 Step 4: Bake in Layers at Low Temperature
Divide the batter evenly between two 5-inch round cake pans lined with parchment paper. Smooth the tops with a spatula. Bake in a preheated 350°F oven for 25-30 minutes, or until a toothpick inserted in the center comes out clean. Rotate the pans halfway through for even baking.
The key here is patience—low and slow gives you even layers without burning. I check the cakes at the 20-minute mark because ovens vary. If the edges brown too quickly, tent with foil. Let the cakes cool in the pans for 10 minutes, then transfer to a wire rack to cool completely.
🥘 Step 5: Make the Vanilla Buttercream and Assemble
Beat the 1 cup Heavy Whipping Cream and 1 tbsp Vanilla Bean Paste with an electric mixer until stiff peaks form. Gradually add the 3 cups Powdered Sugar, mixing on low speed until combined, then increase to medium-high and beat for 2-3 minutes until light and fluffy. Spread a thin layer on the first cake layer, then top with the second layer.
Pipe a generous border of frosting around the edge of the cake, then pipe swirls in the center. Use a long knife to create clean layers by slicing through the center. Chill for 30 minutes before serving to let the frosting set properly. The result should be a cake with perfect height and those gorgeous swirls that look like they came from a professional bakery.
Pro Tips For Making 5 Inch Vanilla Cake
- Cream Butter Properly: Use a stand mixer or strong hands to beat the butter and sugar until it’s pale, fluffy, and just starting to break up when you press your finger into it—about 3-5 minutes. I learned this the hard way: under-creaming makes the cake dense, while over-creaming adds air but can also make it dry. Stop when it looks like wet sand.
- Sift the Flour Twice: Dump the flour into a fine-mesh sieve and shake it twice before adding it to the batter—once to break up any lumps, and again if you’re using a recipe with baking powder or salt mixed in. I skip this step when I’m lazy, but the cake is noticeably lighter and less likely to sink in the middle.
- Room-Temp Eggs Matter: Take the eggs out of the fridge 30 minutes before using them—cold eggs can cause the batter to curdle or separate when mixed with the butter. I was skeptical until I tried it: the batter comes together smoother, and the crumb stays consistently tender.
- Don’t Overmix the Batter: Stop folding in the flour as soon as it’s just combined—no streaks, no dry spots. Overmixing develops the gluten and turns your cake into a tough, chewy brick. I used to think a few extra strokes wouldn’t hurt, but this is the thing that matters most for that classic soft vanilla crumb.
Make-ahead tips for 5 inch vanilla cake
Prep Ahead for Stress-Free Baking
Make the vanilla buttercream frosting up to 3 days ahead—it actually tastes better after the flavors meld. Store it in an airtight container in the fridge, and let it sit at room temperature for 30 minutes before using. The frosting thickens slightly when chilled, so don’t worry if it looks stiffer than expected. 💛
Layer Storage Secrets
Bake the cake layers 1 day ahead and store them wrapped tightly in plastic wrap at room temperature. This prevents drying while keeping the crumb light. For longer storage, freeze the unfrosted layers in a ziplock bag for up to 3 months. Thaw completely at room temperature before assembling.
Frosting Swirl Trick
Pipe the frosting border before adding the swirls—this creates a clean, professional look. Use a Wilton 1M tip for smooth swirls, or a spoon if you’re short on tools. Chill the cake for 30 minutes after frosting to set the buttercream perfectly. Pro tip: Dip your piping tip in hot water and dry it between uses for crisp swirls. ✨
Transporting Your Cake
For moving the cake, place it on a round cake board (or a sturdy plate) and wrap the board in parchment paper before transferring to a cake carrier. If you’re transporting it unfrosted, wrap each layer individually in plastic wrap and stack them in a ziplock bag to prevent crushing. Keep it at room temperature until ready to serve.
Freezing Fully Frosted Cakes
If you’ve already assembled the cake, freeze it unfrosted (as layers) or frosted in an airtight container for up to 2 months. Thaw in the fridge overnight, then let it sit at room temperature for 1 hour before serving. The frosting may soften slightly, so add a quick chill in the fridge for 15 minutes to restore crispness. ❄️
Portioning for Leftovers
Slice the cake into 6 equal wedges (like a pie) for easy serving. Store leftovers in an airtight container at room temperature for up to 2 days. For longer storage, freeze individual slices in ziplock bags for up to 2 months. Reheat slices at room temperature—they’re best enjoyed fresh out of the fridge. 🍰
Nutrition facts
Frequently asked questions
Can I use a different-sized pan for this recipe?
For the best results, stick to 5-inch round pans—this recipe is designed for that specific height and layer ratio. If you must use a different size, adjust the baking time by 2-3 minutes per inch of pan diameter (smaller pans bake faster). For example, a 6-inch pan would need about 30-35 minutes. Just check with a toothpick at 20 minutes to avoid overbaking.
Why does my cake turn out dense instead of light?
Overmixing the batter or using cold butter are the most common culprits. Always cream the butter and sugar until light and fluffy (3-4 minutes), and mix the dry ingredients just until combined. Also, make sure your eggs and milk are room temperature—cold ingredients can cause dense layers. If your oven runs hot, reduce the temperature to 325°F.
How do I make this cake eggless?
Replace the 3 eggs with 3 tbsp ground flaxseed mixed with 9 tbsp water (let it sit for 5 minutes to thicken). For extra moisture, add 2 tbsp applesauce or yogurt to the batter. The texture will be slightly denser, but still delicious. Chill the batter for 15 minutes before baking to help it rise properly.
Can I substitute buttercream with another frosting?
Try cream cheese frosting (mix 8 oz cream cheese with ½ cup butter and 3 cups powdered sugar) or ganache (equal parts chocolate and heavy cream). For a lighter option, whipped cream with vanilla powder works well. Just adjust the sweetness to taste—some frostings are naturally sweeter than buttercream.
How do I decorate this cake for special occasions?
For birthdays, add sprinkles or a handwritten message in chocolate ganache. For weddings, pipe delicate floral patterns with white frosting or add edible flowers. Use a toothpick to create a lattice pattern on top before adding swirls. For a rustic look, dust with powdered sugar or sprinkle crushed nuts around the base.