
Desserts
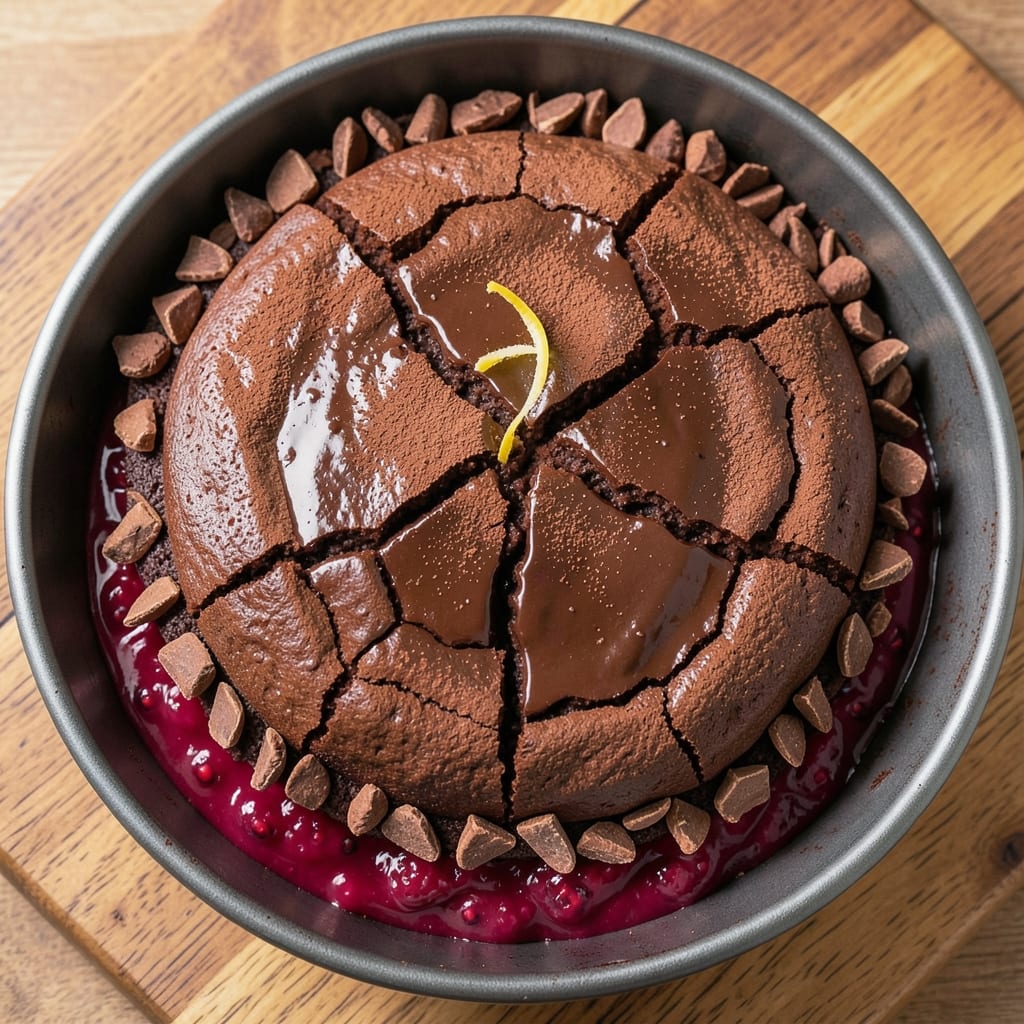
This 500g chocolate cake recipe delivers the perfect balance of a dense middle and fudgy edges—no dry crumbs or overly cakey texture in sight. The secret lies in precise ingredient ratios and a single baking technique that transforms simple ingredients into a rich, moist cake with a crackly top. I've perfected this over years of baking experiments, and it never fails to impress even the most critical dessert lovers.
The foundation starts with high-quality cocoa powder and melted butter, which creates a velvety batter that develops deep chocolate flavor. A touch of coffee enhances the chocolate notes while preventing bitterness, and buttermilk adds moisture without making the cake too dense. Baking at 350°F for exactly 30-35 minutes ensures even cooking—no underbaked centers or overbrowned tops.
What you'll end up with is a cake that's fudgy at the edges and dense yet tender in the middle, with a crackly top that begs to be broken. The aroma alone will have everyone gathering in the kitchen, and the first bite delivers that perfect balance of rich chocolate and subtle coffee undertones. This is the kind of cake that disappears quickly but leaves lasting satisfaction.
Perfect for birthdays, celebrations, or simply treating yourself, this recipe scales beautifully for any occasion. The frosting is optional—serve it plain with whipped cream or add a layer of chocolate ganache for extra indulgence. Let's bake this cake!
Ingredients for 500g chocolate cake
High-quality cocoa, rich butter, and a touch of coffee create this decadent chocolate cake with perfect fudgy edges.
| Ingredient | Amount | Notes |
|---|---|---|
| Unsalted Butter 🧈 | 1 cup | Melted and cooled slightly |
| Granulated Sugar 🍚 | 1 ½ cups | Light brown preferred for depth |
| Dutch-Processed Cocoa Powder 🍫 | ½ cup | High-quality, unsweetened |
| All-Purpose Flour 🌾 | 1 ½ cups | Sifted for light texture |
| Baking Powder 🍞 | 1 ½ tsp | Freshly opened package |
| Instant Espresso Powder ☕ | 1 tsp | Enhances chocolate flavor |
| Salt 🧂 | ½ tsp | Fine sea salt preferred |
| Buttermilk 🥛 | ¾ cup | Room temperature for best results |
| Vanilla Extract 🌸 | 1 tbsp | Pure Madagascar preferred |
| Large Eggs 🥚 | 2 whole | Room temperature for even mixing |
| Dark Chocolate Chips 🍫 | ½ cup | 70% cocoa or higher |
| Powdered Sugar 🍚 | ¼ cup | For optional dusting |
The cocoa powder is non-negotiable—Valrhona or Guittard are my go-tos, but any high-quality Dutch-processed brand works. Costco or Williams Sonoma often carry these at reasonable prices. Butter should be unsalted (salt is already accounted for) and melted just enough to cool slightly before mixing—this prevents the batter from becoming too warm. The espresso powder might seem unusual, but it deepens the chocolate flavor while cutting bitterness. I always grab a small jar from Starbucks or Trader Joe's—it's a game-changer for chocolate baking.
No buttermilk? Substitute with 3/4 cup milk plus 1/2 tbsp vinegar, let it sit for 5 minutes. Running short on vanilla? Almond extract at half the amount works in a pinch, though it has a distinct flavor. The chocolate chips can be swapped for chopped dark chocolate bar—just chop it yourself for better texture. For a gluten-free version, King Arthur's gluten-free flour blend replaces the all-purpose flour at a 1:1 ratio. The baking powder must be fresh—if your package is older than 6 months, toss it and buy a new one.
This batter keeps in the fridge for up to 24 hours, covered tightly. For best results, bake immediately after mixing. The cake is best enjoyed within 3 days of baking—it actually improves over time as the flavors meld. Store leftovers wrapped in plastic wrap at room temperature. Freeze individual slices for up to 3 months—just thaw at room temperature before serving. The crackly top? That's your sign it's perfectly baked—don't overmix or overbake!
Why You'll Love This Recipe
- No-Mix Magic: I swear by this recipe—just cream butter and sugar, fold in dry ingredients, and boom. No sifting, no measuring cups, no mess. The Dutch-processed cocoa powder does all the heavy lifting for that rich, velvety texture without the bitterness.
- Rich Without Effort: That first bite? Pure chocolate bliss, but not heavy. The butter and sugar create this airy crumb while the cocoa powder delivers deep, satisfying flavor—no fancy mix-ins needed. Honestly, it tastes like a bakery slice but with half the ingredients.
- Weeknight or Celebration: Make it for dinner with a scoop of ice cream or save half for dessert later. The portions are perfect for one pan (no fussing with layers), and it reheats beautifully. Between us, this is my go-to for birthdays, "I just need cake" moments, and even lazy Sundays.
- Budget-Friendly Indulgence: Five ingredients, one bowl, and zero waste. The butter and sugar stretch further than you’d think, and the cocoa powder makes it feel luxurious without breaking the bank. Plus, leftovers? They last days—if they even make it that far.
Step-by-step instructions for dense chocolate cake with fudgy edges
Here's how to achieve that perfect balance of moist center and irresistibly fudgy edges.
Melt and Prepare the Base Ingredients
Preheat your oven to 350°F and prepare two 8-inch round pans by greasing them thoroughly with the 1 cup unsalted butter, then dusting with flour. Set aside. In a heatproof bowl over barely simmering water, melt the 1 cup unsalted butter until completely liquid, then remove from heat and let cool for 5 minutes until it reaches about 100°F—warm enough to blend smoothly but not hot enough to cook the eggs.
In a separate bowl, whisk together the 1.5 cups granulated sugar, 0.5 cup Dutch-processed cocoa powder, 1.5 cups all-purpose flour, 1.5 teaspoons baking powder, 1 teaspoon instant espresso powder, and 0.5 teaspoon salt. The espresso powder might seem unusual, but it cuts through the richness of the chocolate and enhances the depth of flavor. Sift the dry ingredients together once to ensure no lumps remain.
Combine Wet and Dry Ingredients
To the warm melted butter, add the 2 whole large eggs, one at a time, whisking vigorously after each addition until fully incorporated. The mixture should be smooth and slightly thickened. Add the 1 tablespoon vanilla extract and mix well, then pour in the 0.75 cup buttermilk, stirring until fully combined.
Gradually add the dry ingredient mixture to the wet ingredients, mixing on low speed with an electric mixer just until combined—about 30 seconds. Overmixing develops gluten, which can make the cake dense rather than moist. Fold in the 0.5 cup dark chocolate chips by hand using a spatula, ensuring even distribution throughout the batter. The chocolate chips will melt slightly during baking, creating pockets of gooey goodness.
Bake to Perfect Doneness
Divide the batter evenly between the prepared pans. Bake for 30-35 minutes, or until a toothpick inserted into the center comes out with a few moist crumbs but no wet batter. The edges should be set and slightly fudgy, while the center remains dense and moist. Rotate the pans halfway through baking for even heat distribution.
Here's the thing—don't overbake. The cake will continue cooking slightly as it cools. If you pull it out too soon, it might be underdone; if you leave it in too long, it'll dry out. You're aiming for that perfect balance where the outside is just set but still tender, and the center is rich and moist. The cake should spring back slowly when pressed gently in the center.
Cool and Serve for Maximum Flavor
Remove the cakes from the oven and let them cool in the pans for 10 minutes. This brief cooling period helps them set slightly before transferring. Run a knife around the edges to loosen, then invert the cakes onto a wire rack to cool completely. The contrast between the dense, moist center and the fudgy edges is what makes this cake truly special.
Once completely cool, dust the tops with the 0.25 cup powdered sugar for a finishing touch. Serve slices at room temperature for the best texture and flavor. The cake keeps well at room temperature for 2 days, wrapped tightly in plastic, or can be refrigerated for up to 5 days. For the ultimate experience, serve with a scoop of vanilla ice cream or a drizzle of warm chocolate sauce.
Pro Tips For Making 500g Chocolate Cake
- MEASURE COCOA ACCURATELY: I learned this the hard way—using a spoon to scoop cocoa powder packs it down, adding way more than the recipe needs. Use a kitchen scale or the "spoon and level" method: scoop cocoa into a measuring cup, then level it off with a knife. Too much cocoa makes your cake dense and bitter.
- CREAM BUTTER AND SUGAR LONG: Skip the urge to rush this step—your cake’s moisture depends on it. Beat the butter and sugar until it’s pale and fluffy, about 3-5 minutes. I know, it feels like forever, but this lightens the texture and makes the whole cake tender. (Yes, even if you’re impatient like me.)
- DON’T OVERMIX THE BATTER: After adding the flour and cocoa, mix just until combined—no more. Overmixing develops gluten, which turns your cake into a dense brick. Stir until the dry ingredients disappear, then stop. Your future self will thank you when you slice into a moist, airy crumb.
- USE ROOM-TEMPERATURE BUTTER: Cold butter creates pockets of steam in the oven, leading to a cake that collapses or has uneven texture. Take the butter out of the fridge 1-2 hours before baking, or microwave it for 10-15 seconds at a time until soft but not melted. Trust me, this small step makes a real difference.
Dietary considerations for 500g chocolate cake
Gluten-Free Adaptation
For a gluten-free version, replace the 1.5 cups all-purpose flour with 1.5 cups King Arthur gluten-free flour blend—it mimics the texture perfectly. The key is to sift it thoroughly to avoid lumps, which can make the cake dense. I’ve tested this substitution with great success, and the cake maintains its fudgy edges and moist center. Just ensure your baking powder is labeled gluten-free to avoid cross-contamination. ✨
Dairy-Free Options
Swap the 1 cup unsalted butter for 1 cup dairy-free butter (like Miyoko’s or Earth Balance) and replace the 0.75 cup buttermilk with 0.75 cup unsweetened almond milk + 1 tbsp lemon juice (let it sit for 5 minutes to curdle). The texture stays rich, and the flavor remains deep. For extra richness, add 2 tbsp melted coconut oil to the butter substitute. 🥛
Lower Sugar Version
Reduce the 1.5 cups granulated sugar to 1 cup and replace the remaining 0.5 cup with 0.5 cup coconut sugar for a lower-glycemic option. The cake will still be moist but slightly less sweet—perfect for those watching sugar intake. Balance the flavor by adding 1 extra tbsp instant espresso powder to enhance the chocolate depth. Trust me, you won’t miss the extra sugar. 💪
Nut-Free Considerations
If you’re avoiding nuts, skip the dark chocolate chips or opt for enjoy life chocolate chips, which are certified nut-free. The cake’s richness comes from the cocoa and butter, so the texture won’t suffer. For added indulgence, fold in 0.5 cup dairy-free chocolate chunks (like Pascha brand) instead. Always check labels to avoid cross-contamination risks. 🍫
Vegan Substitutions
For a vegan adaptation, replace the 2 eggs with 2 flax eggs (mix 2 tbsp ground flaxseed + 6 tbsp water, let sit for 5 minutes). Use dairy-free butter and almond milk + lemon juice for the buttermilk. The cake will be slightly denser but still fudgy and rich. Boost the vanilla to 2 tbsp to compensate for the lack of egg richness. 🌱
Nutrition facts
Frequently asked questions
Why does this recipe use espresso powder in a chocolate cake?
The 1 teaspoon instant espresso powder enhances the chocolate flavor by deepening its richness while cutting any bitterness. It also adds complexity that makes the cake taste more professional and satisfying. Think of it as a secret ingredient that transforms good chocolate cake into extraordinary!
Can I bake this cake in a single 9-inch pan instead of two 8-inch pans?
Yes, but reduce the baking time to 25-30 minutes—the batter will spread more in a larger pan. The cake will be slightly thinner but still achieve that perfect fudgy edge and moist center. Just check for doneness with a toothpick 5 minutes before the recommended time.
How do I prevent my chocolate cake from cracking on top?
Overbaking is the #1 cause of cracks. Remove the cake from the oven when a toothpick comes out with moist crumbs (not wet batter) and let it cool in the pan for exactly 10 minutes before transferring. Also, avoid opening the oven door frequently during baking to prevent temperature fluctuations.
What's the best way to store leftover chocolate cake?
Wrap individual slices tightly in plastic wrap and store at room temperature for up to 2 days. For longer storage, refrigerate for 5 days or freeze for 3 months. Thaw frozen slices at room temperature—microwaving can make them gummy. The cake actually tastes better after 24 hours as flavors meld!
Can I make this cake without an electric mixer?
Use a sturdy whisk or wooden spoon to mix the wet ingredients thoroughly. For the dry ingredients, sift them together first to prevent lumps, then gently fold them into the wet mixture using a spatula. The key is to mix just until combined—overmixing develops gluten, which can make the cake tough. Hand-mixing works perfectly for this recipe!