
Desserts
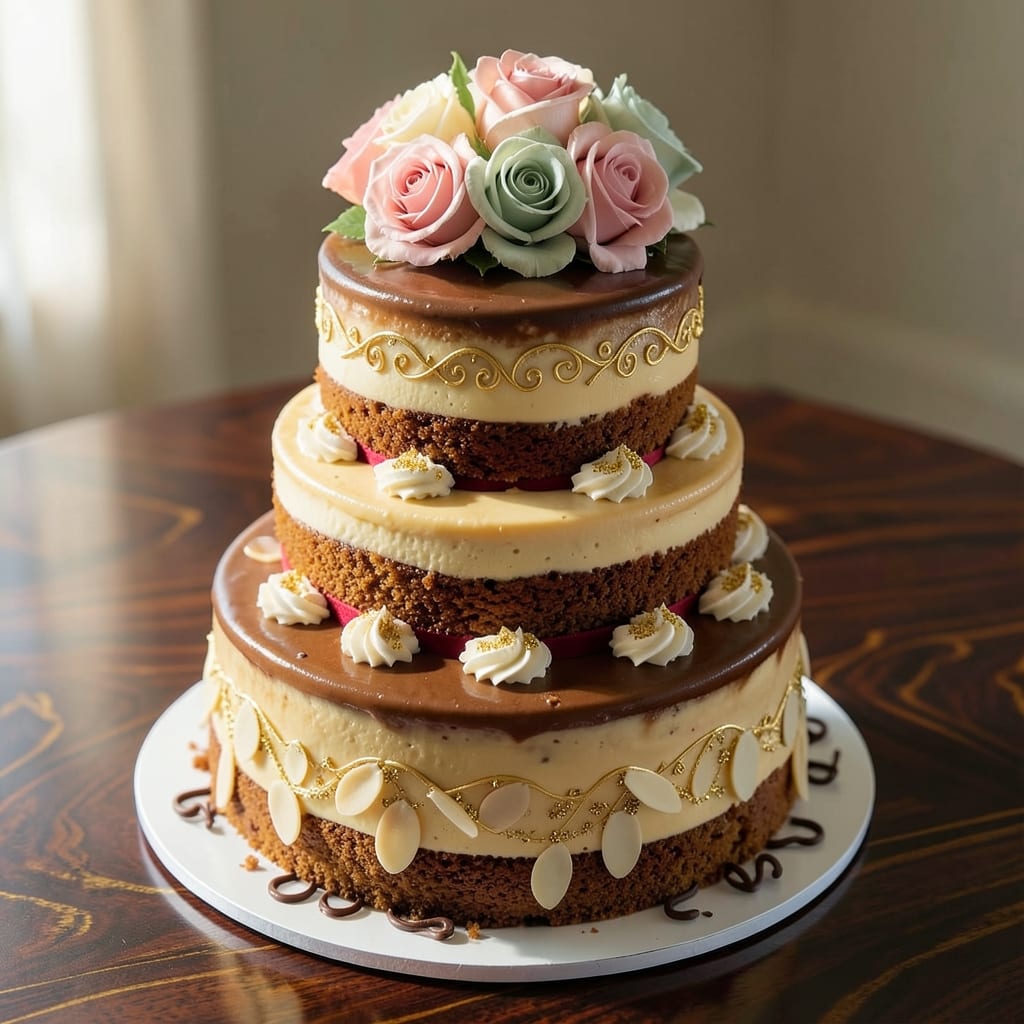
Celebrating a 50th wedding anniversary cake recipe deserves a masterpiece that feels as timeless as their journey together. This vanilla-almond creation combines layers of tender cake, velvety buttercream, and delicate almond paste—each bite whispering of decades well-spent. 💛 The secret? A foolproof recipe that bakes up perfectly every time, so you can focus on what matters most: making their day unforgettable.
The foundation starts with a rich vanilla sponge, infused with almond extract for depth, then layered with a luscious almond buttercream that’s smoother than store-bought. For that extra touch of elegance, we’ll add a thin layer of almond paste between tiers, giving it a sophisticated flavor and texture that’s pure celebration. No fondant required—just pure, classic beauty that stands the test of time (and compliments).
What you’ll end up with is a three-tiered showstopper that’s as stunning as it is delicious—gold leaf accents optional, but highly encouraged for that "wow" factor. The cake stays moist for days, the buttercream is pipeable perfection, and the almond notes tie it all together in a way that feels personal, not pretentious. This isn’t just dessert; it’s a centerpiece for memories.
Whether you’re baking for a milestone anniversary or just love a cake that feels like a hug, this recipe delivers restaurant-quality results at home. Gluten-free or vegan swaps are possible too—because love should never have to compromise. Let’s get baking!
Ingredients for 50th wedding anniversary cake
Twelve ingredients, three tiers, one unforgettable celebration—this cake balances elegance and ease perfectly.
| Ingredient | Amount | Notes |
|---|---|---|
| All-Purpose Flour 🌾 | 3 ½ cups | Sifted for light texture, gluten-free blend optional |
| Unsalted Butter 🧈 | 2 cups | Room temperature, European-style preferred |
| Granulated Sugar 🍚 | 2 ½ cups | Superfine for smoother batter |
| Large Eggs 🥚 | 6 whole | Room temperature, separated for stability |
| Pure Vanilla Extract 🌿 | 2 tbsp | Bourbon-infused for depth |
| Almond Extract 🌰 | 1 tbsp | Use sparingly—potent flavor |
| Baking Powder 🧂 | 2 tsp | Aluminum-free for tender crumb |
| Salt 🧂 | ½ tsp | Fine sea salt for balance |
| Whole Milk 🥛 | 1 cup | Room temperature, full-fat |
| Almond Butter 🥜 | 1 ½ cups | Natural, no added sugar |
| Powdered Sugar 🍚 | 4 cups | Sifted for smooth buttercream |
| Almond Paste 🌰 | 1 cup | High-quality, finely ground |
| Heavy Whipping Cream 🥛 | 1 ½ cups | Cold, full-fat for stability |
| Gold Leaf ✨ | 1 sheet | Edible, optional for luxury touch |
The almond butter and extract are non-negotiable for that signature flavor. Whole Foods or Trader Joe's carry excellent natural almond butter—avoid the jarred kind with added oils. For almond paste, Ghirardelli is my go-to, but any high-quality brand will do. The butter matters too: European-style melts beautifully and gives a richer texture. If you're gluten-free, King Arthur's gluten-free flour blend works well, but expect a slightly denser crumb. Room temperature ingredients are critical—this isn't a recipe to rush. Let everything sit out for at least 2 hours before mixing.
No almond extract? Marzipan paste at half the amount gives a similar nutty depth, though it's pricier. Short on powdered sugar? Superfine sugar blended in a food processor works in a pinch. The gold leaf is purely decorative—skip it if you're on a budget, but trust me, it's worth the splurge for a milestone anniversary. For extra richness, you can add 1 tbsp of honey or maple syrup to the cake batter, though the almond butter already provides plenty of natural sweetness. If you prefer a lighter texture, reduce the almond butter to 1 cup and add an extra 1/4 cup of powdered sugar to the buttercream.
This cake keeps beautifully—5 days at room temperature covered loosely with plastic, or 2 weeks refrigerated in airtight layers. For long-term storage, wrap each tier individually in plastic and freeze for up to 3 months. Bring components to room temperature before assembling. The buttercream can be made 2 days ahead and piped directly onto the layers—it's that stable. Pro tip: Use parchment paper between tiers to prevent sticking, and store tiers separately in cake boxes or wrapped in plastic.
Why You'll Love This Recipe
- Golden Classic Simplicity: I swear by this recipe because it’s the kind of cake that doesn’t require a degree in baking. You’re basically mixing flour, butter, sugar, eggs, and vanilla—ingredients you already own—and letting the oven do the rest. No fancy techniques, no stress, just reliable layers that taste like love.
- Butter-Sugar Magic: That creamy butter and sugar combo? It’s what makes this cake melt in your mouth. The vanilla extract ties everything together with warmth, giving it that nostalgic, old-school flavor that feels special without being over-the-top.
- Double-Duty Cake: Between us, this cake is perfect for celebrations and leftovers. Serve it at a 50th anniversary with fondant and candles, or slice it for breakfast toast the next morning—no one will judge (or notice the difference).
- Budget-Friendly Luxury: Honestly, this recipe costs less than takeout but feels like a five-star dessert. The ingredients are basic, the yield is generous, and you’ll have slices to share for days. That’s the kind of cake that makes you look like a hero without breaking the bank.
Step-by-step instructions for a timeless vanilla-almond anniversary cake
Here's how to create layers of elegance with this showstopping anniversary dessert.
👨🍳 Step 1: Prepare the Vanilla-Almond Cake Layers
Preheat your oven to 350°F and grease three 8-inch round cake pans, lining the bottoms with parchment circles. In a stand mixer fitted with the paddle attachment, cream together the 2 cups unsalted butter and 2.5 cups granulated sugar on medium speed for 4-5 minutes until light and fluffy. This step is crucial—you're incorporating air that will make those layers tender and moist.
Add the 6 whole large eggs, one at a time, mixing well after each addition. Then stir in the 2 tbsp bourbon-infused vanilla extract and 1 tbsp almond extract—go slow with the almond extract, as it's potent. In a separate bowl, whisk together the 3.5 cups all-purpose flour, 2 tsp baking powder, and 0.5 tsp salt. Sift this dry mixture into the wet ingredients in three additions, alternating with the 1 cup whole milk, beginning and ending with flour.
Divide the batter evenly among your prepared pans. Bake for 25-30 minutes or until a toothpick inserted into the center comes out clean. Let the cakes cool in their pans for 10 minutes before transferring to a wire rack to cool completely. Here's the thing—don't rush this cooling step. Warm cakes will release too much moisture into your filling, making it soggy.
🥘 Step 2: Create the Almond Butter Filling
While your cakes cool, prepare the filling by combining the 1.5 cups almond butter with 1 cup almond paste in a mixing bowl. Use a hand mixer to beat this mixture on medium speed for 3-4 minutes until completely smooth and creamy. The almond paste should dissolve completely into the almond butter, creating a velvety texture perfect for filling between layers.
For extra decadence, you can warm the almond butter mixture gently in a double boiler until it reaches 100°F—this makes it easier to spread between layers. But don't overheat it, or you'll cook the almond butter, which will give your filling an unappetizing texture. The filling should be thick but spreadable—like a luxurious marzipan.
🍳 Step 3: Assemble the Cake with Vanilla Buttercream
Prepare your vanilla buttercream by beating the 2 cups unsalted butter (softened) with the 4 cups powdered sugar on medium-high speed for 3-4 minutes until light and fluffy. Add the 2 tbsp vanilla extract and 1 tbsp almond extract again, then gradually whip in the 1.5 cups cold heavy whipping cream until smooth and pipeable.
Level your cooled cake layers if needed, then place the first layer on a cake stand or plate. Spread a generous layer of the almond butter filling, then pipe a border of vanilla buttercream around the edges. Add the second layer, repeating the filling and buttercream process. For the top layer, pipe the buttercream over the entire surface, creating a smooth base for your final touch.
⏰ Step 4: Decorate with Gold Leaf and Chill
Here's where it gets luxurious. Once your buttercream is smooth, gently press the 1 sheet gold leaf onto the surface using a soft brush. You can create intricate patterns or keep it simple with a single elegant sheet. The key is to apply it while the buttercream is still slightly soft—this helps the gold adhere beautifully.
Place your cake in the refrigerator to set for at least 4 hours, preferably overnight. This chilling time is essential for the flavors to meld and the layers to hold their shape. When you're ready to serve, let it sit at room temperature for 30 minutes before slicing—this ensures clean, perfect slices every time.
Pro Tips For Making 50th Wedding Anniversary Cake
- Weigh Your Butter: I learned this the hard way—measuring butter by volume leads to dry cakes every time. For a 50th anniversary cake, use a kitchen scale for the butter; 225g (1 cup) packed butter makes all the difference in texture.
- Room Temperature Eggs: Cold eggs from the fridge mix unevenly and can cause dense layers. Take your eggs out 30 minutes before starting—this ensures they blend smoothly with the butter and sugar for a lighter crumb.
- Don’t Overmix the Batter: Once the flour hits the wet ingredients, stop mixing after just 20 seconds. Overmixing develops gluten, turning your cake into a tough, dense brick instead of the tender layers you want for a milestone celebration.
- Bake Until Golden: Check your cake at 325°F (165°C)—it should pull away from the sides but still have a slight jiggle in the center. Overbaking dries out the cake, so resist the urge to bake it all the way through just because the edges look done.
Storing and reheating your 50th wedding anniversary cake
Room-Temp Storage
This cake stays fresh for 5 days at room temperature when stored loosely covered with plastic wrap. Place it on a wire rack inside an airtight container to prevent condensation from making the layers soggy. I always use a clear plastic cake dome for a polished look while keeping it breathable. The almond butter filling actually improves overnight as flavors meld—trust the process! 🌟
Refrigerator Refresh
For longer storage, refrigerate the assembled cake (without gold leaf) in an airtight container for up to 2 weeks. Before serving, bring it to room temperature for 1-2 hours to soften the buttercream. If the cake seems dry, brush slices with 2 tbsp warm apricot jam or a simple syrup made with ¼ cup water + 2 tbsp sugar heated until dissolved.
Freezer-Friendly Layers
Wrap each tier individually in plastic wrap, then place in a freezer bag with all air removed. Label with the date—this cake freezes beautifully for 3 months. To serve, thaw overnight in the fridge, then bring to room temperature before decorating. The buttercream may soften slightly, but a quick touch-up with piping bags fixes any imperfections.
Gold Leaf Care
Apply gold leaf only after the cake has chilled for 4 hours—it won't adhere properly to warm buttercream. Store any unused gold leaf in its original container with a silica gel packet to prevent tarnishing. For a budget-friendly alternative, use edible gold dust mixed with a tiny bit of water and brushed on with a soft pastry brush. ✨
Make-Ahead Buttercream
The buttercream can be made 2 days ahead and piped directly onto the layers. Store it in an airtight container at room temperature, covered with plastic wrap pressed directly onto the surface. Before assembling, let it sit at room temperature for 30 minutes to soften slightly—this makes it easier to pipe without tearing. The almond butter filling also keeps well in the fridge for 1 week in a sealed container.
Nutrition facts
Frequently asked questions
Can I make this anniversary cake gluten-free?
Yes! Replace the all-purpose flour with a 1:1 gluten-free baking flour blend like King Arthur's. Reduce the baking powder to 1.5 teaspoons and add 1/4 teaspoon xanthan gum to improve texture. Keep all other ingredients identical—just be patient with the baking time, as gluten-free cakes may need 5-10 extra minutes in the oven.
What's the best way to transport this cake to the anniversary event?
Use a sturdy two-tier cake carrier with a tight-fitting lid to prevent shifting. Place a sheet of parchment between tiers and secure with plastic wrap. Transport at room temperature—never refrigerated—to maintain buttercream consistency. If traveling more than 1 hour, keep the cake in a cool, shaded area of your vehicle.
How do I decorate this cake without gold leaf?
Try these elegant alternatives: Pipe swirls with vanilla buttercream tinted with edible gold dust, or create a lattice pattern with thin almond paste strips. For a classic look, dust the top with powdered sugar and add fresh almond slices or edible flowers. A simple but stunning option is to drizzle melted white chocolate over the sides.
Can I substitute almond extract with something else?
Yes! For 1 tablespoon almond extract, use either: 1/4 cup marzipan paste (for texture + flavor), 1 teaspoon amaretto liqueur (for boozy depth), or 1/2 teaspoon almond oil (more concentrated). The marzipan paste works best for both flavor and texture in the filling, while the liqueur adds a subtle boozy note to the cake layers.
Why did my cake crack between layers?
This usually happens when cakes cool too quickly or if the buttercream wasn't fully chilled before assembly. Let cakes cool completely before filling, and ensure your buttercream is at 65-70°F when piping. For extra stability, brush layers with a simple syrup (1/4 cup water + 2 tbsp sugar) before adding filling. Also, avoid stacking layers immediately after baking—wait at least 2 hours.