
Desserts
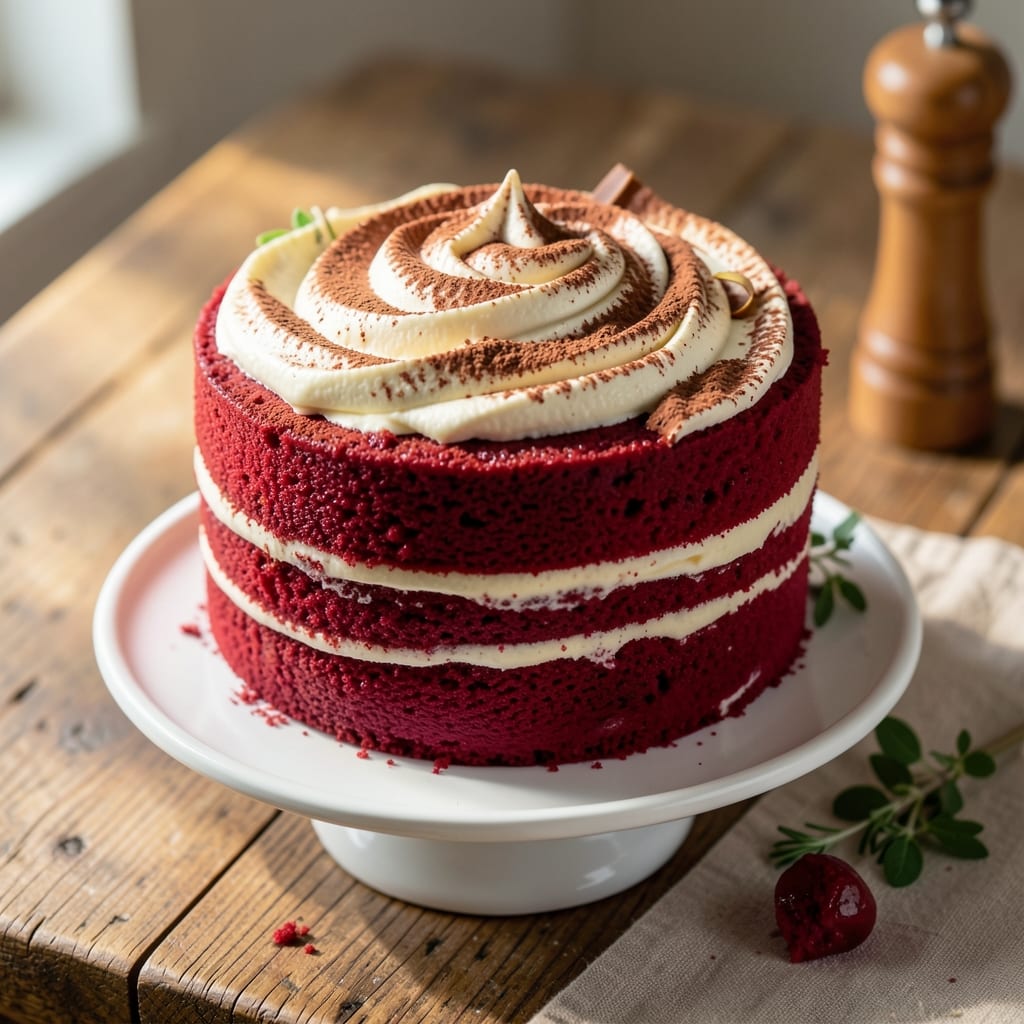
This 8-inch red velvet cake recipe delivers the perfect balance of tender crumb and rich cream cheese frosting—every slice is moist, velvety, and packed with that signature cocoa depth. 💛 The secret lies in precise ingredient ratios and a gentle baking technique that prevents dryness, ensuring each layer stays luscious from the first bite to the last.
What sets this recipe apart is the foolproof method for achieving a perfectly textured cake without cracking or sinking. The batter incorporates buttermilk for moisture, while the cream cheese frosting adds a tangy contrast that makes every forkful irresistible. With just 35 minutes of active prep and 45 minutes in the oven, you’ll have a showstopping dessert ready for any occasion.
The result is a moist, tender cake with a subtle cocoa flavor that’s neither too sweet nor too bitter, topped with a velvety cream cheese frosting that’s neither too heavy nor too light. The 8-inch size makes it ideal for small gatherings, perfect for serving 6-8 people without leftovers—or with just enough for seconds.
Whether you’re baking for a birthday, holiday celebration, or simply craving a classic treat, this recipe delivers restaurant-quality results at home. The assembly process is straightforward, ensuring a flawless finish every time. Let’s get started on creating your perfect red velvet masterpiece.
Ingredients for 8 inch red velvet cake
Fifteen ingredients transform into velvety layers and dreamy frosting—moisture secrets included.
| Ingredient | Amount | Notes |
|---|---|---|
| All-Purpose Flour 🌾 | 2 cups | Sifted for light texture |
| Granulated Sugar 🍚 | 1 ½ cups | White or light brown |
| Cocoa Powder 🍫 | ⅓ cup | Dutch-processed for smoothness |
| Unsalted Butter 🧈 | 1 cup | Room temperature, softened |
| Large Eggs 🥚 | 2 whole | Room temperature for even baking |
| Buttermilk 🥛 | 1 cup | Fresh for optimal moisture |
| Red Food Coloring 🎨 | ¼ tsp | Gel or liquid, vibrant red |
| Vanilla Extract 🌸 | 1 tbsp | Pure, high-quality extract |
| Baking Soda 🧂 | ½ tsp | Freshly opened for potency |
| Salt 🧂 | ½ tsp | Fine sea salt preferred |
| Vegetable Oil 🫒 | ½ cup | Light, neutral flavor |
| Cream Cheese 🧀 | 8 oz | Room temperature, full-fat |
| Powdered Sugar 🍚 | 3 cups | Sifted for smooth frosting |
| Heavy Whipping Cream 🥛 | ½ cup | Cold for stiff peaks |
| White Vinegar 🍶 | 1 tbsp | For buttermilk substitute |
The cocoa powder is non-negotiable—Dutch-processed gives that signature smoothness without bitterness. Hershey’s Special Dark or Ghirardelli Natural Cocoa are my go-tos, but any high-quality brand works. For the butter, Land O’Lakes or Plugrá are reliable, but don’t substitute margarine—this cake needs real fat. The buttermilk? If you’re out, mix 1 cup milk + 1 tbsp white vinegar, let it sit for 5 minutes. That tang is what keeps the crumb tender.
No red food coloring? Beet juice or raspberry puree works in a pinch—just adjust to taste. For the frosting, Philadelphia cream cheese is the gold standard, but Wisconsin Brick or Neufchatel are great too. The powdered sugar should be sifted—Domino or C&H brands are fine, but avoid clumpy varieties. If you’re making this ahead, wrap the cake tightly in plastic and store at room temp for up to 2 days—the flavors deepen overnight.
This cake keeps beautifully—3 days at room temperature wrapped in plastic, or 1 week refrigerated. For the frosting, whip it up to soft peaks and spread it 1 hour before serving so it sets properly. I like to make a double batch of frosting—one for the cake, one for filling cupcakes later. The leftovers? Perfect for frosting donuts or topping pancakes. Store frosting in the fridge for up to 5 days—just rewhip before using.
Why You'll Love This Recipe
- No Mixer Needed: I swear by this recipe when my stand mixer’s on strike—just creaming butter and sugar by hand gives that perfect light crumb. The eggs and cocoa powder do all the heavy lifting, so you’re basically just folding in flour like you’re making a giant mug cake.
- Velvet Cream Magic: That subtle cocoa-butter balance? It’s the kind of flavor that makes you pause mid-bite. The sugar and eggs keep it moist, while the butter makes every slice rich without being heavy—like a hug from your favorite dessert.
- Party in a Pan: An 8-inch cake is the ultimate crowd-pleaser: big enough for a small gathering but not so overwhelming you’ll stress over slices. I’ve used it for birthdays, book club meetups, and even as a “I just want cake” emergency—no one questions it.
- Budget-Friendly Luxury: You’re already using pantry staples—flour, sugar, butter—that stretch across recipes. The cocoa powder adds depth without costing a fortune, and leftovers? They disappear faster than I can say “second cup of coffee.”
Step-by-step instructions for 8-Inch red velvet cake
Here's how to bake layers so moist they practically melt in your mouth.
👨🍳 Step 1: Whisk Dry Ingredients for Perfect Texture
In a medium bowl, sift together the 2 cups all-purpose flour, 0.33 cup cocoa powder, 0.5 tsp baking soda, and 0.5 tsp salt. I always sift the cocoa powder separately first—this prevents clumping that can create dense pockets in the cake. Whisk everything thoroughly until no lumps remain and the mixture is completely homogeneous. The goal here is to maximize surface area for even baking.
Set this bowl aside while you prepare the wet ingredients. The dry mixture will stay light and airy if you don't overmix it later. I like to use a whisk with flexible wires—it cuts through cocoa powder's natural oils better than a spoon.
🍳 Step 2: Cream Butter and Sugar Until Light and Fluffy
In a stand mixer fitted with the paddle attachment, beat the 1 cup softened unsalted butter and 1.5 cups granulated sugar on medium speed for 3-4 minutes. You're looking for a pale, fluffy mixture that nearly doubles in volume—the butter should be completely incorporated with no visible streaks. This step is crucial for creating that tender, moist crumb we want in red velvet.
Here's the thing—if your butter isn't truly room temperature (it should leave a slight indentation when pressed), the cake will turn out dense. I like to soften butter by microwaving it in 10-second bursts until it's pliable but not melted. Scrape down the sides of the bowl every 30 seconds to ensure even mixing.
👨🍳 Step 3: Combine Wet Ingredients for Smooth Batter
Add the 2 whole large eggs, one at a time, mixing on low speed after each addition until fully incorporated. Then stir in the 1 cup buttermilk, 1 tbsp vanilla extract, 0.5 cup vegetable oil, and 0.25 tsp red food coloring. I use a gel food coloring here—it disperses more evenly than liquid and won't affect the batter's consistency.
With the mixer running on low speed, gradually add the dry ingredients to the wet mixture. Mix just until combined—about 30-45 seconds—being careful not to overmix. The batter should be smooth and slightly thinner than traditional cake batter. This is normal! The buttermilk and oil create a lighter texture that keeps the cake moist even after baking.
🔥 Step 4: Bake in Prepared Pans for Even Rise
Preheat your oven to 350°F and grease two 8-inch round cake pans with butter or baking spray, then line the bottoms with parchment circles. Divide the batter evenly between the pans—you should have about 1½ cups per pan. Tap each pan gently on the counter to remove air bubbles and ensure even distribution.
Bake for 25-30 minutes, or until a toothpick inserted in the center comes out with just a few moist crumbs (not wet batter). The edges should be set while the top still looks slightly soft. I know it's tempting to open the oven early, but resist! The cake needs that full baking time to develop its signature moisture without being dense.
⏰ Step 5: Cool and Assemble with Cream Cheese Frosting
Let the cakes cool in their pans for 10 minutes, then transfer to a wire rack to cool completely. This gradual cooling prevents cracking. While they cool, make the frosting by beating the 8 oz room-temperature cream cheese and 3 cups powdered sugar until smooth. Add the 0.5 cup cold heavy whipping cream and 1 tbsp vanilla extract, then whip until light and fluffy.
Once completely cool, level the tops if needed, then frost between the layers and on the outside. For that classic red velvet look, I like to spread a thin layer of frosting on the cake pans before baking—it creates a beautiful contrast when sliced. Cover and refrigerate for 30 minutes before serving to let the flavors meld.
Pro Tips For Making 8 Inch Red Velvet Cake
- Sift the Cocoa: Don’t just dump that cocoa powder—sift it first, especially if your recipe calls for unsweetened cocoa. I learned this the hard way when my cake turned out dense and uneven; the fine particles clump like stubborn flour ghosts. A quick sift through a fine-mesh sieve guarantees smooth batter and that signature creamy texture.
- Cream Butter Cold: Take your unsalted butter straight from the fridge—yes, even if you’re eager to start. Cold butter creates tiny air pockets when creamed with sugar, which means a lighter cake. I used to let it sit out, and my cakes always came out heavier. Skip the waiting? At least let it sit in the freezer for 10 minutes first.
- Whisk Eggs Separately: Beat those eggs until they’re frothy and pale before folding them into the batter. I used to just crack them in and mix—big mistake. Separate whisking adds structure and keeps the cake from sinking in the middle. Bonus: No weird egg curdling in your red velvet.
- Check Oven Early: Red velvet cake sets faster than it looks—start checking for doneness 5 minutes before the recipe’s suggested time. My first few cakes were dry because I waited for the full 30-35 minutes. A toothpick with a few moist crumbs (not wet batter) is your friend. If in doubt, pull it early—it’ll finish cooking while cooling.
Dietary considerations for this dish
Gluten-Free Adaptation
For a gluten-free version, replace the 2 cups all-purpose flour with a 1:1 gluten-free baking flour blend like Bob's Red Mill 1-to-1 or King Arthur Measure for Measure. Add ½ tsp xanthan gum to the dry ingredients to mimic gluten's structure—this prevents crumbling. The cake will still be moist, but expect slightly denser texture. Use the same baking time, but check for doneness at 22 minutes—gluten-free batters often bake faster. 💛
Vegan Red Velvet
Make this cake dairy-free and vegan by substituting 1 cup coconut oil for the butter and oil, using 1 cup almond milk + 1 tbsp apple cider vinegar instead of buttermilk, and 2 flax eggs (2 tbsp ground flaxseed + 6 tbsp water). For the frosting, replace cream cheese with 8 oz vegan cream cheese like Kite Hill or Miyoko's, and use ½ cup coconut cream instead of heavy whipping cream. The texture remains rich, though slightly lighter.
Lower Sugar Option
Reduce the 1.5 cups granulated sugar to 1 cup and replace the remaining ½ cup with ½ cup applesauce or ½ cup mashed banana for natural sweetness. In the frosting, cut the powdered sugar to 2.5 cups and add 1 tbsp maple syrup to maintain creaminess. The cake will still taste decadent but with 30% fewer calories per slice. Balance the flavor by adding ½ tsp cinnamon to the dry ingredients.
Nut-Free Allergies
Ensure all ingredients are nut-free by checking labels on cocoa powder (some brands process in nut facilities) and vanilla extract (pure extracts are typically safe). Use sunflower seed oil instead of vegetable oil if concerned about cross-contamination. For the frosting, Earth Balance vegan butter can replace cream cheese if needed, though texture will differ slightly. Always verify all brands for allergen warnings—safety first! ✨
Dairy-Free Cream Cheese
For those avoiding dairy but not vegan ingredients, use dairy-free cream cheese like Kite Hill Almond-Free or Violife Just Like Cream Cheese. These maintain the tangy richness while being lactose-free. The frosting will still whip to stiff peaks, though it may require 1 extra minute of beating. Pair with the regular cake batter for a hybrid version that satisfies both dietary needs and flavor cravings.
Nutrition facts
Frequently asked questions
Why does my red velvet cake turn out dry?
Overbaking is the #1 culprit! Take the cake out when a toothpick comes out with just a few moist crumbs (not wet batter). Also check your butter—if it's not truly room temperature, the cake will dry out faster. For extra moisture, brush the warm layers with simple syrup (equal parts sugar + water) before frosting.
Can I make this cake in a 9-inch pan instead?
Yes, but adjust the baking time! For 9-inch pans, reduce the batter by about 25% and bake for 20-25 minutes instead of 25-30. The cake will be thinner but still delicious. For an 8-inch equivalent, you'd need about 1 cup batter per pan instead of 1.5 cups.
How do I get the perfect red color without overpowering the flavor?
Use gel food coloring (⅛ tsp) instead of liquid—it disperses evenly without adding liquid. Start with less and add gradually. For natural color, blend 1 tbsp raspberry puree into the batter. The key is balance: your cake should look vibrant red, not pink or purple!
Can I make this cake ahead of time?
Bake the layers 1 day ahead and store wrapped at room temperature. Frost the day of serving—this keeps the texture perfect. For the frosting, make it up to 3 days ahead and store in the fridge, rewhipping before using. The flavors actually improve overnight!
What's the secret to smooth frosting?
Cold cream cheese and powdered sugar are your best friends! Chill the cream cheese for 30 minutes before whipping, and use room-temperature heavy cream. Beat the cream cheese and powdered sugar for 2-3 minutes first to dissolve all lumps before adding the cream. Sift the powdered sugar for extra smoothness.