
Desserts
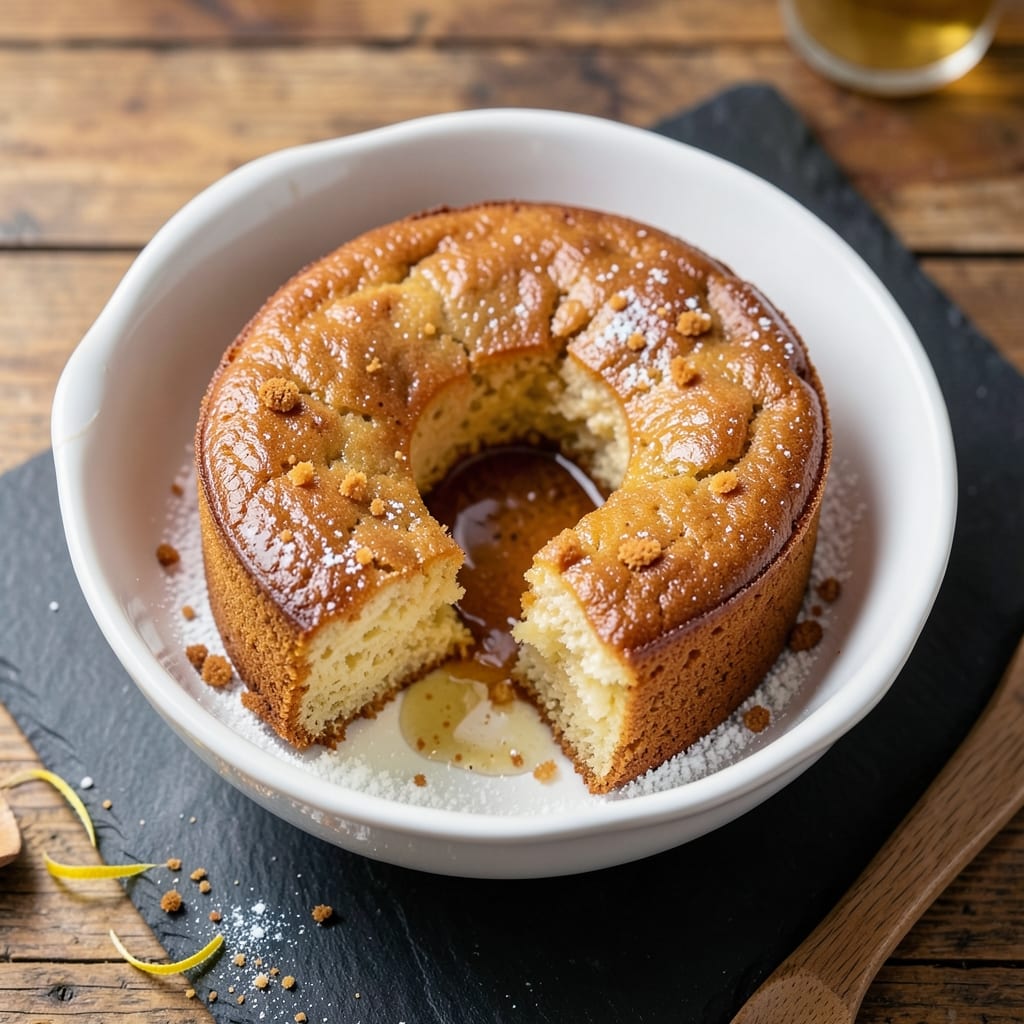
This all butter cake recipe delivers the richest, most tender crumb you'll ever taste—no oil substitutes needed. The secret lies in proper butter temperature and creaming technique, which creates a velvety texture that separates this cake from the rest. I've perfected this method over years of baking, and it consistently produces a moist interior with a delicate crumb that melts in your mouth.
The key to success begins with room-temperature butter and sugar, creamed together until light and fluffy. This process incorporates air into the batter, which expands during baking to create that signature tender crumb. The recipe uses all-purpose flour for structure while maintaining softness, and vanilla extract adds depth without overpowering the butter's natural richness. Every element works together to create a cake that's both impressive and foolproof.
What you'll end up with is a golden-domed cake with a fine, even crumb that stays moist for days. The butter flavor shines through in every bite, creating a rich yet balanced taste that pairs beautifully with any frosting or filling. This is the kind of cake that makes you look like a baking expert—even if you're just starting out.
Whether you're baking for a special occasion or simply craving a classic dessert, this recipe delivers consistent, professional-quality results. The beauty of this method is its versatility—use it for layer cakes, sheet cakes, or cupcakes, and always achieve that perfect texture. Let's get started on creating your perfect all butter cake.
Ingredients for all butter cake
Rich butter flavor meets delicate crumb—just these nine ingredients transform into velvety perfection.
| Ingredient | Amount | Notes |
|---|---|---|
| Unsalted Butter 🧈 | 1 cup | Room temperature, not melted |
| Granulated Sugar 🍚 | 2 cups | Superfine preferred for smoother texture |
| All-Purpose Flour 🌾 | 2 cups | Sifted, spooned lightly |
| Pure Vanilla Extract 🍯 | 2 tsp | Bourbon or imitation-free |
| Baking Powder 🍃 | 1 ½ tsp | Aluminum-free preferred |
| Salt 🧂 | ½ tsp | Fine sea salt |
| Large Eggs 🥚 | 4 whole | Room temperature |
| Whole Milk 🥛 | ¾ cup | Room temperature |
| Lemon Zest 🍋 | 1 tbsp | Freshly grated |
The butter makes or breaks this cake. Unsalted butter is non-negotiable—it gives that pure, rich flavor without competing with salt. Grab the European-style butter if you can (like Plugrá or President), but any good unsalted will work. Room temperature is critical—press a thumbprint into the butter; if it springs back slowly, it's ready. The sugar? Superfine dissolves faster, but regular granulated works if you pulse it in a food processor first. I always double-check my butter's temperature by testing the creaming stage—if it's too cold, the batter won't be light enough.
No vanilla extract? Vanilla bean paste works in a pinch, but trust me, pure extract makes the difference. Short on milk? Heavy cream or buttermilk both work, but adjust the leavening slightly if using buttermilk. The baking powder must be fresh—if it's over a year old, toss it. For the flour, King Arthur or Gold Medal are my go-tos, but any all-purpose will do. The lemon zest adds brightness without overpowering; if you don't have lemons, orange zest works too. And yes, you can skip the zest entirely if you're not a fan—this cake is already rich enough.
This batter keeps for 2 days in the fridge, covered tightly. For best results, bake the cake immediately after mixing—don't let the batter sit too long or it'll lose its lift. Store the finished cake in an airtight container at room temperature for 3-4 days, or freeze slices wrapped in plastic for up to 3 months. The flavor actually improves over time, so if you can, make it a day ahead. And if you're nervous about overmixing, don't be—this recipe is forgiving, even if you're new to baking.
Why You'll Love This Recipe
- Here’s what sold me: this cake begs to be made ahead. Slice it fresh, and it’s moist; save a piece for tomorrow, and it’s still perfect. Plus, the ingredients are basic—no fancy shortcuts needed. I’ve fed a crowd with half the cost of store-bought, and everyone leaves happy. My secret weapon? A sharp knife and a little patience.
- No-Mix Magic: I swear by this recipe—just cream butter and sugar until light, fold in dry ingredients, and boom. No food processor, no stress, just a whisk and your arms. The secret’s in that slow butter-sugar dance, which makes the whole thing come together faster than you can say “preheat oven.”
- Butter’s Rich Payoff: Honestly, the difference between this and other cakes is night and day. That cold, unsalted butter? It keeps the crumb tender yet rich, while the vanilla extract (don’t skimp!) adds this warm, cozy depth. It’s the kind of flavor that makes people pause mid-bite—“Wait, what’s in this?”—and then ask for the recipe.
- Every Occasion Cake: Between us, this is my go-to for birthdays, potlucks, or even a lazy Sunday. Frost it with cream cheese, drizzle with chocolate, or leave it naked—it’s the blank canvas of cakes. And because it’s simple, I can pull it off even when I’m winging it. (Yes, even on a Tuesday night.)
Step-by-step instructions for all butter cake
Here's how to create the perfect all butter cake with a tender crumb and rich flavor.
Cream the Butter and Sugar Together
In a large mixing bowl, combine the 1 cup unsalted butter and 2 cups granulated sugar. Using an electric mixer on medium speed, beat until light and fluffy—this should take about 3-5 minutes. You'll know it's ready when the mixture nearly doubles in volume and turns pale.
Here's the thing—this creaming process incorporates air into the butter, which creates that signature tender crumb. I like to scrape the sides of the bowl every 30 seconds to ensure everything gets evenly mixed. If your butter isn't at room temperature, it won't cream properly, so make sure it's soft enough to leave a slight indent when pressed.
Add Eggs and Lemon Zest
Add the 4 whole large eggs one at a time, mixing well after each addition. Then stir in the 1 tablespoon lemon zest and 2 teaspoons pure vanilla extract. Mix on low speed just until combined—about 30 seconds total.
This is where the lemon zest adds that bright, citrusy note that balances the richness of the butter. I always use freshly grated zest because it makes a noticeable difference in flavor. If you're worried about bitterness, don't be—just 1 tablespoon is perfect for this recipe.
Combine Dry and Wet Ingredients
In a separate bowl, whisk together the 2 cups all-purpose flour, 1.5 teaspoons baking powder, and 0.5 teaspoon salt. Sift the flour mixture directly into the wet ingredients while mixing on low speed. Add the 0.75 cup whole milk and mix just until the flour is incorporated.
Real talk: don't overmix here. Once the flour disappears, stop mixing immediately. Overmixing develops gluten, which makes the cake tough instead of tender. You should still see a few streaks of flour in the batter—this is normal and actually what we want.
Prepare and Bake the Cake
Preheat your oven to 350°F and grease two 9-inch round cake pans with butter or baking spray. Divide the batter evenly between the pans. Bake for 25-30 minutes or until a toothpick inserted into the center comes out clean.
I press down gently on the cake during the first 10 minutes of baking to prevent it from doming too much. This ensures even baking and a smooth top. Don't open the oven door during the first 20 minutes—this prevents the cake from sinking in the middle.
Cool and Enjoy
Remove the cakes from the oven and let them cool in the pans for 10 minutes. Then transfer them to a wire rack to cool completely. Once cooled, you can frost with your favorite buttercream or simply enjoy them plain.
This cake is best served at room temperature, so give it at least 1 hour to fully cool. The texture should be moist and tender with a fine crumb—no dense or dry spots. If you're making layers, level the tops with a serrated knife before frosting for a professional finish.
Pro Tips For Making All Butter Cake
- CREAM BUTTER TO ROOM TEMP: Mix the butter and sugar when the butter is just soft—press your finger in, and it should leave a slight indent. Cold butter won’t emulsify properly, leaving your cake dense, while melted butter can make it greasy. I learned this the hard way after a cake that looked perfect but tasted like a brick.
- SIFT DRY INGREDIENTS TOGETHER: Don’t just dump flour and baking powder into the bowl—sift them together first. This prevents lumps and ensures even distribution, which is especially critical for an all-butter cake where structure matters. I used to skip this, and my cakes would rise unevenly, no matter how carefully I mixed.
- STOP WHEN IT SPRINGS BACK: Test doneness by pressing the center gently—it should spring back slowly, not bounce right up. Overbaking dries out the crumb, and underbaking leaves it gummy. Pull it out when it’s just slightly under, then let it cool fully before slicing. (Yes, even if you’re impatient like me.)
- ADD VANILLA TO WET MIX: Fold the vanilla extract into the wet ingredients after combining butter and sugar. This helps distribute the flavor evenly instead of pooling in spots. My grandmother swore by this, and she was right: the vanilla taste is richer and more consistent throughout the cake.
Make-ahead tips for all butter cake
Batter Prep Ahead
Mix your batter up to 2 days in advance and store it in an airtight container in the fridge. When ready to bake, let it sit at room temperature for 30-60 minutes before pouring into pans. This gives the ingredients time to blend fully without losing lift. I like to cover the bowl with plastic wrap pressed directly on the surface to prevent a skin from forming. 🧈
Baked Cake Storage
Once fully cooled, wrap individual layers or the whole cake tightly in plastic wrap or place in an airtight container. Store at room temperature for 3-4 days—the flavors actually deepen over time. For longer storage, freeze the cake (unfrosted) for up to 3 months. Thaw overnight in the fridge before frosting or serving.
Frosting Prep
Make your buttercream or ganache 1 day ahead and store it in the fridge. Let it soften slightly at room temperature for 10-15 minutes before spreading—this makes it easier to work with. I often make extra frosting and freeze it in 1-tbsp portions for quick touch-ups later. For a smoother finish, chill your cake layers for 15 minutes before frosting to firm up the buttercream.
Layering Tips
If assembling layers, use cardboard cake rounds as a base to prevent sogginess. Place them on a wire rack before adding frosting. For extra stability, chill the assembled cake in the fridge for 30 minutes before slicing. This helps the frosting set properly and keeps the layers intact. I always use a serrated knife to level the tops—it gives a cleaner finish than a regular knife.
Freezing Fully Frosted
For a fully frosted cake, wrap it tightly in plastic wrap first, then place in a freezer bag with all air squeezed out. Freeze for up to 2 months. Thaw in the fridge overnight before serving. The frosting might soften slightly, but it'll firm up at room temperature. This method works best for cakes you want to serve chilled, like a lemon buttercream cake.
Reheating Slices
To revive slightly dried slices, warm them in the microwave for 10-15 seconds or at 300°F for 5 minutes wrapped in foil. A quick spritz with water before reheating helps restore moisture. For a more professional touch, brush warm slices with a little simple syrup (equal parts sugar and water, heated until dissolved) before serving. 💫
Nutrition facts
Frequently asked questions
Why does this recipe use only butter instead of oil?
Butter creates a richer flavor and tender crumb that oil can't match. The fat content in butter contributes to a moist texture while the milk solids add depth. For the best results, always use unsalted butter—it gives you complete control over the salt level in your cake. The creaming process with butter also incorporates more air, which is key for that signature light texture.
Can I substitute European-style butter for regular butter?
European-style butter (like Plugrá or President) works perfectly—it has a higher fat content (82-86% vs. 80-81% in US butter), which makes the cake even more tender. If you only have regular butter, use the full 1 cup called for in the recipe. Never reduce the butter amount, as this affects both flavor and texture. The extra fat is what makes all butter cakes so special!
What's the best way to check if my cake is done?
Insert a toothpick into the center—it should come out clean or with just a few moist crumbs. Tap the top gently: if it sounds hollow, it's done. Never rely on visual cues alone, as cakes can look done but still be underbaked inside. For this recipe, 25-30 minutes at 350°F is ideal, but ovens vary, so always check with the toothpick test.
How do I prevent my cake from cracking?
Cracking usually happens from sudden temperature changes or overbaking. Avoid opening the oven door in the first 20 minutes, and bake until just done. Let the cake cool in the pan for 10 minutes before transferring to a rack. If you notice cracks forming during baking, gently press down on the cake with a spoon to redistribute the batter. Chilling the cake layers for 15 minutes before frosting also helps prevent cracks.
Can I make this cake in a different pan size?
Yes! For a 9x13-inch pan, bake at 350°F for 30-35 minutes. For cupcakes, fill liners ⅔ full and bake for 18-22 minutes. Adjust baking time based on your pan material—dark pans may need 5 minutes less time. Always use an oven thermometer to confirm your oven's accuracy, as this affects baking times significantly.