
Desserts
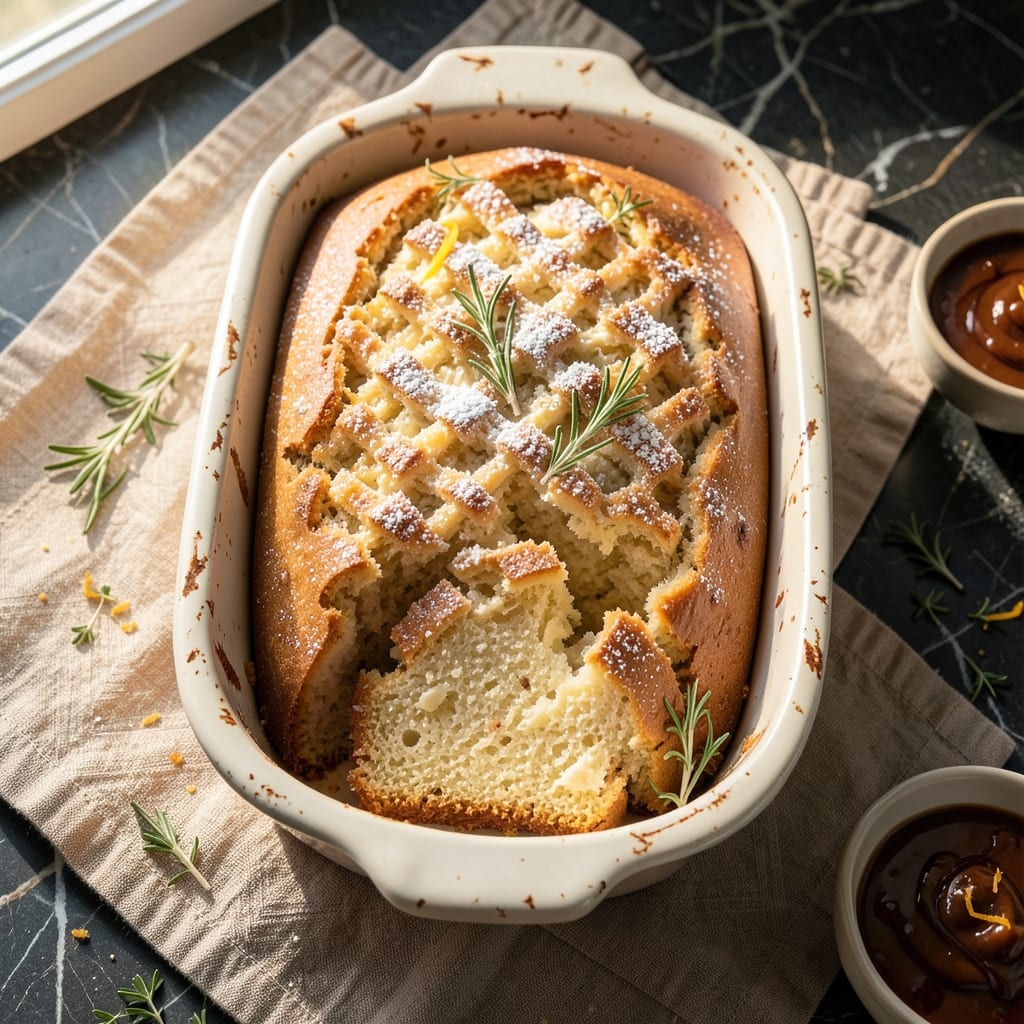
This all butter loaf cake recipe delivers layers of rich, velvety crumb and a golden, crisp crown—the kind of dessert that makes every slice feel like a celebration. The secret lies in creaming butter and sugar to perfection, creating a tender crumb that melts in your mouth while maintaining just enough structure to hold its shape. I've perfected this technique over years of baking, ensuring a foolproof method that yields consistent results.
The beauty of this recipe is its simplicity—no fancy equipment or complicated steps, just high-quality butter worked into a light, airy batter that bakes into a moist, flavorful loaf. Baking at a precise temperature ensures even cooking, while a simple glaze or dusting of powdered sugar adds that final touch of elegance. This is the kind of cake that feels special without requiring hours in the kitchen.
What you'll end up with is a buttery, fragrant loaf that's perfect for brunch, dessert, or even a thoughtful gift. The aroma alone will have everyone gathering around the table, and each slice delivers that perfect balance of richness and tenderness. Whether you're a seasoned baker or just starting out, this recipe is designed to impress.
The best part? This loaf cake freezes beautifully, making it ideal for meal prep or special occasions. Let's get started on creating a dessert that's as delicious as it is satisfying.
Ingredients for all butter loaf cake
Eight simple ingredients transform into a showstopping loaf cake with layers of buttery perfection.
| Ingredient | Amount | Notes |
|---|---|---|
| Unsalted Butter 🧈 | 1 ½ cups | Cold, cut into cubes (the good stuff, not margarine) |
| Granulated Sugar 🍚 | 2 cups | Superfine preferred for smoother texture |
| Large Eggs 🥚 | 4 whole | Room temperature for best mixing |
| All-Purpose Flour 🌾 | 2 ½ cups | Sifted, spooned and leveled (King Arthur preferred) |
| Baking Powder 🧂 | 1 tbsp | Freshly opened for best lift |
| Salt 🧂 | ½ tsp | Diamond Crystal preferred (less iodine) |
| Vanilla Extract 🌿 | 2 tsp | Pure Madagascar bourbon vanilla |
| Whole Milk 🥛 | ¾ cup | Room temperature, full-fat for richness |
| Powdered Sugar 🍚 | ½ cup | For glaze (plus 1 tbsp milk) |
| Lemon Zest 🍋 | 1 tbsp | Fresh, finely grated (optional but bright) |
Butter is the star here—Plugrá or Land O'Lakes are my go-tos, but any high-fat, unsalted butter works. Grab the coldest butter from your fridge (the kind that needs 10 minutes to soften) and cut it into even cubes. This ensures even distribution in the batter. If your butter smells like milk or has a yellowish tint, it's past its prime—replace it. The sugar? Superfine if you have it, but regular granulated works too—just pulse it in a food processor first. Sifting the flour is non-negotiable—this prevents dense pockets in your cake. Pro tip: Measure flour by spooning it into your cup and leveling it off (don't scoop).
No vanilla extract? Almond extract at half the amount gives a similar depth, though less floral. Running short on milk? Heavy cream thinned with water works in a pinch (use 0.5 cup cream + 0.25 cup water). For the lemon zest, if you've got no lemons, 1 tsp lemon juice + 0.5 tsp sugar mimics that bright note. The baking powder must be fresh—if it's over a year old, toss it. And that powdered sugar glaze? Confectioners' sugar from the canister is fine, but if it's clumpy, sieve it first. Trust me, that extra step makes all the difference in the smoothness.
This cake keeps beautifully—3 days at room temperature wrapped in foil, or 1 week refrigerated in an airtight container. For longer storage, freeze the whole loaf (unfrosted) for up to 3 months. Thaw overnight at room temperature—no need to microwave. The glaze sets quickly, so have your powdered sugar and milk measured before you pull it from the oven. And if anyone asks, this tastes even better the next day (like all good cakes, it needs time to mellow).
Why You'll Love This Recipe
- No Mixer Needed: I swear by this—just cream butter and sugar until light, fold in dry ingredients, and you’re done. No electric mixer, no fuss, just elbow grease that pays off with that signature tender crumb.
- Rich Without Fuss: That all-butter ratio? It’s the secret weapon—creamy, buttery layers that don’t require fancy techniques. Honestly, the moment you pull it from the oven, you’ll understand why people pay for bakery loaves.
- Weeknight Magic: Slice it warm with breakfast or pack it for lunch—it’s my go-to when I need something reliable. Between us, it’s the only cake I bake that doesn’t scream “special occasion” but still feels like a treat.
- Leftovers That Last: This cake keeps beautifully for days, and honestly? It’s even better the next day. Toast a slice for a cozy snack, or freeze slices for a quick dessert when you’re too tired to bake. Budget-friendly and foolproof.
Step-by-step instructions for all butter loaf cake
This rich, buttery loaf cake delivers layers of flavor and a crisp crown every time.
Cream the Butter and Sugar to Light and Fluffy
In a stand mixer fitted with the paddle attachment, beat the 1.5 cups unsalted butter and 2 cups granulated sugar on medium speed for 5-7 minutes. You're aiming for a pale, fluffy mixture that nearly doubles in volume—the butter should look like ribbons pulling away from the bowl. This step incorporates air, which creates that tender crumb and helps the cake rise beautifully.
Here's the thing—don't rush this step. I've found that under-creaming leads to dense cake, while over-creaming can make it too dry. The perfect moment is when the mixture is light, airy, and leaves clean streaks on the sides of the bowl. Scrape down the sides of the bowl with a spatula every couple of minutes to ensure even mixing.
Add Eggs and Vanilla for Richness
Add the 4 whole large eggs, one at a time, mixing on low speed after each addition until fully incorporated. Then add the 2 teaspoons vanilla extract and mix briefly for 10 seconds. The eggs should blend smoothly into the mixture, creating a thick, creamy batter. If you're using room-temperature eggs, they'll incorporate more easily and create a lighter texture.
I like to give the batter a quick taste at this stage—it should be sweet and rich, with a hint of vanilla. If you notice any curdling, don't worry; it will smooth out once you add the dry ingredients. The vanilla extract is where the magic happens—pure Madagascar bourbon vanilla adds depth that imitation just can't match.
Combine Dry Ingredients and Alternate with Milk
In a separate bowl, whisk together the 2.5 cups all-purpose flour, 1 tablespoon baking powder, and 0.5 teaspoon salt. Sift the flour mixture over the wet ingredients in three parts, alternating with the 0.75 cup whole milk in three parts as well. Start and end with the flour to ensure even distribution. Mix on low speed just until combined—you should still see small flour streaks. Overmixing develops gluten, which can make the cake tough.
This is where the cake's structure comes together. The milk adds moisture and helps activate the baking powder for that perfect rise. I like to use a silicone spatula to gently fold the dry ingredients into the wet, making sure not to overwork the batter. The final mixture should be smooth but still slightly thick—it should hold its shape when you lift the spatula.
Fold in Lemon Zest for Brightness
Gently fold in the 1 tablespoon lemon zest using a rubber spatula. The zest adds a bright, citrusy note that cuts through the richness of the butter. Be careful not to overmix—just combine it evenly throughout the batter. The lemon zest should be finely grated and free of any pith, which can make the cake bitter. If you're using fresh zest, make sure it's finely grated for a smooth texture.
At this point, your batter is ready for the oven. It should be thick, smooth, and slightly glossy. If the batter looks too thin, you can add an extra 1-2 tablespoons of flour to help it hold its shape. The lemon zest will infuse the cake with a subtle brightness that balances the buttery richness—trust me, it makes all the difference.
Bake to Golden Perfection
Preheat your oven to 350°F and grease a 9x5-inch loaf pan generously with butter, then dust it with flour. Pour the batter into the prepared pan and smooth the top with a spatula. Bake for 50-60 minutes, or until a toothpick inserted into the center comes out clean and the top is golden brown. The cake should spring back slightly when pressed gently in the center.
Here's a pro tip: I like to place the loaf pan on a baking sheet lined with parchment paper to catch any drips and make cleanup easier. The cake is done when the edges pull away from the pan slightly and the top is beautifully crisp. If the top browns too quickly, tent the pan with foil to prevent over-browning while the center finishes baking.
Glaze and Serve
While the cake is still warm, make the glaze by whisking together the 0.5 cup powdered sugar and 1 tablespoon milk until smooth. Drizzle the glaze evenly over the top of the cake, letting it drip slightly down the sides for that bakery-style finish. The glaze should be thin enough to spread easily but thick enough to hold its shape. Let the glaze set for 10-15 minutes before slicing.
This cake is best served at room temperature, so let it cool completely before cutting. Each slice should be rich, moist, and layered with buttery flavor. The lemon zest adds a subtle brightness that makes every bite feel fresh and inviting. Serve with a cup of tea or coffee for the ultimate indulgence—you'll want to savor every crumb of this decadent loaf cake.
Pro Tips For Making All Butter Loaf Cake
- Cream Butter Slowly: Use a hand mixer on low speed when combining the butter and sugar—rushing this step traps air unevenly, leading to a dense crumb. After 2-3 minutes, you’ll see a ribbon consistency; that’s your cue to add the eggs one at a time. ---
- Sift Flour Twice: I learned this the hard way—skipping the second sift means baking powder clumps hide in your batter, causing uneven rises. Fold in flour in two additions: first half lightly mixed, then the rest just until combined. Your cake will thank you with a uniform texture. ---
- Avoid Overmixing Eggs: Once you’ve added all three eggs, mix just until the yolks disappear—overbeating turns them into glue, and your loaf will sink in the center. The batter should look thick but not stiff; if it clings to the whisk, you’ve gone too far. ---
- Test Doneness Early: Start checking for doneness at 45 minutes (yes, even if the recipe says 50-60). Insert a skewer—if it comes out clean but crumbs stick slightly, that’s perfect. Pulling it too soon makes for a gummy center; leaving it too long dries out the edges. Trust your nose too: a sweet, buttery aroma means it’s ready.
Essential equipment for this dish
Stand Mixer Essentials
Your stand mixer is the MVP for this recipe—I use my KitchenAid Artisan Series with the paddle attachment for creaming butter and sugar. The paddle’s flat surface ensures even mixing without overincorporating air like a whisk would. If you don’t have a mixer, a hand mixer works, but you’ll need to scrape the bowl every 30 seconds to prevent uneven creaming. 💫
For the bowl, I recommend a stainless steel mixing bowl (like the OXO Good Grips set) because it stays cool and prevents butter from melting too quickly. If yours is plastic, chill it in the freezer for 10 minutes before mixing to maintain proper texture. Pro tip: Use the largest bowl that fits your mixer’s base to give the ingredients room to expand during creaming.
Measuring Tools
Precision matters most with butter and flour—use a digital kitchen scale for accuracy, especially if you’re measuring by weight (like 340g butter instead of cups). For dry ingredients, a clear measuring cup with leveling off works best. I swear by the OXO Good Grips set—their spoon-and-level design prevents overpacking flour, which can make your cake dense. 🧈
For liquids, a liquid measuring cup with clear markings is a must. Pour the milk into it first, then add the vanilla extract—this prevents spills when adding to the batter. A medicine dropper comes in handy for precise vanilla extraction measurements if you’re feeling fancy. Trust me, those tiny details add up to a smoother batter.
Baking Pans
A 9x5-inch loaf pan is non-negotiable for this recipe—I use Wilton’s non-stick loaf pans because they release the cake easily without sticking. If yours isn’t non-stick, grease it generously with butter and dust with flour (or use baking spray like Misto). For extra insurance, line the bottom with parchment paper to prevent browning. 🔥
For even baking, place your loaf pan on a baking sheet (like USA Pan’s half-sheet) before putting it in the oven. This catches any drips and makes cleanup a breeze. If your oven runs hot, lower the rack to the middle position—this ensures even heat distribution and prevents the top from browning too quickly.
Optional Extras
For lemon zest, a microplane is the best tool—it creates fine, even zest without the bitter pith. If you’re short on time, a zester works too, but it’s slower. Store-bought zest is fine in a pinch, but fresh is always brighter. I keep a small bowl nearby to catch the zest as I grate it—this prevents cross-contamination with other ingredients. 🍋
A silicone spatula (like OXO’s Good Grips) is perfect for folding in the lemon zest and scraping every last bit of batter from the bowl. For the glaze, a small whisk and measuring spoons ensure smooth, even drizzling. And if you’re feeling ambitious, a piping bag with a small round tip lets you create decorative drips for a bakery-style finish.
Nutrition facts
Frequently asked questions
Why does this recipe use all butter instead of oil?
All butter creates a richer, more flavorful cake with a tender crumb and crisp crown. Butter contains both fat and water, which helps create steam during baking—this produces that signature moist texture. Oil would make the cake denser and less flavorful. The high butter content also gives that perfect golden crust that bakes love at first sight!
Can I make this cake without a stand mixer?
Use a hand mixer or even a sturdy wooden spoon with elbow grease. Cream the butter and sugar by hand for 8-10 minutes, scraping the bowl frequently. For the eggs, mix them in one at a time with a whisk. The key is patience—just work the butter until it's light and fluffy. You'll get the same delicious results!
How do I know when the cake is fully baked?
Insert a toothpick into the center—it should come out clean with just a few moist crumbs. The cake should also spring back slightly when pressed gently in the middle and have a golden brown color. If the top browns too quickly, tent with foil. Remember, the center might look slightly underdone but will set as it cools.
Can I add mix-ins like chocolate chips or nuts?
Yes, but keep portions small—½ cup max of chocolate chips or ⅓ cup chopped nuts. Fold them in gently after adding the milk to avoid overmixing. For best results, use high-quality dark chocolate chunks or toasted pecans. The butter richness pairs beautifully with these additions, but too many can make the cake dense.
Why does my cake sink in the middle after baking?
This usually happens from overmixing the batter or opening the oven door too early. The cake relies on baking powder for lift—mix just until combined. Also, check your baking powder is fresh (it loses potency over time). For next time, bake at 325°F instead of 350°F if your oven runs hot. The cake will rise more gradually.