
Desserts
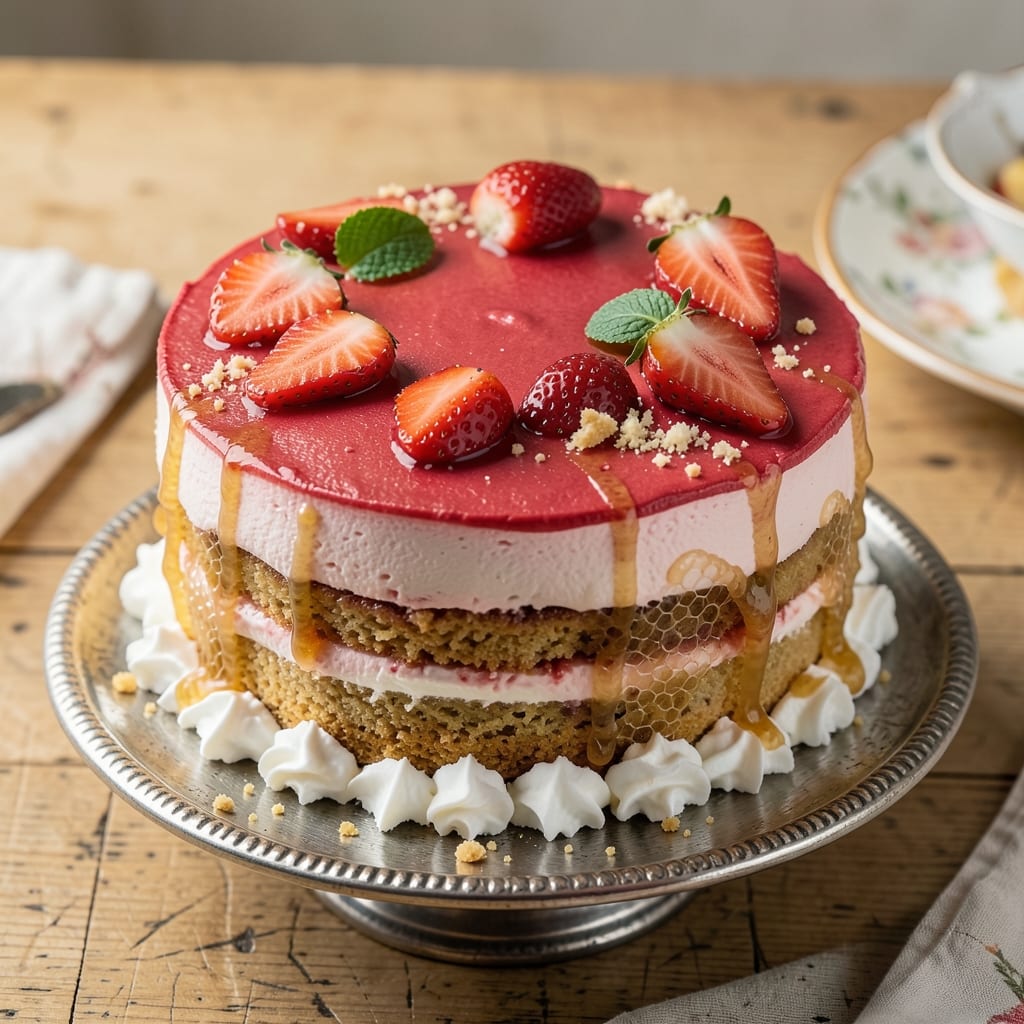
This all-natural strawberry cake delivers the perfect balance of tender crumb, juicy berries, and vanilla depth—all without refined sugar or artificial ingredients. 🌸 The secret lies in using honey for natural sweetness and coconut oil for moisture, ensuring every slice stays rich and flavorful while keeping the cake light. Fresh strawberries folded into the batter create pockets of bursting sweetness that make this dessert truly special.
What sets this recipe apart is its simplicity—just a handful of wholesome ingredients that come together in one bowl. The cake layers are moistened with a light strawberry glaze, adding an elegant finish without overpowering the natural flavors. Whether you're baking for a celebration or a simple treat, this cake feels indulgent yet guilt-free.
By the time it emerges from the oven, you'll have a golden, fragrant cake with tender layers and just the right amount of strawberry brightness. The texture is perfectly balanced—soft enough to melt in your mouth yet sturdy enough to hold up to fresh berries or a dollop of coconut whipped cream. It's the kind of dessert that tastes homemade, even when you're the one making it.
Serve it warm with a sprinkle of powdered sugar or chilled with a scoop of vanilla ice cream for a showstopping finish. The natural ingredients shine through, making this cake as beautiful as it is delicious. Let's get baking!
Ingredients for all natural strawberry cake
Fresh strawberries and honey star this naturally sweetened cake—simple ingredients for a showstopping dessert.
| Ingredient | Amount | Notes |
|---|---|---|
| All-Purpose Flour 🌾 | 2 ½ cups | Sifted for light texture |
| Granulated Honey 🍯 | 1 cup | Local honey preferred |
| Unsalted Butter 🧈 | 1 cup | Room temperature, full-fat |
| Coconut Oil 🫒 | ½ cup | Refined for neutral flavor |
| Large Eggs 🥚 | 2 whole | Room temperature, separated |
| Vanilla Extract 🌸 | 2 tsp | Pure, high-quality extract |
| Baking Powder 🍞 | 2 tsp | Aluminum-free preferred |
| Salt 🧂 | ½ tsp | Fine sea salt |
| Fresh Strawberries 🍓 | 1 ½ cups | Hulled and quartered |
| Plain Greek Yogurt 🥛 | ½ cup | Full-fat for richness |
| Powdered Sugar 🍬 | ½ cup | For glaze |
| Lemon Juice 🍋 | 2 tbsp | Freshly squeezed |
The strawberries make or break this cake. Look for deep red, firm berries at the grocery store—Whole Foods or local farmers markets have the best quality. I always buy a little extra to slice over the top too. Honey is key here—local honey adds subtle floral notes, but any liquid honey works. The butter and coconut oil combo keeps the cake moist without being greasy. Room temperature eggs whip up lighter, so take them out 30 minutes before baking if they're cold. For the Greek yogurt, full-fat is worth it—it makes the cake tender and rich.
No honey? Maple syrup works in a pinch, but reduce the amount by 1 tbsp since it's sweeter. Short on strawberries? Frozen berries work too, just thaw and drain them well. The powdered sugar glaze can be swapped for a simple honey drizzle if you're avoiding refined sugar. For extra vanilla flavor, add a pinch of vanilla bean paste if you've got it. The baking powder is non-negotiable—double-check it's fresh by mixing with water (it should bubble). If your recipe calls for buttermilk and you don't have it, mix 1 tbsp lemon juice or vinegar with 1 cup milk and let it sit for 5 minutes.
Strawberries keep best in the fridge for 3-4 days—use the extra ones for smoothies or oatmeal. The cake itself stays fresh for 4 days wrapped tightly at room temperature, or 1 week in the fridge. For longer storage, slice and freeze portions between parchment paper—they'll keep for 3 months. I always make a double batch because it disappears fast. The glaze sets quickly, so assemble the cake right before serving for the prettiest presentation.
Why You'll Love This Recipe
- No Mixer Needed: Honestly, I swear by this recipe when I’m in a rush—just cream the honey and butter by hand, fold in the eggs, and you’re halfway there. The coconut oil keeps it tender without needing fancy equipment.
- Honey-Sweetened Magic: That granulated honey isn’t just sugar—it caramelizes into a deep, floral sweetness that makes the strawberries pop. (Yes, even if you’re not a strawberry fan, this will change your mind.)
- Weeknight or Celebration: Between us, I’ve served this at book club gatherings and solo Tuesday dinners. The same batter works for a single layer or a tower—just adjust the pan. Zero stress, all reward.
- Budget-Friendly Luxury: Butter and eggs feel fancy, but they stretch further than you’d think. A single batch feeds four, and leftovers? They’re still moist enough to slice the next day—no sad, dry crumbs here.
Step-by-step instructions for all natural strawberry cake
Let's bake this moist, naturally sweetened strawberry cake with a secret yogurt boost for tender crumb.
👨🍳 Step 1: Prep the Strawberry Filling and Mix Wet Ingredients
Start by hulling and quartering the 1.5 cups fresh strawberries. Toss them with the 2 tablespoons lemon juice and set aside—the acidity brightens their flavor and prevents browning. In a medium bowl, whisk together the 1 cup granulated honey, 0.5 cup coconut oil, and 0.5 cup plain Greek yogurt until smooth. This honey-yogurt base keeps the cake moist without needing extra fat.
In a separate large bowl, beat the 1 cup unsalted butter and 2 whole large eggs until pale and fluffy—about 3 minutes with an electric mixer. The butter should be room temperature but not greasy. Add the vanilla extract and mix for another 30 seconds to fully incorporate. This creaming step is what creates that light, airy texture we're after.
👨🍳 Step 2: Combine Dry Ingredients and Fold Gently
Sift the 2.5 cups all-purpose flour into the wet mixture, then whisk in the 2 teaspoons baking powder and 0.5 teaspoon salt. I always sift the flour first—it prevents lumps and gives the cake a lighter texture. Gently fold in the strawberry mixture using a spatula, being careful not to overmix. You'll see some purple streaks, and that's perfect—it means the berries are distributed throughout.
Here's the thing—don't overmix. You want to see just a few flour streaks remaining. Overmixing develops gluten, which makes cakes tough. Fold until the batter is just combined, about 10-15 strokes with the spatula. The batter will be thick but pourable, and that's exactly what we want for that perfect cake texture.
🔥 Step 3: Bake Until Golden and Springy
Preheat your oven to 350°F and grease two 8-inch round cake pans (or line them with parchment paper). Divide the batter evenly between the pans and smooth the tops. Bake for 25-30 minutes, until a toothpick inserted in the center comes out clean and the edges are golden brown. I like to tap the sides of the pans gently—when the cake springs back slightly, that's your signal it's done.
Don't open the oven door early to check—this causes the cakes to sink. If you're unsure, trust the timer first. The cakes will continue cooking for a few minutes after you remove them. Let them cool in the pans for 10 minutes before transferring to a wire rack to cool completely. This gradual cooling prevents cracking.
🍳 Step 4: Assemble with Strawberry Glaze
While the cakes cool, make the glaze by whisking together the 0.5 cup powdered sugar and any strawberry juices that collected at the bottom of the bowl during baking. If needed, add 1-2 teaspoons water to reach a drizzling consistency. You want it thick enough to coat but still pourable—like heavy syrup.
Once the cakes are completely cool, place one cake layer on a serving plate. Spread a thin layer of the strawberry glaze on top, then add the second cake layer. Drizzle the remaining glaze over the top and sides, letting some of it pool at the edges for that bakery-style look. For extra presentation, top with a few fresh strawberry slices or a dusting of powdered sugar. This cake tastes even better the next day when the flavors meld together!
Pro Tips For Making All Natural Strawberry Cake
- Melt Butter Slowly: Heat the unsalted butter and coconut oil together over low heat—just until the butter turns golden and smells nutty, but don’t let it brown. I learned this the hard way: rushing it makes the cake taste buttery instead of rich, and the texture gets gummy. Take your time; it’s the thing that matters most for that perfect balance of sweetness and depth. ---
- Whisk Eggs Cold: Crack your large eggs into a separate bowl first, then whisk them before adding them to the warm butter mixture. Cold eggs temper the heat better, and you’ll avoid scrambling them—trust me, I’ve seen it happen when someone skips this. The result? A smoother batter and no weird lumps in your cake. ---
- Fold in Strawberries Gently: If you’re adding fresh strawberries, chop them small and fold them in last, using a spatula to cut through the batter just enough to distribute them. Dumping them in roughly makes for a lumpy cake—your future self will thank you for this extra 30 seconds of care. (Yes, even if you’re impatient like me.) ---
- Skip the Overmixing: Once you add the flour, mix just until combined—no more. Overmixing develops the gluten, and that’s how you end up with a tough, dense cake instead of a tender one. I was skeptical until I tried it: the texture is noticeably lighter when you resist the urge to stir like you’re making pancakes.
Make-ahead tips for leftovers
Batter Prep Ahead
Mix the cake batter up to 24 hours in advance and store it in an airtight container in the fridge. The flavors meld beautifully overnight, and the batter will be even more flavorful when you bake it. Just let it sit at room temperature for 30 minutes before dividing into pans—cold batter can cause uneven baking. I always make the batter the night before so I can focus on baking fresh the next day. 💫
Bake and Freeze Layers
Bake the cake layers as directed, then cool completely before wrapping each layer individually in plastic wrap. Place the wrapped layers in a freezer bag and freeze for up to 1 month. Thaw overnight in the fridge before assembling. This is my go-to method for entertaining—I bake ahead and assemble the cake just before serving. The texture stays perfect when frozen this way. ❄️
Glaze Prep in Advance
Make the strawberry glaze up to 3 days ahead and store it in a small glass jar in the fridge. Stir well before using—it thickens as it sits. For a quicker assembly, you can even make the glaze the day before and let it come to room temperature while the cake thaws. The glaze keeps its shine and consistency beautifully when stored properly. 🍓
Fully Assembled Cake
For maximum freshness, assemble the cake 1 day before serving and store it wrapped at room temperature. The flavors deepen as it sits, and the glaze sets perfectly. If you need to store it longer, slice the assembled cake and freeze the portions on a tray before transferring to a bag. Reheat slices in the microwave for 10-15 seconds to restore moisture. This cake keeps well for 5 days when stored properly. 💛
Strawberry Prep Shortcut
Save time by prepping the strawberries the night before. Hull and quarter 2 cups of strawberries (you'll have extras for topping) and store them in a bowl with 2 tbsp lemon juice in the fridge. The acidity preserves their color and flavor perfectly. I always do this because fresh strawberries are my favorite part of the cake, and prepping ahead ensures they stay vibrant. 🍋
Make-Ahead Serving Ideas
Use your prepped cake for make-ahead desserts like cake pops or trifles. Crumble cooled cake layers into 1 cup lollipop molds and mix with ½ cup strawberry jam to bind. Freeze for 2 hours, then dip in melted chocolate. For trifles, layer cake with whipped coconut cream and fresh berries in a glass dish—it's stunning and ready in minutes. These ideas turn your cake into party-ready treats! 🎉
Nutrition facts
Frequently asked questions
Can I substitute maple syrup for honey in this recipe?
Yes, but use 3/4 cup maple syrup instead of 1 cup honey—maple syrup is sweeter and more concentrated. The cake will still be moist, but the flavor profile will be slightly different. For best results, reduce the amount by 1 tablespoon and add 1 tablespoon water to maintain the right consistency.
How do I keep the cake moist without butter?
Replace the butter with 1 cup coconut oil (refined for neutral flavor) or ½ cup applesauce for moisture. The Greek yogurt and honey already add richness, so these swaps work well. For extra moisture, brush the cooled layers with strawberry syrup before assembling.
Why did my cake sink in the middle?
This usually happens from opening the oven door too early or underbaking. Always check for doneness with a toothpick—it should come out clean. Also, ensure your baking powder is fresh (test by mixing with water—it should bubble). Let the cake cool in the pan for 10 minutes before removing to prevent collapsing.
Can I make this cake gluten-free?
Swap the all-purpose flour for a 1:1 gluten-free baking flour blend (like Bob's Red Mill). Add ½ teaspoon xanthan gum if your blend doesn't include it. The cake will still be tender, but gluten-free flours absorb more liquid—reduce other liquids by 2 tablespoons if needed.
How can I make this cake vegan?
Use flax eggs (mix 2 tbsp ground flaxseed + 6 tbsp water per egg) and replace honey with ¾ cup maple syrup**. For butter, use 1 cup coconut oil or vegan butter. The Greek yogurt can be swapped for ½ cup coconut yogurt or silken tofu blended smooth. Test the batter consistency—it may need 1-2 extra tablespoons plant milk.