
Breakfast & Brunch
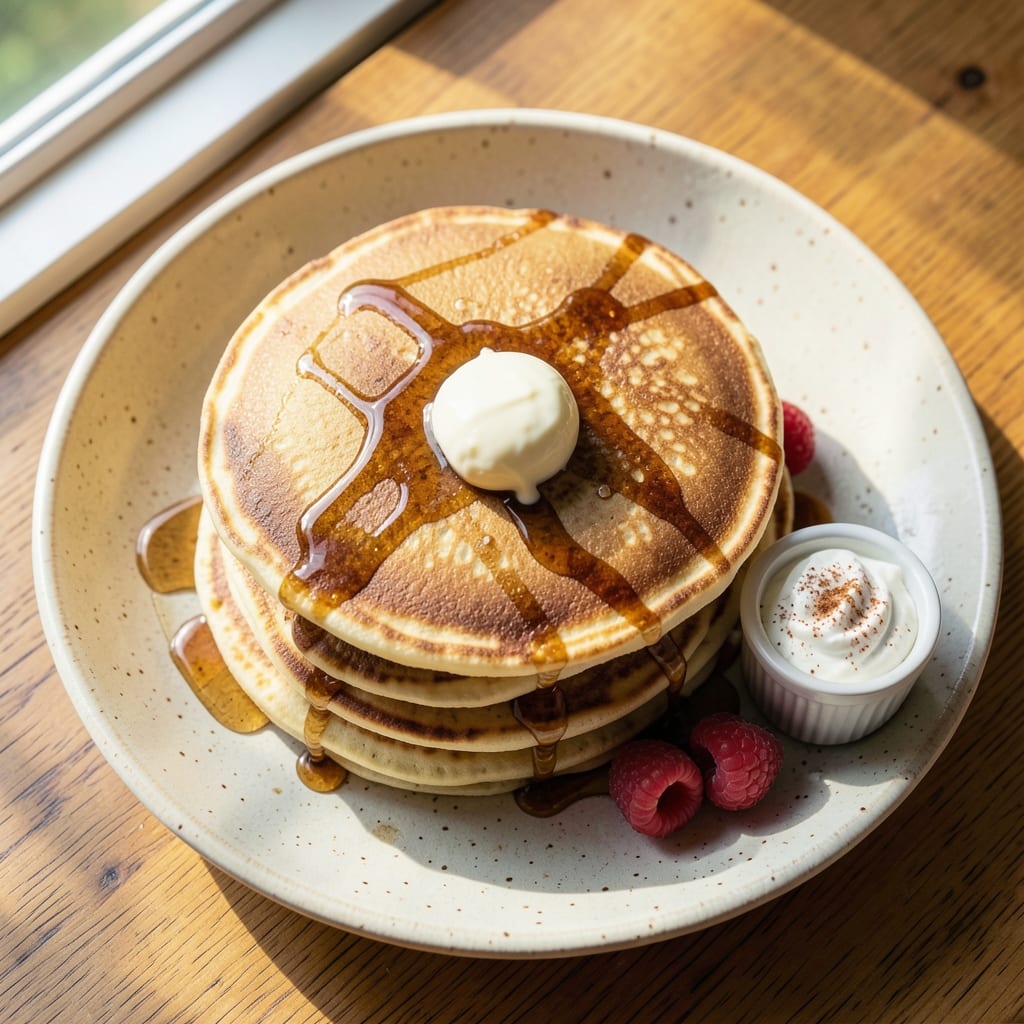
This all-purpose gluten-free flour pancake recipe delivers fluffy, golden stacks without the crumble or dryness that often plagues gluten-free baking. The secret lies in a simple but strategic blend of gluten-free flour, xanthan gum (for structure), and a touch of baking powder to create that signature lightness. I've tested countless variations, and this one consistently delivers restaurant-quality results at home—no special equipment or advanced skills required.
The magic happens in the batter: combining gluten-free flour with a foaming agent (like whipped egg whites) creates air pockets that expand into tender, airy pancakes. We also incorporate a moisture boost from buttermilk and applesauce, which prevents the common dryness issue in gluten-free baking. The result? Pancakes with crispy edges and a soft, pillowy center that holds up to syrup without falling apart.
What makes this recipe truly foolproof is the cooking technique—medium heat and gentle flipping ensure even browning without burning. Serve with classic toppings like maple syrup, fresh berries, or whipped cream, and you'll have a breakfast that rivals any diner favorite. The best part? This recipe accommodates dietary needs without sacrificing flavor or texture.
Perfect for weekend brunches, meal prep, or satisfying a gluten-free craving any day of the week. Let’s get started—your first stack will be ready in just 15 minutes!
Ingredients for all purpose gluten free flour pancake
Fluffy gluten-free pancakes start with this precise blend of ingredients designed to mimic traditional texture.
| Ingredient | Amount | Notes |
|---|---|---|
| All-Purpose Gluten-Free Flour Blend 🌾 | 1 ½ cups | Bob's Red Mill 1:1 preferred |
| Xanthan Gum 🧂 | ½ tsp | Essential for structure and binding |
| Baking Powder 🧂 | 1 ½ tsp | Aluminum-free for best results |
| Large Eggs 🥚 | 2 whole | Room temperature for best volume |
| Unsweetened Applesauce 🍎 | ½ cup | Unsweetened for neutral flavor |
| Buttermilk 🥛 | 1 cup | Homemade or store-bought |
| Granulated Sugar 🍚 | ¼ cup | White or light brown |
| Vanilla Extract 🌿 | 1 tsp | Pure vanilla for authentic flavor |
| Salt 🧂 | ½ tsp | Fine sea salt preferred |
| Unsalted Butter 🧈 | 2 tbsp | Melted, for cooking |
| Pure Maple Syrup 🍯 | ½ cup | For serving, optional |
| Fresh Blueberries 🫐 | ½ cup | For topping, optional |
The gluten-free flour blend is the foundation, and Bob's Red Mill 1:1 is my go-to for its reliability—it mimics all-purpose flour closely without grittiness. Xanthan gum is non-negotiable here; it replicates the elasticity gluten provides, preventing that dreaded crumble. Diamond Crystal baking powder is my preferred brand because it's aluminum-free, which ensures a lighter rise. For the eggs, room temperature matters—they whip up to a stiffer foam, creating those crucial air pockets that translate to fluffiness. If you're short on time, store-bought buttermilk works just as well as homemade, though I always make my own for a tangier flavor.
No xanthan gum? Psyllium husk powder at half the amount works in a pinch, though the texture will differ slightly. Substituting applesauce? Unsweetened pumpkin puree maintains moisture without altering flavor. For a sweeter touch, maple syrup or agave can replace the granulated sugar, though the pancakes will have a distinct taste. If you're avoiding dairy entirely, swap the butter for coconut oil or vegan butter—just don't overcook, as plant-based fats have lower smoke points. The vanilla extract can be omitted, but I recommend keeping it; it rounds out the flavor profile beautifully.
Store the dry ingredients—flour blend, baking powder, xanthan gum—in an airtight container in a cool, dark place for up to 6 months. The wet ingredients (buttermilk, applesauce) can be refrigerated for 5 days, though I suggest making the batter fresh for optimal texture. Once cooked, pancakes reheat beautifully in a toaster or air fryer for 2-3 minutes at 350°F. For meal prep, freeze cooked pancakes between parchment paper for up to 3 months—reheat directly from frozen in a skillet with a splash of water for crispy edges.
Why You'll Love This Recipe
- Five-Ingredient Magic: I swear by this lineup—no fancy substitutions, just the basics. The all-purpose GF blend handles the texture like a champ, while the applesauce keeps things moist without needing extra oil. Honestly, my pantry already had everything except the eggs.
- Secretly Fluffy: That xanthan gum might sound weird, but it’s the MVP here—gives them that satisfying lift without tasting off. The eggs add richness, and the baking powder? Well, it’s the reason they don’t taste like cardboard. Between us, these are the closest GF pancakes I’ve had to the real deal.
- Weekday Superstar: Make a double batch on Sunday, freeze them flat, and reheat in seconds. No one will guess they’re gluten-free—my kid’s school lunchbox gets these all the time. (Yes, even on a Tuesday night when I’m too tired to think.)
- Budget Breakthrough: Applesauce isn’t just healthy—it’s cheap. I buy it in bulk, and it stretches the mix further than store-bought GF pancake kits. Plus, the eggs? Versatile enough to use for other meals if needed. Not the prettiest, but the taste makes up for it every time.
Step-by-step instructions for all-purpose gluten-free pancakes
Master these precise techniques and you'll achieve light, fluffy gluten-free pancakes that stack beautifully.
Whisk Wet Ingredients to Perfect Consistency
In a medium bowl, combine the 2 whole large eggs, 1 cup buttermilk, 0.5 cup unsweetened applesauce, 0.25 cup granulated sugar, 1 teaspoon vanilla extract, and 0.5 teaspoon salt. Whisk vigorously for 2-3 minutes until the mixture is completely smooth and slightly thickened—this ensures proper incorporation of all ingredients and prevents lumps in the batter.
The applesauce acts as a natural fat substitute while keeping the texture tender. If the mixture appears too thick after whisking, add 1 tablespoon water at a time until it reaches a thin but pourable consistency. This step is critical for achieving the right balance of moisture and structure in gluten-free baking.
Gently Fold in Dry Ingredients
In a separate large bowl, sift together the 1.5 cups all-purpose gluten-free flour blend and 1.5 teaspoons baking powder. Make a well in the center and pour in the wet ingredient mixture. Using a rubber spatula, gently fold the dry ingredients into the wet until just combined—do not overmix. A few small lumps are acceptable at this stage.
Next, sprinkle in the 0.5 teaspoon xanthan gum and fold it in completely. The xanthan gum is essential for binding the batter and mimicking the structure gluten would normally provide. The batter should have a thick, crepe-like consistency—similar to traditional pancake batter but slightly more cohesive.
Preheat and Prepare Your Cooking Surface
Heat a non-stick skillet or griddle over medium heat and melt 2 tablespoons unsalted butter evenly across the surface. Allow the butter to foam for 30 seconds before adding batter—this ensures proper browning and flavor development. The pan should be hot enough to create small bubbles around the edges of the batter when poured.
While the pan heats, cover the batter with plastic wrap and let it rest for 5 minutes. This brief resting period allows the xanthan gum to fully hydrate and the flour to fully absorb the liquid, resulting in pancakes with better structure and fewer cracks.
Cook Pancakes to Golden Perfection
Using a ladle or measuring cup, pour ¼ cup batter onto the hot skillet, spreading it slightly to form a 4-inch diameter pancake. Cook until bubbles form on the surface and the edges look set—typically 2-3 minutes. Flip carefully using a spatula and cook the other side for another 1-2 minutes, until golden brown.
Keep cooked pancakes warm in a 200°F oven while you finish the batch. The internal temperature should reach 190°F when done—this ensures they're fully cooked through without becoming dry. Avoid stacking pancakes too soon after cooking, as the residual steam helps maintain their moisture.
Serve Warm with Fresh Toppings
Transfer the pancakes to a serving platter and top immediately with 0.5 cup fresh blueberries and a drizzle of 0.5 cup pure maple syrup. The blueberries add a lovely contrast in color and texture, while the maple syrup enhances the natural sweetness without overpowering the delicate pancake flavor.
Serve each stack immediately while warm. These pancakes should be light, slightly domed in the center, and hold their shape without crumbling. The interior should be tender with a fine, even crumb—proof that the xanthan gum and proper technique have worked their magic.
Pro Tips For Making All Purpose Gluten Free Flour Pancake
- Whisk the Applesauce: Mix the unsweetened applesauce into the wet ingredients until it’s completely smooth—no lumps, no streaks. I learned this the hard way: even a tiny clump can make your pancakes dense or gummy. A fork works, but a whisk gets it right faster. ---
- Medium-High Heat Only: Start the pan at medium-high, then drop to medium-low once bubbles form. Too hot? Your pancakes will burn on the outside before cooking through. Too low? They’ll steam into a sad, flat mess. Find that sweet spot—it’s the only way to get crisp edges and a fluffy center. ---
- Sift the Dry Mix: Gluten-free flour blends are heavy and clumpy. Sift the all-purpose GF flour, xanthan gum, and baking powder together before mixing—yes, even if the bag says “pre-mixed.” This guarantees even distribution of xanthan gum, which keeps your pancakes from falling apart. ---
- Let Batter Rest 5 Minutes: After combining wet and dry ingredients, give the batter a quick 5-minute rest. The xanthan gum needs time to hydrate fully, and the baking powder will activate properly. Skipping this? Your pancakes might rise too fast, then collapse under their own weight. (Your future self will notice.)
Troubleshooting this dish
Batter Too Thick?
If your batter feels too thick after mixing, don’t panic—this is common with gluten-free flours. Gradually add 1 tablespoon water at a time while folding until you reach a crepe-like consistency that pours smoothly. Overmixing can introduce too much air, causing pancakes to spread too thin. Test the batter by lifting your spatula—it should leave a clean trail without dripping. 🥄
Pancakes Cracking or Splitting
Cracks usually mean the batter wasn’t rested long enough or the pan wasn’t hot enough. Let the batter sit covered for 5-10 minutes before cooking, and ensure your skillet is at medium heat with butter foaming before pouring. If cracks persist, reduce baking powder by ¼ teaspoon—too much leavening causes uneven expansion.
Dry or Crumbly Texture
Gluten-free pancakes often dry out if overcooked or if the batter lacks moisture. Keep heat at medium-low and cook until bubbles form (about 2 minutes per side). For extra moisture, add 1 tablespoon applesauce or Greek yogurt to the batter. Avoid flipping too soon—they’re ready when edges look set and the center resists gentle pressure.
Burning Before Cooking Through
If your pancakes brown too quickly but stay undercooked inside, your heat is too high. Reduce to medium-low and let the butter melt slowly before adding batter. A non-stick skillet helps prevent sticking, but avoid overcrowding the pan—cook in batches if needed. For even cooking, use a 4-inch ring mold to portion batter consistently. 🔥
Batter Separating or Lumpy
Lumps happen when dry ingredients aren’t fully incorporated or xanthan gum isn’t dissolved. Whisk the wet ingredients first until smooth, then gently fold in dry ingredients with a rubber spatula. If lumps persist, sift the flour blend before mixing. For extra insurance, whisk the xanthan gum into the wet ingredients first to ensure even distribution.
Pancakes Sticking to Pan
Even with non-stick cookware, gluten-free pancakes can stick if the pan isn’t properly prepped. Melt 2 tablespoons butter until foamy, then wipe excess with a paper towel for a thin, even coating. Avoid using oil—it can interfere with browning. If pancakes still stick, your pan may need seasoning. Lightly coat with flour before adding butter for the first use.
Nutrition facts
Frequently asked questions
Why do gluten-free pancakes need xanthan gum?
Xanthan gum acts as a binder and replaces the structural role gluten normally provides in traditional pancakes. Without it, your pancakes may turn out crumbly or fall apart when flipping. This recipe uses just 0.5 teaspoon—it's essential for that perfect fluffy texture without overpowering the flavor.
Can I make these pancakes without buttermilk?
Mix 1 cup milk (dairy or plant-based) with 1 teaspoon lemon juice or vinegar, then let it sit for 5 minutes to curdle. This homemade substitute works just as well for moisture and tang. For extra richness, use 1 cup Greek yogurt instead of buttermilk.
How do I store leftover gluten-free pancakes?
Keep pancakes fresh by storing them in an airtight container at room temperature for 2 days. For longer storage, freeze them between parchment paper for up to 3 months. To reheat, warm in a skillet over medium-low heat for 1-2 minutes per side or use a toaster until crispy.
What's the best gluten-free flour blend to use?
This recipe was tested with Bob's Red Mill 1:1 Gluten-Free Baking Flour for its reliable texture. Other reliable brands include King Arthur or Cup4Cup, but avoid single-ingredient flours like almond or coconut—these can make pancakes dense or oily. Always check the label for xanthan gum content to adjust accordingly.
Can I make these pancakes ahead for brunch?
Yes! Prepare the batter the night before and refrigerate it overnight. The flavors meld beautifully, and the pancakes will be even fluffier. Cook fresh batches in the morning—just let the batter sit at room temperature for 10 minutes before pouring to restore proper consistency. For a make-ahead breakfast, freeze cooked pancakes and reheat in a toaster.