
Desserts
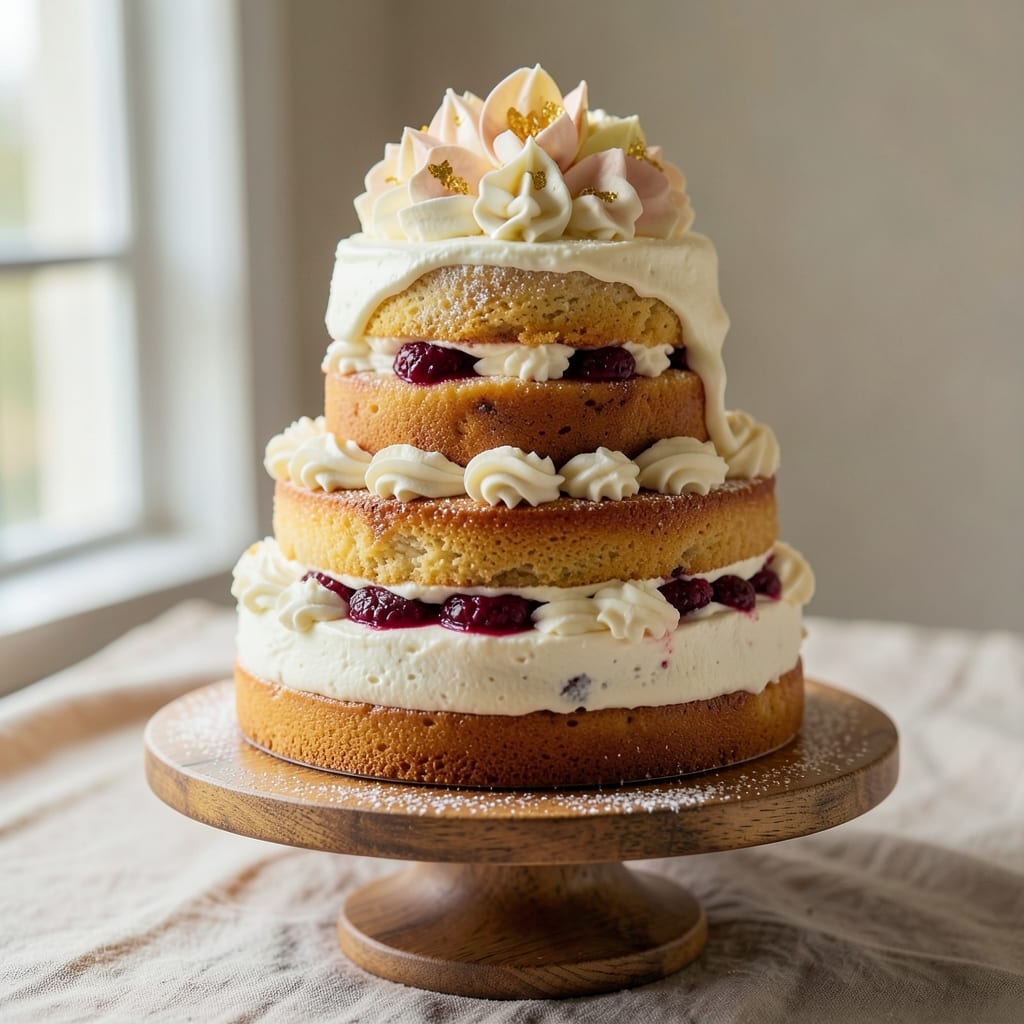
An allergy-free birthday cake that actually tastes like a birthday cake—no compromises, no substitutions that compromise flavor. This recipe delivers a moist, tender cake that bakes up golden and delicious while keeping allergens at bay. The secret lies in simple, high-quality ingredients that work together to create a texture and taste that rivals traditional recipes.
What makes this cake truly special is its foolproof method, designed with beginners in mind. You won't need special equipment or advanced techniques—just a few key ingredients and a reliable oven. The recipe includes clear instructions for mixing, baking, and decorating, ensuring every step is straightforward and stress-free. Perfect for anyone who wants to celebrate safely without sacrificing flavor.
By the time you pull this cake from the oven, you'll have a beautifully risen, evenly baked dessert with a tender crumb and subtle sweetness. The frosting is just as important—creamy, smooth, and easy to spread without cracking. It's the kind of cake that makes birthdays feel special, no matter who's celebrating.
Whether you're baking for someone with dietary restrictions or simply want a cake that's as safe as it is delicious, this recipe delivers. Let's get started on a celebration that everyone can enjoy.
Ingredients for allergy free birthday cake
Safe, delicious ingredients that deliver a birthday cake worthy of celebration—no compromises here.
| Ingredient | Amount | Notes |
|---|---|---|
| All-Purpose Flour 🌾 | 2 ½ cups | Gluten-free blend if needed |
| Granulated Sugar 🍚 | 1 ½ cups | Organic preferred for purity |
| Unsalted Butter 🧈 | 1 cup | Vegan butter for dairy-free option |
| Egg Substitute 🥚 | ¾ cup | Flax eggs or applesauce blend |
| Vanilla Extract 🌸 | 2 tsp | Pure vanilla for authentic flavor |
| Baking Powder 🧂 | 2 tsp | Aluminum-free for allergies |
| Baking Soda 🧂 | ½ tsp | Pure, no additives |
| Salt 🧂 | ½ tsp | Fine sea salt preferred |
| Almond Milk 🥛 | ¾ cup | Unsweetened for neutral flavor |
| Lemon Zest 🍋 | 1 tbsp | Fresh for bright citrus notes |
| Powdered Sugar 🍚 | 3 cups | For smooth, crack-free frosting |
| Coconut Oil 🥥 | ½ cup | Solid for stable frosting |
| Vanilla Bean Paste 🌸 | 1 tbsp | Intensifies vanilla flavor |
The flour is the foundation, so grab a high-quality all-purpose blend—Bob's Red Mill or King Arthur work wonders. If allergies demand gluten-free, their blends are your best bet. Organic sugar keeps things pure, and trust me, it makes a difference in the final taste. Butter can be swapped for vegan butter like Miyoko's or Earth Balance, but keep it cold when creaming. For the egg substitute, flax eggs (1 tbsp ground flax + 3 tbsp water per egg) or applesauce both work, but flax adds a subtle nuttiness that pairs well with vanilla. The vanilla extract? Pure, nothing imitation—look for brands like Nielsen-Massey in the baking aisle.
No almond milk? Oat or soy milk are great stand-ins, just ensure they're unsweetened. Lemon zest can be tricky—zest only the outer layer to avoid bitterness. For the frosting, powdered sugar should be sifted to avoid lumps, and coconut oil needs to be solid but not hard (microwave 10 seconds if needed). Short on vanilla bean paste? Double the extract, but you'll miss that little speckled magic. The baking powder and soda are non-negotiable for rise—check expiration dates to ensure potency. And if you're worried about cross-contamination, use separate utensils and bowls for each ingredient.
Store cake layers in an airtight container with parchment between them for up to 3 days at room temperature. The frosting? Keep it refrigerated and bring to room temp before spreading—5 minutes in warm water speeds this up. Freeze unfrosted layers for 2 months if prepping ahead. For decorating, use food coloring that's allergy-tested (like Americolor), and avoid sprinkles with hidden dairy or nuts. This cake keeps its moisture for days, so you can bake ahead without stress—just assemble when ready to celebrate.
Why You'll Love This Recipe
- No-Fuss Mixing: I swear by this recipe—just cream butter and sugar, toss in the egg substitute (no cracking, no mess), and fold in flour. The vanilla ties everything together without overpowering, and honestly? Even my toddler can "help" stir.
- Vanilla Butter Bliss: That first bite of moist, buttery cake with just a whisper of vanilla? It’s the kind of simple joy you forget exists until you taste it. The egg substitute keeps it rich without the guilt, and the sugar caramelizes just enough for a subtle depth.
- Birthday Every Day: Between us, this cake is my go-to for any celebration—birthdays, holidays, or just because. The neutral flavor means it pairs perfectly with frosting (or none at all), and the texture holds up for slicing. My daughter’s friends have no idea it’s allergy-friendly.
- Budget-Friendly Stretch: A single batch costs me less than $5 and feeds a crowd—no fancy ingredients, just pantry staples. Leftovers? They’re even better the next day, and I’ve frozen slices for months without losing moisture. (Yes, even on a Tuesday night.)
Step-by-step instructions for allergy-free birthday cake
This cake delivers rich flavor and perfect texture without any common allergens—let's make it.
Cream Butter and Sugar for Maximum Fluffiness
In a stand mixer fitted with the paddle attachment, beat the 1 cup unsalted butter and 1.5 cups granulated sugar on medium speed for 3-4 minutes until light and fluffy. You'll see the mixture nearly double in volume and become pale. This step is crucial—it incorporates air that creates that signature tender crumb.
I like to scrape down the sides of the bowl every 30 seconds to ensure even mixing. If you're using vegan butter, don't worry—the same technique works perfectly. The butter should be at room temperature for best results, leaving a slight indentation when pressed with your finger.
Add Wet Ingredients and Mix Until Combined
Add the 0.75 cup egg substitute, 2 tsp vanilla extract, and 1 tbsp lemon zest to the butter mixture. Mix on low speed for 1 minute until fully incorporated. The lemon zest adds a bright citrus note that balances the richness beautifully.
Next, add the 0.75 cup almond milk and mix for another 30 seconds until smooth. Here's the thing—don't overmix or you'll develop gluten in the flour later, which makes the cake dense. The batter should be thick but pourable at this stage.
Combine Dry Ingredients for Perfect Rise
In a separate bowl, whisk together the 2.5 cups all-purpose flour, 2 tsp baking powder, 0.5 tsp baking soda, and 0.5 tsp salt. This is where the magic happens—the baking powder and soda create that perfect lift while the salt enhances all the flavors.
With the mixer on low speed, gradually add the dry ingredients to the wet mixture. Mix just until combined—you should still see some flour streaks. Overmixing develops gluten, which makes the cake tough. Stop mixing as soon as the batter comes together smoothly.
Prepare Pans and Bake to Golden Perfection
Preheat your oven to 350°F. Grease two 8-inch round cake pans with coconut oil and line the bottoms with parchment paper. Divide the batter evenly between the pans. I use a kitchen scale for precision—each pan should get about 2 cups of batter.
Bake for 25-30 minutes or until a toothpick inserted in the center comes out clean. The edges should be golden brown while the top might still look slightly underbaked. This is normal—cakes finish cooking as they cool. Let the cakes cool in the pans for 10 minutes before transferring to a wire rack.
Prepare and Frost the Cake with Allergy-Free Elegance
While the cakes cool, prepare the frosting by beating the 0.5 cup coconut oil and 3 cups powdered sugar together until smooth. Add the 1 tbsp vanilla bean paste and mix until fully incorporated. This creates a stable, creamy frosting that won't melt in warm temperatures.
Once the cakes are completely cool, level the tops if needed. Spread a thin layer of frosting on each cake, then place one on top of the other. Frost the entire cake, creating smooth sides and swirls on top. The coconut oil frosting gives a beautiful sheen while remaining stable for decorating.
Pro Tips For Making Allergy Free Birthday Cake
- MEASURE FLOUR RIGHT: Dump that cup straight from the bag and you’re asking for trouble—packing it down compresses the gluten and makes the cake dense. Instead, spoon the flour into your measuring cup, then level it off with a knife. I learned this the hard way when my first allergy-free cake turned out like a brick.
- CREAM BUTTER AND SUGAR LONG: Skip the rush and let that butter and sugar mix sit for 2-3 minutes after blending—it’s when the texture actually transforms from grainy to smooth. I used to eyeball it, but now I set a timer. Patience here means lighter, fluffier layers.
- DON’T OVERMIX THE BATTER: Once you fold in the egg substitute, stop mixing the second everything’s just combined. Overworking it develops gluten, and your cake will taste more like a dense loaf than a birthday treat. Two turns of a spatula is all you need—promise.
- CHILL THE BATTER 10 MINUTES: Sounds counterintuitive, but letting the batter rest before baking prevents cracks and helps the layers rise evenly. I was skeptical until I tried it—now it’s non-negotiable. Just pop it in the fridge while you preheat the oven.
Wine and beer pairings for these flavors
Light and Refreshing
A crisp, dry sparkling white wine like Italian Pinot Grigio or French Sancerre complements this cake beautifully. The bright acidity cuts through the richness of the coconut frosting while enhancing the lemon zest's citrus notes. I recommend chilling the wine for 30 minutes before serving to let the flavors fully develop. 🍷
Fruity and Festive
For a birthday celebration, a slightly sweet Moscato d'Asti or Prosecco adds a festive touch. The delicate bubbles and light fruitiness pair wonderfully with the vanilla and lemon flavors in the cake. Serve this wine slightly chilled—around 45-50°F—to maintain its crispness and refreshing quality.
Non-Alcoholic Options
Don't worry if alcohol isn't an option! A sparkling apple cider like Martinelli's or a ginger beer with a splash of lemon juice works perfectly. For an extra special touch, add 1 tsp vanilla extract to the ginger beer and serve it ice-cold. The effervescence cleanses the palate between bites of cake.
Beer Pairings
A light wheat beer like Blue Moon or Hoegaarden offers a malty contrast that balances the cake's sweetness. The citrus notes in the beer echo the lemon zest in the cake, creating a harmonious flavor profile. For a darker option, try a Belgian witbier—its coriander and orange peel flavors add an interesting twist. Serve all beers well-chilled at 40-45°F.
Warm Spiced Options
If you prefer something warmer, a mulled wine with cinnamon and orange peel complements the cake's vanilla and lemon flavors. Heat 1 cup red wine with 1 cinnamon stick, 1 orange peel strip, and a pinch of cloves until steaming. Strain before serving to avoid any spice bits. This pairing feels especially cozy for winter birthdays. 🍷
Coffee Pairing
For an after-dinner touch, serve a light roast coffee with a hint of vanilla. The bitterness of the coffee balances the cake's sweetness, while the vanilla ties back to the cake's flavor profile. I recommend a medium-bodied brew like a Colombian or Costa Rican coffee to avoid overpowering the delicate cake flavors. 💫
Nutrition facts
Frequently asked questions
Can I make this cake without eggs entirely?
Yes! This recipe uses a flax egg substitute (1 tbsp ground flax + 3 tbsp water per egg), but you can also use applesauce or a commercial egg replacer like Ener-G. The key is to maintain the same total volume of 0.75 cup for the wet ingredients. Flax eggs add subtle nuttiness that pairs beautifully with vanilla, while applesauce keeps things neutral.
How do I prevent cross-contamination when baking for someone with severe allergies?
Use separate bowls, utensils, and measuring cups for each allergen-free ingredient. Wipe down all surfaces with a damp cloth before starting, and consider using disposable gloves. If your kitchen has shared ingredients (like nuts or dairy), store the allergy-free ingredients in sealed containers first. For extra safety, bake the cake in a clean oven preheated to 350°F with no residue from previous baking sessions.
Can I substitute coconut oil in the frosting?
You can use vegetable shortening or dairy-free margarine in a 1:1 ratio, but coconut oil gives the frosting its signature sheen and stability. For a dairy-free option, try refrigerated coconut oil (solid but soft) or avocado oil (neutral flavor). Avoid nut oils like almond if nut allergies are a concern. The frosting should remain smooth and pipeable at room temperature.
Why does my cake taste slightly bitter?
Bitter flavors usually come from overmixing the batter (which develops gluten) or using old baking powder/soda. Mix dry ingredients just until combined—stop when you see a few flour streaks. Check your baking powder's expiration date (it loses potency over time). Lemon zest can also add bitterness if you zest too deeply—stick to the outer yellow layer only. For extra sweetness, add 1 tbsp extra powdered sugar to the frosting.
Can I make this cake ahead of time?
Bake the layers up to 3 days ahead and store them in an airtight container with parchment between layers. Frost the cake 4 hours before serving to let flavors meld. For longer storage, freeze unfrosted layers for up to 2 months**. Thaw in the fridge overnight, then bring to room temperature before frosting. The coconut frosting stays stable even after refrigeration.