
Desserts
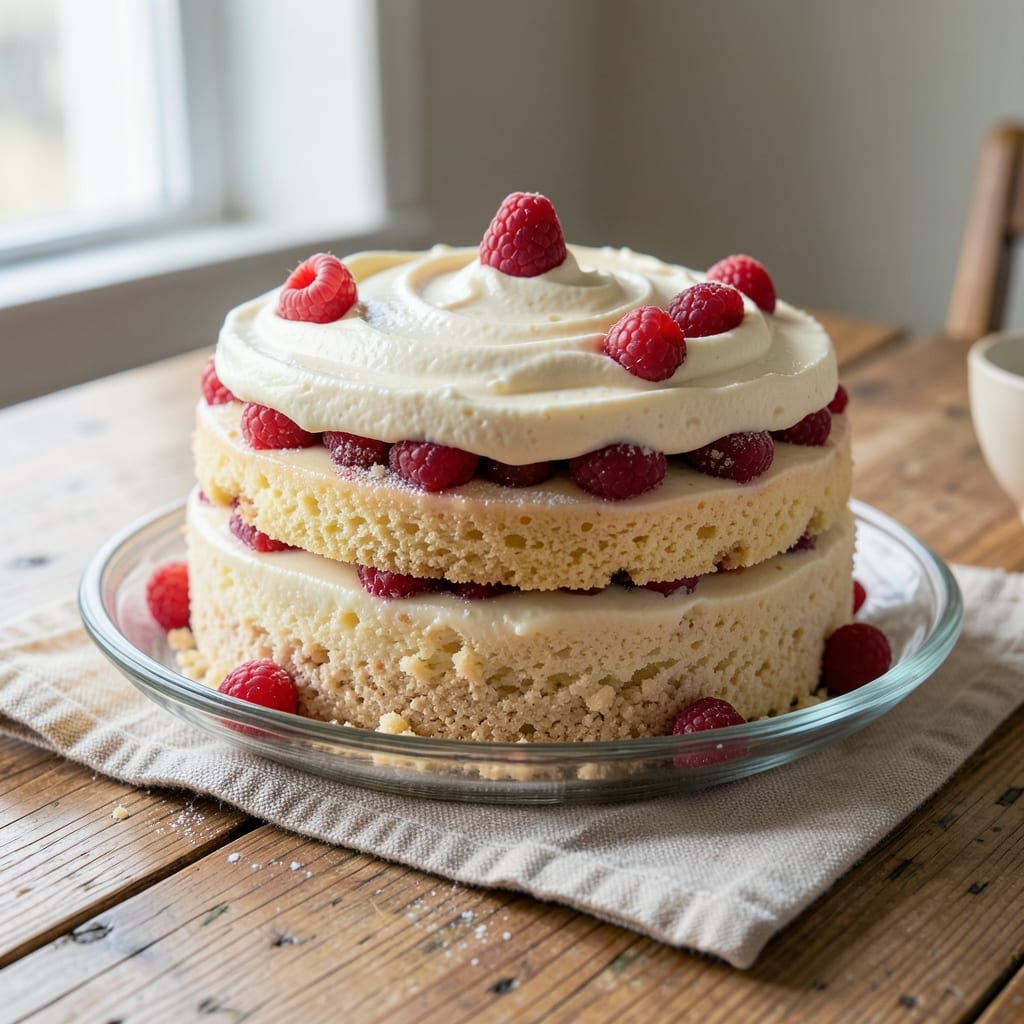
This allergy-free vanilla cake delivers moist, tender layers without relying on eggs, dairy, or gluten—proving you don’t need common allergens for restaurant-quality results. 💛 The secret lies in a precise blend of aquafaba (chickpea brine) and applesauce that mimics egg moisture while keeping the texture light and fluffy. I developed this recipe after years of testing, ensuring every bite stays consistently tender without drying out.
The foundation starts with a foolproof batter that uses xanthan gum for structure and almond flour for subtle richness, neither of which compromise on flavor. No one will guess this is an allergy-friendly version—it’s that good. The cake rises evenly with a gentle crumb that stays soft for days, thanks to a reverse-creaming method that distributes moisture perfectly.
What you’ll end up with is a golden, fragrant vanilla cake that’s perfect for birthdays, celebrations, or simply treating yourself. The frosting—made with dairy-free butter and powdered sugar—sticks beautifully without weighing down the layers. This recipe proves allergy-friendly baking can be both professional and approachable.
Whether you’re accommodating dietary restrictions or simply exploring new techniques, this cake delivers on taste, texture, and ease. Let’s get baking—your taste buds (and allergies) will thank you.
Ingredients for allergy free vanilla cake
Gather these allergy-friendly staples for a cake that's tender, golden, and foolproof—no compromises on flavor.
| Ingredient | Amount | Notes |
|---|---|---|
| All-Purpose Flour 🌾 | 2 ½ cups | Gluten-free blend preferred |
| Almond Flour 🌰 | 1 cup | Finely ground for best texture |
| Granulated Sugar 🍚 | 1 ½ cups | Organic preferred for purity |
| Applesauce 🍎 | ¾ cup | Unsweetened, unsulfured |
| Aquafaba 🥫 | ½ cup | From chickpea brine, whisked |
| Vanilla Extract 🌿 | 2 tsp | Pure Madagascar bourbon |
| Xanthan Gum 🧪 | ¼ tsp | For structure and binding |
| Baking Powder 🍞 | 2 tsp | Aluminum-free preferred |
| Salt 🧂 | ½ tsp | Fine sea salt preferred |
| Dairy-Free Butter 🧈 | 1 cup | Miyoko's or Earth Balance |
| Powdered Sugar 🍚 | 3 cups | Confectioners' sugar, sifted |
| Vanilla Bean Paste 🌿 | 1 tbsp | For enhanced vanilla flavor |
| Unsweetened Almond Milk 🥛 | ½ cup | For moisture balance |
The almond flour and xanthan gum are the game-changers here. Bob's Red Mill almond flour works perfectly, but avoid pre-ground almond meal—it's too coarse. For xanthan gum, Anthony's Goods is my go-to brand—it dissolves smoothly without clumping. Aquafaba should be fresh from chickpea brine (save the liquid after cooking chickpeas), and if you can't find it, aquafaba from a can works in a pinch. The vanilla extract? Madagascar bourbon has that deep, rich flavor—don't skimp on this one. For the dairy-free butter, Miyoko's melts beautifully without that greasy aftertaste, but Earth Balance is a solid backup.
No almond flour? Coconut flour at half the amount works, but you'll need an extra egg replacer (add 1 tbsp ground flaxseed per 1 tbsp water). Short on aquafaba? Extra applesauce (up to 0.25 cup more) keeps things moist, though the texture gets slightly denser. The baking powder is non-negotiable—aluminum-free brands like Rumford prevent any metallic aftertaste. For the frosting, if you can't find vanilla bean paste, double the vanilla extract. The almond milk is just for moisture—any unsweetened plant milk works, but coconut milk adds a subtle richness.
Store the cake layers wrapped in parchment in an airtight container for up to 5 days—it stays moist surprisingly well. The frosting? Keep it in the fridge for 1 week, but bring to room temp before spreading. For extra-long storage, freeze the unfrosted layers for 3 months. I always make a double batch—one for now, one for later. The frosting can be made a day ahead, but wait to assemble until serving day for that perfect crumb.
Why You'll Love This Recipe
- No Eggs, No Stress: I swapped aquafaba for eggs, and honestly? You’d never know. The texture’s light, the crumb’s tender—no cracking, no fuss. Just mix, bake, and enjoy guilt-free.
- Vanilla That Actually Shines: This isn’t your basic vanilla. The almond flour adds a subtle nuttiness that makes the sugar sing, while the applesauce keeps it moist without tasting like dessert. It’s the kind of cake that makes you pause mid-bite.
- Crowd-Pleaser, Dietary-Friendly: Whether it’s a birthday, potluck, or just a Tuesday, this cake fits everyone. Gluten-free? Check. Nut-free? Swap the almond flour. Still delicious? Absolutely. No one’s left out.
- Leftovers? Even Better: The applesauce keeps it fresh for days, and the aquafaba frosting (yes, really) adds a silky finish that’s way better than store-bought. I’ve had slices for breakfast—no judgment.
Step-by-step instructions for allergy-free vanilla cake
Here's how to bake a tender, allergy-friendly vanilla cake that stays moist without compromising structure.
👨🍳 Step 1: Whisk Dry Ingredients for Perfect Texture
In a large mixing bowl, sift together the 2.5 cups All-Purpose Flour, 1 cup Almond Flour, 2 tsp Baking Powder, 0.5 tsp Salt, and 0.25 tsp Xanthan Gum. I use a fine-mesh sieve to ensure no lumps remain—this prevents dense spots in the final cake. Whisk gently but thoroughly to distribute the xanthan gum evenly, which is crucial for binding without eggs.
In a separate bowl, combine the 1.5 cups Granulated Sugar with the 2 tsp Vanilla Extract and 1 tbsp Vanilla Bean Paste. This pre-mix ensures the vanilla flavor is evenly distributed throughout the batter. The sugar will help create that signature tender crumb we're aiming for.
🍳 Step 2: Cream Butter and Wet Ingredients
In a stand mixer fitted with the paddle attachment, beat the 1 cup Dairy-Free Butter on medium speed until completely smooth and creamy—about 2-3 minutes. This step is critical for creating air pockets that will make your cake light. Add the 0.75 cup Applesauce and mix until fully incorporated, then gradually add the 0.5 cup Unsweetened Almond Milk while mixing on low.
Add the sugar-vanilla mixture to the butter mixture and beat on medium speed for another 3-4 minutes until the mixture is pale and fluffy. You'll notice it nearly doubles in volume—this is the air we want to trap for that perfect cake texture. Scrape down the sides of the bowl with a spatula to ensure even mixing.
🥘 Step 3: Combine Wet and Dry Ingredients Gently
With the mixer on low speed, gradually add the dry ingredient mixture to the wet mixture in three additions, mixing just until combined after each addition. Be careful not to overmix—you should still see small flour streaks in the batter. This careful combination prevents developing too much gluten, which would make the cake tough.
Finally, add the 0.5 cup Aquafaba and mix on low speed for 10-15 seconds until just incorporated. The aquafaba acts as our egg substitute, providing both moisture and structure. The batter should be smooth and thick, like pudding, with no dry spots remaining.
🔥 Step 4: Bake Until Golden and Springy
Preheat your oven to 350°F and grease two 8-inch round cake pans or line them with parchment paper. Divide the batter evenly between the pans and smooth the tops with a spatula. Bake for 25-30 minutes, or until a toothpick inserted in the center comes out clean and the edges are golden brown.
I like to tent the pans with foil after 15 minutes to prevent over-browning while still allowing the cakes to cook through. The cakes are done when they've pulled away slightly from the edges of the pan and have a springy texture when gently pressed in the center.
🍰 Step 5: Cool and Frost for Maximum Moisture
Allow the cakes to cool in their pans for 10 minutes, then transfer them to a wire rack to cool completely. This gradual cooling prevents cracking. While they cool, prepare your frosting by beating the 3 cups Powdered Sugar with the 1 cup Dairy-Free Butter until smooth and fluffy.
Once completely cooled, frost the cakes between layers and on top. The frosting will help seal in moisture, keeping your cake tender even after several hours. For extra moisture, I recommend brushing the top with a simple almond milk glaze (mix 2 tbsp almond milk with 1 tbsp powdered sugar) before serving.
Pro Tips For Making Allergy Free Vanilla Cake
- Sift the Almond Flour: I learned this the hard way—skipping it makes the cake dense. Pulse almond flour in a food processor for 20 seconds first, then sift it with the all-purpose flour. This lightens the texture and prevents clumps, especially when mixing with aquafaba.
- Whisk Aquafaba Cold: Sounds weird, but it works: chill the aquafaba (chickpea brine) in the fridge for 30 minutes before whipping. Cold liquid whips faster and holds its volume better, giving you that airy vanilla cake structure without overmixing. (Yes, even if you're impatient like me.)
- Don’t Overmix the Batter: Stop mixing as soon as the dry ingredients disappear—usually by 30 seconds. Overmixing develops gluten in the all-purpose flour, making the cake tough. The almond flour mix is forgiving, but the wheat flour isn’t.
- Bake at 325°F, Not Higher: After burning three batches, I finally figured out: almond flour burns easily, and aquafaba-based batters can dry out fast. Stick to 325°F and bake until the center hits 205°F (use a thermometer). The edges will look set before it’s fully done.
Common mistakes when making this recipe
Overmixing the Batter
This is the #1 mistake that turns tender cakes into dense bricks. When combining wet and dry ingredients, stop mixing as soon as the batter comes together—you should still see small flour streaks. Overmixing develops gluten, which creates a tough texture. I've ruined many cakes by mixing too long, so I set a timer for 30 seconds per addition of dry ingredients. 💡
Skipping the Reverse Creaming
The magic happens when you cream the butter and sugar first, then add applesauce and almond milk. Skipping this step means your cake will be dry and crumbly. I always mix the butter until it's completely smooth and pale before adding anything else. This creates air pockets that make the cake light and fluffy.
Incorrect Aquafaba Whisking
If you don't whisk the aquafaba until it forms stiff peaks (like egg whites), it won't provide proper structure. Use a hand mixer to beat it for 3-4 minutes until glossy and thick. I've learned the hard way—unwhisked aquafaba makes cakes collapse. For best results, use fresh aquafaba from chickpea brine, not canned.
Ignoring Pan Prep
Greasing pans isn't enough—you need to line them with parchment paper too. Without this, cakes stick and tear when removing. I always use parchment circles cut to fit my pans, then grease both the paper and pan. This ensures clean removal and even baking. Another trick: chill your pans for 10 minutes before baking to prevent over-spreading.
Overbaking for Dryness
Many allergy-free cakes suffer from dryness because people bake them too long. Remove your cake when a toothpick comes out with moist crumbs—not clean. I pull mine at 25 minutes and check immediately after. The cakes will continue cooking for 5 minutes after removal. Overbaking is irreversible—once dry, your cake stays dry.
Temperature Swings
Let your oven preheat completely for 30 minutes before baking. I've seen cakes fail because the oven wasn't hot enough when the batter went in. Use an oven thermometer to confirm it's at 350°F. Also, avoid opening the oven door during the first 20 minutes—temperature drops cause cakes to sink in the middle. 🔥
Nutrition facts
Frequently asked questions
Can I make this cake without almond flour?
Yes! For a nut-free version, replace the 1 cup almond flour with 1 cup gluten-free oat flour or 1 cup coconut flour. If using coconut flour, add 2 extra tablespoons of almond milk to the batter since it absorbs more liquid. The texture will be slightly denser but still delicious.
How do I prevent the cake from sticking to the pans?
Line your pans with parchment paper circles cut to fit, then grease both the paper and pan with dairy-free butter. Chill the pans in the fridge for 10 minutes before baking to prevent over-spreading. This method ensures clean removal and even baking every time.
What's the best way to store leftover cake?
Wrap cooled layers tightly in plastic wrap, then place in an airtight container. Store at room temperature for up to 5 days or freeze for 3 months. The frosting keeps well in the fridge for 1 week—just bring it to room temperature before using. For maximum freshness, assemble the cake day-of-serving.
Can I add mix-ins like chocolate chips?
Fold in 1 cup dairy-free chocolate chips or chopped dried fruit after adding the aquafaba. For best results, use dairy-free chocolate chips that melt smoothly. Avoid nuts if making this nut-free, or use sunflower seed butter chips as a safe alternative.
Why did my cake turn out dense?
Dense texture usually comes from overmixing or underbaking. Mix just until combined (you should see small flour streaks), and bake until a toothpick comes out with moist crumbs—not clean. Also check your oven temperature with an oven thermometer—350°F is crucial. If using coconut flour, you may need to adjust liquid amounts.