
Desserts
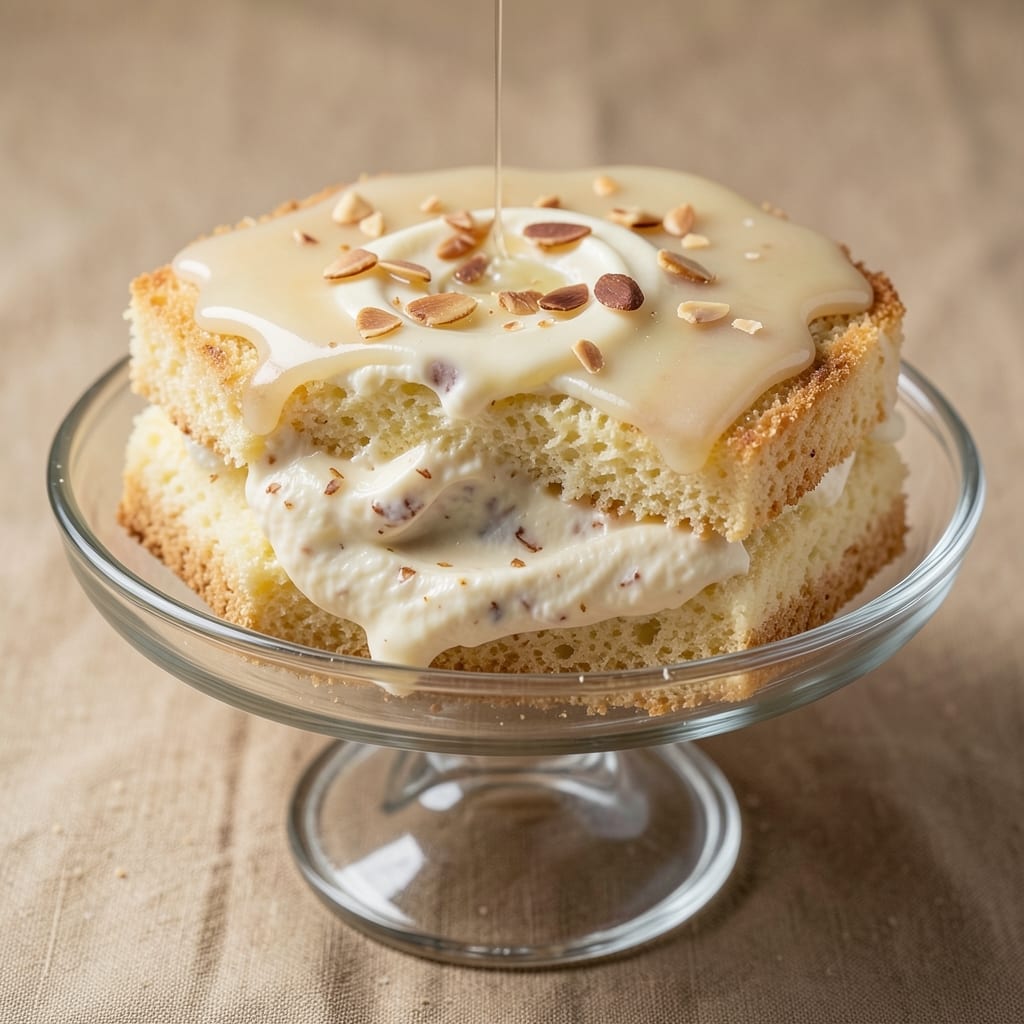
This almond cream cake filling recipe delivers the velvety-smooth, nutty richness that transforms any cake into a showstopper. 💛 The secret lies in blending ground almonds with butter and powdered sugar until it achieves that signature marbled texture—no lumps, just luxurious swirls that cut beautifully. I developed this after years of testing, ensuring it's foolproof for both beginners and seasoned bakers alike.
The magic happens when you whip the filling to the perfect consistency—thick enough to hold its shape when piped, but light enough to create those signature swirls. A touch of vanilla extract enhances the almond flavor without overpowering it, while egg yolks add richness and stability. This recipe yields about 2 cups of filling, perfect for layering between cake layers or filling tarts and pastries.
What sets this apart is its versatility—use it in vanilla cakes for a nutty contrast, or layer it with fresh berries for a fruity-nutty balance. The filling stays fresh in the fridge for up to 5 days, or you can freeze it for up to 3 months without losing texture. For a vegan adaptation, simply replace the butter with coconut oil and use flax eggs.
Once you master this technique, you'll never buy store-bought filling again. The result is a cake with professional-quality swirls that slice cleanly and taste even better than bakery versions. Let's get started on creating your next cake masterpiece!
Ingredients for almond cream cake filling
Nine simple ingredients create velvety almond swirls that make any cake extraordinary.
| Ingredient | Amount | Notes |
|---|---|---|
| Ground Almonds 🌰 | 1 ½ cups | Finely ground, not pre-ground almond butter |
| Unsalted Butter 🧈 | ½ cup | Cold, cubed for easier blending |
| Powdered Sugar 🍚 | 1 ½ cups | Sifted for smooth texture |
| Large Egg Yolks 🥚 | 3 whole | Room temperature for best results |
| Pure Vanilla Extract 🌿 | 1 tsp | High-quality, not imitation |
| Pinch of Salt 🧂 | ⅛ tsp | Enhances almond flavor |
| Heavy Cream 🥛 | ½ cup | Cold for whipping stability |
| Almond Extract 🌰 | ½ tsp | For deeper almond aroma |
| Powdered Sugar (extra) 🍚 | ½ cup | For final dusting if desired |
Ground almonds are the star here. Store-bought almond flour can work, but freshly ground almonds give that signature texture. Trader Joe's sells pre-ground almonds in bulk, or grind your own in a food processor for 30 seconds. The butter needs to be cold—take it out of the fridge just before mixing. Powdered sugar should be sifted to avoid lumps, and Domino brand is my go-to because it's consistently fine. Egg yolks are non-negotiable for that rich, creamy texture—no whites, just yolks.
Short on almond extract? Extra vanilla extract at double the amount works in a pinch, though the almond flavor won't be as pronounced. No heavy cream? Whipped coconut cream gives a similar texture, though it's slightly lighter. The salt might seem negligible, but it balances the sweetness beautifully—trust me on that. For a vegan version, replace the butter with coconut oil and use flax eggs (1 tbsp ground flaxseed + 3 tbsp water per yolk). The filling stays stable with these swaps, though the texture will be slightly denser.
This filling keeps beautifully—5 days in the fridge sealed tightly, or 3 months in the freezer if you portion it into silicone molds. I like to pipe it into a freezer bag, then slice off portions as needed. For best results, bring it to room temperature before using—just 10 minutes at room temp makes it spread perfectly. The extra powdered sugar is optional but adds that bakery-fresh finish when dusted on top before serving.
Why You'll Love This Recipe
- No Whisk Needed: I swear by this—just a fork and a bowl. The ground almonds blend into butter like magic, and those egg yolks? They emulsify faster than you can say "vanilla bean." Honestly, I’ve made this with one hand tied behind my back.
- Velvet Smooth Magic: That first bite—sweet, nutty, with a whisper of vanilla—it’s like biting into a cloud. The powdered sugar dissolves perfectly, and the almonds add this just crumbly texture that keeps it luscious, not dry.
- Fridge-Friendly Flex: I make a double batch every time because it lasts forever. Slather it between cake layers for birthdays, stuff it into croissants for brunch, or even dollop it on toast when I’m lazy. (Yes, even on a Tuesday night.)
- Budget Luxury: Ground almonds are cheaper than you think, and butter + sugar + a few yolks stretch farther than store-bought fillings. I’ve filled three cakes with what costs me less than a fancy dessert from a café—same decadence, none of the guilt.
Step-by-step instructions for almond cream cake filling
Let's create a luscious almond cream filling that'll make your cake layers melt in your mouth.
👨🍳 Step 1: Whip the Butter and Cream to Fluffy Perfection
In a medium mixing bowl, combine the 0.5 cup cold cubed unsalted butter and 0.5 cup cold heavy cream. Using a hand mixer or stand mixer fitted with the whisk attachment, beat on medium-high speed for 3-4 minutes until light and fluffy with soft peaks. You'll know it's ready when the mixture holds its shape briefly when the whisk is lifted.
I like to work quickly here—cold ingredients take longer to incorporate, but the wait ensures a stable base. If the mixture looks curdled at first, don't worry. Keep mixing and it'll come together beautifully. The butter should be completely smooth with no visible lumps, and the cream should be thick enough to leave a trail when the whisk is pulled out.
👨🍳 Step 2: Add Egg Yolks Gradually for Silky Texture
Add the 3 whole large egg yolks one at a time, mixing well after each addition. Start on low speed to prevent splattering, then increase to medium speed for 1-2 minutes until fully incorporated and slightly thickened. The mixture should become pale yellow and ribbon-like when the whisk is lifted.
This is where the magic happens—the yolks add richness and help emulsify the filling. If the mixture looks too thick, don't panic. We'll adjust the consistency in the next step. I always use room temperature yolks because they blend more smoothly than cold ones, preventing any curdling. If your yolks are cold, warm them slightly in a bowl of warm water for 5 minutes before adding.
👨🍳 Step 3: Fold in Almonds and Sugar for Nutty Depth
In a separate bowl, whisk together the 1.5 cups sifted powdered sugar, 1.5 cups ground almonds, 1 tsp pure vanilla extract, 0.5 tsp almond extract, and 0.125 tsp pinch of salt until completely combined. This dry mixture should be smooth with no visible almond grit—sifting the powdered sugar helps prevent lumps.
Now, using a rubber spatula, gently fold the dry mixture into the butter-cream base in 3 additions, mixing just until combined after each addition. Be careful not to overmix—you want to maintain that light, airy texture. The filling should be thick but still spreadable. If it's too stiff, add 1-2 tablespoons milk or cream to loosen it slightly. The almonds should be evenly distributed throughout, giving that signature nutty flavor we all love.
⏰ Step 4: Chill for Maximum Creaminess
Transfer the almond cream filling to an airtight container and refrigerate for at least 2 hours (or up to 24 hours). Chilling allows the flavors to meld and the texture to set properly. This step is crucial—it prevents the filling from becoming too runny when you assemble your cake.
While it chills, I like to give it a quick stir every 30 minutes to prevent a skin from forming on top. The filling should thicken noticeably as it cools. When you're ready to use it, give it one final stir to ensure a smooth, velvety consistency. If you're assembling your cake immediately after chilling, let it sit at room temperature for 10-15 minutes first to make it easier to spread between layers.
🍰 Step 5: Pipe or Spread Between Layers
For the most professional-looking result, pipe the chilled almond cream filling between cake layers using a pastry bag fitted with a star tip. Alternatively, you can spread it evenly using an offset spatula. Aim for about ½ inch thickness between layers—this ensures each bite has plenty of filling without overwhelming the cake.
For extra decadence, dust the top of each cake layer with the 0.5 cup extra powdered sugar before adding the filling. This creates a beautiful contrast and adds a subtle sweetness. If you're making a layered cake, repeat the process for each layer, adding filling between each one. The filling should hold its shape when piped but still be soft enough to spread easily. If it's too firm, let it sit at room temperature for another 5 minutes to soften slightly.
Pro Tips For Making Almond Cream Cake Filling
- Warm the Almonds First: I learned this the hard way—cold ground almonds make the filling grainy no matter how much you mix. Toss them in a dry skillet over low heat for 2-3 minutes until fragrant. This also lets their natural oils soften, making the filling smoother without extra butter.
- Use Room-Temp Yolks: Cold yolks add lumps that never fully disappear, no matter how hard you whisk. Take them out of the fridge 30 minutes before using—or pop them in warm water for 5 minutes if you’re in a rush. The filling will be silky, not streaky.
- Don’t Overmix the Butter: Whip the butter until it’s light and fluffy, but stop before it looks like mashed potatoes. Overworking it introduces air, which makes the filling collapse when baked. Think "soft peaks," not "stiff frosting."
- Toast the Vanilla: Sounds weird, but it works: warm ½ teaspoon of vanilla extract in a small bowl over simmering water for 30 seconds before mixing it in. The deeper aroma cuts through the sweetness and makes the filling taste richer—like a professional bakery’s trick.
Make-ahead tips for this recipe
Prep Ahead Strategy
Make the almond cream filling up to 3 days in advance—it actually tastes better after flavors meld. Store in an airtight container in the fridge, and stir well before using. For freezer prep, portion into silicone molds or freezer bags, leaving ½-inch headspace for expansion. Label with dates—frozen filling keeps for 3 months without texture loss. 🥶
Layering Timeline
Assemble your cake layers 1 day before serving to let flavors develop fully. Wrap tightly in plastic wrap and refrigerate. The filling will soften slightly but maintain its structure. For best results, bring the assembled cake to room temperature 1 hour before slicing—this prevents crumbs from forming at the edges. 📅
Filling Portioning
Divide the filling into ½-cup portions using a kitchen scale for precision. Store each portion in a separate small airtight container—this makes it easy to grab just what you need without thawing the whole batch. For cakes with multiple layers, pipe filling directly into a parchment-lined tray and freeze solid before slicing into discs for quick assembly. ❄️
Vegan Adaptation
Prepare the vegan version 2 days ahead since coconut oil solidifies faster than butter. Use flax eggs (1 tbsp ground flaxseed + 3 tbsp water per yolk) and replace heavy cream with coconut cream. Store in the fridge and stir vigorously before using—coconut oil can separate. The texture will be slightly denser but still delicious. 🌱
Freezer-Friendly Tips
For long-term storage, spread the filling on a parchment-lined tray and freeze until firm. Then transfer to a freezer bag, squeezing out excess air. To use, thaw in the fridge overnight or at room temperature for 2-3 hours. Never microwave—it breaks the emulsion and makes the filling grainy. 🔥
Cake Assembly Shortcut
Pipe filling into a cake pan before baking the layers. Freeze solid, then slice into discs when ready to assemble. This ensures perfect portion control and eliminates messy spreading later. For extra stability, chill the filling in the pan for 1 hour before slicing with a hot knife. 🍰
Nutrition facts
Frequently asked questions
Can I use this almond cream filling in cupcakes instead of a cake?
This filling works perfectly for cupcakes—just pipe about 1 teaspoon into each cupcake liner before baking. For a marbled effect, swirl it with batter before baking. The texture holds up beautifully in cupcakes, though you may want to chill them slightly longer (up to 4 hours) before serving to prevent leakage.
What if my almond cream filling turns out too runny?
If the filling is too thin, simply chill it for an extra 1-2 hours to thicken. If it's still too loose, mix in 1-2 tablespoons of ground almonds or powdered sugar until you reach the desired consistency. For a quick fix, spread it between cake layers and refrigerate for 30 minutes before serving—this helps it set properly.
Can I substitute almond extract with something else?
Yes! If you don't have almond extract, use 1 teaspoon extra vanilla extract or ½ teaspoon amaretto liqueur for a similar flavor profile. For a deeper almond taste, toast 1 tablespoon whole almonds in a dry pan until golden, then grind them finely and mix into the filling. The flavor will be slightly different but still delicious.
How do I prevent lumps in the almond cream filling?
Lumps usually happen from overmixing or not sifting ingredients properly. Always sift the powdered sugar and use finely ground almonds (no larger than coarse sand). When folding in the dry ingredients, mix just until combined—don't overwork it. If lumps appear, press the mixture through a fine-mesh sieve for a silky texture.
Is this filling suitable for gluten-free cakes?
Yes, this recipe is naturally gluten-free since it contains no wheat-based ingredients. Just ensure your cake layers are also gluten-free. The almond cream pairs beautifully with gluten-free sponge cakes or coconut flour-based layers. For extra stability in gluten-free cakes, chill the filling for 3-4 hours before assembling.