
Desserts
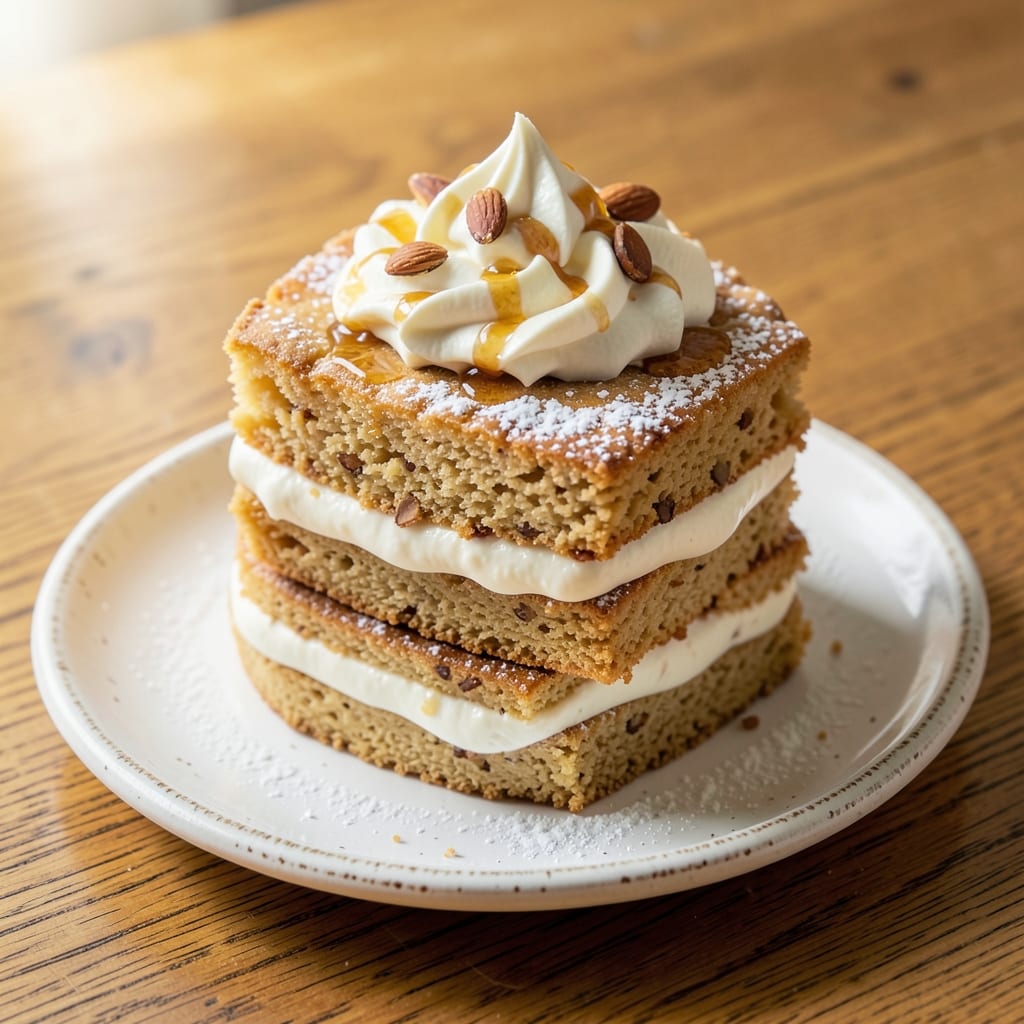
This almond flour yogurt cake delivers the perfect balance of fluffy texture and nutty moisture without a hint of dryness. 💛 The secret lies in combining almond flour's natural richness with Greek yogurt's moisture-retaining properties, creating a tender crumb that stays fresh for days. Unlike traditional flour cakes, this version relies on almond flour for a naturally gluten-free structure while maintaining that classic cake texture.
The recipe begins with a simple mixing method that preserves air pockets for that signature rise, then relies on a gentle baking process at 350°F for 25-30 minutes to develop the perfect golden crust while keeping the interior moist. What makes this cake truly special is how the almond flour's subtle sweetness complements the yogurt's tangy notes, creating a flavor profile that's both comforting and sophisticated.
What you'll end up with is a cake that's impossibly tender yet sturdy enough to slice cleanly, with a delicate crumb that practically melts in your mouth. The nutty aroma alone makes it irresistible, while the moist texture ensures every bite feels indulgent. This recipe proves you don't need traditional flour to create a cake that's both impressive and comforting.
Perfect for brunch, dessert, or even breakfast, this almond flour yogurt cake adapts beautifully to seasonal garnishes. Top with fresh berries for a summery touch or drizzle with honey for a touch of elegance. The versatility makes it suitable for any occasion while maintaining its naturally vegetarian-friendly profile.
Ingredients for almond flour yogurt cake
Eight simple ingredients transform into a moist, nutty cake that's fluffy and delicious without a hint of dryness.
| Ingredient | Amount | Notes |
|---|---|---|
| Almond Flour 🌰 | 2 cups | Finely ground, unsweetened preferred |
| Plain Greek Yogurt 🥛 | 1 cup | Full-fat for best moisture |
| Granulated Sugar 🍚 | ¾ cup | White or light brown |
| Large Eggs 🥚 | 2 whole | Room temperature preferred |
| Extra-Virgin Olive Oil 🫒 | ½ cup | For richness and moisture |
| Vanilla Extract 🌿 | 1 tbsp | Pure, high-quality preferred |
| Baking Powder 🍞 | 1 tsp | Aluminum-free for best results |
| Salt 🧂 | ½ tsp | Fine sea salt preferred |
| Unsweetened Almond Milk 🥛 | ½ cup | For extra moisture |
| Lemon Zest 🍋 | 1 tbsp | Brightens flavor profile |
| Powdered Sugar 🍚 | ¼ cup | For dusting (optional) |
| Fresh Berries 🍓 | 1 cup | For garnish (optional) |
Almond flour is the star here—Bob's Red Mill or Anthony's Goods are my go-tos for the finest grind. The difference between almond flour and almond meal? Fine texture matters for that tender crumb. If you can't find full-fat Greek yogurt, plain yogurt works too—just know it might be slightly less moist. For the almond milk, Blue Diamond or Silk brands are reliable, but any unsweetened version will do. The secret to that perfect rise? Room-temperature eggs—crack them into a bowl first and let them sit for 10 minutes if they're straight from the fridge.
No Greek yogurt? Plain yogurt plus 1 tbsp sour cream mimics the texture. Short on almond flour? Substitute half with oat flour—it's a game-changer for binding. The vanilla extract can be swapped for 1 tsp vanilla bean paste if you're feeling fancy. For the lemon zest, organic lemons have more vibrant flavor, but regular works too. If you're making this ahead, wrap the cake tightly in plastic—it keeps for 3 days at room temperature or 1 week in the fridge. The powdered sugar topping is optional but adds that restaurant-quality finish.
This cake tastes even better the next day—trust me on that—so bake it a day ahead if you can. Store leftovers in an airtight container with a slice of bread to keep it fresh. For freezing, wrap individual slices in plastic wrap and pop them in a bag—they thaw in 10 minutes and taste like fresh-baked. The berries? Add them just before serving—they keep the cake looking pretty and add a pop of freshness. This cake is naturally gluten-free, dairy-free (if using dairy-free yogurt), and vegetarian-friendly—perfect for any dietary need.
Why You'll Love This Recipe
- No Mixer Needed: Mixing this batter is a breeze—just stir until combined. The almond flour and yogurt blend effortlessly, and honestly, I’ve made it with a fork in a mug when I was too tired to wash bowls.
- Moist Without Syrup: That Greek yogurt keeps it tender, while the olive oil adds richness without heaviness. The sugar caramelizes just enough to give it a subtle, natural sweetness—no one will guess it’s not a boxed cake.
- Weeknight or Party: Slice it warm for breakfast or pack it for lunches—it stays fresh for days. I’ve brought it to potlucks, and no one’s ever left a crumb behind. (Yes, even my picky uncle.)
- Budget-Friendly Luxury: Almond flour might sound fancy, but it stretches further than regular flour. The yogurt and eggs bulk it up, so you get two servings per dollar—plus, it tastes like you spent hours baking. (Spoiler: You didn’t.)
Step-by-step instructions for almond flour yogurt cake
Here's how to create a wonderfully moist, nutty cake that rises beautifully every time.
👨🍳 Step 1: Whisk Wet Ingredients for Maximum Moisture
In a large mixing bowl, combine the 1 cup plain Greek yogurt, 0.75 cup granulated sugar, 0.5 cup extra-virgin olive oil, and 1 tbsp vanilla extract. Whisk vigorously for 2-3 minutes until the mixture becomes pale and slightly thickened. This step ensures proper emulsification, which creates that signature tender crumb.
Here's the thing—don't skip the whisking. The olive oil needs to fully incorporate with the yogurt to create that rich, moist texture we're after. You'll see the mixture change from chunky to smooth as it emulsifies. I like to use a balloon whisk for this part because it incorporates air beautifully, giving that extra lift to our cake.
👨🍳 Step 2: Add Eggs and Lemon Zest for Bright Flavor
Add the 2 whole large eggs one at a time, whisking well after each addition until fully incorporated. Then stir in the 1 tbsp lemon zest and 0.5 cup unsweetened almond milk. The lemon zest will brighten the nutty flavors while adding a subtle tang that balances the sweetness.
This is where the magic happens for that perfect flavor balance. The lemon zest should be finely grated—no big chunks! I like to use a microplane for this because it gives you that perfect fine texture. The almond milk adds just enough moisture without making the batter too runny. Give everything a final whisk to make sure all the dry ingredients we'll add next get evenly distributed.
👨🍳 Step 3: Gently Fold in Dry Ingredients
In a separate bowl, sift together the 2 cups almond flour, 1 tsp baking powder, and 0.5 tsp salt. This sifting step is crucial—it aerates the flour and prevents dense pockets in our cake. With the mixer on low speed, gradually add the dry ingredients to the wet mixture, mixing just until combined.
I know it seems weird, but trust me—you don't want to overmix. Stop mixing as soon as you see no more flour streaks. The batter should be thick but pourable. If it looks too thick, you can add 1-2 tablespoons more almond milk to help it flow better. The goal is a smooth, lump-free batter that's ready to bake into a tender cake.
🔥 Step 4: Bake Until Golden and Springy
Preheat your oven to 350°F and grease an 8-inch round cake pan or line it with parchment paper. Pour the batter into the prepared pan and smooth the top with a spatula. Bake for 35-40 minutes until the top is golden brown and a toothpick inserted in the center comes out clean.
Here's the moment that matters: don't open the oven door during the first 25 minutes of baking. The sudden temperature change can cause the cake to sink. You'll know it's ready when the edges pull away slightly from the pan and the top has that beautiful golden hue. The cake should spring back gently when you press the center with your finger—this is your perfect doneness test.
⏰ Step 5: Cool and Serve with Fresh Berries
Remove the cake from the oven and let it cool in the pan for 10 minutes. Then transfer it to a wire rack to cool completely. While it cools, you can dust the top with 0.25 cup powdered sugar for a sweet finish. Top with 1 cup fresh berries just before serving to add that fresh, vibrant touch.
Real talk: this cake is best served at room temperature. The flavors develop and mellow as it cools, giving you that perfect balance of nutty, moist goodness. The berries add a beautiful contrast to the rich almond flavor and keep the cake feeling fresh. And hey, if you want to make it extra special, serve it with a dollop of whipped cream or a scoop of vanilla ice cream!
Pro Tips For Making Almond Flour Yogurt Cake
- Whisk Eggs Cold: Crack the eggs into a chilled bowl first—room temperature eggs make the batter too runny with almond flour. I learned this after watching my first batch spread like pancake batter; cold eggs keep the structure tight. ---
- Sift the Almond Flour: Skip the clumps by sifting the almond flour before mixing—it’s the only way to avoid a dense, cakey texture. Yes, it’s extra work, but your cake will actually rise instead of sinking like a brick. ---
- Don’t Overmix the Yogurt: Stir the yogurt in just until combined—whipping it into the batter makes the cake gummy. Fold it in gently with a spatula, like you’re tucking in a blanket, not kneading dough. ---
- Olive Oil First: Mix the olive oil into the wet ingredients before adding the eggs—it emulsifies better and keeps the crumb moist. I used to add it last, and the cake always turned out dry, no matter how much I adjusted the liquid.
Make-ahead tips for almond flour yogurt cake
Pre-Bake Prep
Bake this cake the night before—it tastes even better after resting! After cooling completely, wrap it tightly in plastic wrap and store at room temperature. The flavors meld beautifully overnight, making each slice more flavorful. I like to add a slice of bread in the container to keep the cake fresh longer. This also makes morning servings effortless for brunch. 💛
Freezer-Friendly Layers
For long-term storage, slice the cake into individual portions and wrap each piece tightly in plastic wrap. Place the wrapped slices in a freezer bag with all the air squeezed out to prevent freezer burn. These freeze beautifully for up to 3 months. When ready to serve, thaw at room temperature for 10-15 minutes—no microwave needed! The texture remains moist and tender.
Portion Control Tips
Use a sharp serrated knife to slice the cake cleanly. Dip the knife in hot water and wipe dry between cuts for perfectly smooth layers. For easy transport, stack slices between parchment paper and secure with a rubber band. This keeps them stable for picnics or office treats. I always double-wrap for travel to prevent crumbs.
Make-Ahead Garnishes
Prep your toppings ahead of time for a stress-free presentation. Wash and dry fresh berries and store them in an airtight container in the fridge for up to 3 days. For powdered sugar, sift it into a small jar and store at room temperature—it'll be ready to dust in seconds. I also like to make a simple honey-lemon drizzle (mix 2 tbsp honey with 1 tsp lemon juice) and store it in the fridge for 1 week.
Reheating Secrets
If you prefer warm cake, reheat individual slices in the microwave for 10-15 seconds on 50% power. For a gentler approach, place slices on a baking sheet and warm in a 250°F oven for 5 minutes. This maintains moisture better than high heat. I find the microwave method works best for quick servings without drying out the cake. 🔥
Batch Baking Hacks
Double the recipe for parties—this cake bakes beautifully in a 9-inch round pan or two 6-inch pans. Use the same baking time but check for doneness 5 minutes earlier in smaller pans. For large gatherings, bake one day ahead and store wrapped at room temperature. The cake keeps its moist texture perfectly for 3 days this way. I always make extras for leftovers—they disappear fast!
Nutrition facts
Frequently asked questions
Why does my almond flour cake turn out dense?
Overmixing the batter or using almond meal instead of finely ground almond flour are common culprits. Always sift the dry ingredients and mix just until combined—stop when no flour streaks remain. Also, ensure your almond flour is finely ground (not meal) and don't skip the whisking step for the wet ingredients. The olive oil needs time to fully emulsify with the yogurt for that signature tender crumb.
Can I make this cake without eggs?
Yes! Replace the 2 eggs with 2 tbsp ground flaxseed mixed with 6 tbsp water (let sit for 5 minutes to thicken) or ½ cup unsweetened applesauce. The cake will be slightly less sturdy but still moist and delicious. For best results, use these substitutes at room temperature. The lemon zest and yogurt will still provide that bright, tangy flavor you love.
How do I keep this cake moist for longer?
Store it in an airtight container with a slice of bread to absorb excess moisture. For extra freshness, brush the cooled cake with a simple syrup (equal parts sugar and water, heated until dissolved) before serving. This method works wonders for keeping the crumb tender for up to 5 days at room temperature. If freezing, wrap individual slices tightly in plastic wrap to prevent drying.
What's the best way to make this cake vegan?
Swap the Greek yogurt for 1 cup coconut yogurt (unsweetened) and use flax eggs (2 tbsp ground flax + 6 tbsp water). Replace the olive oil with ½ cup melted coconut oil or vegan butter. The cake will maintain its moist texture while becoming completely plant-based. Taste as you go—you may need to adjust sweetness slightly since coconut yogurt can be less sweet than dairy versions.
Can I use this batter for cupcakes?
Divide the batter evenly among 12 lined cupcake tins and bake at 350°F for 18-22 minutes until a toothpick comes out clean. The smaller size means they'll bake faster than a full cake. For extra flavor, add ½ tsp cinnamon to the batter or top with a swirl of lemon glaze. These cupcakes freeze beautifully—just thaw at room temperature before serving for that perfect texture.