
Desserts
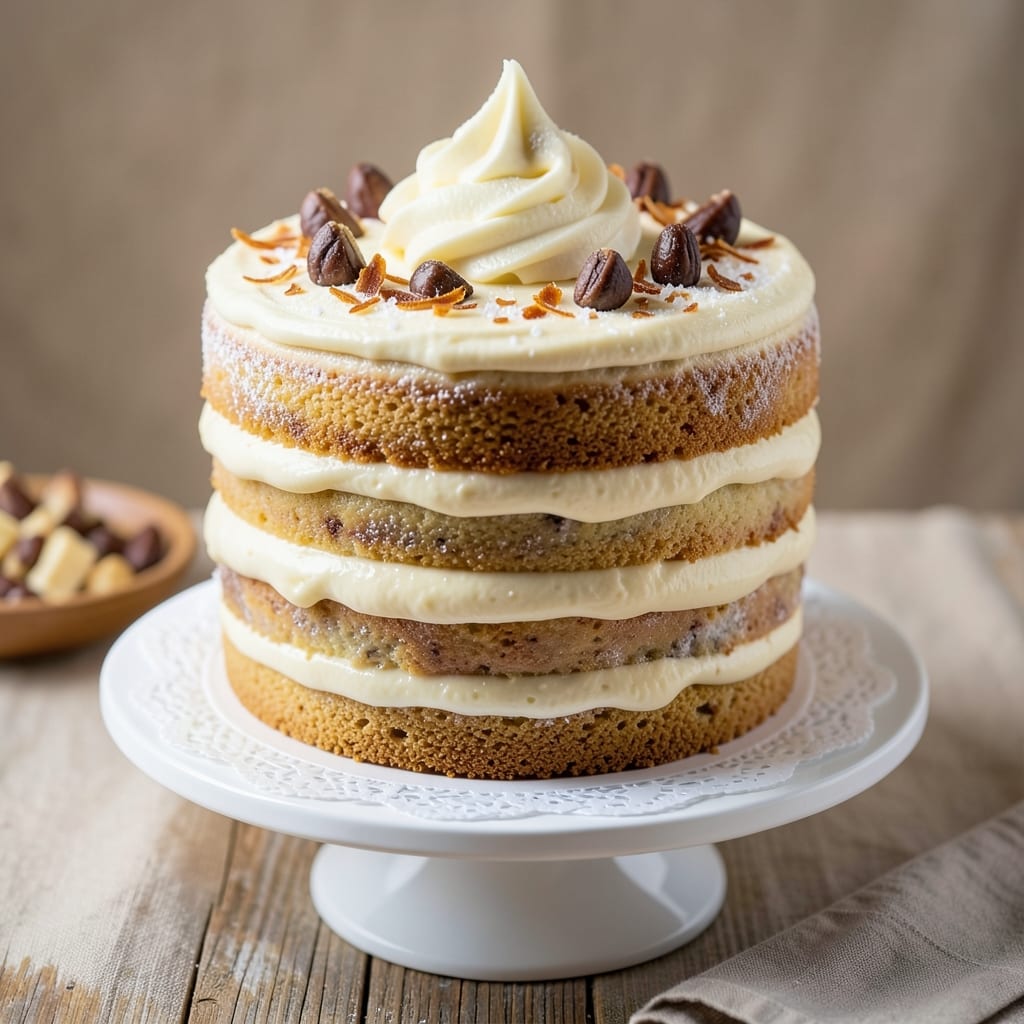
This Almond Joy layer cake recipe delivers the perfect balance of toasted coconut, rich chocolate, and creamy Almond Joy filling—every bite tastes like nostalgia in cake form. 🌟 The secret lies in a moist vanilla cake base infused with coconut extract, swirled with a velvety Almond Joy ganache that mirrors the candy’s signature flavors. What sets this apart is the toasted coconut layer between each cake tier, adding crunch and depth that store-bought versions can’t match.
The recipe starts with a foolproof vanilla cake batter that bakes to a tender crumb, then gets elevated with a luscious buttercream frosting laced with Almond Joy candy pieces for bursts of flavor. Assembly is where the magic happens—each layer gets spread with the ganache filling, creating those signature swirls that make this cake irresistible. The toasted coconut not only adds texture but also ties into the Almond Joy theme, making every slice feel like a celebration.
By the time you’re done, you’ll have a showstopping cake with layers of rich chocolate, creamy coconut, and the unmistakable taste of Almond Joy. The frosting is smooth yet sturdy enough to hold decorative coconut flakes or chocolate shavings, giving it that bakery-fresh look. This cake is perfect for birthdays, holidays, or just because—it’s the kind of dessert that makes people ask for seconds.
Ready in about 3 hours (including chilling time), this recipe is designed for home bakers who want restaurant-quality results without the complexity. The key is patience—letting the cake cool completely and chilling the frosting ensures clean layers and a flawless finish. Let’s get baking!
Ingredients for almond joy layer cake
Twelve ingredients, three layers, and a taste of childhood nostalgia in every bite.
| Ingredient | Amount | Notes |
|---|---|---|
| All-Purpose Flour 🌾 | 3 cups | Sifted for light texture |
| Granulated Sugar 🍚 | 2 ¼ cups | White or light brown |
| Unsalted Butter 🧈 | 1 ½ cups | Room temperature, softened |
| Large Eggs 🥚 | 6 whole | Room temperature for even mixing |
| Vanilla Extract 🌿 | 2 tsp | Pure extract for authentic flavor |
| Baking Powder 🍞 | 1 ½ tsp | Diamond Crystal preferred |
| Salt 🧂 | ½ tsp | Fine sea salt preferred |
| Coconut Extract 🥥 | 1 tsp | For authentic tropical flavor |
| Unsweetened Shredded Coconut 🥥 | 2 cups | Toasted for enhanced flavor |
| Almond Joy Candy Bars 🍫 | 12 whole | Chopped for filling and frosting |
| Heavy Whipping Cream 🥛 | 2 cups | Cold for stable buttercream |
| Powdered Sugar 🍚 | 4 cups | Sifted for smooth frosting |
| Dark Chocolate Chips 🍫 | 1 cup | Semi-sweet for ganache |
| Milk 🥛 | ¼ cup | For ganache consistency |
The Almond Joy candy bars are the heart of this cake—use the classic version with the white chocolate and coconut coating, not the mini bars. Trader Joe's and Walmart stock them reliably, but check the expiration date since they can dry out. For the coconut, toast it in a dry skillet over medium heat for 5-7 minutes until golden and fragrant—this step is non-negotiable for that bakery-quality crunch. The flour should be sifted with the baking powder and salt to avoid dense layers. If you can't find coconut extract, vanilla bean paste adds depth, though it won't replicate the exact flavor.
No Almond Joy bars? Substitute with white chocolate chips mixed with shredded coconut—it won't be identical, but it'll get you close. For the chocolate ganache, use semi-sweet chocolate chips (60% cacao) for the perfect balance of sweetness and richness. If you're making this ahead, prep the ganache first and store it at room temperature—it melts beautifully when reheated. The buttercream can be made a day in advance and stored in the fridge, though you'll need to re-whip it before using. For the cake layers, underbake slightly (check at 270°F internal temp) to ensure they stay moist when layered.
Toasted coconut loses its crunch quickly, so store it in an airtight container at room temperature for up to 3 days. The cake layers keep well wrapped at room temperature for 2 days, while the frosting and ganache can be refrigerated for 5 days. For assembly, work in a cool room to prevent the buttercream from melting. The final cake holds for 3 days at room temperature if covered tightly, but it's best enjoyed fresh. Freeze the fully assembled cake (unfrosted) for up to 3 months—thaw overnight in the fridge before serving.
Why You'll Love This Recipe
- No Mixer Needed: I swear by this—just a bowl and a whisk. The butter and sugar cream so smoothly by hand (yes, even if you’re not a pro), and the eggs blend right in without a fuss. Honestly, my arms get a workout, but the cake turns out fluffier than anything I’ve ever made with a machine.
- Coconut Buttercream Bliss: That Almond Joy filling? It’s where the magic happens. The toasted coconut swirled into the buttercream gives it this textural contrast—creamy layers with little crunchy pockets. Between us, it’s the kind of flavor that makes people pause mid-bite and ask, “What is this thing?”
- Birthday Party Ready: I’ve used this for everything from my nephew’s 8th birthday to a last-minute office celebration. The layers hold up beautifully, and the coconut shavings on top make it look fancy without the effort. (Pro tip: Add a sprinkle of crushed almonds for extra wow factor.)
- Fridge-Friendly for Days: Between us, I’ve had this cake last a full week in my fridge—still moist, still delicious. The buttercream doesn’t dry out, and the layers stay intact if you slice it carefully. Plus, it’s way cheaper than buying a store-bought cake for two, and honestly? It tastes better.
Step-by-step instructions for Almond Joy layer cake
Here's how to assemble this decadent cake with perfect layers and rich swirls.
👨🍳 Step 1: Prepare the Cake Batter
Preheat your oven to 350°F and grease three 8-inch round cake pans with butter, then line the bottoms with parchment paper. In a large mixing bowl, cream together the 1.5 cups softened unsalted butter and 2.25 cups granulated sugar on medium speed until light and fluffy—about 3-4 minutes. You'll know it's ready when the mixture nearly doubles in volume and looks pale.
Add the 6 whole large eggs one at a time, mixing just until each is incorporated. In a separate bowl, whisk together the 3 cups sifted all-purpose flour, 1.5 tsp baking powder, and 0.5 tsp salt. Gradually add the dry ingredients to the butter mixture, alternating with 2 tsp vanilla extract and 1 tsp coconut extract. Mix on low speed until just combined—don't overmix or your cake will be dense.
🔥 Step 2: Bake and Assemble the Layers
Divide the batter evenly among the prepared pans. Bake for 25-30 minutes or until a toothpick inserted in the center comes out clean. Let the cakes cool in the pans for 10 minutes, then transfer to a wire rack to cool completely. This cooling step is crucial—warm layers will turn your filling soggy.
While the cakes cool, prepare the filling. Chop 8 of the 12 Almond Joy candy bars into small pieces. In a microwave-safe bowl, melt the 1 cup dark chocolate chips and 0.25 cup milk in 30-second intervals, stirring between each, until smooth. Stir in the chopped Almond Joy pieces until fully melted and combined. Let this mixture cool slightly but remain spreadable.
🥘 Step 3: Create the Coconut-Chocolate Filling
Toast the 2 cups unsweetened shredded coconut in a dry skillet over medium heat for 3-4 minutes, stirring constantly, until golden brown and fragrant. Immediately transfer to a bowl and let cool. In a separate bowl, beat the 2 cups cold heavy whipping cream until stiff peaks form. Gently fold in the toasted coconut and 4 cups sifted powdered sugar until smooth.
Spread half of the coconut cream mixture over the first cake layer. Add the chocolate-Almond Joy filling, then repeat with the remaining cream. Place the second layer on top, press gently, and repeat the process for the final layer. This careful layering ensures each bite delivers that perfect balance of coconut, chocolate, and Almond Joy.
🍽️ Step 4: Chill and Decorate
Refrigerate the assembled cake for at least 2 hours to allow the filling to set completely. This chilling time is essential for clean slices and proper texture. Once firm, use the remaining 4 chopped Almond Joy pieces to decorate the top. For extra flair, dust with additional powdered sugar or arrange whole Almond Joy bars around the edges.
Slice and serve immediately. The contrast of warm toasted coconut, rich chocolate ganache, and the signature Almond Joy crunch in every bite makes this cake unforgettable. Store any leftovers in the refrigerator for up to 3 days, though I doubt it will last that long!
Pro Tips For Making Almond Joy Layer Cake
- Whisk Eggs Cold: Pull your eggs straight from the fridge and whisk them until the yolks and whites are fully blended before adding them to the butter-sugar mix. I learned this the hard way—room-temperature eggs can turn your batter into a greasy mess, especially with all that butter in an Almond Joy cake. ---
- Sift That Flour: Don’t just dump the flour into the bowl—sift it first, especially if your recipe calls for more than 2 cups. Aerating the flour lightens the texture, and trust me, you’ll notice the difference in a layered cake where every ounce of lift matters. ---
- Don’t Overmix: Stop mixing the moment the flour disappears into the wet ingredients. Overmixing develops gluten, and your cake will turn out dense instead of tender. I used to worry about lumps, but a quick spatula scrape takes care of that—no one’s judging your cake for a few tiny streaks. ---
- Butter at Room Temp: Let your unsalted butter sit out for 30-45 minutes before creaming it with sugar—it should be soft but not greasy. Cold butter won’t emulsify properly, and your cake will end up with a weird, crumbly texture instead of that rich, moist crumb you’re after.
Pro cooking tips for this dish
Toasted Coconut Perfection
Toast your shredded coconut in a dry skillet over medium heat for 3-4 minutes, stirring constantly until golden brown and fragrant. This step is non-negotiable for that bakery-quality crunch and aroma. I like to use a 10-inch nonstick skillet—it gives me better control than a large pan. Transfer immediately to a bowl and let cool completely before adding to your frosting. 🥥
Ganache Temperature Control
When melting the chocolate for the ganache, work in 30-second intervals in the microwave to avoid overheating. Stir between each interval until smooth. Let it cool to room temperature before spreading—around 70°F—so it doesn’t melt the cake layers. I’ve ruined a cake or two by rushing this step, so patience pays off here. 🌡️
Layering Like a Pro
Spread the coconut cream evenly across each cake layer using an offset spatula—this prevents lumps and ensures clean slices. For the chocolate-Almond Joy filling, use a piping bag with a star tip to create decorative swirls between layers. Press each layer gently but firmly to avoid air pockets. I like to tap the cake plate on the counter after adding each layer to help everything settle. ✨
Chilling for Clean Slices
Refrigerate the assembled cake for at least 2 hours before slicing—this allows the filling to set completely and prevents messy crumbs. I’ve found that 2-3 hours is ideal for a firm yet creamy texture. For extra stability, place the cake in the fridge for 30 minutes before serving, especially in warm kitchens. 💫
Decorating with Confidence
Use the remaining 4 chopped Almond Joy pieces to decorate the top, pressing them gently into the frosting for a secure finish. For a polished look, dust with powdered sugar using a fine-mesh sieve or arrange whole Almond Joy bars around the edges. I like to add a few toasted coconut flakes on top for an extra tropical touch. 🍫
Equipment Upgrades
Invest in a digital kitchen scale for precise measurements, especially when weighing the cake batter. A stand mixer with the paddle attachment makes whipping the frosting effortless. For baking, I recommend Lodge 8-inch round cake pans—they distribute heat evenly and prevent sticking. These tools elevate your cake from homemade to showstopper. 💡
Nutrition facts
Frequently asked questions
Can I make this cake without Almond Joy bars?
Yes! You can substitute with white chocolate chips mixed with shredded coconut (about 1 cup white chips + 1 cup coconut) for the filling. For the frosting, use extra coconut extract (½ tsp more) and add chopped toasted coconut for texture. The flavor won't be identical, but it'll still taste delicious.
How do I prevent the cake layers from getting soggy?
Always let the cake layers cool completely before assembling. Spread a thin layer of frosting as a "barrier" between layers, then add your fillings. Chill the cake for at least 2 hours before slicing—this helps the filling set and keeps the layers firm. For extra insurance, bake the cake 1-2 minutes less than directed.
Can I make this cake ahead of time?
Bake the layers 1 day ahead and store them wrapped at room temperature. Make the frosting and filling 1 day before and refrigerate. Assemble the cake 4-6 hours before serving to let flavors meld. Keep it refrigerated until ready to serve—it'll taste even better after resting!
Why does my frosting look grainy?
Grainy frosting usually means the powdered sugar wasn't sifted or the buttercream was overmixed. Always sift your powdered sugar and mix the buttercream on medium speed just until smooth. If it's already made, try blending it briefly with an immersion blender to smooth out lumps. Cold ingredients also cause graininess—make sure your butter and cream are properly chilled.
How do I store leftovers?
Cover the cake tightly with plastic wrap and store at room temperature for up to 2 days. For longer storage, refrigerate for up to 5 days. Bring it to room temperature before serving—cold cake can make the filling taste bland. Freeze unfrosted layers for up to 3 months if you need to make it ahead.