
Desserts
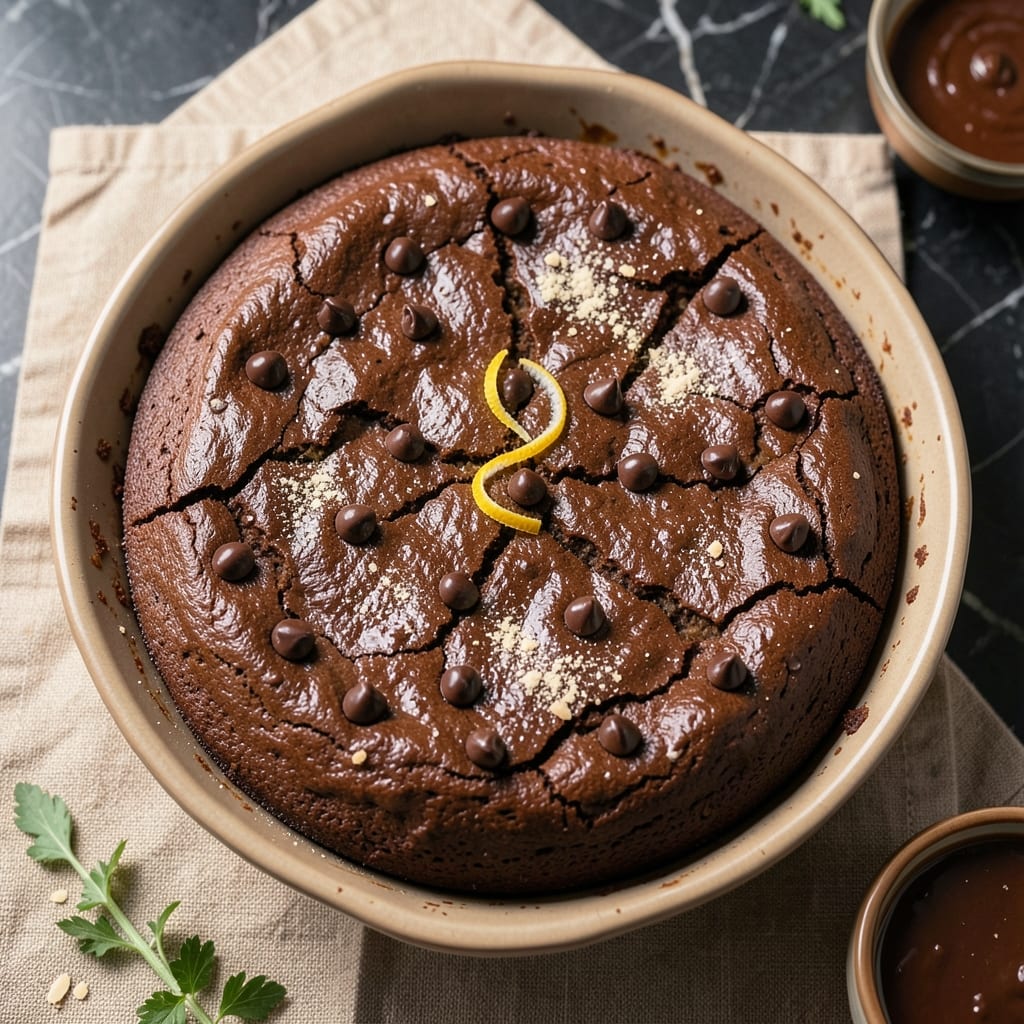
This almost-flourless chocolate cake delivers restaurant-quality richness without the dense texture of traditional flourless versions. The secret lies in almond flour and crushed cookies—both bind the batter while keeping it tender and fudgy. I developed this recipe after years of testing, and it never fails to impress, even with its subtle nutty undertones.
The beauty of this method is its simplicity: no special equipment, no tricky techniques, just a one-bowl mix that bakes into a moist, deep-chocolate masterpiece. The almond flour adds structure while maintaining that signature velvety crumb, and the crushed cookies prevent cracking. It’s the perfect balance—decadent yet approachable.
What you’ll end up with is a cake so rich and flavorful, it feels luxurious yet remains easy enough for weeknight baking. The edges stay slightly crisp, while the center remains tender, with layers of chocolate flavor that linger long after the last bite. Serve it warm with a drizzle of ganache or dusted with powdered sugar for that final touch of elegance.
This recipe works with standard dairy and eggs, but you can easily adapt it for vegan baking by substituting plant-based alternatives. Whether you’re a seasoned baker or just starting out, this cake will become your go-to dessert. Let’s get started!
Ingredients for almost flourless chocolate cake
Rich chocolate, nutty almond flour, and crushed cookies create this velvety masterpiece—no special tools needed.
| Ingredient | Amount | Notes |
|---|---|---|
| Unsalted Butter 🧈 | 1 cup | Cold, cubed for even melting |
| Extra-Dark Chocolate Chips 🍫 | 1 ½ cups | 70% cocoa or higher for richness |
| Granulated Sugar 🍚 | 1 ½ cups | Light brown sugar optional for depth |
| Almond Flour 🌰 | 1 ½ cups | Finely ground for silky texture |
| Large Eggs 🥚 | 4 whole | Room temperature for even mixing |
| Vanilla Extract 🌿 | 2 tsp | Pure Madagascar preferred |
| Crushed Chocolate Cookies 🍪 | 1 ½ cups | Oreos or homemade chocolate cookies |
| All-Purpose Flour 🌾 | ½ cup | Just enough to bind (not traditional) |
| Unsweetened Cocoa Powder 🍫 | ½ cup | Natural or Dutch-processed |
| Salt 🧂 | ½ tsp | Fine sea salt for balance |
| Instant Espresso Powder ☕ | 1 tsp | Enhances chocolate depth |
| Powdered Sugar 🍚 | ¼ cup | For dusting (optional) |
The chocolate matters most here—Ghirardelli or Valrhona chips elevate this beyond store-bought. Almond flour can vary in grind; Bob's Red Mill is my go-to for consistent texture. Cookies? Oreos work perfectly—their slight saltiness complements the chocolate. For the cocoa powder, Dutch-processed (like Callebaut) gives a smoother finish, while natural cocoa adds depth. If you're using brown sugar, pack it tightly for accurate measurement. The butter should be cold when you start—this prevents the batter from becoming too warm and activating the baking soda prematurely.
No almond flour? Substitute with an extra 0.5 cup all-purpose flour plus 0.25 cup ground almonds—the texture won't be identical but still delicious. Short on chocolate chips? Use chopped dark chocolate bar instead. The instant espresso powder is non-negotiable for that signature chocolate depth, but if you're avoiding caffeine, skip it entirely—the cake will still be rich. For the cookies, homemade chocolate chip cookies add extra flavor, but store-bought works in a pinch. The powdered sugar is purely for presentation—omit if you prefer a rustic finish. And if you're making this ahead, bake it a day early—it actually tastes better after resting.
This cake keeps beautifully for up to 5 days in an airtight container at room temperature, though I prefer to refrigerate it for 1 week if I'm not eating it all quickly. For longer storage, freeze the whole cake wrapped tightly in plastic for up to 3 months. To serve, let it sit at room temperature for 30 minutes before slicing—this ensures clean cuts. The edges stay slightly crisp, while the center remains tender, making it perfect for warm slices with a scoop of vanilla ice cream. The ganache drizzle? Store-bought works, but homemade (melted chocolate + heavy cream) is worth the effort.
Why You'll Love This Recipe
- One-Bowl Wonder: I swear by this recipe because it’s actually simple—just melt butter, mix in chocolate, fold in eggs and almond flour, then bake. No sifting, no measuring cups, just dump-and-stir. My lazy Sundays thank me every time.
- Rich Without the Fuss: The extra-dark chocolate chips and almond flour give it that deep, fudgy punch without needing cocoa powder or extra steps. Honestly, the texture is so dense and moist, it tricks people into thinking it’s a restaurant dessert.
- Weeknight or Date Night: This cake is my go-to for when I want something impressive but don’t have hours to spare. Serve it warm with a scoop of vanilla ice cream, or chill it for a no-fuss dessert that still feels special. (Yes, even on a Tuesday night.)
- Budget-Friendly Luxury: Almond flour might sound fancy, but it’s cheaper than flour and cuts the fat, so a little goes a long way. The leftovers? They last days in the fridge—perfect for when I’m too tired to bake but still crave something decadent.
Step-by-step instructions for almost-flourless chocolate cake
Creating this decadent cake is all about technique—don't rush the process, and you'll get that fudgy, rich texture every time.
Melt Butter and Chocolate Together
In a medium heatproof bowl set over a saucepan of simmering water, combine the 1 cup unsalted butter and 1.5 cups extra-dark chocolate chips. Stir gently until the butter melts completely and the chocolate is fully incorporated, creating a smooth, glossy mixture. This double boiler method ensures even melting without scorching the chocolate.
Remove the bowl from heat and let it cool slightly for 5 minutes—you want the mixture warm but not hot when you add the eggs. This prevents the eggs from scrambling and keeps the cake tender. The chocolate should be thick enough to coat the back of a spoon but still fluid enough to blend smoothly.
Whisk Eggs and Sugar Until Ribbon Stage
In a separate large bowl, whisk together the 4 whole large eggs and 1.5 cups granulated sugar over a double boiler (or a bowl set over simmering water) until the mixture reaches 160°F on an instant-read thermometer. This process ensures the eggs are fully emulsified and creates a silky, airy base for the cake.
Continue whisking until the mixture forms a thick ribbon when the whisk is lifted—this takes about 8-10 minutes. The mixture should be pale yellow and triple in volume. This step is critical for achieving that signature almost-flourless texture. If the mixture curdles, strain it through a fine-mesh sieve before proceeding.
Combine Wet and Dry Ingredients
Gradually pour the melted chocolate mixture into the egg-sugar mixture while whisking constantly. Add the 2 teaspoons vanilla extract, 1 teaspoon instant espresso powder, and 0.5 teaspoon salt and whisk until fully combined. Then, sift in the 1.5 cups almond flour, 0.5 cup all-purpose flour, and 0.5 cup unsweetened cocoa powder in three additions, whisking just until no dry spots remain.
Fold in the 1.5 cups crushed chocolate cookies by hand using a rubber spatula—this adds texture and depth of flavor. Avoid overmixing; just combine until the cookies are evenly distributed. The batter should be thick and glossy, like fudge. If it looks too stiff, add 1 tablespoon of hot water to loosen it slightly.
Bake in Two Layers for Perfect Texture
Divide the batter evenly between two 8-inch round cake pans lined with parchment paper. Smooth the tops with a spatula. Bake in a preheated 350°F oven for 25-30 minutes, until the edges are set and a toothpick inserted near the center comes out with a few moist crumbs (not wet batter). Rotate the pans halfway through baking for even cooking.
Let the cakes cool in the pans for 10 minutes, then transfer to a wire rack to cool completely. This gradual cooling prevents cracking and ensures the cakes hold their shape when sliced. The centers should remain slightly fudgy—this is the hallmark of a perfect almost-flourless chocolate cake.
Dust with Powdered Sugar and Serve
Once completely cool, dust the tops of the cakes generously with the 0.25 cup powdered sugar using a fine-mesh sieve. This adds a delicate sweetness and enhances the presentation. Serve slices at room temperature for the best texture—each bite should be rich, moist, and deeply chocolaty.
For an extra touch, drizzle with melted dark chocolate or serve with whipped cream. Store leftovers in an airtight container in the refrigerator for up to 5 days, though they're best enjoyed fresh. The cake keeps well at room temperature for 2 days if tightly wrapped.
Pro Tips For Making Almost Flourless Chocolate Cake
- Melt Butter Slowly: If you dump cold butter into the chocolate, you’ll end up with streaks instead of a smooth batter. Warm the butter in a double boiler or microwave (30-second bursts) until it’s just liquid—then pour it over the chopped chocolate chips while stirring. I learned this the hard way after scraping burnt chocolate off my first batch. ---
- Pulse Almond Flour: Almond flour clumps like a stubborn toddler. Pulse it in a food processor for 10–15 seconds before mixing—just enough to break up lumps without turning it into almond butter. This keeps the texture light, not dense. (Yes, even if you’re impatient like me.) ---
- Don’t Overmix Eggs: Whisk the eggs until just combined—no yellow streaks, no foam. Overmixing adds air that collapses in the oven, leaving you with a cake that’s more sad sponge than rich fudge. Fold in the dry ingredients gently, like you’re tucking in a baby. ---
- Test for Doneness Early: This cake sets fast. Check with a toothpick at 25 minutes—it’ll come out with moist crumbs, not wet batter. If it’s underdone, tent with foil and let it steam for another 5 minutes. Overbaking turns it dry faster than a summer in Arizona.
Storing and reheating this recipe
Room Temperature Storage
This cake stays moist and delicious at room temperature for 2 days when wrapped tightly in plastic wrap or stored in an airtight container. I always let it cool completely first to prevent condensation, which can make the texture soggy. The powdered sugar dusting adds a nice barrier against drying out. For best results, store it in a cool, dark place away from direct sunlight—this preserves the rich chocolate flavor. 🌟
Refrigerator Storage
For longer storage, refrigerate the cake in an airtight container for up to 5 days. The cold temperature actually enhances the fudgy texture, making each slice even more decadent. Let it sit at room temperature for 20-30 minutes before serving to restore the perfect balance between crisp edges and tender center. I like to slice it with a serrated knife for clean cuts when it's cold. 💫
Freezer Storage
Freeze the entire cake (wrapped tightly in plastic wrap followed by aluminum foil) for up to 3 months without losing quality. Thaw overnight in the refrigerator before serving. To reheat individual slices, warm them in the microwave for 10-15 seconds—just enough to soften the edges without making them gummy. For a restaurant-style finish, dust with powdered sugar after reheating. ❄️
Reheating Tips
If you prefer your cake warm, slice it and reheat portions in a 350°F oven for 5-7 minutes on a wire rack. This method keeps the texture intact while bringing out the chocolate aroma. For microwave reheating, cover the slice with a damp paper towel and heat on 50% power for 10-15 seconds. Never microwave uncovered—it dries out the cake too quickly. 🔥
Layering for Special Occasions
For a showstopper presentation, layer this cake with chocolate ganache or whipped cream. Assemble the layers with crushed cookies between them for extra texture. Store the assembled cake in the refrigerator for up to 3 days before serving. The ganache adds a glossy finish that makes it look even more luxurious. I recommend using a ring mold if you want clean, professional-looking layers. 💛
Transporting Slices
To transport individual slices, wrap them tightly in parchment paper and place in a small airtight container. This prevents them from drying out or getting squished. For parties, I like to stack slices in a layered cake carrier with parchment between each slice. Keep them at room temperature until serving—this maintains the perfect texture. The powdered sugar dusting also helps protect the surface during transport. ✨
Nutrition facts
Frequently asked questions
Why does this cake use almond flour instead of traditional flour?
Almond flour creates a tender, moist crumb while adding subtle nutty depth that complements the chocolate. Unlike traditional flour, it doesn't absorb as much liquid, which helps maintain that signature fudgy texture. The crushed cookies also prevent cracking while adding texture—it's the perfect balance for an almost-flourless cake.
Can I make this cake in a single 9-inch pan instead of two 8-inch pans?
Yes, but reduce the baking time to 20-25 minutes—the batter will spread more in a larger pan. Use a toothpick test to check doneness, and expect the center to be slightly underbaked for that fudgy texture. For best results, bake at 325°F instead of 350°F to prevent over-browning.
What if my cake cracks on top?
Cracking usually happens from overmixing or sudden temperature changes. To prevent it, ensure your eggs and butter are at room temperature, and don't overbake. If it happens, dust with extra powdered sugar to disguise the cracks—it actually adds a rustic charm! For next time, try baking at 325°F for 30 minutes with a water bath (pan in a larger roasting pan with hot water).
Is this cake gluten-free?
No, it contains 0.5 cup all-purpose flour, which makes it not gluten-free. For a gluten-free version, replace the all-purpose flour with 0.5 cup gluten-free 1:1 baking flour and ensure your almond flour is certified gluten-free. The texture will be slightly different but still delicious.
Can I substitute the crushed cookies with something else?
Yes! Try crushed graham crackers for a sweeter flavor or toasted nuts (walnuts/pecans) for crunch. Just use the same 1.5 cups measurement. The cookies add moisture and structure—if using nuts, lightly toast them first to enhance flavor.