
Desserts
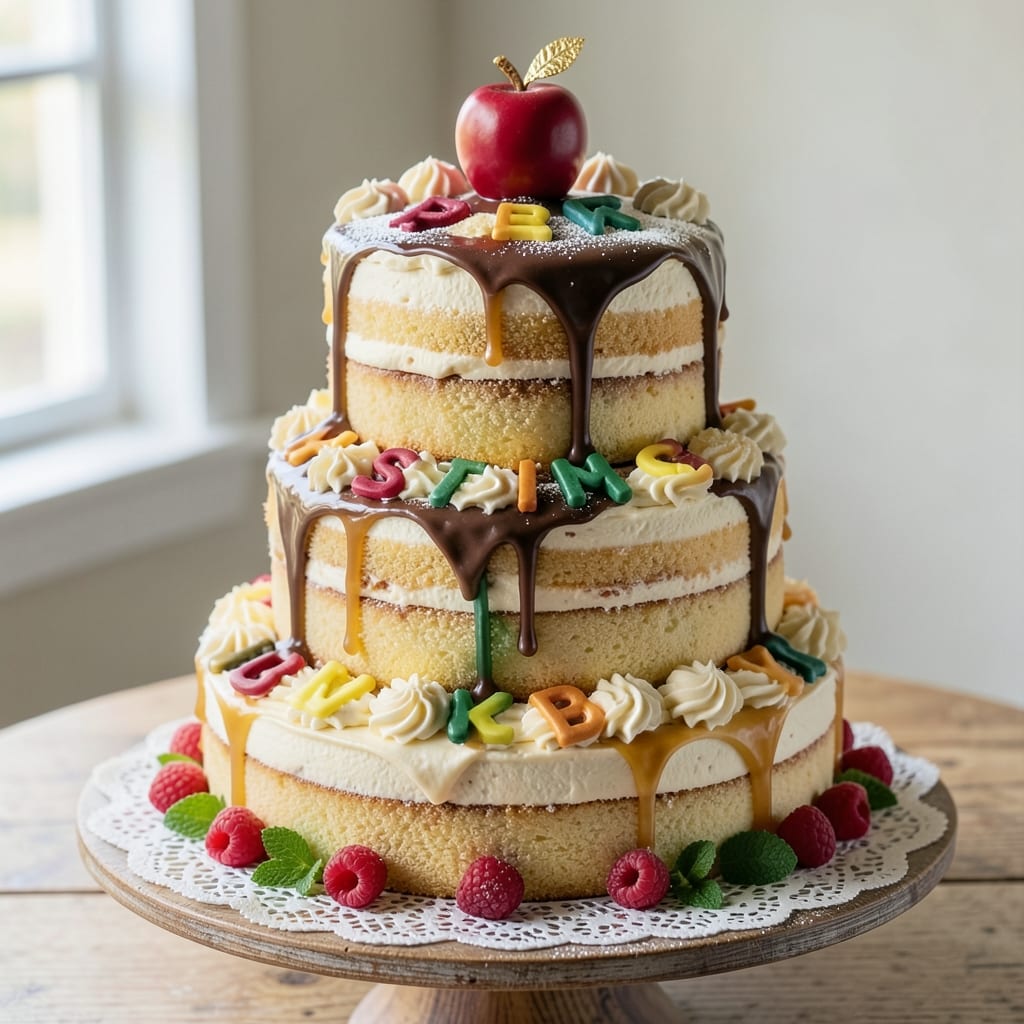
This alphabet cake recipe transforms baking into a playful, edible adventure that will delight both kids and adults alike. 💛 The secret lies in a sturdy vanilla sponge base that holds its shape perfectly when carved into crisp, clean letters—no messy crumbs or collapsed edges. What makes this recipe special is its versatility: you can customize flavors (vanilla, chocolate, or even funfetti) and decorate with fondant or buttercream letters for any occasion, from birthdays to name celebrations.
The process is surprisingly straightforward for such an impressive result. After baking a single-layer cake, you’ll use a sharp knife or letter cutters to create precise alphabet shapes while the cake is still warm but fully cooled. A light dusting of powdered sugar prevents sticking, ensuring your letters stay intact when transferred to a decorated base. This method guarantees professional-looking results without requiring advanced baking skills.
What you’ll end up with is a showstopping centerpiece that doubles as an interactive dessert—kids can "build" words or names with the letters, making it both fun and functional. The cake’s tender crumb and smooth frosting create the perfect canvas for vibrant decorations, while the sturdy base ensures your letters stay upright. Perfect for celebrations or simply adding a creative touch to any gathering, this recipe proves baking can be both beautiful and playful.
Whether you’re celebrating a milestone, teaching the alphabet, or just craving a unique dessert, this alphabet cake delivers. The best part? You can adapt it to any theme or flavor preference, making it as customizable as it is impressive. Let’s get started on creating edible letters that will wow your little chefs!
Ingredients for alphabet cake
Twelve playful ingredients to create edible alphabet magic that wows little chefs and big celebrations alike!
| Ingredient | Amount | Notes |
|---|---|---|
| All-Purpose Flour 🌾 | 2 ½ cups | Sifted for light texture |
| Granulated Sugar 🍚 | 1 ½ cups | Superfine preferred for smoothness |
| Unsalted Butter 🧈 | 1 cup | Room temperature, full-fat |
| Large Eggs 🥚 | 4 whole | Room temperature for even mixing |
| Vanilla Extract 🌸 | 2 tsp | Pure extract, not imitation |
| Baking Powder 🧪 | 2 tsp | Aluminum-free for tender crumb |
| Salt 🧂 | ½ tsp | Fine sea salt preferred |
| Powdered Sugar 🍚 | 2 cups | For dusting and frosting |
| Heavy Whipping Cream 🥛 | 1 cup | Cold for stable frosting |
| Fondant or Buttercream 🎂 | 2 cups | For letter decorations |
| Sharp Knife or Letter Cutters 🔪 | 1 piece | For clean letter edges |
| Alphabet Cookie Cutters 🔤 | 1 set | Plastic or metal preferred |
| Food Coloring 🎨 | 1 tbsp | Gel-based for vibrant colors |
| Parchment Paper 📄 | 1 sheet | For clean transfer of letters |
The foundation starts with flour—King Arthur or Gold Medal brands work best for that sturdy yet tender crumb. Room-temperature butter is non-negotiable here; it creates that perfect light texture for clean letter edges. For the sugar, superfine makes all the difference—it dissolves smoothly for a velvety crumb. The vanilla extract should be pure, not imitation; McCormick or Nielsen-Massey are my go-tos. Baking powder? Clabber Girl aluminum-free is my secret for that tender crumb. Pro tip: Sift everything together before mixing—this eliminates lumps and ensures your letters stay crisp when carved.
No superfine sugar? Pulse regular granulated in a food processor for 2 minutes—it’ll work in a pinch. Swapping butter for vegetable shortening makes the cake more stable for carving, but it’ll taste less rich. Egg substitutes? Flax eggs (1 tbsp ground flax + 3 tbsp water per egg) work, but the texture won’t be quite as sturdy. For the fondant or buttercream, Wilton or Betty Crocker boxed mixes are perfect for beginners—just tint them with gel food coloring for vibrant letters. The cookie cutters can be plastic, but metal ones give the cleanest edges. If you’re hand-cutting, a serrated knife works better than a chef’s knife for clean lines.
This cake stays fresh for 3 days at room temperature, but the letters are best used within 24 hours for maximum crispness. Wrap the fondant-covered letters in plastic wrap and refrigerate if prepping ahead—just let them sit at room temp for 10 minutes before assembling. The powdered sugar keeps forever in a sealed container, while the whipping cream should be used within 3 days of opening. For a longer shelf life, freeze the unfrosted cake for up to 3 months—thaw at room temperature before decorating. The parchment paper trick? Dust it with powdered sugar before transferring letters to prevent sticking.
Why You'll Love This Recipe
- No Fuss Mixing: Mixing this cake is like making pancakes—just cream butter and sugar, crack eggs, add vanilla, then fold in flour. No sifter, no food processor, just a big bowl and a whisk. I’ve made it while chatting on the phone, and it still turns out light and tender.
- Vanilla Butter Bliss: That simple vanilla extract and rich butter combo? It’s the secret weapon. The cake has this melt-in-your-mouth softness with just enough sweetness to make it feel like a treat, not a chore. Honestly, I’ve skipped frosting entirely—it’s that good on its own.
- Birthday or Boredom: This cake is my go-to for anything: a 5th birthday, a lazy Sunday, or when I just need a pick-me-up. Cut it into letters for a themed cake, slice it into squares for a snack, or serve it warm with ice cream. It’s the one recipe that does it all without extra effort.
- Leftovers? Even Better: The best part? It stays fresh for days. I’ve wrapped slices in parchment and stashed them in the fridge—still moist the next morning. And because it’s just flour, sugar, butter, and eggs, it’s cheap enough to bake twice if you’re craving it again. (Yes, even on a Tuesday night.)
Step-by-step instructions for edible alphabet cake letters
Here's how to bake and decorate these magical edible letters that'll have little chefs begging for seconds!
🍳 Step 1: Bake the Perfect Letter-Shaped Cake Base
Preheat your oven to 350°F and line a baking sheet with the parchment paper. Gently press the alphabet cookie cutters into the 2.5 cups All-Purpose Flour to create stencils - this prevents flour from sticking to the cutters. In a large mixing bowl, cream together the 1 cup Unsalted Butter and 1.5 cups Granulated Sugar until light and fluffy, about 3-4 minutes.
Add the 4 whole Large Eggs one at a time, mixing well after each addition. Stir in the 2 tsp Vanilla Extract, then sift in the 2.5 cups All-Purpose Flour, 2 tsp Baking Powder, and 0.5 tsp Salt until just combined. The batter should be smooth but not overmixed - you'll still see some flour streaks. Transfer the batter to a piping bag fitted with a round tip.
Pipe the batter through the flour-stenciled cookie cutters onto the prepared baking sheet, filling each letter shape about ¾ full. Bake for 12-15 minutes until the edges are light golden brown and a toothpick inserted comes out clean. Let the letter cakes cool completely on the baking sheet before transferring to a wire rack.
👨🍳 Step 2: Prepare the Decorative Frosting
While the letter cakes cool, prepare your decorative frosting. For buttercream, beat the 1 cup Heavy Whipping Cream until soft peaks form, then gradually add the 2 cups Powdered Sugar while mixing on low speed. Add the 1 cup Unsalted Butter (softened) and continue beating until light and fluffy, about 3-4 minutes. For fondant, roll out the 2 cups Fondant or Buttercream between two sheets of parchment paper to about ¼-inch thickness.
Divide the frosting into small bowls and tint each with 1 tbsp Food Coloring to create vibrant colors. I recommend making at least 4-5 different colors for variety. If using fondant, knead in the coloring until evenly distributed. The frosting should be smooth and pliable - if it's too stiff, soften it slightly with a few drops of water or milk.
🥘 Step 3: Assemble and Decorate the Edible Letters
Place each cooled letter cake on a clean sheet of parchment paper. Using the sharp knife or letter cutters, carefully trim any uneven edges to create clean letter shapes. For buttercream letters, spread a thin layer over the entire surface of each cake letter, then pipe additional frosting around the edges to create a neat border.
For fondant letters, roll out colored fondant to about ⅛-inch thickness and cut out letter shapes using the alphabet cookie cutters. Press these fondant letters onto the cake letters, smoothing gently with your fingers. Use the sharp knife to trim any excess fondant from the edges. For extra flair, pipe contrasting colors around the edges or add small fondant decorations.
⏰ Step 4: Final Touches and Display
Let the decorated letters set for 15-20 minutes at room temperature to allow the frosting to firm up slightly. This prevents smudging when you handle them. Once set, carefully transfer each letter to individual serving plates or arrange them on a platter to spell out words or names.
Here's where it gets fun - arrange the letters to create messages like "Happy Birthday" or "Mom & Dad". For extra stability, you can lightly brush the back of each letter with a tiny bit of water before placing them on the display surface. The letters will keep for 3-4 days at room temperature if stored in an airtight container, though they're always best enjoyed fresh!
Pro Tips For Making Alphabet Cake
- MIX BUTTER AND SUGAR UNTIL PALE: I learned this the hard way—skipping the pale color means your cake will taste dull and dense. Beat the butter and sugar for 3-5 minutes until it looks like wet sand, not crumbly. (Yes, even if you’re impatient like me.)
- WEIGH YOUR FLOUR (DON’T SCOOP): That cup measure in your drawer lies. Spooning flour packs it too tightly, throwing off your cake’s structure. Use a kitchen scale for precision—1 cup of all-purpose flour is actually 125 grams, not the 160 grams you’d get from scooping.
- DON’T OVERMIX THE BATTER: Once you fold in the flour, stop mixing the second it’s just combined. Overworking it develops gluten, and your alphabet cake will turn out tough instead of tender. Use a spatula and lift—no need to stir like you’re making pancake batter.
- LET THE CAKE REST BEFORE BAKING: I used to pop the batter into the oven ASAP, but a 10-minute rest at room temp lets the flour absorb the moisture. This keeps your cake from sinking in the middle—trust me, it’s worth the wait. (Your future self will thank you.)
Creative variations of these flavors
Flavor Variations
Swap the classic vanilla for chocolate cake mix—just add an extra ½ cup cocoa powder to the dry ingredients. For a fun twist, use funfetti cake mix and fold in sprinkles before piping the batter. I once made a lemon poppy seed version by replacing vanilla extract with 2 tbsp lemon zest and adding ¼ cup poppy seeds to the batter. The citrus brightens the cake while keeping it sturdy enough for clean letter cuts. 💛
Themed Celebrations
For a baby shower, spell out the baby’s name in pastel fondant letters—use Wilton’s gel food coloring for vibrant hues. For a birthday party, add glitter or edible glitter to the frosting for a festive touch. I once decorated a "Happy Graduation" cake with fondant diplomas attached to the letters for a keepsake dessert. The key is to match the theme’s colors and textures—think gold accents for weddings or rainbow sprinkles for pride celebrations.
Dietary Adaptations
Make this cake gluten-free by substituting the all-purpose flour with a 1:1 gluten-free baking flour blend like Bob’s Red Mill. For a vegan version, replace butter with vegan butter (like Miyoko’s) and eggs with flax eggs (1 tbsp ground flax + 3 tbsp water per egg). The texture will be slightly denser, but the letters still hold their shape beautifully. I’ve also made a nut-free version by omitting any almond-based frostings and using sunflower seed butter as a substitute for butter in the frosting. ✨
Letter-Shaping Hacks
If you don’t have alphabet cookie cutters, trace letters onto parchment paper with a pencil, then press the paper into the batter before piping. For 3D letters, pipe the batter into a silicone letter mold (available at baking supply stores) instead of flat shapes. I once used plastic alphabet blocks as stencils—just press them into the batter before piping for instant letter shapes. For extra stability, bake the letters on a wire rack instead of a baking sheet to prevent soggy bottoms. 🔥
Decorative Techniques
For textured fondant, dust your work surface with cornstarch before rolling out the fondant to prevent sticking. Create embossed letters by pressing lace doilies or metal mesh onto the fondant before cutting. I love adding mini fondant flowers or edible pearls to the edges of letters for a whimsical touch. For a marbled effect**, swirl two colors of fondant together before rolling it out. The possibilities are endless—let your creativity spell out the fun! 🎨
Nutrition facts
Frequently asked questions
Do I need special equipment to make alphabet cake letters?
Not necessarily! While alphabet cookie cutters make the process easier, you can create letter shapes using parchment paper stencils or even trace letters onto the batter with a knife. For cleaner edges, a sharp serrated knife works well when trimming baked letters. The key is patience—take your time to achieve crisp lines.
How do I prevent my alphabet letters from crumbling when cutting?
Let the cake cool completely before cutting to avoid crumbling. Chill the baked letters in the fridge for 15-20 minutes before trimming for extra stability. Use a hot knife (dip in hot water) for cleaner cuts, and dust with powdered sugar before transferring to prevent sticking. A slightly denser batter (like chocolate or funfetti) also holds up better to cutting.
Can I make this cake ahead of time?
Bake the letter shapes up to 2 days ahead and store them in an airtight container at room temperature. For decorated letters, assemble them 1 day before serving and store in the fridge. Fondant letters can be prepped 3 days ahead—just let them sit at room temperature for 10 minutes before arranging to prevent sticking.
What’s the best way to spell words with the letters?
Arrange letters on a parchment-lined platter or individual plates for easy serving. For stability, lightly brush the back of each letter with water or edible glue before placing them on the display surface. Use toothpicks (hidden under decorations) to secure letters temporarily during setup. For a 3D effect, stack letters slightly or add small fondant accents between them.
How do I make the frosting or fondant colors vibrant?
Use gel food coloring (like Wilton) instead of liquid dyes—it mixes better and won’t alter the frosting’s consistency. For fondant, knead the coloring thoroughly and let it rest for 10 minutes before rolling. To intensify colors, add a tiny bit of citric acid (for pink/red) or turmeric (for yellow). Avoid overmixing—just a few strokes blend evenly.