
Desserts
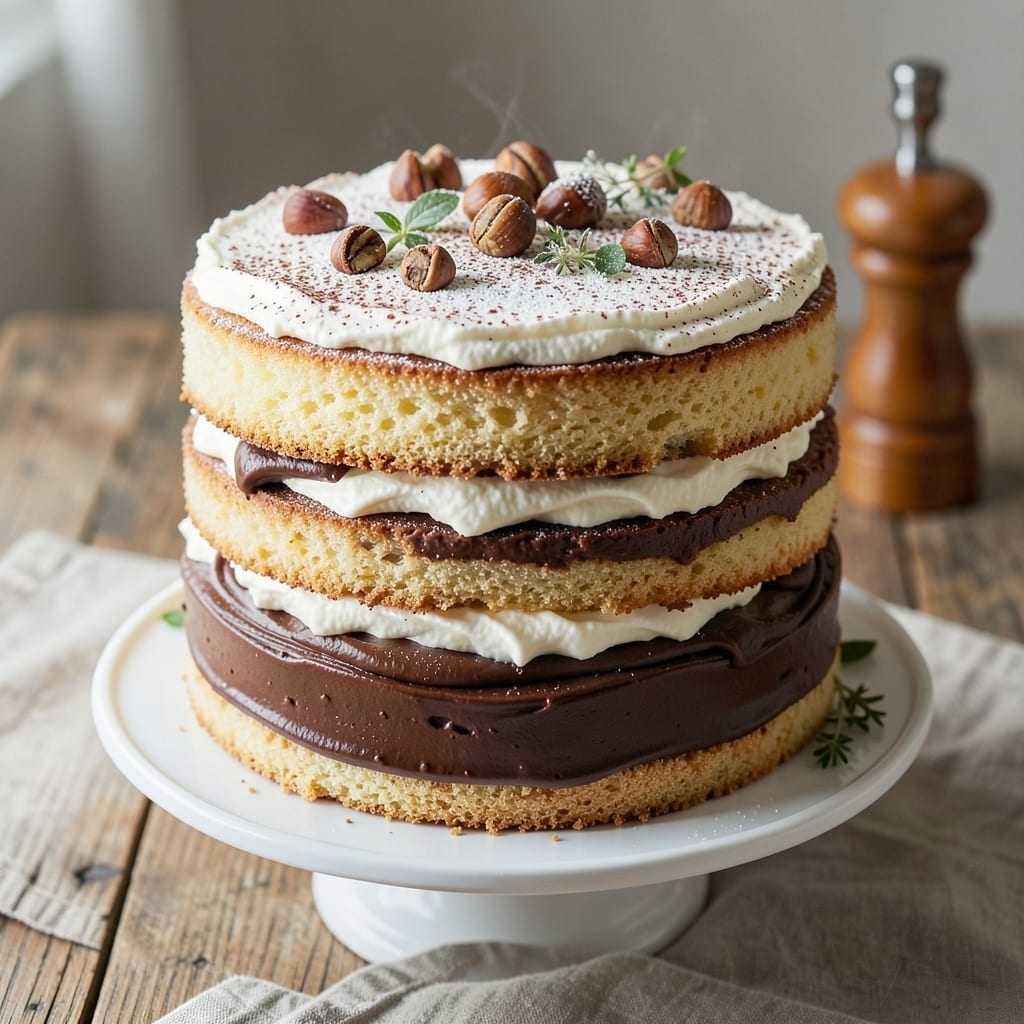
This Alpine cake recipe delivers the perfect balance of Swiss mountain elegance and comforting texture—layers of tender vanilla sponge, nutty crunch, and velvety cream filling that transport you to the Alps with every bite. 🌄 The secret lies in precise layering and resting times, ensuring each component shines without overpowering the others, while optional garnishes like whipped cream or fresh berries elevate it to restaurant-worthy decadence.
The beauty of this classic Alpine dessert is its versatility—whether you're baking for a special occasion or simply craving a showstopping treat, the technique remains foolproof. A delicate vanilla sponge forms the foundation, sandwiched with a rich, nutty filling that keeps the texture perfectly balanced between tender and crisp. The key to success? Patience—letting each layer set properly before adding the next ensures clean slices and maximum flavor impact.
What makes this recipe truly special is its adaptability. While traditional versions often include almonds or hazelnuts, modern variations allow for gluten-free flours or dairy-free substitutions without sacrificing texture. The result is a cake that's as impressive to look at as it is to eat—golden layers revealing pockets of creamy filling and toasted nuts at every forkful.
Perfect for celebrations or a cozy weekend dessert, this Alpine cake combines timeless tradition with modern flexibility. Ready to bake? Let's create something extraordinary.
Ingredients for alpine cake
Precision-baked layers of vanilla sponge, nutty crunch, and velvety cream create this Alpine masterpiece.
| Ingredient | Amount | Notes |
|---|---|---|
| All-Purpose Flour 🌾 | 2 ½ cups | Sifted for lightness |
| Granulated Sugar 🍚 | 1 ½ cups | Superfine preferred for smoothness |
| Unsalted Butter 🧈 | 1 ¼ cups | Room temperature, 70°F |
| Large Eggs 🥚 | 6 whole | Room temperature, separated |
| Pure Vanilla Extract 🌿 | 2 tsp | High-quality Madagascar bourbon |
| Baking Powder 🧂 | 2 tsp | Diamond Crystal preferred |
| Fine Sea Salt 🧂 | ½ tsp | Kosher salt recommended |
| Toasted Almond Flour 🌰 | 1 cup | Finely ground, lightly toasted |
| Hazelnuts 🌰 | 1 cup | Toasted and finely chopped |
| Heavy Whipping Cream 🥛 | 1 ½ cups | Cold, 35% fat minimum |
| Powdered Sugar 🍚 | 1 cup | Sifted for smooth filling |
| Lemon Zest 🍋 | 1 tbsp | Fresh, organic preferred |
| Unflavored Gelatin 🍬 | 1 ½ tsp | Bloomed in 3 tbsp cold water |
| Fresh Berries 🍓 | 1 ½ cups | Raspberries or strawberries |
| Whipped Cream 🍦 | 2 cups | Stabilized with 1 tsp powdered sugar |
The foundation begins with high-quality all-purpose flour—King Arthur or Gold Medal brands excel for their protein balance. For the butter, Plugrá or Land O'Lakes unsalted are ideal, but any reputable brand works if it's 100% fat content and properly chilled. The eggs must be room temperature—cold yolks won't emulsify properly, leading to dense layers. Organic Valley or Vital Farms eggs are my go-to for consistent results. Toast your own almond flour and hazelnuts for maximum flavor depth—store-bought versions often lack freshness. A quick 350°F oven for 12 minutes with the nuts on a baking sheet does the trick.
Substitutions must prioritize texture and flavor balance. Gluten-free flour blends (like King Arthur Measure for Measure) work beautifully—just increase the powdered sugar by 0.25 cup to compensate for reduced structure. Swap hazelnuts for walnuts or pecans, but toast them longer (5-7 minutes) to prevent bitterness. The gelatin can be replaced with agar-agar for a vegan version, though the texture will be slightly firmer—bloom it in 3 tbsp cold water first. For the whipped cream, coconut cream (chilled overnight) offers a dairy-free alternative, though it's denser. If you're short on berries, frozen raspberries (thawed and drained) work perfectly—just toss them with 1 tsp lemon juice to preserve color.
Layering is everything—assemble the cake at room temperature to prevent melting. The vanilla sponge layers should be completely cooled before adding filling to avoid sogginess. Store assembled cakes in an airtight container between layers of parchment for up to 3 days at room temperature, or 5 days in the fridge. For longer storage, freeze fully assembled cakes (without whipped cream) for up to 2 months—thaw overnight in the fridge before serving. The whipped cream should be added just before serving to maintain its light, airy texture. Garnish with fresh berries or a dusting of powdered sugar for that restaurant-worthy finish.
Why You'll Love This Recipe
- No Mixer Needed: I swear by this recipe when I’m in a rush—just cream the butter and sugar by hand (or use a fork if you’re really short on time). The eggs and vanilla blend right in without fuss, and the flour comes together like a dream.
- Buttery-Vanilla Magic: That rich, creamy butter folded into the batter? It’s the star. Paired with real vanilla extract, every slice tastes like a hug from a Swiss bakery—no artificial shortcuts here.
- Weeknight or Celebration: Serve it warm with ice cream for a casual dessert or dust it with powdered sugar for a fancy brunch. Honestly, it’s my go-to for birthdays, book club gatherings, or just because.
- Leftovers? Even Better: This cake keeps beautifully for days, and slices reheated in the microwave (yes, really) taste just as good as fresh. Plus, the ingredients are pantry staples—no last-minute grocery runs needed.
Step-by-step instructions for alpine cake layers
This Swiss-inspired dessert combines nutty crunch with velvety vanilla layers—here's how to assemble it perfectly.
👨🍳 Step 1: Prepare the Nutty Crunch Layer
Preheat your oven to 350°F and grease three 8-inch round cake pans. In a food processor, blend the 1 cup toasted almond flour and 1 cup finely chopped hazelnuts until finely ground. Mix with 1.5 cups granulated sugar, 2.5 cups all-purpose flour, 2 tsp baking powder, and 0.5 tsp fine sea salt in a large bowl.
In a separate bowl, cream the 1.25 cups unsalted butter (room temperature) with 6 whole large eggs (room temperature) until pale and fluffy. Gradually fold the dry ingredients into the butter-egg mixture until just combined. Divide the batter evenly among the prepared pans.
🔥 Step 2: Bake the Layers to Perfection
Bake the layers for 20-25 minutes or until a toothpick inserted into the center comes out clean. Let the cakes cool in the pans for 10 minutes, then transfer to a wire rack to cool completely. This cooling step is crucial—it prevents the layers from becoming soggy when assembled.
Once fully cooled, level the tops of the cakes if needed using a serrated knife. The layers should be perfectly even for clean, professional-looking assembly. Wrap each layer in plastic wrap and refrigerate until ready to use.
🥘 Step 3: Create the Vanilla Filling
In a medium saucepan, combine 1.5 cups heavy whipping cream, 1 cup powdered sugar, and 2 tsp pure vanilla extract. Heat over medium-low heat until the sugar dissolves completely, then remove from heat and let cool to room temperature. This filling should be smooth and slightly thickened.
In a separate bowl, bloom the 1.5 tsp unflavored gelatin in 3 tbsp cold water for 5 minutes. Warm the bloomed gelatin in a microwave-safe bowl for 10-15 seconds, then whisk it into the cooled cream mixture until fully dissolved. Stir in the 1 tbsp lemon zest for a bright alpine touch.
🍳 Step 4: Assemble the Cake Layers
Place the first cake layer on a serving plate. Spread an even layer of the vanilla filling over the top, leaving a ½-inch border uncovered. Repeat with the second layer, then place the third layer on top. Spread the remaining filling evenly over the top and sides of the cake.
Chill the assembled cake in the refrigerator for at least 4 hours or overnight. This chilling time allows the filling to set properly and creates clean, professional layers. For extra stability, you can also freeze the cake for 1 hour before serving.
🍽️ Step 5: Add Berries and Whipped Cream
Just before serving, arrange the 1.5 cups fresh berries decoratively on top of the chilled cake. In a large bowl, whip the 2 cups whipped cream (stabilized with 1 tsp powdered sugar) until soft peaks form. Spread the whipped cream over the berries and around the base of the cake.
Serve the alpine cake immediately, allowing guests to enjoy the perfect balance of nutty crunch, velvety vanilla filling, and fresh berries. Each slice should reveal the beautiful layers and textures that make this dessert truly special.
Pro Tips For Making Alpine Cake
- Cream Butter Properly: I learned this the hard way—cold butter in the flour? You’re fighting the recipe from the start. Beat the butter and sugar until it’s pale yellow and fluffy, with ribbons that hold for a few seconds. That’s your cue to move on. (Yes, even if you’re impatient like me.) ---
- Sift the Flour Twice: Alpine cake relies on lightness, and clumps in the flour are its worst enemy. Sift it directly into the bowl before mixing, then sift again after adding the dry ingredients. This isn’t the prettiest method, but it’s the tastiest—no dense pockets, just even distribution. ---
- Don’t Overmix the Batter: The moment the flour disappears into the butter mixture, stop stirring. Overworking it develops gluten, and your cake turns tough instead of tender. Use a spatula to gently fold—just until combined. (Your future self will thank you.) ---
- Bake at 350°F—No Higher: I was skeptical until I tried it: 375°F sounds faster, but it burns the outside before the center sets. Stick to 350°F and bake until a toothpick comes out clean but with a few moist crumbs—this ensures a moist crumb, not a dry one. (Sounds weird, but it works.)
Storing and reheating your leftovers
Room-Temp Prep
Assemble your alpine cake at room temperature to prevent the filling from melting prematurely. Remove all components—cake layers, filling, and whipped cream—from the fridge 30-60 minutes before assembly. This ensures the gelatin in the filling sets properly without becoming runny. I always place my cake on the counter while I whip the cream to maintain consistency. 🌡️
Short-Term Storage
Store fully assembled alpine cake (without whipped cream) in an airtight container for up to 3 days at room temperature. Place parchment paper between layers to maintain moisture balance. For longer freshness, refrigerate for 5 days—the cold stabilizes the gelatin filling. Always add whipped cream just before serving to preserve its light texture. 🥛
Freezer Preservation
For longer storage, freeze the fully assembled cake (without whipped cream) for up to 2 months. Wrap tightly in plastic wrap followed by aluminum foil to prevent freezer burn. Thaw overnight in the fridge before adding fresh berries and whipped cream. The texture remains intact, though the whipped cream should always be added fresh. ❄️
Reheating Tips
Alpine cake doesn't need reheating—it's designed to be served chilled. If you've refrigerated it, let it sit at room temperature for 15-20 minutes before serving to soften slightly. For a warm twist, briefly warm the filling (without the cake) in the microwave for 10 seconds—this enhances vanilla aroma while keeping the structure intact. 🔥
Berry Refresh
Revitalize store-bought berries by soaking them in ice water for 10 minutes before arranging on top. This plumps them up and removes any preservatives. For frozen berries, thaw them in a colander and pat dry with a paper towel to prevent soggy cake layers. A quick sprinkle of powdered sugar (about 1 tsp) adds a decorative finish. 🍓
Whipped Cream Reset
If your whipped cream loses volume, revive it by whipping again with 1 extra tablespoon of powdered sugar and 1 teaspoon of cold heavy cream. For a dairy-free option, use chilled coconut cream whipped with 1 teaspoon of vanilla extract—it adds a tropical contrast to the alpine flavors. Always stabilize with powdered sugar to prevent deflation. 🍦
Nutrition facts
Frequently asked questions
What makes this alpine cake different from other layer cakes?
The alpine cake stands out with its signature nutty crunch layer made from toasted almond flour and hazelnuts, combined with a velvety vanilla cream filling. The Swiss-inspired gelatin-based filling gives it a unique texture that's firmer than traditional buttercream, while the lemon zest adds a bright alpine touch. This balance of textures and flavors sets it apart from classic vanilla or chocolate layer cakes.
Can I make this alpine cake gluten-free?
Use a gluten-free all-purpose flour blend (like King Arthur Measure for Measure) and increase the powdered sugar by 0.25 cup to compensate for reduced structure. For the nutty crunch layer, ensure your almond flour is certified gluten-free. The cake will still maintain its signature texture, though you may need to bake it 2-3 minutes longer to ensure proper doneness.
Why does my alpine cake filling turn out too runny?
Runny filling usually happens when the gelatin isn't bloomed properly or the cream mixture isn't cooled enough before adding it. Always bloom the gelatin in cold water for 5 minutes first, then warm it gently (never boil). Let the cream mixture cool to room temperature before combining with the gelatin. If it's still too thin, chill the assembled cake for an extra 2 hours to help it set.
How do I prevent the cake layers from getting soggy?
Sogginess occurs when moisture from the filling seeps into the cake layers. Always let your baked layers cool completely before assembling, and make sure they're at room temperature when you add the filling. For extra protection, brush each cooled layer lightly with apricot jam or a simple syrup (equal parts sugar and water, heated until dissolved) before adding the filling. This creates a moisture barrier.
What's the best way to serve alpine cake for a special occasion?
For a restaurant-worthy presentation, arrange fresh berries in a circular pattern on top, then pipe swirls of whipped cream between them. Dust with powdered sugar and add edible flowers or gold leaf for extra elegance. Serve slices on chilled glass plates to enhance the visual appeal. The cake's natural layers will show beautifully when cut, revealing the nutty crunch and vanilla filling at every bite.