
Desserts
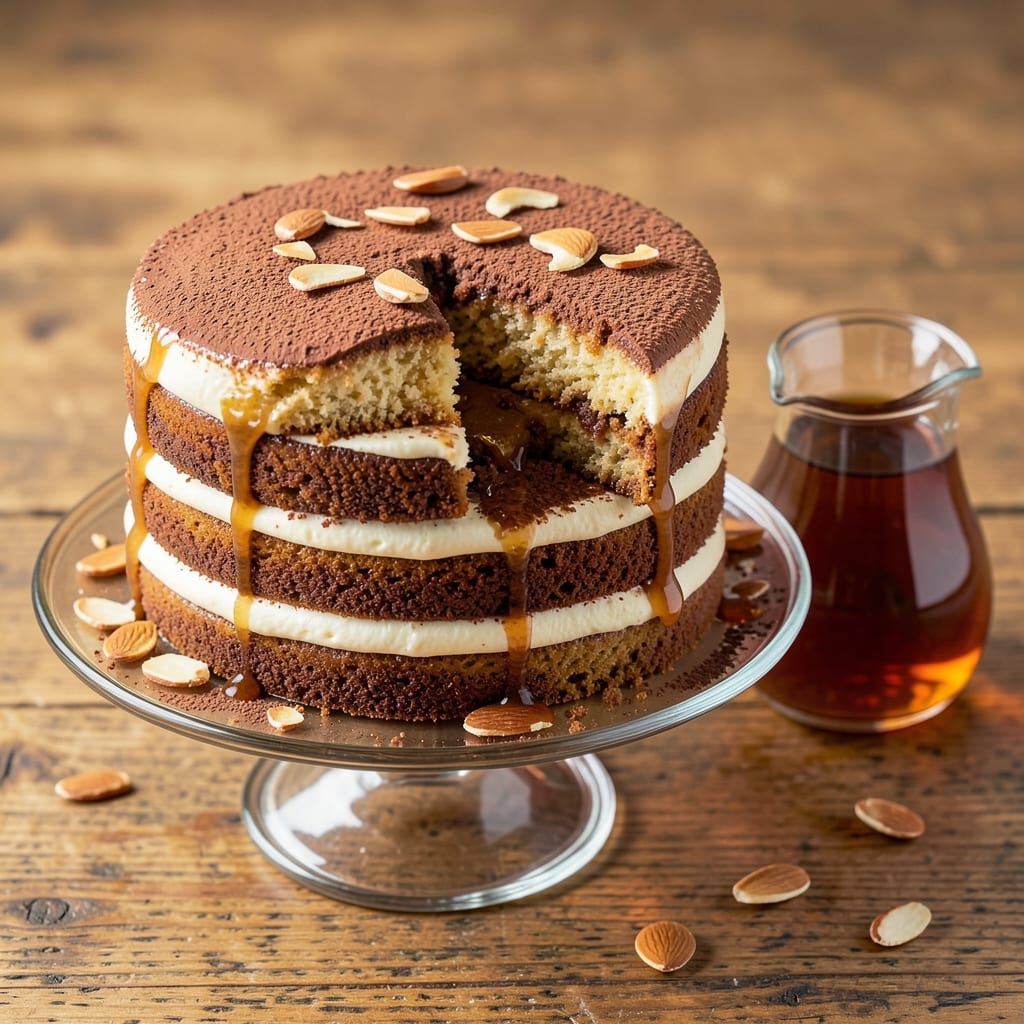
This amaretto divine cake recipe delivers layers of velvety chocolate cake swirled with rich amaretto-infused filling, creating a dessert that balances nutty depth and smooth sweetness. The secret lies in soaking the cake layers in amaretto liqueur, then layering them with a velvety buttercream that mirrors the liqueur's almond-kissed flavor. I've perfected this recipe over years of baking—it's the kind of dessert that disappears faster than you can say "second slice."
The process starts with a moist, tender chocolate cake base that's infused with just enough amaretto to enhance its natural richness without overpowering. Between each layer, we add a liqueur-soaked filling that creates those signature swirls, while the buttercream topping ties everything together with a glossy finish. The result? A cake that's as impressive to look at as it is to eat—ideal for celebrations or when you want to impress without stress.
What makes this recipe truly special is how the amaretto transforms ordinary cake into something extraordinary. The liqueur's nutty, slightly bitter notes cut through the sweetness, creating a perfect balance that keeps every bite interesting. Whether you're baking for a special occasion or just craving a decadent treat, this cake delivers restaurant-quality results with a fraction of the effort.
Ready in about 2 hours (including cooling time), this recipe is designed for home bakers who want to create showstopping desserts without advanced techniques. The layers stay moist for days, and the flavors only get better with time—making it perfect for meal prep or gifting. Let's get started on creating your own amaretto-infused masterpiece.
Ingredients for amaretto divine cake
Chocolate cake, amaretto swirls, and velvety buttercream—this dessert delivers restaurant-quality layers with simple ingredients.
| Ingredient | Amount | Notes |
|---|---|---|
| All-Purpose Flour 🌾 | 2 ½ cups | Sifted for light texture |
| Unsalted Butter 🧈 | 2 cups | Room temperature for creaming |
| Granulated Sugar 🍚 | 2 ¼ cups | Superfine preferred for smoothness |
| Cocoa Powder 🍫 | ¾ cup | Dutch-processed for rich flavor |
| Large Eggs 🥚 | 4 whole | Room temperature for best mixing |
| Amaretto Liqueur 🍷 | ½ cup | Disaronno brand recommended |
| Vanilla Extract 🌿 | 2 tsp | Pure Madagascar preferred |
| Baking Powder 🍞 | 1 tsp | Aluminum-free for best rise |
| Salt 🧂 | ½ tsp | Fine sea salt preferred |
| Heavy Cream 🥛 | 1 ½ cups | Cold for stable buttercream |
| Confectioners' Sugar 🍬 | 3 cups | Sifted for smooth buttercream |
| Powdered Sugar 🍬 | ½ cup | Extra for dusting layers |
The amaretto makes this cake special—Disaronno is my go-to brand, but any quality amaretto works. For the butter, Plugrá or Land O'Lakes unsalted melt beautifully. The cocoa powder? Dutch-processed gives that deep, rich flavor without bitterness. I always buy mine from King Arthur Flour—their Dutch-processed is consistent and affordable. The eggs should be at room temperature when you mix them in, or you'll end up with dense layers. Pro tip: if you're short on time, just take them out of the fridge 30 minutes before baking.
No amaretto? Almond extract at half the amount works in a pinch, but the flavor won't be as complex. Running low on vanilla extract? Vanilla bean paste adds little flecks of vanilla that make the cake feel extra special. For the buttercream, if you're worried about it being too sweet, reduce the powdered sugar to 2.5 cups—it's still luscious but not overwhelming. The heavy cream must be cold when you whip it, or the buttercream will split. If you're using a stand mixer, let it run for about 5 minutes until it's thick but still pipeable. And trust me, the extra powdered sugar for dusting between layers? Worth it—it adds that professional look.
This cake keeps beautifully—3 days at room temperature covered loosely with plastic, or 1 week in the fridge wrapped tightly. The flavors actually improve over time as the amaretto infuses deeper. For gifting, slice it when it's still slightly warm—it holds its shape better and looks stunning on a plate. Store leftovers in an airtight container with parchment between layers to keep them moist. Freezing? Not recommended—the texture gets too dense. Make it fresh for the best experience.
Why You'll Love This Recipe
- No Mixer Needed: I swear by this—just cream butter and sugar by hand until it’s light, then fold in the cocoa and eggs. No fancy equipment, no stress, just good old elbow grease that actually works.
- Almond-Kissed Magic: That amaretto swirl? It’s not just flavor—it’s comfort. The buttery richness of the cake meets the nutty warmth of cocoa and a hint of almond liqueur that makes every bite feel like a little treat.
- Weekend or Weeknight: Slice it for a fancy dessert after dinner or pack it for a picnic. The layers stay moist for days, so it’s perfect when you’re hosting or just craving something sweet without the fuss.
- Budget-Friendly Luxury: Flour, butter, sugar—these are pantry staples. The amaretto adds that special touch, but you can even cut it with a splash of vanilla if needed. Tastes indulgent, costs next to nothing.
Step-by-step instructions for amaretto divine cake
Here's how to create layers of nutty perfection with this velvety cake and rich buttercream.
Cream Butter and Sugars for Light Texture
In a stand mixer fitted with the paddle attachment, beat the 2 cups unsalted butter and 2.25 cups granulated sugar on medium speed for 4-5 minutes. You're aiming for a pale, fluffy mixture that nearly doubles in volume—this incorporates air that makes the cake tender. I like to scrape down the sides every minute or so to ensure even mixing.
Here's the thing—room temperature butter is critical. If it's too cold, it won't cream properly; if too soft, it'll turn greasy. Press your finger into it—it should leave a slight indent but hold its shape. Add the 2 teaspoons vanilla extract and mix for another 30 seconds to fully incorporate.
Add Eggs and Dry Ingredients Alternately
Add the 4 whole large eggs, one at a time, mixing just until each is fully incorporated after each addition. This prevents scrambling while maintaining that light texture. After the eggs, reduce speed to low and alternate adding the 2.5 cups all-purpose flour (sifted first for that perfect lightness) and the 0.5 cup amaretto liqueur in three parts.
Start and end with flour to avoid a dry batter. Mix just until combined—you should still see some flour streaks. Then add the 0.75 cup cocoa powder, 1 teaspoon baking powder, and 0.5 teaspoon salt, mixing until smooth. The batter should be thick but pourable. If it looks too stiff, add 1 tablespoon milk to loosen it.
Bake the Cake Layers for Even Rising
Preheat your oven to 350°F and grease two 8-inch round cake pans with butter and flour. Divide the batter evenly between the pans. Tap each pan gently on the counter to remove air bubbles, then smooth the tops with a spatula. Bake for 25-30 minutes until a toothpick inserted comes out clean and the edges pull away slightly from the pan.
I always check for doneness at the 25-minute mark—your oven might run hot. Let the cakes cool in the pans for 10 minutes, then transfer to a wire rack to cool completely. This prevents them from becoming gummy. While they cool, make the buttercream—it needs time to set up properly before assembly.
Make the Amaretto Buttercream
In a stand mixer fitted with the whisk attachment, beat the 1.5 cups heavy cream (cold) on high speed until soft peaks form. In a separate bowl, beat the 2 cups unsalted butter until smooth, then gradually add the 3 cups confectioners' sugar, mixing until fully incorporated. Add 1 tablespoon amaretto liqueur and the 2 teaspoons vanilla extract, beating until light and fluffy.
Gently fold the whipped cream into the buttercream mixture until fully combined. This creates that signature light, airy texture that makes this cake so special. Taste and adjust sweetness with more confectioners' sugar if needed. The buttercream should be thick enough to hold peaks but still spreadable.
Assemble and Swirl for Dramatic Layers
Level the cooled cake layers if needed, then place one layer on a cake stand or plate. Spread a thin layer of buttercream, then pipe a generous layer of the remaining buttercream around the edges. Place the second layer on top and repeat the buttercream process. Dust the top and sides with the 0.5 cup powdered sugar for a professional finish.
Here's where the magic happens: use a skewer to swirl the buttercream through the cake layers. Start at the center and work outward, creating those beautiful marbled patterns. Chill the cake in the refrigerator for at least 2 hours before slicing—this allows the layers to set properly and makes for cleaner cuts. Serve with a dusting of powdered sugar and enjoy the perfect balance of rich chocolate and nutty amaretto flavor.
Pro Tips For Making Amaretto Divine Cake
- Sift the Cocoa: Don’t just dump that cocoa powder—sift it first, especially if you’re using Dutch-process. I learned this the hard way when my cake turned out dense and gritty. A fine mesh sift ensures even distribution and prevents clumps that ruin the texture. ---
- Cream Butter and Sugar Slowly: Start your butter and sugar on low speed, then gradually increase to medium-high. Rushing this step traps air unevenly, and you’ll end up with a cake that’s dense in spots. Let the mixer do the work—this is where fluffiness begins. ---
- Room-Temp Eggs Matter: Cold eggs from the fridge will curdle your butter mixture, and you’ll be scrambling to fix it mid-bake. Pop those eggs in warm water for 5 minutes before cracking them—smooth, creamy batter every time. ---
- Don’t Overmix the Batter: Once you fold in the dry ingredients, stop as soon as they’re just combined. Overmixing develops gluten, and your cake will turn out tough instead of tender. A few streaks of flour are fine—perfection isn’t the goal here.
Storing and reheating this dish
Room Temperature Storage
Keep your amaretto divine cake at room temperature for up to 3 days, loosely covered with plastic wrap. The key is to let air circulate slightly—this prevents condensation that can make the layers soggy. I like to place it on a wire rack inside an airtight container to maintain that perfect balance of moisture and freshness. The flavors actually deepen over time as the amaretto infuses more into the cake layers. 🌟
Fridge Preservation
For longer storage, refrigerate the cake for up to 1 week in an airtight container. Wrap each layer separately with plastic wrap before stacking to prevent drying. The cold temperature helps preserve the buttercream's texture, though you might want to bring it to room temperature before serving for the best experience. I always let it sit for 30-45 minutes before slicing to restore that perfect crumb.
Freezing Limitations
While this cake freezes, I don't recommend it for more than 1 month—the texture can become dense and crumbly. If you must freeze, wrap each layer individually in plastic wrap, then place them in a freezer bag with all the air squeezed out. Thaw overnight in the fridge before serving. The flavors remain intact, but the texture won't be as light as a fresh-baked cake. Honestly, this dessert is best enjoyed fresh or within a few days. ❄️
Reheating Slices
If you've stored leftovers, reheat individual slices in the microwave for 10-15 seconds on medium power. This just warms the buttercream without drying out the cake layers. For a more even heat, place the slice on a microwave-safe plate and cover it with a damp paper towel. If you prefer stovetop reheating, warm the slice on a skillet over low heat for 20-30 seconds per side—just enough to melt the buttercream slightly.
Gifting Tips
When gifting this cake, slice it while still slightly warm for a cleaner presentation. Arrange slices on a cake board or platter, dust with extra powdered sugar, and add fresh berries or mint leaves for a pop of color. I like to pack individual slices in small cake carriers with parchment paper between layers to keep them fresh during transport. The cake stays moist for 24 hours this way, making it perfect for special occasions or last-minute surprises. 💫
Make-Ahead Assembly
You can assemble the cake layers up to 1 day in advance and refrigerate before decorating. This is especially helpful if you're short on time. Just let it come to room temperature before adding the final powdered sugar dusting. The flavors meld beautifully overnight, creating an even more complex taste profile. For parties, I often assemble the cake the night before—it saves time and ensures everything is perfect when guests arrive. 💡
Nutrition facts
Frequently asked questions
Can I substitute amaretto liqueur in this cake?
Yes, but the flavor will change. For a similar nutty profile, use 1 teaspoon almond extract mixed with 1 tablespoon water to replace the 0.5 cup amaretto in the batter. For the buttercream, use 1 teaspoon amaretto extract instead of the liqueur. If avoiding alcohol entirely, try 1 tablespoon almond syrup for depth. The cake will still be delicious, but the signature liqueur flavor will be missing.
Why does my cake turn out dense instead of light?
Dense cake usually means overmixing or incorrect butter temperature. Mix the batter just until combined—overmixing develops gluten, making the cake tough. Ensure your butter is room temperature (press your finger in; it should leave a slight indent). Also, don't overbake: pull the cake when a toothpick comes out clean (around 25-30 minutes at 350°F). Let it cool completely before assembling.
How do I make this cake gluten-free?
Replace the 2.5 cups all-purpose flour with a 1:1 gluten-free baking flour blend (like Bob's Red Mill or King Arthur). Add 1 teaspoon xanthan gum to help bind the layers. For the buttercream, use a gluten-free powdered sugar. The texture may be slightly denser, but the flavor remains rich. Test the recipe with one layer first to adjust consistency.
Can I use this recipe for a single-layer cake?
Use the same batter in a 9-inch round or square pan and bake for 30-35 minutes. For a single-layer look, spread the buttercream evenly on top and decorate with powdered sugar or fresh fruit. The swirl technique works best with layers, but a single layer still tastes amazing. This is a great option for smaller gatherings or when you want a simpler presentation.
What’s the best way to decorate this cake for special occasions?
For elegance, dust the top and sides with extra powdered sugar and add fresh berries or edible flowers. For a rustic touch, drizzle melted dark chocolate over the buttercream and sprinkle crushed almonds or candied orange peel. For a festive look, pipe rosettes or swirls with the buttercream in contrasting colors. Chill for 1 hour before decorating to keep everything in place.