
Desserts
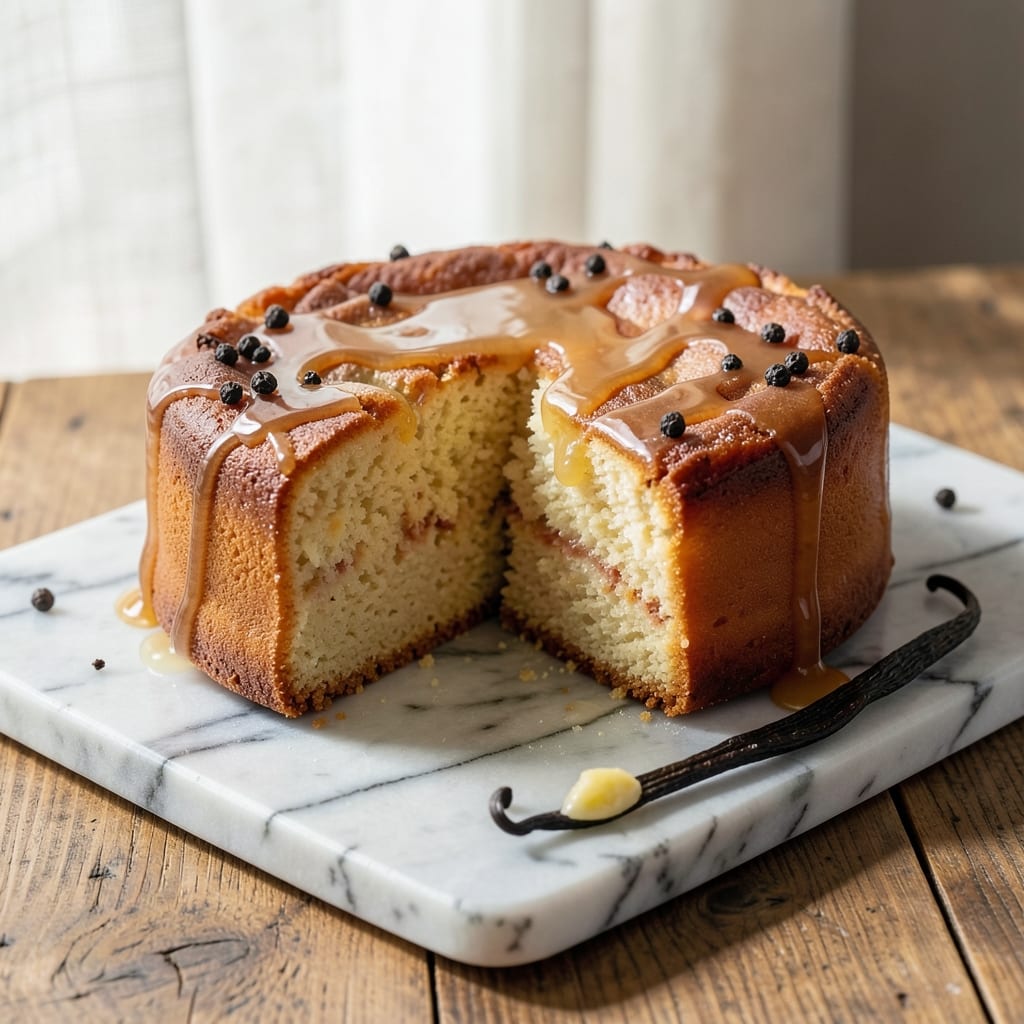
This amazing pound cake recipe delivers layers of vanilla heaven that stay moist for weeks—no dry crumbs in sight. 💛 The secret? A perfect balance of butter, sugar, and vanilla bean that creates tender, melt-in-your-mouth crumb with just the right crumbly texture. I’ve baked this version for family gatherings, and it’s always the first to disappear. What makes it truly special is the vanilla infusion—real vanilla bean paste instead of extract—plus a touch of citrus zest for brightness. The cake bakes up golden and fragrant, with a slightly domed top that’s impossible to resist. And don’t worry about it drying out; this recipe includes a simple storage trick that keeps it fresh for days. By the time you pull it from the oven, you’ll have a cake so rich and flavorful it’ll taste like a bakery masterpiece. The vanilla flavor is deep and aromatic, while the citrus adds a subtle freshness that keeps every bite interesting. It’s the kind of cake that makes people ask for seconds—and thirds. Serve it plain with fresh berries, drizzled with glaze, or layered with cream cheese frosting. Here’s how to make it happen!
Ingredients for amazing pound cake
Butter, sugar, and vanilla bean create this ultra-moist pound cake that stays fresh for weeks.
| Ingredient | Amount | Notes |
|---|---|---|
| Unsalted Butter 🧈 | 1 lb | Room temperature, full-fat preferred |
| Granulated Sugar 🍚 | 2 cups | Superfine preferred for smooth texture |
| Vanilla Bean Paste 🌿 | 2 tbsp | Real vanilla bean, not imitation |
| Large Eggs 🥚 | 4 whole | Room temperature, separated if preferred |
| All-Purpose Flour 🌾 | 3 cups | Sifted for lightest texture |
| Baking Powder 🧂 | 1 tsp | Diamond Crystal preferred |
| Salt 🧂 | ½ tsp | Fine sea salt preferred |
| Lemon Zest 🍋 | 1 tbsp | Freshly grated, bright yellow |
| Lemon Juice 🍋 | 1 tbsp | Freshly squeezed |
| Milk 🥛 | ½ cup | Whole milk for richness |
The butter is everything here—European-style or Plugrá makes all the difference. Grab it from Whole Foods or the baking aisle at Wegmans if you want that extra richness. I always buy a second pound and freeze it for future cakes. The vanilla bean paste? Madagascar or Tahitian gives the deepest flavor—none of that imitation stuff. For the flour, I sift it twice to avoid dense crumb. And that lemon zest? Use a microplane for the finest texture, not a grater.
No vanilla bean paste? Pure vanilla extract at double the amount works, but you’ll miss that complex flavor. Short on butter? Coconut oil can substitute, but the cake will be slightly denser. The milk can be swapped for buttermilk or heavy cream—just keep the same total volume. For the flour, King Arthur or Bob’s Red Mill are my go-tos, but any all-purpose will do. And if you’re feeling fancy, add 1 tsp almond extract for extra depth.
This cake keeps beautifully—3-4 days at room temperature in an airtight container, or 1 week in the fridge. For longer storage, slice and freeze portions for up to 3 months. I always wrap the whole cake in plastic wrap, then foil, to lock in moisture. The vanilla flavor actually gets better overnight, so bake it a day ahead if you can—trust me on this.
Why You'll Love This Recipe
- Rich but simple: butter, sugar, eggs, flour. That’s it. No specialty ingredients, no markup—just the kind of cake that makes you feel fancy without breaking the bank. My go-to for showy desserts that don’t scream “I spent hours.”
- No-Fuss Mixing: I swear by the creamy butter-sugar blend—just whip it until light, then fold in the eggs one at a time. No food processor? No problem. A sturdy hand mixer does the trick in five minutes flat, and honestly, the fewer steps, the better.
- Vanilla Bomb: That vanilla bean paste isn’t just flavor—it’s a moment. One split bean swirled into the batter gives you real vanilla scent and depth that generic extract can’t touch. The first slice? Pure nostalgia in every bite.
- Leftovers Win: This cake stays moist for days, which means I can bake one Sunday and slice it for breakfast toast, afternoon snacks, or even crumbled into oatmeal. (Yes, even on a Tuesday night.) No sad, dry ends here—just pure, buttery goodness.
Step-by-step instructions for vanilla-infused pound cake
This method delivers layers so moist and flavorful they'll stay fresh for weeks.
👨🍳 Step 1: Cream Butter and Sugar to Light and Fluffy
In a stand mixer fitted with the paddle attachment, beat the 1 lb unsalted butter (room temperature) and 2 cups granulated sugar on medium speed for 5-7 minutes. You're looking for a pale, fluffy mixture that nearly doubles in volume—this incorporates air that creates those signature tender layers. I press down on the butter occasionally to make sure it's fully incorporated.
Here's the thing—don't rush this step. The butter should be completely smooth with no grainy texture. If you're using superfine sugar, you'll notice the mixture lightens faster, but still give it the full time. This creaming process is what makes pound cake so rich and moist compared to other cakes.
🍳 Step 2: Add Eggs and Vanilla in Stages
Add the 4 whole large eggs one at a time, mixing on low speed for 30 seconds after each addition until fully incorporated. Then add the 2 tbsp vanilla bean paste and mix for another 30 seconds on low speed. The vanilla paste will give you that authentic vanilla flavor without the need for vanilla extract.
I like to let the eggs warm up slightly before adding them—just sit them in warm water for 5 minutes if they're straight from the fridge. This helps them emulsify better with the butter. The mixture should be thick and pale yellow at this point, with no streaks of egg white remaining.
👨🍳 Step 3: Combine Dry Ingredients and Wet Additions
In a separate bowl, whisk together the 3 cups all-purpose flour, 1 tsp baking powder, and 0.5 tsp salt. Sift the flour mixture directly into the butter mixture while mixing on low speed—this prevents gluten development that would make the cake tough. Mix just until combined, about 30 seconds, until you see a few small flour streaks remaining.
In a small bowl, whisk together the 0.5 cup milk, 1 tbsp lemon zest, and 1 tbsp lemon juice. With the mixer running on low speed, add about ⅓ of the milk mixture to the batter. This helps prevent the flour from absorbing all the liquid at once, which can make the batter too thick. Then add the remaining milk mixture in a slow, steady stream.
🥘 Step 4: Divide and Bake for Perfect Layers
Preheat your oven to 350°F. Grease and flour two 9-inch round cake pans (or one 9x13-inch pan for a single layer). Divide the batter evenly between the prepared pans. Tap each pan firmly on the counter 3-4 times to release any air bubbles and ensure even baking.
Bake for 50-60 minutes (or 40-50 minutes for the 9x13-inch pan) until a toothpick inserted in the center comes out clean. The cake should be golden brown on top and spring back gently when pressed in the center. I like to tent the pans with foil after 30 minutes to prevent over-browning if my oven runs hot.
⏰ Step 5: Cool and Layer for Maximum Freshness
Remove the cakes from the oven and let them cool in their pans for 10 minutes. Then invert them onto wire racks to cool completely. For the best results, wrap each cooled layer tightly in plastic wrap and store at room temperature. This pound cake stays fresh for 5-7 days when stored this way—way longer than most boxed cakes!
To serve, slice between the layers and spread with whipped cream or fresh berries. The lemon zest adds a bright citrus note that balances the richness perfectly. And here's a pro tip: if you want to make it ahead, you can bake the layers up to 2 days in advance—they actually taste better after a day or two as the flavors meld.
Pro Tips For Making Amazing Pound Cake
- MELT BUTTER SLOWLY: I learned this the hard way—dumping cold butter into hot sugar makes a greasy mess that won’t emulsify properly. Instead, melt the butter first (just until it’s liquid but not browned), then whisk it into the sugar while still warm. The mixture will look like a thick, glossy paste, not a sad, lumpy glop.
- SCRAPE EVERYTHING OUT: Your mixing bowl’s job isn’t done until it’s spotless. After adding the flour, use a rubber spatula to scrape the bottom and sides relentlessly—especially if you’re using a stand mixer. Leftover dry bits in the corners mean pockets of unincorporated flour, which guarantees a dense, crumbly cake. (Yes, even if you’re in a hurry.)
- DON’T OVERMIX THE FLOUR: As soon as the flour hits the wet ingredients, stop stirring. Just fold it in until just combined—no streaks, but no aerating either. Overmixing develops gluten, and that’s how you end up with a tough, chewy pound cake instead of the tender, crumbly texture you’re after. (I used to ignore this and wondered why my cake felt like a hockey puck.)
- USE ROOM-TEMP EVERYTHING: Cold eggs and butter are the enemy of even baking. Take your eggs out of the fridge 30 minutes before starting, and let the butter sit out until it’s soft enough to press a finger into but not leave a greasy smear. Cold ingredients slow down the chemical reactions, leading to uneven rising and a cake that’s dense in the middle. (Your future self will thank you—trust me.)
Creative variations of this dish
Citrus Twist Variation
Boost the classic flavor with extra lemon or orange zest—I like adding 2 tbsp orange zest alongside the lemon for a sunny, tropical vibe. For a deeper citrus punch, replace the milk with ½ cup orange juice instead. This variation works especially well with a white chocolate glaze that complements the bright citrus notes beautifully. 🍊
Spiced Chai Version
Transform this into a cozy chai-inspired cake by adding 1 tsp ground cinnamon, ½ tsp cardamom, and ¼ tsp cloves to the dry ingredients. Swap the lemon zest for 1 tsp grated ginger and the milk for ½ cup chai tea concentrate (simmered and cooled). Top with a spiced cream cheese frosting for a dessert that feels like autumn in every bite.
Chocolate-Dipped Layers
For a decadent twist, bake the cake as directed, then cool completely. Once set, dip each layer in melted dark chocolate (use 70% cacao for balance) and let it harden on parchment paper. The chocolate adds a rich contrast to the vanilla, making it perfect for chocolate lovers. Serve with raspberry compote to cut through the richness.
Coconut-Almond Fusion
Replace 1 cup of the all-purpose flour with 1 cup almond flour for a nutty, moist texture. Add ½ cup shredded coconut to the batter and fold in ¼ cup toasted coconut flakes after baking. This version pairs wonderfully with a coconut whipped cream and fresh mango slices. The almond flour adds a subtle earthiness that complements the vanilla beautifully. 🥥
Boozy Vanilla Bean
Infuse the batter with 2 tbsp bourbon or vanilla vodka (like Kettle One) instead of plain milk. The alcohol enhances the vanilla flavor while adding a subtle warmth. For extra indulgence, brush the cooled layers with 2 tbsp bourbon before serving. This version is a crowd-pleaser at dinner parties and pairs perfectly with espresso or coffee.
Gluten-Free Adaptation
Use a 1:1 gluten-free flour blend (like King Arthur Measure for Measure) and reduce the baking powder to ½ tsp. Add ½ cup cornstarch to the dry ingredients for better texture. The cake will be slightly denser but still moist and delicious. Store it in an airtight container with a slice of bread to keep it fresh longer—this trick works wonders for gluten-free baked goods! 🌾
Nutrition facts
Frequently asked questions
Why does this pound cake stay moist longer than other recipes?
The secret lies in the 1 lb of butter and the proper creaming technique—beating the butter and sugar for 5-7 minutes incorporates air that creates tender layers. Plus, the vanilla bean paste and lemon zest add moisture-retaining properties that keep it fresh for 5-7 days at room temperature.
Can I bake this in a 9x13-inch pan instead of round pans?
Yes! This recipe works perfectly in a 9x13-inch pan—just reduce baking time to 40-50 minutes at 350°F. For even baking, place the pan on the middle rack and tent with foil after 30 minutes if your oven runs hot. The texture will be slightly denser but still moist.
What's the best way to store leftover pound cake?
Wrap each layer tightly in plastic wrap, then place in an airtight container at room temperature for 5-7 days. For longer storage, slice and freeze portions for up to 3 months. Pro tip: Add a slice of bread to the container to absorb excess moisture and keep it fresh longer.
Can I substitute vanilla extract for vanilla bean paste?
Yes, but you'll miss the depth of flavor. Use double the amount of pure vanilla extract (so 4 tbsp instead of 2 tbsp paste). For best results, use Madagascar or Tahitian extract—it has more complex flavor notes than imitation. The vanilla bean seeds add a unique texture that extract can't replicate.
Why did my cake sink in the middle?
This usually happens from overmixing or opening the oven too soon. Mix just until combined (about 30 seconds after flour is added) and avoid overfilling pans. For a 9x13-inch pan, fill only ⅔ full—overfilling causes sinking. Also, check your oven temperature with a thermometer—if it's running hot, tent with foil after 30 minutes.