
Desserts
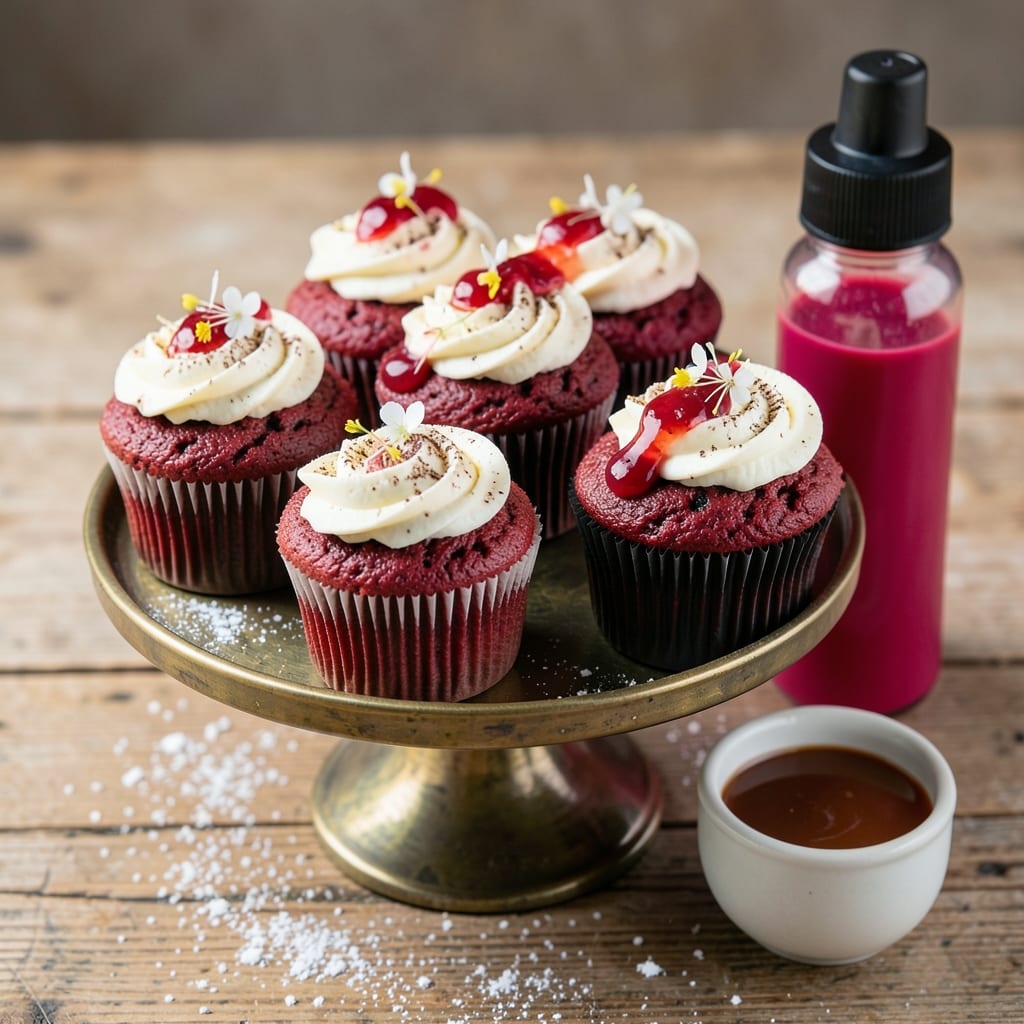
This amazing red velvet cupcake recipe delivers the perfect balance of bold cocoa swirls and velvety cream cheese frosting—every bite is a showstopper. 💛 I’ve baked these for birthdays, holidays, and just-because moments, and they never disappoint. The secret? A rich, moist batter with a hint of vinegar for that signature tang, plus a swirl of cocoa powder that creates marbled beauty inside. What makes these cupcakes truly special is the texture: a tender crumb that stays moist for days, topped with a light-as-air cream cheese frosting that melts in your mouth. The frosting isn’t too sweet—just enough to complement the deep red velvet flavor without overpowering it. And the swirls? They’re not just for looks; they add layers of cocoa richness that make each bite unforgettable. Baking these is easier than you think—just mix, swirl, and bake at 350°F for 18-20 minutes. The frosting comes together in minutes with just a few ingredients, and the results are worth every second. Whether you’re celebrating a special occasion or treating yourself, these cupcakes will steal the show. Serve them on a festive platter with a dusting of cocoa powder or fresh berries for extra flair. Trust me, once you try these, they’ll become your new go-to recipe. Let’s get baking!
Ingredients for amazing red velvet cupcake
Twelve ingredients, one showstopper recipe—these cupcakes look like they came from a bakery.
| Ingredient | Amount | Notes |
|---|---|---|
| All-Purpose Flour 🌾 | 2 ½ cups | Sifted for even texture |
| Granulated Sugar 🍚 | 2 cups | White or light brown |
| Cocoa Powder 🍫 | ¾ cup | Natural unsweetened preferred |
| Red Food Coloring 🎨 | ½ tsp | Gel-based for better control |
| Buttermilk 🥛 | 1 ½ cups | Room temperature for best results |
| Vegetable Oil 🫒 | ½ cup | Light neutral oil |
| Vanilla Extract 🌸 | 2 tsp | Pure alcohol-free preferred |
| Large Eggs 🥚 | 2 whole | Room temperature for even baking |
| Baking Soda 🧂 | 1 tsp | Pure, not baking powder |
| Salt 🧂 | ½ tsp | Fine sea salt preferred |
| Cream Cheese 🧀 | 8 oz | Room temperature for smooth frosting |
| Powdered Sugar 🍚 | 3 cups | Sifted for fluffy frosting |
| Heavy Whipping Cream 🥛 | ½ cup | Cold for stiff peaks |
| White Vinegar 🍶 | 1 tbsp | For homemade buttermilk |
The cocoa powder is non-negotiable here—natural unsweetened gives that deep, rich flavor without bitterness. Ghirardelli or Hershey's Special Dark are my go-tos, but any natural cocoa works. Red food coloring can be tricky, so gel-based is your best friend—it mixes better and won't bleed through the batter. For the buttermilk, if you don't have any, just mix 1 tbsp white vinegar with 1 cup milk and let it sit for 5 minutes. The eggs need to be room temp, so take them out 20 minutes before baking—this ensures even cooking and that perfect crumb. I always grab my cream cheese from Trader Joe's—it's cheaper and just as good as the name brands.
No buttermilk? Plain yogurt works too—just use the same ratio. Running short on powdered sugar? Granulated sugar processed in a food processor gives you the same texture. The frosting can be made 3 days ahead, which is a lifesaver for parties. Want extra richness? Add 1 tbsp lemon juice to the frosting for a bright tang. The cocoa swirl is what makes these cupcakes iconic—don't skip it! Use a piping bag or a plastic bag with a corner snipped off for clean lines. And if your frosting isn't coming together? Your cream cheese might be too warm—chill it for 10 minutes before whipping.
These cupcakes keep well for 3 days at room temperature, wrapped tightly in plastic. For longer storage, freeze them unfrosted for up to 3 months. Just thaw at room temp before adding frosting. The frosting itself lasts 5 days in the fridge, so make extra—you'll want seconds. I always bake mine in liners for easy serving, and they reheat beautifully in the microwave for 10 seconds if you want that warm-from-the-oven feeling later. Pro tip: Chill the cupcakes 10 minutes after baking before frosting—they'll hold their shape better.
Why You'll Love This Recipe
- No-Fail Mix-In: I swear by this batter—just fold in the cocoa and buttermilk, then let the red food coloring do its magic. No weird measurements or last-minute scrambling, and honestly? The buttermilk keeps it moist without extra fuss.
- Velvet Magic: That cocoa-sugar balance? Chef’s kiss. The buttermilk adds a tangy depth, while the red velvet hue makes every bite feel like a little celebration—no heavy frosting needed to taste the difference.
- Party or Pajamas: These cupcakes work for everything—birthday spreads, coffee dates, or even a midnight snack (no judgment). The batter’s forgiving, so I double it for gatherings or save half for lazy mornings.
- Budget Baking Win: Flour, sugar, cocoa—these are pantry staples, and buttermilk stretches further than you’d think. Plus, the red coloring? A tiny bottle lasts for months of these, making it my go-to treat without breaking the bank.
Step-by-step instructions for red velvet cupcakes with cream cheese frosting
Here's how to make these showstopping cupcakes with rich cocoa swirls and velvety frosting.
👨🍳 Step 1: Make the Buttermilk and Prepare Wet Ingredients
First, let's handle the buttermilk. In a small bowl, mix the 1 tablespoon white vinegar with the 1.5 cups buttermilk. Let it sit for 5 minutes until it curdles slightly—this homemade version adds depth to the flavor. Meanwhile, in a large mixing bowl, whisk together the 2 cups granulated sugar, 0.5 cup vegetable oil, 2 teaspoons vanilla extract, and 2 whole large eggs until smooth and fully combined.
This is where the magic starts. The sugar and oil create a creamy base that will give your cupcakes that signature tender crumb. I like to use room temperature eggs here—they blend more easily and help create a lighter texture. Make sure everything is fully incorporated before moving to the next step, or you'll end up with pockets of unmixed ingredients in your batter.
👨🍳 Step 2: Combine Dry Ingredients and Create the Swirl
In a separate bowl, sift together the 2.5 cups all-purpose flour, 0.75 cup cocoa powder, 1 teaspoon baking soda, and 0.5 teaspoon salt. This sifting step is crucial—it prevents dense cupcakes and ensures even distribution of the cocoa. Gradually add this dry mixture to your wet ingredients, mixing on low speed just until combined. Be careful not to overmix, or your cupcakes will turn out tough.
Now for the signature swirl. Divide your batter evenly between two mixing bowls. To one bowl, add the 0.5 teaspoon red food coloring and mix until evenly distributed. This creates our signature red velvet color. Keep both bowls ready—we'll alternate between them when filling the cupcake liners to create those beautiful marbled swirls.
🍳 Step 3: Fill Cupcake Liners and Bake to Perfection
Preheat your oven to 350°F and line a cupcake pan with 12 cupcake liners. Here's the fun part: fill each liner halfway with the red batter, then top with the chocolate batter. Use a toothpick to gently swirl the colors together for that classic red velvet look. Fill the liners about ⅔ full—these cupcakes will rise nicely but not overflow.
Bake for 18-20 minutes until a toothpick inserted comes out clean and the edges are just starting to pull away from the pan. I know it's tempting to open the oven early, but resist! The cupcakes need that full baking time to develop their signature moist texture. Let them cool in the pan for 5 minutes before transferring to a wire rack to cool completely.
🥘 Step 4: Prepare the Cream Cheese Frosting
While your cupcakes cool, let's make the frosting. In a medium bowl, beat the 8 ounces cream cheese and 3 cups powdered sugar together using an electric mixer until smooth and creamy. This is where patience pays off—make sure there are no lumps in your cream cheese, or they'll show up in the frosting. Add the 0.5 cup heavy whipping cream and mix until light and fluffy.
Here's the thing about cream cheese frosting—it needs to be at room temperature for the best consistency. If your cream cheese is too cold, it'll be grainy. If it's too warm, it might melt. The key is to let it sit at room temperature for about 30 minutes before starting this step. The frosting should be thick enough to pipe but still spreadable—you want that perfect balance between stability and smoothness.
🍽️ Step 5: Frost and Decorate Your Cupcakes
Once your cupcakes are completely cool, it's time to frost. Use a piping bag fitted with a star tip to pipe generous swirls of frosting onto each cupcake. For that classic red velvet look, I like to create a swirl pattern that matches the cupcake itself. If you're feeling fancy, add a small dollop of frosting on top and swirl it with a toothpick before piping the main decoration.
Here's a pro tip: don't rush the frosting process. Let your frosting sit at room temperature for 10-15 minutes before piping—this helps it reach the perfect consistency. The finished cupcakes should have that signature red velvet color peeking through the cream cheese frosting, with a smooth, velvety texture that melts in your mouth. Serve immediately for the best experience, or store in an airtight container in the refrigerator for up to 3 days.
Pro Tips For Making Amazing Red Velvet Cupcake
- STOP OVERMIXING THE BATTER: Mixing red velvet batter until it’s smooth is tempting, but you’ll end up with dense, tough cupcakes. Fold the dry ingredients into the wet just until combined—lumps are fine—then give it one final turn to even out. I used to overdo it, and the texture suffered every time.
- WHISK THE BUTTERMILK FIRST: Let the buttermilk sit at room temperature for 10-15 minutes before using. Cold buttermilk curdles when mixed with hot ingredients, and that’s a texture disaster. If you’re in a rush, pour it into a warm (not hot) measuring cup for 5 minutes—it makes a real difference in how the batter behaves.
- WEIGH YOUR COCOA POWDER: That little scoop-and-level trick with cocoa powder? It’s lying to you. Use a kitchen scale for 2 tablespoons (about 15 grams) of cocoa—packed or not, it varies wildly. I learned this the hard way when a batch turned out bitter and uneven. Sift it first too, or you’ll get streaks of pure cocoa in your cupcakes.
- BAKE UNTIL THE CENTER IS SET: Red velvet cupcakes look done at 10-12 minutes, but if you pull them out too soon, they’ll sink later. Test with a toothpick—it should come out with moist crumbs, not wet batter. I used to eyeball it and regretted it every time. A minute extra in the oven saves you from a collapsed batch.
Serving suggestions for this dish
Classic Presentation
Serve these cupcakes on a marble slab tray or wooden cake stand to elevate their rustic charm. I love arranging them in a circle with a red velvet ribbon tied around the center for a festive touch. Add a sprinkle of cocoa powder or edible gold dust on top of the frosting for extra glamour. 💛
Frosting Variations
For a nutty twist, fold 2 tablespoons of crushed pecans into the cream cheese frosting before piping. Or try a berry swirl by adding 1 tablespoon of raspberry jam to the frosting for a fruity kick. If you prefer a smoother finish, use an offset spatula to spread the frosting instead of piping.
Pairing Ideas
These cupcakes shine with hot coffee or chilled vanilla chai latte—the warmth cuts through the richness beautifully. For a festive spread, pair them with mini vanilla beans or chocolate-dipped strawberries on the side. I also love serving them at afternoon tea parties with shortbread cookies for balance.
Seasonal Touches
In summer, add fresh strawberries or raspberries as garnishes. For holiday celebrations, top with mini marshmallows and a candy cane for a festive look. In winter, dust with powdered sugar and add a sprinkle of cinnamon for warmth. The possibilities are endless!
Make-Ahead Tips
Frost the cupcakes up to 1 day ahead and store them in an airtight container in the fridge. Bring them to room temperature before serving for the best texture. If you're prepping for a party, assemble the cupcakes unfrosted, then frost just before serving to keep them looking fresh. 💡
Gift-Worthy Packaging
For a giftable presentation, place each cupcake in a mini cupcake box and tie with a ribbon. Stack them in a clear acrylic display case or wrap them in cellophane bags with a personalized tag. I’ve even seen these cupcakes styled in mini mason jars with a sprig of fresh mint for a charming touch.
Nutrition facts
Frequently asked questions
Why do red velvet cupcakes have a swirl pattern?
The signature swirl comes from alternating red and cocoa batters in each liner. This creates both visual appeal and flavor contrast—each bite has tender red velvet with rich cocoa pockets. The swirl also helps distribute moisture evenly for that perfect moist crumb.
Can I make these cupcakes without buttermilk?
Mix 1 tablespoon white vinegar with 1 cup milk and let sit for 5 minutes to make a quick substitute. Yogurt works too—use the same amount as the buttermilk. The tang is key for that signature red velvet flavor!
How do I prevent my cupcakes from cracking?
Cracking usually means overmixing or opening the oven too soon. Mix dry ingredients just until combined, then fill liners ⅔ full and bake at 350°F for 18-20 minutes. Let them cool completely in the pan before removing. Avoid high humidity days too!
What's the best way to store leftover frosting?
Transfer frosting to an airtight container and refrigerate for up to 5 days. Bring to room temperature before using—microwave for 10-15 seconds if needed. For longer storage, freeze in portions and thaw overnight in the fridge.
Can I use boxed red velvet mix?
While possible, homemade batter gives better texture and deeper flavor. If using a mix, add 1 extra tablespoon cocoa powder and ½ teaspoon vinegar to enhance the red velvet taste. The swirl technique still works with boxed mix!