
Desserts
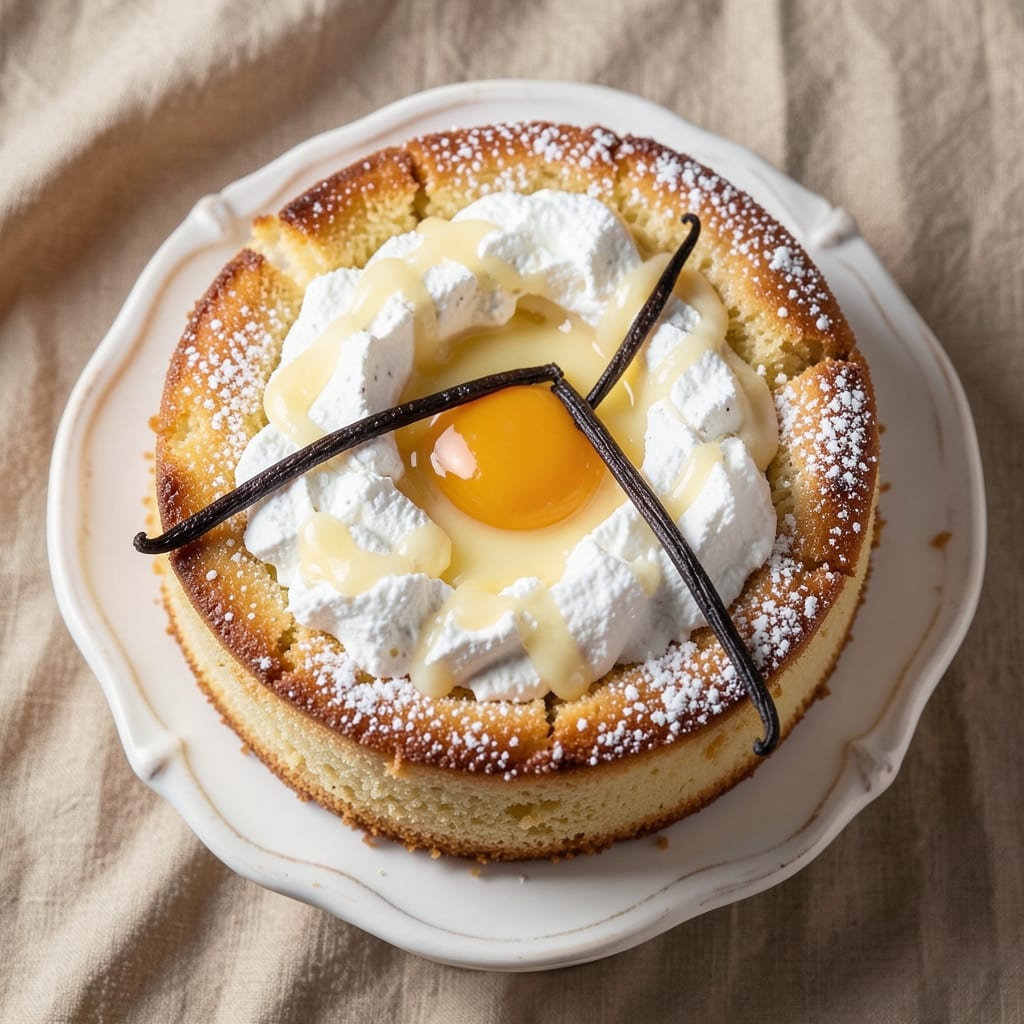
This amazing sponge cake recipe delivers layers so light they practically disappear on your tongue, all thanks to a vanilla bean infusion that adds depth without overpowering. I spent years perfecting the technique—whipping egg whites to stiff peaks, folding in just enough flour, and baking at the perfect temperature to ensure that signature rise. The secret? Patience and precision, but don't let that scare you—this method is foolproof once you get the hang of it.
What sets this recipe apart is the vanilla bean infusion, which transforms ordinary cake into something extraordinary. The cake bakes up golden and tender, with a delicate crumb that's neither too dense nor too dry. The key is folding the dry ingredients into the egg mixture gently, preserving those airy pockets that make sponge cake so magical. And yes, it's worth investing in a good vanilla bean—trust me, the flavor difference is night and day.
By the time you pull this cake from the oven, you'll have a masterpiece that's perfect for birthdays, celebrations, or just treating yourself. The layers are light enough to hold fillings like whipped cream or jam, or you can enjoy it plain with a dusting of powdered sugar. It's the kind of cake that makes you feel like a baking pro, even if you've burned a few cakes in your time.
Once baked, let it cool completely before slicing—this is crucial for clean layers. Serve at room temperature for the best texture, and watch as everyone asks for seconds. This isn't just another sponge cake; it's the kind that becomes a family favorite. Let's get baking!
Ingredients for amazing sponge cake
Eight simple ingredients, one magical vanilla bean—this is how you make sponge cake that disappears on your tongue.
| Ingredient | Amount | Notes |
|---|---|---|
| Large Egg Whites 🥚 | 8 whole | Room temperature, pasteurized preferred |
| Large Egg Yolks 🥚 | 4 whole | Room temperature, separated carefully |
| Granulated Sugar 🍚 | 1 ½ cups | Superfine preferred for smooth texture |
| All-Purpose Flour 🌾 | 1 ½ cups | Sifted, spooned lightly |
| Unsalted Butter 🧈 | ½ cup | Cold, cubed, European style preferred |
| Vanilla Bean 🌿 | 1 whole | High-quality Madagascar preferred |
| Vanilla Extract 🍯 | 1 tsp | Pure, no alcohol substitute |
| Salt 🧂 | ¼ tsp | Fine sea salt |
| Cream of Tartar 🧂 | ¼ tsp | Stabilizes egg whites |
| Powdered Sugar 🍚 | ½ cup | For dusting, confectioners' sugar |
The vanilla bean is non-negotiable here—Madagascar beans from Penzeys or a specialty store are worth the splurge. Look for plump, moist pods with dark seeds inside; those dried-out ones in the back of the spice aisle won't cut it. If you can't find a whole bean, high-quality vanilla extract (like Heinz Pure) works in a pinch, but trust me, the real thing transforms this cake. For the eggs, room temperature is key—cold yolks won't emulsify properly, and cold whites won't whip as high. Separate them over a bowl so you don't risk any yolk sneaking in. The butter should be cold too—European-style (like Plugrá) has higher fat content, giving you that perfect tender crumb.
No vanilla bean? Double the vanilla extract—but don't skip it entirely. Superfine sugar isn't a must, but it dissolves faster and gives a smoother texture. If you only have regular granulated, pulse it in a food processor first. The flour needs to be sifted—this prevents lumps and ensures those signature airy layers. For the egg whites, make sure your bowl and beaters are spotless (even a trace of fat can prevent stiff peaks). Cream of tartar isn't strictly necessary, but it helps stabilize the whites if you're in a high-altitude area. And if you're worried about raw eggs? Use pasteurized egg whites—they whip just as well.
This cake needs to rest for 1 hour before slicing—patience is everything. Store it in an airtight container at room temperature for 3 days, or freeze the whole cake (wrapped tightly) for 3 months. To revive frozen layers, let them sit at room temperature for 20 minutes before serving. The powdered sugar dusting? Do it right before serving—it keeps the layers looking fresh. And if you're making this ahead for a party, bake it a day early and store it wrapped in plastic—it actually tastes better after a night's rest.
Why You'll Love This Recipe
- No Stand Mixer Needed: I’ll be real—this sponge cake only asks for a whisk and a bowl. Those egg whites? They fold together like a dream without any fancy equipment. My first attempt was a little lopsided, but honestly, the texture was so light I didn’t care.
- Butter-Soft Perfection: That creamy butter folded into the yolks? It’s what makes this cake melt-in-your-mouth tender. The sugar caramelizes just enough to give it a subtle sweetness, but the flour keeps it from being too heavy—like a cloud with a little bite.
- Birthday or Breakfast: Between us, this cake works for everything. Frost it with whipped cream for a casual dessert, or serve it plain with tea for a cozy morning. I’ve even used slices to make French toast—trust me, it’s a game-changer.
- Leftovers? No Problem: This recipe makes enough for seconds (or thirds). Store it in the fridge for up to 5 days, and it stays moist without drying out. I usually bake two pans at once—one for today, one for when my kids "forget" to pack snacks.
Step-by-step instructions for light-as-air vanilla sponge cake
Here's how to create the perfect fluffy, melt-in-your-mouth sponge cake with that signature vanilla aroma.
Prepare the Vanilla Infusion and Separate Eggs
First, split the 1 whole vanilla bean lengthwise and scrape out the seeds using the back of a knife. Combine the seeds with the 4 whole Large Egg Yolks in a heatproof bowl. Gently warm this mixture over a pot of simmering water (double boiler) for 3-4 minutes—just until the yolks reach 100°F and become slightly thickened. This gentle heating helps create a silky texture.
While the yolks warm, separate the 8 whole Large Egg Whites from their yolks, making sure no yolk slips into the whites. This is crucial—even a tiny bit of yolk can prevent your whites from whipping properly. Transfer the egg whites to a clean, grease-free bowl. The bowl should be spotless because any grease will deflate your meringue later.
Whip Egg Whites to Stiff Peaks
Add the 0.25 tsp Cream of Tartar and 0.25 tsp Salt to the egg whites. Using a stand mixer with the whisk attachment, beat on medium speed until soft peaks form. Gradually add 0.75 cups of the 1.5 cups Granulated Sugar while mixing, increasing speed to high as the mixture thickens.
Continue whipping until the meringue forms stiff, glossy peaks that hold their shape when you lift the whisk. The bowl should feel cool to the touch—this indicates proper stabilization. Be patient here; rushing this step can lead to a dense cake. I like to check the consistency by tilting the bowl—if the meringue holds a peak that stands straight up, it's ready.
Fold in Yolks and Flour for Lightness
Gently fold the warmed egg yolk mixture into the meringue using a spatula, working from the bottom up in three additions. This keeps air incorporated while combining the ingredients. The mixture should look like pale yellow ribbon swirls when you lift the spatula.
In a separate bowl, whisk together the remaining 0.75 cups Granulated Sugar with the 1.5 cups All-Purpose Flour and the 1 tsp Vanilla Extract. Sift this dry mixture over the egg mixture, then fold it in gently but thoroughly. The goal is to maintain as much air as possible—overmixing now will deflate your cake. You'll know it's properly combined when no dry flour streaks remain.
Add Butter and Final Folding
Cut the 0.5 cup Unsalted Butter into small cubes and let them soften slightly at room temperature. Gently fold them into the batter using the same ribbon technique, working quickly to maintain air incorporation. The butter should be soft enough to blend smoothly but not melted.
For best results, divide the batter evenly between two 8-inch round cake pans lined with parchment paper and lightly greased. Tap the pans gently on the counter to remove any air bubbles. Bake at 350°F for 25-30 minutes, or until the tops spring back when touched and a toothpick inserted comes out clean. The edges should be just beginning to pull away from the pan.
Cool and Dust for Perfect Finish
Let the cakes cool in their pans for 10 minutes, then transfer to a wire rack to cool completely. This gradual cooling prevents cracking. Once fully cooled, dust the tops generously with the 0.5 cup Powdered Sugar using a fine-mesh sieve for that classic vanilla sponge finish.
Here's the secret to serving: slice the cake with a serrated knife that's been dipped in hot water and wiped dry. This ensures clean cuts through the delicate layers. Serve immediately for the most tender texture, or store in an airtight container for up to 3 days. The flavor actually improves as it sits, developing that perfect vanilla depth.
Pro Tips For Making Amazing Sponge Cake
- Whip Whites to Stiff Peaks: I learned this the hard way—under-whipped egg whites are the #1 reason sponge cakes sink like a rock. Use a stand mixer (or hand mixer) and whip them until they hold a peak when you lift the beaters. Yes, it takes longer than you think, but soft peaks = a dense, sad cake.
- Room-Temp Everything: Cold eggs and butter are the enemy of even crumb. Take your yolks, whites, and butter out of the fridge 1–2 hours before baking. I used to skip this and wondered why my cakes turned out dense or greasy—turns out, fat and protein behave better when they’re not fighting the cold.
- Fold Like You Mean It: Gentle is good, but too gentle ruins the structure. When folding dry ingredients into the egg mixture, use a spatula and cut through the center to let the air rise. Overmixing collapses those bubbles you worked so hard to create—think of it like tucking in a blanket, not stirring soup.
- Butter the Pan Lightly: A thin layer of softened butter on the pan bottom (and a dusting of flour) prevents sticking without making the cake heavy. Skip the grease-soaked paper—it adds unnecessary moisture. (And yes, even if you’re impatient like me, let the butter melt slightly before adding flour to avoid clumps.)
Regional styles of this recipe
Italian Geletato Style
In Italy, sponge cake takes center stage as the base for geletato—a lighter, airier version of our gelato. The secret lies in substituting half the butter with 1 cup mascarpone cheese, folded in after the egg whites. This creates a velvety texture perfect for scooping. Serve it with a drizzle of blood orange syrup and crushed amaretti cookies for a Tuscan-inspired twist. The vanilla infusion remains key—Italian bakers often add a splash of limoncello (just 1 tbsp) to the yolk mixture for brightness. 🌟
French Sponge (Biscuit)
French patisseries elevate sponge cake with their biscuit technique, where the batter is spread thin in a jelly roll pan (about ¼-inch thick) and baked at 375°F for 10-12 minutes. The result? A delicate, almost translucent layer perfect for roll cakes or operas. For authenticity, replace the vanilla bean with ½ tsp almond extract and fold in 2 tbsp apricot jam after baking. Roll the warm cake around a wooden dowel while still hot, then chill before slicing. 🥖
Japanese Castella Cake
Japan’s castella transforms sponge cake into a golden, melt-in-mouth masterpiece by omitting butter entirely and replacing it with 1 cup melted sugar (cooled to 113°F) folded into the meringue. The batter is baked in a wooden mold (or lined pan) at 325°F for 45-50 minutes, yielding a soft, custard-like crumb. For extra richness, brush the cooled cake with a honey syrup (equal parts honey and water, heated until dissolved). Serve with matcha whipped cream for a modern fusion. ✨
German Buttercream Layer
German bakers take sponge cake to the next level by layering it with buttercream (made from ½ cup softened butter, 2 cups powdered sugar, and 2 tbsp heavy cream). The cake itself uses 1 tsp baking powder for extra lift, and the batter is baked in 9-inch pans for a taller, more dramatic presentation. For a signature touch, fold ½ cup crushed hazelnuts into the batter before baking. Top with chocolate ganache and fresh blackberries for a rustic yet elegant finish. 🍫
Latin American Tres Leches
In Latin America, sponge cake becomes tres leches by soaking layers in a milk mixture of 1 can evaporated milk, 1 can sweetened condensed milk, and 1 cup heavy cream. The cake is baked slightly denser (using 1 tsp baking powder) to handle the liquid. For a regional twist, add 1 tsp cinnamon to the batter and top with caramelized plantains or coconut flakes. The vanilla bean infusion is replaced with ½ tsp lime zest for a citrusy kick. 🌴
Scandinavian Cardamom Twist
Nordic bakers infuse their sponge cake with cardamom (add 1 tsp ground cardamom to the dry ingredients) and bake it in a loaf pan for a rustic, free-form shape. The cake is often served with lingonberry jam and a dusting of powdered sugar. For a festive touch, fold ½ cup chopped almonds into the batter before baking. The vanilla bean is kept but paired with 1 tsp orange zest for a bright, aromatic profile. ❄️
Nutrition facts
Frequently asked questions
Why does this sponge cake need to cool completely before slicing?
Sponge cake relies entirely on air pockets for its light texture. If you slice it too soon, the layers will crumble and lose their delicate structure. Cooling for 1 hour at room temperature allows the cake to set properly, ensuring clean slices that hold together beautifully. Patience here makes all the difference!
Can I substitute vanilla extract for the vanilla bean?
Yes, but you'll notice a difference. Use 2 teaspoons of high-quality vanilla extract instead of the whole bean. For best results, choose pure extract without alcohol (like Heinz Pure) and add it to the yolk mixture. The bean's seeds create tiny flavor bursts that extract can't fully replicate.
What's the secret to getting perfectly even layers?
Use two 8-inch round pans and divide the batter evenly between them. Tap the pans gently on the counter before baking to remove air bubbles. Also, bake until the edges just begin to pull away from the pan - this ensures even doneness. For clean cuts, dip your knife in hot water and wipe dry before slicing.
How do I store leftover sponge cake?
Keep it in an airtight container at room temperature for up to 3 days. For longer storage, wrap the whole cake tightly in plastic and freeze for 3 months. To revive frozen layers, let them sit at room temperature for 20 minutes before serving. The flavor actually improves as it sits!
What if my egg whites won't whip properly?
This usually happens if your bowl or beaters have traces of fat. Make sure everything is completely clean and grease-free. Also, use room-temperature egg whites - cold ones whip less effectively. If needed, add ¼ teaspoon more cream of tartar to stabilize them. Don't overmix the yolks either, as even tiny yolk bits can prevent stiff peaks.