
Desserts
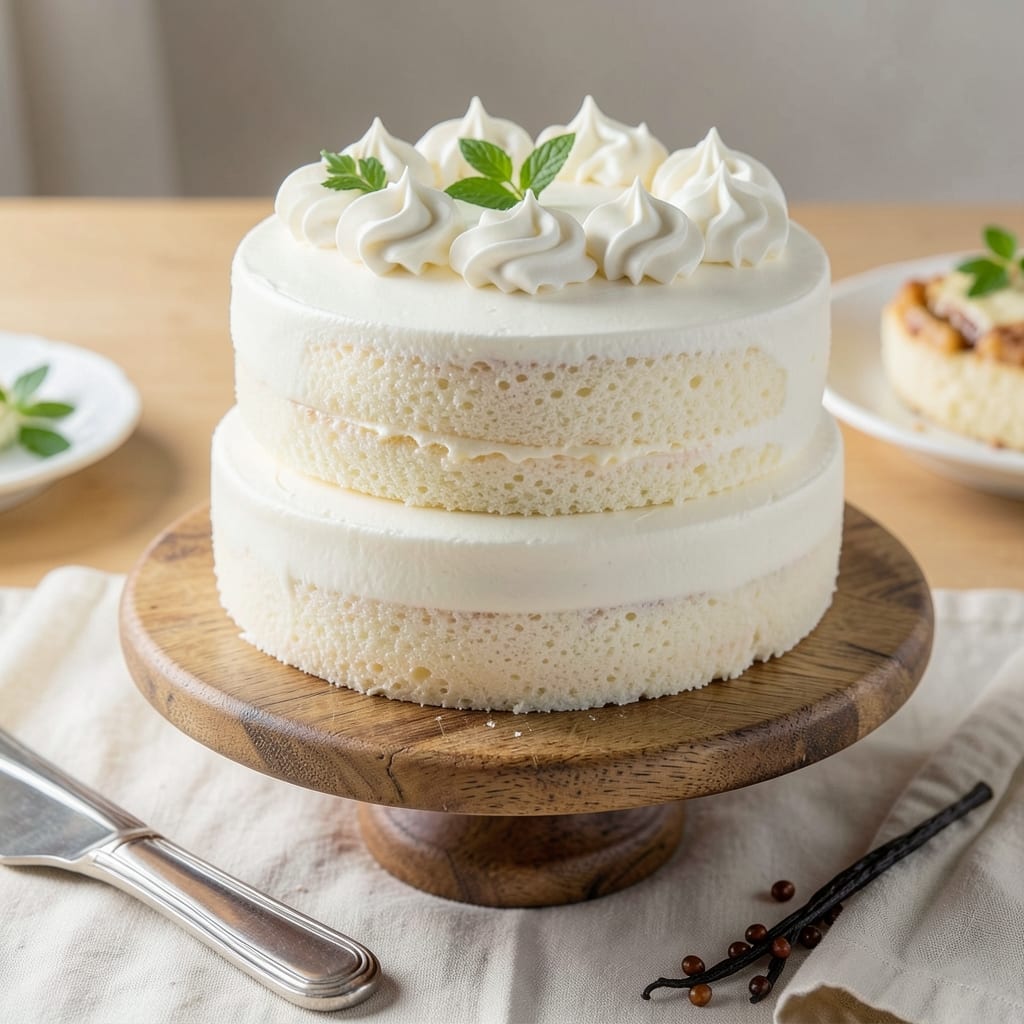
This amazing white cake recipe delivers the fluffiest, most tender vanilla layers you'll ever taste—thanks to a buttermilk trick that keeps it impossibly light. 💛 I've been perfecting this recipe for years, and the secret lies in the buttermilk's acidity, which creates those signature airy pockets without a trace of tang in the final bite.
The magic happens in the mixing: creaming butter and sugar until light and fluffy, then folding in egg whites for extra lift. The buttermilk adds moisture and tenderness, while vanilla extract infuses every layer with that classic warm flavor. Baking at the right temperature ensures golden, even layers that slice cleanly.
What you'll end up with is a cake so light it practically melts in your mouth, with a delicate crumb that's perfect for frosting or leaving naked. The buttermilk trick makes all the difference—trust me, I've tested countless variations. Whether you're making it for a celebration or a simple dessert, this recipe delivers every time.
Pair it with your favorite vanilla buttercream or fresh berries for a showstopping dessert that's easier than it looks. Let's get baking—this cake is worth every calorie!
Ingredients for amazing white cake
Buttermilk, butter, and vanilla—these are the stars of your lightest white cake yet.
| Ingredient | Amount | Notes |
|---|---|---|
| Unsalted Butter 🧈 | 1 cup | Room temperature, softened |
| Granulated White Sugar 🍚 | 2 cups | Superfine preferred for smoothness |
| Large Eggs 🥚 | 4 whole | Room temperature, separated |
| All-Purpose Flour 🌾 | 2 ½ cups | Sifted, level measurements |
| Buttermilk 🥛 | 1 cup | Fresh or homemade (milk + vinegar) |
| Pure Vanilla Extract 🌿 | 2 tsp | High-quality, not imitation |
| Baking Powder 🧂 | 2 tsp | Aluminum-free preferred |
| Salt 🧂 | ½ tsp | Fine sea salt |
| Vegetable Oil 🫒 | ½ cup | Light, neutral flavor |
| Cornstarch 🌾 | 1 tbsp | For extra tenderness |
The butter and buttermilk are your secret weapons here. Use European-style butter (like Plugrá or Land O'Lakes) if you can—it has higher fat content for richer flavor. For buttermilk, Whole Foods sells it pre-made, but I always make mine with milk and white vinegar (1 tbsp vinegar to 1 cup milk). Let it sit for 5 minutes to curdle properly. The eggs? Room temperature is a must—they'll whip up fluffier. I always grab extra-large eggs from Trader Joe's when I'm baking, but any size works if you adjust the whites slightly.
No buttermilk? Substitute 1 cup milk + 1 tbsp vinegar or lemon juice—let it sit for 5 minutes. Running low on vanilla? Vanilla bean paste works too (use half the amount). The cornstarch is non-negotiable—it's what makes this cake so tender. No cornstarch? Add 1 tbsp extra flour, but the texture won't be as delicate. For the flour, King Arthur or Bob's Red Mill are my go-tos—they're consistent. If you're at high altitude, reduce the baking powder to 1.5 tsp to avoid a dense cake.
This cake keeps beautifully—3 days wrapped at room temperature, 1 week in the fridge, or 3 months frozen. For freezing, wrap each layer tightly in plastic. The frosting is where the magic happens—vanilla buttercream or a simple glaze of powdered sugar and milk takes it to the next level. I always bake mine in two 8-inch pans for perfect layers, but a 9-inch pan works too if you reduce the batter by 10%.
Why You'll Love This Recipe
- No-Fuss Mixing: I swear by the creamy butter-and-sugar combo here—just whip it until light, toss in eggs one at a time, and fold in the flour. That buttermilk? It keeps the crumb tender without extra fuss.
- Moisture Locked In: The buttermilk and butter create this perfect balance—never dry, never heavy. Honestly, I’ve made cakes that crumbled by day three, but this stays fresh for days.
- Everyday Star: Layer it with jam for breakfast, frost it for birthdays, or serve it plain with tea. The neutral flavor means it works for brunch, celebrations, or just because.
- Budget-Friendly Staples: You’re using pantry basics—no specialty ingredients, no markup. That butter and sugar go a long way, and the flour? Always on hand. (Yes, even on a Tuesday night.)
Step-by-step instructions for fluffy vanilla layers
This method guarantees a light, airy texture that'll make your cake the star of any celebration.
👨🍳 Step 1: Whip Butter, Sugar, and Eggs to Peak Perfection
In a stand mixer fitted with the paddle attachment, beat the 1 cup unsalted butter and 2 cups granulated white sugar on medium speed for 3-4 minutes until light and fluffy. You're looking for a nearly doubled volume with ribbons forming when the paddle lifts. This step is crucial—it incorporates air that creates those signature fluffy layers.
Add the 4 whole large eggs, one at a time, mixing well after each addition until fully combined. Scrape down the sides of the bowl with a spatula to ensure even mixing. The mixture should be thick and pale yellow. Here's the thing—room temperature ingredients mix better and create a smoother batter. If your eggs or butter aren't at room temperature, let them sit for 10-15 minutes before starting.
👨🍳 Step 2: Add Vanilla and Dry Ingredients
Mix in the 2 teaspoons pure vanilla extract until fully incorporated. In a separate bowl, whisk together the 2.5 cups all-purpose flour, 2 teaspoons baking powder, 0.5 teaspoon salt, and 1 tablespoon cornstarch. Sift this dry mixture directly into the wet ingredients while mixing on low speed—this prevents overmixing and develops gluten, which keeps your cake tender.
I like to add about a third of the dry ingredients first, mix until just combined, then add the remaining dry ingredients. The batter should be smooth but slightly thick. Don't overmix—you're looking for a few small lumps. This ensures your cake will be tender rather than dense. If the batter looks too thick, you can add 1-2 tablespoons of the buttermilk to loosen it slightly.
👨🍳 Step 3: Incorporate Buttermilk and Oil
Add the 1 cup buttermilk and 0.5 cup vegetable oil to the batter. Mix on low speed for 30-45 seconds until fully combined. The buttermilk is our secret weapon—it reacts with the baking powder to create extra lift, giving you that signature fluffy texture. The oil adds moisture and tenderness. Here's the trick: don't overmix after adding the buttermilk, or you'll develop gluten and make the cake tough.
Once fully combined, the batter should be smooth and slightly thick, like heavy pudding. If you're using this batter for layers, you'll need to divide it evenly between two 8-inch round pans. I like to use a kitchen scale for accuracy—each pan should get about 12 ounces of batter. Grease and flour your pans thoroughly before adding the batter to prevent sticking.
🔥 Step 4: Bake Until Golden and Springy
Preheat your oven to 350°F and place your pans on the middle rack. Bake for 25-30 minutes or until a toothpick inserted in the center comes out clean. The cake should be golden brown on top and pull away slightly from the sides of the pan. Don't open the oven during baking—this causes the cakes to sink.
I know it's tempting to check early, but resist! The cakes need that full baking time to develop their structure. When you see the tops start to pull away from the pan edges and develop a slight dome, that's your signal. If the tops are browning too quickly, tent the pans with aluminum foil to prevent over-browning while they finish baking.
⏰ Step 5: Cool and Layer with Confidence
Remove the cakes from the oven and let them cool in their pans for 10 minutes. Then carefully invert them onto a wire rack to cool completely. This cooling process is crucial—it allows the cakes to set properly before you add any filling or frosting. If you try to frost warm cakes, the filling will melt and create a soggy layer.
Once completely cool, you're ready to add your filling—whether it's whipped cream, buttercream, or a simple vanilla glaze. The secret to perfect layers is to level the tops if needed and apply your filling evenly. For a professional finish, I like to use a serrated knife to trim any domed tops. Now you've got the base for an amazing cake that'll impress everyone!
Pro Tips For Making Amazing White Cake
- CREAM BUTTER AND SUGAR LONG: Buttermilk cakes need a proper start—beat that butter and sugar until it’s pale, not just fluffy. I used to rush this, but 3-4 minutes with a stand mixer (or 5 by hand) ensures the butter emulsifies with the sugar, giving you a tender crumb instead of a dry one.
- CHILL THE DOUGH: This isn’t optional—let the batter sit for at least 30 minutes before baking. The flour absorbs moisture, and the eggs firm up slightly, preventing a domed, cracked cake. I learned this the hard way when my first batch collapsed like a sad soufflé.
- MEASURE FLOUR BY WEIGHT: Scooping and scooping? Stop. Use a kitchen scale for the flour—1 cup isn’t always 120g. Packed flour adds density, and too little means a cake that’s more air than structure. My cakes went from "meh" to "wow" the second I switched.
- USE ROOM-TEMP BUTTERMILK: Cold buttermilk makes the cake gummy. Stir yours into the dry milk powder first, then add water—it’ll thicken properly and stay at room temp. No one likes a cake that fights back with a rubbery bite. (Yes, even if you’re impatient like me.)
Creative variations of this recipe
Citrus Twist Variation
Brighten up your white cake with a zesty twist by adding 2 tablespoons fresh lemon or orange zest to the batter along with the vanilla. The citrus pairs beautifully with vanilla and adds a subtle tang that cuts through the richness. I like to use Eureka lemons for their intense flavor. For extra pop, fold 2 tablespoons orange juice into the buttermilk before mixing. This variation works especially well with a cream cheese frosting. 🍊
Spiced Chai White Cake
Transform your cake into a cozy spiced delight by adding 1 teaspoon ground cardamom, ½ teaspoon cinnamon, and ¼ teaspoon ginger to the dry ingredients. These warm spices complement the vanilla beautifully and create a sophisticated flavor profile. I recommend using Penzeys Spices for high-quality, aromatic spices. This version pairs perfectly with a brown sugar buttercream or a light glaze. 🌿
Coconut Dream Variation
For a tropical twist, replace ½ cup of the all-purpose flour with ½ cup unsweetened shredded coconut and add 1 teaspoon coconut extract to the wet ingredients. The coconut adds a delicate nuttiness that enhances the vanilla flavor. I use Trader Joe's shredded coconut for its fine texture. This cake tastes amazing with a coconut whipped cream or a simple dusting of powdered sugar. 🥥
Espresso Infusion
Add a sophisticated coffee note by dissolving 1 tablespoon instant espresso powder in 2 tablespoons hot water and mixing it with the buttermilk. The espresso enhances the vanilla flavor and adds depth without overpowering. I prefer Starbucks Via for its smooth, rich taste. This variation works beautifully with a chocolate ganache or a coffee buttercream. ☕
Almond Blossom Version
For a nutty, elegant twist, replace ½ cup of the all-purpose flour with ½ cup almond flour and add 1 teaspoon almond extract to the wet ingredients. The almond flour adds a delicate crunch, while the extract infuses a subtle nutty aroma. I use Bob's Red Mill almond flour for its fine texture. This cake pairs wonderfully with a lemon curd filling or a light dusting of powdered sugar. 🌸
Lemon Poppy Seed
Brighten your cake with a classic combination by adding 2 tablespoons poppy seeds to the dry ingredients and folding 2 tablespoons lemon juice into the buttermilk. The poppy seeds add a delightful crunch, while the lemon juice keeps the cake fresh and tangy. I use Great Mills poppy seeds for their high quality. This variation is perfect with a cream cheese frosting or a simple glaze. 🌼
Nutrition facts
Frequently asked questions
Why does this recipe use buttermilk instead of regular milk?
The buttermilk creates that signature fluffy texture through its acidity, which reacts with baking powder to produce extra lift. It also adds moisture without making the cake taste tangy. For a quick substitute, mix 1 cup milk + 1 tbsp vinegar or lemon juice and let it sit for 5 minutes.
Can I bake this cake in a 9-inch pan instead of 8-inch?
Yes, but reduce the batter by about 10% (about 1.5 cups) to avoid overflow. Bake at 350°F for 20-25 minutes instead. The cake will be slightly shorter but just as tender. For a single layer, you can use the full batter in one 9-inch pan.
How do I prevent my cake from cracking on top?
Cracking usually happens from overmixing or opening the oven too early. Mix just until combined, avoid overbaking, and never open the oven during the first 20 minutes. If the top browns too quickly, tent with foil. Also ensure your oven is fully preheated.
What's the best way to store leftover cake?
Wrap tightly in plastic wrap at room temperature for 3 days, or refrigerate for 1 week. For long-term storage, freeze layers wrapped individually for up to 3 months. Thaw overnight in the fridge before serving. The frosting stays fresh longer when properly sealed.
Can I make this cake gluten-free?
Yes, but you'll need a 1:1 gluten-free flour blend (like Bob's Red Mill or King Arthur) and add ½ teaspoon xanthan gum to the dry ingredients. Replace the cornstarch with 1 tbsp extra gluten-free flour. The texture will be slightly denser but still delicious with a good vanilla frosting.