
Desserts
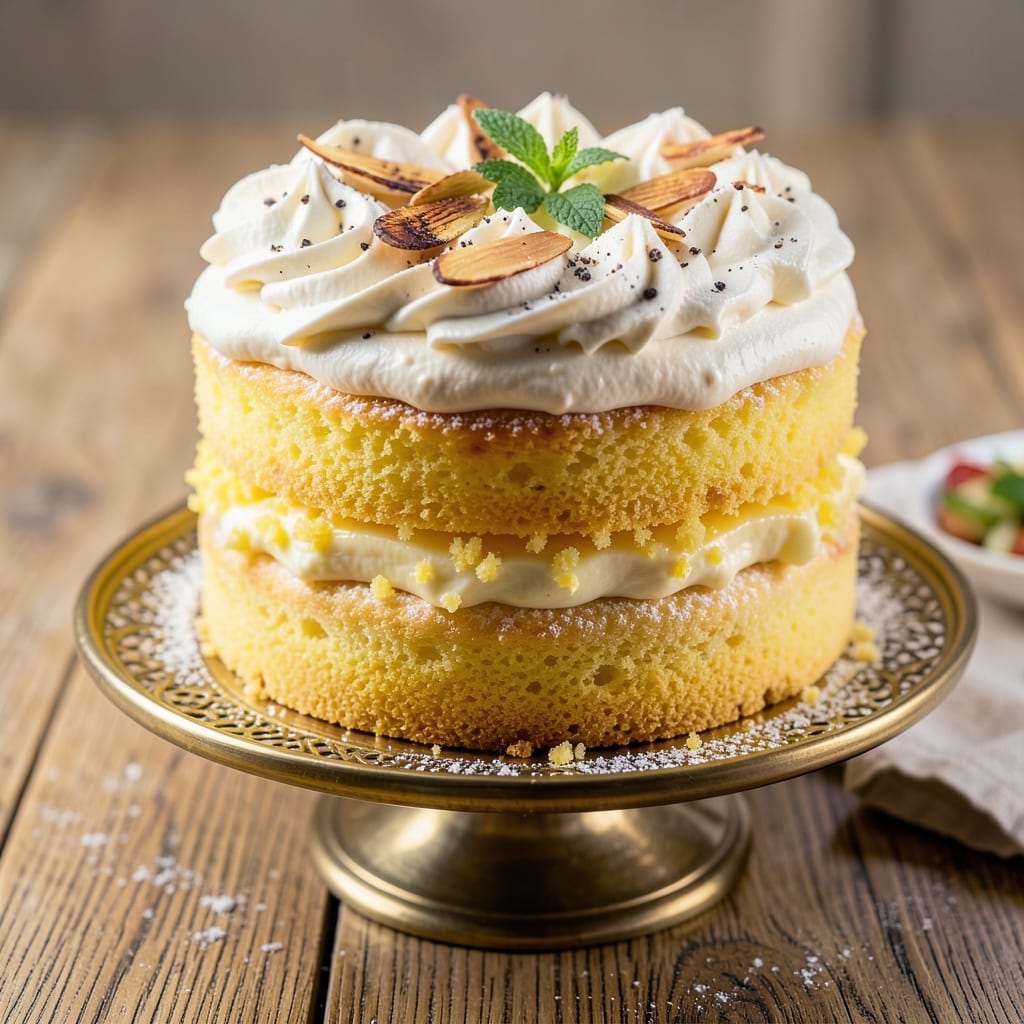
This amazing yellow cake recipe delivers vanilla bean magic with layers of buttery richness that'll make your taste buds dance. 💛 The secret? A perfect balance of tender crumb and moist texture, achieved through a foolproof method that even beginners can master. I've baked this cake for family gatherings and it never fails to impress—every slice is packed with flavor. What makes this cake truly special is the vanilla bean infusion, which adds depth that store-bought extracts can't match. The cake bakes up golden and fluffy, with just the right amount of springiness. Whether you're making it for a birthday celebration or a simple dessert night, this recipe delivers restaurant-quality results at home. The best part? This cake is incredibly versatile—you can serve it plain, layer it with cream cheese frosting, or top it with fresh berries. The flavor is so good that people always ask for seconds. With just a few simple ingredients and some patience, you'll have a showstopping cake that tastes like it came from a bakery. Ready in about an hour (including cooling time), this recipe is perfect for any occasion. Let's get baking!
Ingredients for amazing yellow cake
Vanilla bean magic meets buttery layers—this cake is pure joy in every bite!
| Ingredient | Amount | Notes |
|---|---|---|
| All-Purpose Flour 🌾 | 2 ½ cups | Sifted for light texture |
| Granulated Sugar 🍚 | 2 cups | White or light brown |
| Unsalted Butter 🧈 | 1 cup | Room temperature, cubed |
| Large Eggs 🥚 | 4 whole | Room temperature, separated |
| Vanilla Bean 🌸 | 1 whole | Scraped seeds + pod |
| Baking Powder 🧂 | 2 tsp | Metal container preferred |
| Salt 🧂 | ½ tsp | Fine sea salt |
| Whole Milk 🥛 | 1 cup | Room temperature |
| Lemon Zest 🍋 | 1 tbsp | Freshly grated |
| Vanilla Extract 🌿 | 1 tsp | Pure alcohol-free if preferred |
| Yellow Food Coloring 💛 | ¼ tsp | Optional for vibrant color |
| Cream Cheese 🧀 | 8 oz | Room temperature for frosting |
The vanilla bean is non-negotiable here. Splurge on a quality Madagascar bourbon vanilla bean—it's the secret weapon. I grab mine from Whole Foods or Sur La Table when I can, but even the grocery store version works if it's fresh. Scrape every last bit of those seeds and toss the pod in the batter too—it infuses flavor like nothing else. For the butter, Land O'Lakes or Plugrá are my go-tos, but any good-quality unsalted will do. Room temperature is key—soften it by microwaving 40-second bursts if needed. The flour? King Arthur or Gold Medal for that tender crumb. Sift it, don't skip this step!
No vanilla bean? Double the vanilla extract and add a pinch of almond extract for depth. Running low on cream cheese? Substitute with softened buttercream—just skip the tang. The lemon zest can be swapped for orange zest at half the amount, but trust me, the citrus brightens everything. For the food coloring, Wilton or America's Test Kitchen brands are foolproof. If you're avoiding artificial colors, a tiny bit of turmeric works in a pinch (but it tastes like cake, not sunshine). The milk can be swapped for evaporated milk or half-and-half for extra richness—just keep the total liquid at 1 cup.
This cake keeps beautifully—3 days covered at room temperature or 1 week refrigerated. For extra-long storage, freeze the layers wrapped tightly in plastic for up to 3 months. I always bake an extra layer or two and freeze them—perfect for last-minute celebrations. The frosting? Whip it up just before serving so it stays fluffy. If you're not using it all, store the frosting between parchment layers in the fridge for up to 5 days. Pro tip: Brush the cooled layers with simple syrup (equal parts sugar and water, heated) before frosting—it keeps everything moist!
Why You'll Love This Recipe
- No Mixing Madness: I swear by this batter—just cream butter and sugar, crack eggs, fold in dry stuff. No electric mixer required, no stress, no waiting for the oven to preheat for ages. Honestly, the only thing you’ll need is a sturdy bowl and a spatula.
- Vanilla Kiss Magic: That single vanilla bean? It’s not just flavor—it’s the secret weapon. The seeds scrape out into the butter first, so every bite gets that deep, aromatic punch. (Yes, even the cheap store-bought vanilla works here, but if you splurge? Worth it.)
- Birthday to Brunch: This cake handles everything. Frost it with cream cheese for a wedding, dump a bowl of berries on top for a lazy Sunday, or slice it into squares for a workday snack. Between us, I’ve even turned leftover pieces into cake pops—no judgment.
- Pantry Staple Power: Butter, sugar, flour, eggs—these are things you already own. No specialty ingredients, no last-minute grocery runs. And if you bake a full sheet pan? You’ll have cake for days without breaking the bank. (My kids call it “my secret money-saver.”)
Step-by-step instructions for vanilla bean magic cake
Here's how to bake a showstopper yellow cake with layers of vanilla bean flavor and buttery richness.
👨🍳 Step 1: Prepare the Vanilla Bean and Whipped Cream Cheese Frosting
First, split the 1 whole vanilla bean lengthwise and scrape out the seeds with the tip of a knife. Place the seeds in a small bowl and add 1 cup unsalted butter (cut into cubes) and 2 cups granulated sugar. Let this mixture sit at room temperature for 10 minutes—this allows the vanilla to infuse into the butter while you prepare the rest.
In a separate bowl, beat the 8 oz cream cheese with ½ cup unsalted butter (softened) on medium speed until smooth and creamy. Add 1 tsp vanilla extract and mix until fully combined. This will be your dreamy frosting base. Cover and chill while you bake the cake—it needs to be cool for spreading later.
🍳 Step 2: Cream Butter, Sugar and Infuse with Vanilla
In a stand mixer fitted with the paddle attachment, beat the 1 cup unsalted butter (room temperature) and 2 cups granulated sugar on medium speed for 3-4 minutes until light and fluffy. You're looking for a pale, airy texture that nearly doubles in volume. This step is crucial—it incorporates air that will make your cake tender.
Add the vanilla bean seeds and the scraped pod (cut into small pieces) along with the 1 tsp vanilla extract and 1 tbsp lemon zest. Mix on low speed for 30 seconds to distribute the vanilla completely. The lemon zest adds a bright, subtle citrus note that balances the richness. Here's the thing—vanilla bean makes all the difference in this recipe. Don't skip it!
👨🍳 Step 3: Combine Wet and Dry Ingredients Gently
Add the 4 whole large eggs (room temperature) one at a time, mixing just until each is incorporated. Then add the 1 cup whole milk and mix until smooth. In a separate bowl, whisk together the 2.5 cups all-purpose flour (sifted), 2 tsp baking powder, and 0.5 tsp salt.
With the mixer on low speed, gradually add the dry ingredients to the wet mixture. Mix just until combined—you should still see some flour streaks. This prevents overmixing which makes cakes tough. For that perfect yellow hue, add the 0.25 tsp yellow food coloring and mix until evenly distributed. The batter should be smooth and slightly thick, like heavy pudding.
🔥 Step 4: Bake in Two Perfect Layers
Preheat your oven to 350°F and grease two 8-inch round cake pans (or line with parchment rounds). Divide the batter evenly between the pans. Bake for 25-30 minutes until a toothpick inserted in the center comes out clean and the edges are golden brown. I know it seems like too much, but trust me—this ensures fully baked layers.
Let the cakes cool in their pans for 10 minutes, then transfer to a wire rack to cool completely. This prevents them from becoming soggy when you add the frosting. While they cool, give your frosting one last check—it should be smooth and spreadable but not runny. If it's too thick, add 1-2 teaspoons of milk to loosen it.
🥘 Step 5: Assemble and Frost Like a Pro
Place one cake layer on a cake stand or plate. Spread a generous layer of the chilled cream cheese frosting on top. Here's the trick—I like to use an offset spatula to smooth it out evenly. Place the second cake layer on top and press down gently to create a level surface. Frost the top and sides completely, creating a smooth, elegant finish.
For that restaurant-quality look, I like to add a few extra vanilla bean seeds on top before serving. The contrast of the black seeds against the pale yellow frosting is stunning. Let the cake sit at room temperature for 30 minutes before slicing—this gives the frosting time to set slightly so it doesn't slide off when you cut.
Pro Tips For Making Amazing Yellow Cake
- Melt the Butter Slowly: I learned this the hard way—dumping cold butter straight into hot sugar makes a greasy mess that won’t emulsify properly. Warm the butter in the microwave for 20-30 seconds until it’s soft but not liquid, then mix it into the sugar. The butter should ribbon off the whisk cleanly; if it doesn’t, you’re either too hot or too cold.
- Sift the Flour Twice: Skimping on sifting means lumps and uneven texture. First sift the flour with your leavening (baking powder/soda) to distribute it evenly, then sift it again into the bowl. This isn’t just about aeration—it’s about guaranteeing every bite has the same lightness. (Yes, even if you’re impatient like me.)
- Check for Doneness with a Toothpick: The cake will look done before it actually is. Insert a toothpick into the center—it should come out with a few moist crumbs, not wet batter. If you pull it out clean, you’ve overbaked it, and the crumb will turn dense. (Pro move: Tap the pan gently; if it sounds hollow, it’s ready.)
- Scrape the Vanilla Bean: My grandmother swore by this, and she was right: scraping the seeds from a vanilla bean into the butter (not just the sugar) adds depth you won’t get from extract. Use the pod’s empty cavity to whisk the seeds into the butter first—it releases more flavor. (Save the pod for next time; it’ll keep for months.)
Common mistakes when making perfect results
Overmixing the Batter
This is the #1 mistake I see beginners make—and it turns your cake from tender to tough. Once you add the dry ingredients, mix just until combined with a few flour streaks remaining. Overmixing develops gluten, creating a dense, chewy texture. I've ruined many cakes by mixing too long, so I now set a timer for 20 seconds after the flour disappears. The goal is a smooth batter with minimal lumps, not a homogenous paste. 💛
Skipping Room Temp Ingredients
Cold butter and eggs create pockets of steam that disrupt your cake's structure, leading to uneven baking and potential cracks. Take 10 minutes to let your butter soften on the counter (or microwave in 20-second bursts) before using. I also recommend taking eggs out of the fridge 30 minutes before baking. This small step ensures even distribution of ingredients and a perfectly moist crumb.
Incorrect Oven Temperature
Your oven's "350°F" setting might actually be 325°F) or higher due to calibration issues. Invest in an oven thermometer) ($10 at any kitchen store) to verify accuracy. I've had cakes bake unevenly because my oven ran 25°F hotter) than the dial indicated. Bake at 350°F) but monitor with your thermometer for consistent results. The edges should be golden while the center remains slightly jiggly.
Underbaking the Layers
Pulling cakes out too soon is a common mistake that leads to collapsed layers. Always bake until a toothpick comes out clean (no wet batter) and the edges are golden. I've seen cakes that looked done at 20 minutes) but were still undercooked inside. The 25-30 minute) range accounts for oven variations—when in doubt, bake longer. Let them cool completely before frosting to prevent sogginess.
Ignoring the Vanilla Bean
Using vanilla extract instead of a real vanilla bean robs your cake of its signature depth. The scraped seeds contain compounds that extract more slowly during baking, creating complex flavor. I've tested both methods, and the bean version tastes like a bakery cake. If you must substitute, double the extract and add ½ tsp almond extract) for depth. Never skip the pod pieces—they infuse flavor throughout the batter.
Frosting Too Soon
Frosting warm cakes creates a soggy mess as condensation forms between layers. Always let cakes cool completely (at least 2 hours) at room temperature before assembling. I've made this mistake too many times—waiting ensures clean slices and professional presentation. For extra insurance, chill the frosted cake in the fridge for 30 minutes) before serving.
Nutrition facts
Frequently asked questions
Can I make this yellow cake without a stand mixer?
Use a hand mixer or even a whisk with some elbow grease. For the butter and sugar, beat them together for 5-7 minutes until light and fluffy—just keep at it until the mixture nearly doubles in volume. When adding the eggs and milk, mix by hand with a spatula until just combined. The key is patience and consistent mixing to incorporate air.
How do I store leftover cake?
Keep your cake fresh by storing it in an airtight container at room temperature for up to 3 days. For longer storage, refrigerate for 1 week or freeze the layers (without frosting) for 3 months. When ready to serve, let it sit at room temperature for 30 minutes to restore texture. The frosting can be stored separately in the fridge for 5 days.
What's the best way to make this cake gluten-free?
Replace the all-purpose flour with a 1:1 gluten-free baking flour blend (like Bob's Red Mill or King Arthur). Add ½ teaspoon xanthan gum to help bind the cake. Reduce the milk by 2 tablespoons since gluten-free flours absorb more liquid. For extra moisture, add 1 tablespoon applesauce to the batter. The texture will be slightly denser but still delicious!
Can I use this recipe for cupcakes?
Yes! Reduce the batter by 25% and fill cupcake liners ⅔ full. Bake at 350°F for 18-20 minutes until a toothpick comes out clean. For extra height, use a cupcake corer to create a well, then fill with frosting. The vanilla bean flavor shines perfectly in cupcake form too!
Why did my cake crack on top?
Cracking usually happens from sudden temperature changes or overbaking. Make sure your oven is fully preheated and the batter is at room temperature. Bake until just set (center should jiggle slightly) and avoid opening the oven door during baking. If cracks appear, they can be covered with extra frosting or decorative sprinkles for a stylish touch!