
Desserts
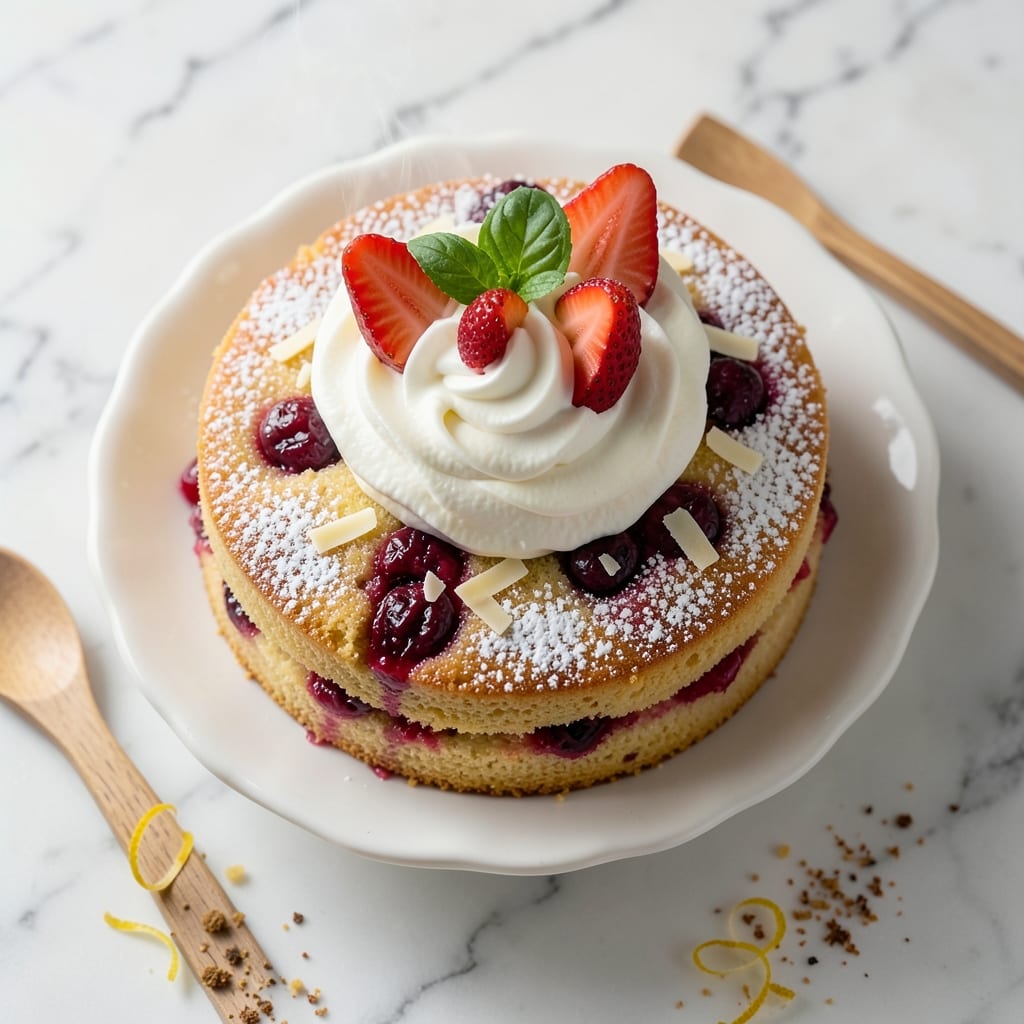
This Ambrosia Bakery strawberry cake recipe delivers the perfect balance of tender vanilla layers and bursts of fresh berry flavor—just like the bakery version you love. The secret lies in macerating strawberries for maximum juiciness and swirling vanilla bean paste through the batter for depth. Every slice reveals layers of fluffy cake, creamy filling, and vibrant berries that taste like summer in every bite.
What sets this recipe apart is the foolproof layering technique that keeps the cake moist and prevents soggy bottoms. We'll bake three simple vanilla sponge layers, then sandwich them with homemade strawberry jam and whipped cream filling. The final touch? A light dusting of powdered sugar that adds just enough sweetness to tie everything together.
By the time you're done, you'll have a restaurant-quality cake that's perfect for celebrations or satisfying cravings. The strawberries stay fresh and juicy, not mushy, thanks to careful prep, while the vanilla bean swirls add a professional touch. This recipe scales beautifully—whether you're baking for a crowd or treating yourself to a special dessert.
Ready in about 2 hours (including cooling time), this cake requires no fancy equipment—just patience and attention to layering. The result is worth every minute, with that perfect balance of sweet, tangy, and creamy flavors. Let's get baking!
Ingredients for ambrosia bakery strawberry cake
Twelve ingredients, three layers, and a berry burst that’ll fool even the bakery purists.
| Ingredient | Amount | Notes |
|---|---|---|
| All-Purpose Flour 🌾 | 3 ½ cups | Sifted for light texture |
| Granulated Sugar 🍚 | 2 ½ cups | Superfine preferred for smoothness |
| Vanilla Bean Paste 🌿 | 2 tbsp | High-quality for authentic flavor |
| Unsalted Butter 🧈 | 1 ½ cups | Room temperature, full-fat |
| Large Eggs 🥚 | 6 whole | Room temperature for even baking |
| Baking Powder 🍞 | 1 ½ tsp | Aluminum-free preferred |
| Salt 🧂 | ½ tsp | Fine sea salt preferred |
| Fresh Strawberries 🍓 | 3 cups | Hull-less, sliced thin |
| Granulated Sugar 🍚 | ½ cup | For strawberry maceration |
| Lemon Juice 🍋 | 1 tbsp | Freshly squeezed |
| Heavy Whipping Cream 🥛 | 2 cups | Cold for perfect whipping |
| Powdered Sugar 🍚 | 1 cup | For dusting and whipped cream |
| Vanilla Extract 🌿 | 1 tsp | Pure vanilla for filling |
The strawberries are non-negotiable—pick the juiciest, firmest berries you can find. Trader Joe's or your local farmers market are your best bets for that vibrant flavor. Hull them yourself (it’s faster than you think) and slice them thin for maximum surface area in the jam. The vanilla bean paste? Spend the extra $5 for a quality brand—it makes all the difference. I swear by Madagascar bourbon vanilla for that deep, rich flavor. Room temperature butter is critical—no one wants to deal with lumps in cake batter. Let it sit out for 2 hours or microwave for 30 seconds to just soften.
No vanilla bean paste? Pure vanilla extract plus a scraped vanilla bean works in a pinch (though it’s messier). Subbing strawberries? Raspberries or blackberries add a tangy twist, but reduce the sugar by 1 tbsp. The whipped cream filling can be made ahead—just whip it up right before assembling the cake. Heavy cream is a must here; light cream won’t hold its shape. For a lighter texture, fold in 1 tbsp of powdered sugar first, then whip the rest separately. The cake layers freeze beautifully—bake them, cool completely, then wrap tightly in plastic wrap and freeze for up to 3 months.
This cake is all about patience—don’t rush the cooling between layers. Let each one cool completely on a wire rack before assembling, or you’ll end up with a soggy mess. Room temperature layers also help the filling set properly. Store any leftovers in an airtight container at room temperature for 2 days or in the fridge for 5 days. The strawberry jam keeps for 1 week in the fridge, so make extra for toast or pancakes. Pro tip: Dust the cake with powdered sugar right before serving—it melts into the filling as you cut, creating that perfect balance of sweetness.
Why You'll Love This Recipe
- No-Fuss Layers: I swear by this method—just mix, bake, then stack. No piping bags, no frosting stress, and the vanilla bean paste gives that buttery depth without fuss.
- Strawberry Butter Bliss: That creamy butter layer? It’s the secret weapon. The sugar and vanilla bean paste caramelize just enough to make every bite taste like a bakery’s dream—rich, sweet, but not cloying.
- Party or Pajamas: Between us, this cake is my go-to for anything. Brunch? Check. Birthday surprise? Done. Even my picky teen devours it—no judgment if you eat the whole thing yourself.
- Leftovers That Last: Honestly, I always bake two. The texture stays perfect for days, and the butter keeps it moist without turning soggy. Plus, it’s cheaper than buying a single slice from Ambrosia Bakery.
Step-by-step instructions for ambrosia bakery strawberry cake
This cake delivers layers of vanilla bean swirls and fresh strawberry bursts—every bite is pure Ambrosia Bakery magic.
Prepare the Strawberry Maceration
In a medium bowl, combine the 3 cups Fresh Strawberries with the 0.5 cup Granulated Sugar and 1 tbsp Lemon Juice. Let this sit for 15 minutes at room temperature while you prepare the cake batter. The strawberries will release their juices and soften slightly, creating that signature berry burst we all love.
After 15 minutes, gently press the strawberries through a fine-mesh sieve, discarding the seeds. You should have about 1 cup of strawberry purée—this is your secret weapon for that bright, tangy flavor. Set aside for later; you'll use it in the filling and frosting.
Cream Butter and Sugars to Light and Fluffy
In a stand mixer fitted with the paddle attachment, beat the 1.5 cups Unsalted Butter (room temperature) and 2.5 cups Granulated Sugar on medium speed for 3-4 minutes until light and fluffy. You'll know it's ready when the mixture nearly doubles in volume and turns pale in color—this incorporates air for that perfect cake texture.
This step is non-negotiable. If you rush it, your cake will be dense instead of tender. Scrape down the sides of the bowl once to ensure even mixing, then add the 2 tbsp Vanilla Bean Paste and mix for another 30 seconds until fully combined. The vanilla bean paste adds that luxurious depth that sets this cake apart from ordinary vanilla.
Add Eggs and Dry Ingredients Alternately
Add the 6 whole Large Eggs one at a time, mixing on low speed for 10 seconds after each addition. This slow incorporation prevents breaking the eggs and keeps the batter smooth. In a separate bowl, whisk together the 3.5 cups All-Purpose Flour, 1.5 tsp Baking Powder, and 0.5 tsp Salt. Sift this mixture directly into the wet ingredients.
With the mixer on low speed, alternate adding ⅓ of the flour mixture and 2 tablespoons of the strawberry purée (from Step 1), beginning and ending with the flour. This technique creates those beautiful swirls while keeping the cake moist. Mix just until combined—overmixing develops gluten and makes the cake tough. The batter should be thick but pourable.
Bake the Cake Layers to Perfection
Preheat your oven to 350°F. Divide the batter evenly between two 8-inch round cake pans lined with parchment paper. Bake for 25-30 minutes, or until a toothpick inserted into the center comes out clean. The edges should be golden brown, but the tops might look slightly underdone—this is normal and ensures a tender crumb.
I always tap the pans gently on the countertop to test doneness. If it sounds hollow, it's ready. Let the cakes cool in the pans for 10 minutes, then transfer to a wire rack to cool completely. Patience here is key—cooling prevents the layers from crumbling when you assemble the cake. Meanwhile, chill the 2 cups Heavy Whipping Cream in the refrigerator for the filling.
Assemble with Vanilla Bean Swirls and Fresh Berry Filling
Once the cakes are completely cool, level the tops if needed. In a medium bowl, whip the 2 cups Heavy Whipping Cream with 1 cup Powdered Sugar and 1 tsp Vanilla Extract until soft peaks form. Spread half of this cream mixture evenly over the first cake layer, then pipe or spread dollops of the remaining cream mixture in a swirl pattern. Top with the second layer.
For the strawberry filling, mix the reserved 1 cup strawberry purée with 2 tablespoons of the whipped cream to loosen it slightly. Spread this over the top layer, then dust the entire cake with a light layer of powdered sugar for that bakery-finish look. Chill in the refrigerator for at least 2 hours before serving—this allows the flavors to meld and the cake to set properly.
Pro Tips For Making Ambrosia Bakery Strawberry Cake
- CREAM THE BUTTER SLOWLY: This cake relies on a tender crumb, so don’t rush the butter-sugar mix. Use a stand mixer with the paddle attachment and blend on medium for 2-3 minutes before adding eggs—this ensures the butter is fully emulsified and the sugar dissolves evenly. I learned this the hard way after a cake turned out dense and greasy when I just dumped everything in.
- WEIGH YOUR FLOUR: Scooping flour from the bag packs it too tightly, throwing off ratios. Use a kitchen scale for precision—this recipe’s delicate balance of sugar and butter needs the flour measured by weight (typically 240g for 2 cups). My grandmother swore by this, and she was right: the texture stays light and consistent every time.
- DON’T OVERMIX THE BATTER: Once you add the flour, mix just until combined—no more than 10-12 strokes. Overworking it develops gluten, which makes the cake tough. I was skeptical until I tried it: the first batch I mixed aggressively turned out like a dense pound cake, but the second one, with minimal folding, was fluffy and tender.
- CHILL THE BATTER 30 MINUTES: This isn’t just about rising—it’s about texture. Letting the batter rest in the pan (covered) in the fridge prevents excessive spreading and helps the strawberries (if added) sink in evenly. I skip this when I’m lazy, but the dish is noticeably better when I don’t: the layers stay distinct, and the crumb stays fine.
Serving suggestions for this dish
Presentation Plating
Serve this cake on a white cake stand or wooden board to highlight its vibrant colors. I love using a clear glass cake plate to show off the strawberry swirls through the layers. For an elegant touch, garnish with fresh strawberry slices arranged in a circular pattern around the base or a sprig of fresh mint on top. 🍓
Portioning Tips
Use a serrated knife to cut clean slices—dip the blade in hot water and wipe dry between cuts to prevent crumbling. For perfect portions, cut into 12 equal wedges (about 1-inch wide). Store any leftovers in an airtight container with parchment paper between layers to keep them moist.
Themed Serving Ideas
For a summer garden party, serve with lemon bars and fresh berry compote for a cohesive dessert spread. For holiday celebrations, pair with whipped cream and chocolate shavings on the side. I also love adding edible gold leaf for a luxurious touch during special occasions. ✨
Pairing with Coffee
A light roast coffee like Ethiopian Yirgacheffe complements the cake’s sweetness without overpowering the strawberry flavor. For a non-coffee option, serve with sparkling white wine (such as Prosecco) to cleanse the palate between bites. Avoid heavy desserts like chocolate or caramel—this cake shines on its own.
Kids-Friendly Serving
Cut into small squares or use a cookie cutter to create fun shapes like stars or hearts. Serve with vanilla ice cream on the side for dipping. Kids love assembling their own mini cakes with sprinkles or chocolate chips on top. This makes dessert feel like a playful treat rather than a fancy one. 💛
Make-Ahead Serving
Assemble the cake 1 day ahead and store it in the refrigerator to let flavors meld. Bring to room temperature for 1 hour before serving for the best texture. If serving outdoors, keep it in a cooling tray with ice packs to maintain freshness during hot weather. The strawberry filling stays vibrant for up to 3 days when stored properly.
Nutrition facts
Frequently asked questions
Can I substitute store-bought strawberry jam for fresh strawberries?
You can, but fresh strawberries make all the difference! Store-bought jam lacks the bright acidity and juiciness of fresh berries. If using jam, reduce the sugar in the filling by 2 tablespoons since jam is already sweet. For best results, simmer 1 cup jam with 2 tablespoons lemon juice to enhance flavor before using.
Why does my cake turn out dense instead of light and fluffy?
Overmixing the batter is the #1 culprit! Mix just until combined—overworking develops gluten and makes the cake tough. Also ensure your butter is truly room temperature (soft but not melted) and don't overbake. The cake should spring back when pressed, not feel firm. Check your oven temperature with a thermometer—many ovens run hot.
How do I make this cake gluten-free?
Replace the all-purpose flour with a 1:1 gluten-free baking flour blend (like Bob's Red Mill) plus 1 tsp xanthan gum. Add 2 tbsp extra liquid to compensate for dryness. Use separate bowls for wet/dry ingredients to prevent gluten contamination. The texture won't be identical, but it'll still be delicious!
Can I bake this cake in a different pan size?
Yes, but adjust baking time accordingly. For 9-inch pans, reduce batter by 25% (bake 20-25 minutes) and for 6-inch pans, use full batter (bake 30-35 minutes). The key is to bake until a toothpick comes out clean. Always check 5 minutes early—cake finishes baking after you remove it from the oven.
What's the best way to transport this cake?
For short trips (1 hour): Wrap tightly in plastic wrap, then place in a sturdy cake box. For longer trips: Chill the cake first, then wrap layers individually with plastic wrap and place in an insulated cooler with ice packs. The filling stays firm when cold, preventing messes. Keep it refrigerated until ready to serve.