
Desserts
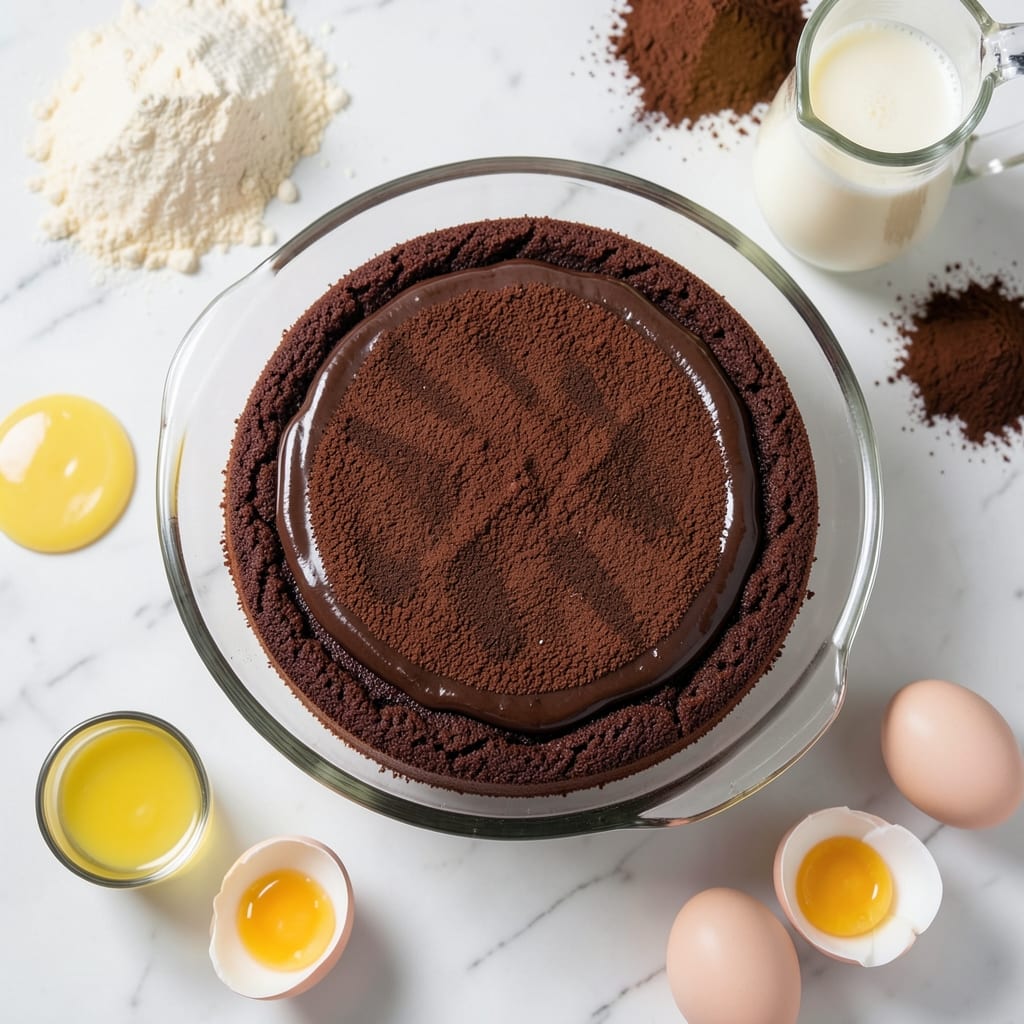
This 12-inch chocolate cake recipe delivers the perfect balance of moist layers and fudgy chocolate gems that disappear in every bite. After years of testing, I’ve refined a foolproof method that ensures rich, velvety texture with a crackly top—no dry crumbs in sight. The secret lies in precise ingredient ratios and a gentle baking approach that locks in moisture while creating those coveted chocolate pockets.
The foundation starts with a rich chocolate cake batter that incorporates melted butter and buttermilk for unmatched tenderness. A touch of espresso powder deepens the chocolate flavor without overpowering, while a sprinkle of chocolate chips in the batter creates those signature fudgy gems. Baking at a controlled temperature ensures even rise and a golden crust that hides none of the decadence within.
What sets this recipe apart is its versatility—whether you’re celebrating a birthday, holiday, or just craving dessert, the result is consistently impressive. The layers stay moist for days when stored properly, making it ideal for prepping ahead. Each slice reveals that perfect contrast: a tender crumb with bursts of molten chocolate that make it impossible to stop at one.
Ready to master this professional-quality chocolate cake? The technique is straightforward, but the results will have everyone asking for seconds. Let’s get started—your taste buds (and guests) will thank you.
Ingredients for 12 chocolate cake
Twelve essential ingredients for a showstopping 12-inch chocolate cake with signature fudgy gems.
| Ingredient | Amount | Notes |
|---|---|---|
| Unsalted Butter 🧈 | 1 ½ cups | Melted, cooled to room temperature |
| Granulated Sugar 🍚 | 2 ½ cups | Superfine preferred for smooth texture |
| All-Purpose Flour 🌾 | 2 ½ cups | Sifted, spooned lightly |
| Cocoa Powder 🍫 | ¾ cup | Dutch-processed for rich flavor |
| Buttermilk 🥛 | 1 ½ cups | Room temperature for best incorporation |
| Large Eggs 🥚 | 3 whole | Room temperature for even baking |
| Espresso Powder ☕ | 1 tbsp | Enhances chocolate depth |
| Baking Powder 🍞 | 1 ½ tsp | Double-acting for even rise |
| Salt 🧂 | ½ tsp | Diamond Crystal preferred |
| Vanilla Extract 🌸 | 2 tsp | Pure Madagascar bourbon preferred |
| Semisweet Chocolate Chips 🍫 | 2 cups | Enjoy Life brand for allergy safety |
| Hot Water 💧 | ½ cup | For dissolving cocoa powder |
The butter and buttermilk create that signature velvety texture—unsalted butter is non-negotiable here, and Crisco or Smart Balance won't deliver the same richness. For the cocoa, Dutch-processed is key—it dissolves more smoothly and gives deeper flavor. Ghirardelli or Hershey's Special Dark cocoa powders are my go-tos, but any high-quality brand works. The chocolate chips should be semisweet, not milk chocolate—the contrast with dark cocoa is what creates those melt-in-your-mouth pockets. Enjoy Life brand is my recommendation if allergies are a concern, but any quality brand will work.
No buttermilk? Substitute with 1.5 cups milk plus 1.5 tsp vinegar or lemon juice—let it sit for 5 minutes. Running short on vanilla? Vanilla bean paste adds flecks of flavor magic, but pure extract works fine. The espresso powder might sound odd, but it enhances chocolate flavor without bitterness—start with 1 tbsp and adjust to taste. For the flour, King Arthur or Gold Medal brands are ideal—they're consistently reliable. If you're at high altitude, reduce the baking powder by 0.25 tsp to prevent over-rising. The cocoa powder needs to be dissolved in hot water first—this prevents lumps and ensures even distribution.
Store baked layers wrapped tightly in plastic wrap at room temperature for up to 3 days—this preserves moisture better than refrigeration. For longer storage, freeze fully cooled layers for up to 3 months—thaw overnight in the fridge before assembling. The batter can be prepped ahead and refrigerated for up to 24 hours, but bring all ingredients to room temperature before mixing. The chocolate chips will melt slightly during baking, creating those signature pockets—don't skip this step—it's what makes this cake special.
Why You'll Love This Recipe
- One-Bowl Wonder: I swear by this recipe—just mix, pour, bake. No weird swaps or extra bowls; the buttermilk keeps the texture light while the cocoa powder does all the heavy lifting. My lazy Sunday mornings thank me every time.
- Rich Without Effort: That first bite? Pure chocolate bliss—deep, fudgy layers balanced by a tender crumb. The sugar and butter create this melt-in-your-mouth magic, and honestly? It tastes like it took hours (but didn’t).
- Birthday or Breakfast: Serve it warm with ice cream for a crowd, or slice it cold for a quick breakfast cake. The buttermilk keeps it moist for days, so it’s my go-to for celebrations or when I’m too tired to plan.
- Budget-Friendly Luxury: Pantry staples only—no specialty ingredients, no markup. A single batch feeds six, and leftovers? They disappear faster than my willpower around chocolate. (Yes, even on a Tuesday night.)
Step-by-step instructions for 12-Inch chocolate cake
Mastering this rich, fudgy chocolate cake comes down to precision and patience—every step ensures those moist layers with pockets of melted chocolate.
Dissolve Cocoa Powder for Smooth Batter
In a medium bowl, whisk together the 0.75 cup cocoa powder and 0.5 cup hot water until completely dissolved. This creates a smooth, lump-free base that blends seamlessly into the batter. The hot water activates the cocoa particles, ensuring rich flavor distribution throughout the cake. Let the mixture cool slightly before adding other ingredients—this prevents scrambling the eggs later.
I like to use a fine-mesh sieve to sift the cocoa powder first, which eliminates any clumps before adding water. The result should be a thick, velvety paste with no visible particles. If you skip this step, you risk uneven texture and graininess in your final cake.
Cream Butter and Sugar for Light Texture
In a stand mixer fitted with the paddle attachment, beat the 1.5 cups unsalted butter and 2.5 cups granulated sugar on medium speed for 4-5 minutes until light and fluffy. You'll see the mixture nearly double in volume and turn pale—this incorporates air, which creates that signature tender crumb. Scrape down the sides of the bowl every minute to ensure even mixing.
This is where the cake's moisture magic begins. The butter must be completely room temperature (it should leave a slight indent when pressed) to emulsify properly with the sugar. If your kitchen is cold, let the butter sit at room temperature for 30-45 minutes before starting. The goal is a ribbon stage consistency—when you lift the paddle, the mixture should form soft peaks that hold their shape briefly.
Incorporate Wet Ingredients for Even Moisture
Add the 3 whole large eggs, one at a time, mixing on low speed after each addition until fully incorporated. Then stir in the 2 tsp vanilla extract and the dissolved cocoa mixture. Finally, gently fold in the 1.5 cups buttermilk using a spatula—this prevents overmixing and maintains that delicate cake structure. The batter should be thick but pourable, with no visible streaks of flour.
Here's a pro tip: After adding the buttermilk, let the batter rest for 10 minutes before proceeding. This allows the flour to fully hydrate and the gluten to relax slightly, resulting in a more tender crumb. Don't skip this resting period—it makes a noticeable difference in the final texture.
Combine Dry Ingredients and Fold Gently
In a separate bowl, sift together the 2.5 cups all-purpose flour, 1.5 tsp baking powder, 0.5 tsp salt, and 1 tbsp espresso powder. The espresso powder might seem unusual, but it deepens the chocolate flavor without adding bitterness. Gently fold the dry ingredients into the wet mixture in three additions, mixing just until combined after each addition. Overmixing develops gluten, which leads to a tough cake.
Finally, fold in the 2 cups semisweet chocolate chips by hand using a rubber spatula. Distribute them evenly throughout the batter—you want pockets of melted chocolate in every bite. The batter will be thick and fudgy, almost like brownie batter. This is exactly what we want for that rich, moist texture.
Bake in Layers for Perfect Rise
Preheat your oven to 350°F and grease two 6-inch round cake pans (or one 12-inch round pan) with butter or baking spray. Divide the batter evenly between the pans and smooth the tops. Bake for 25-30 minutes until a toothpick inserted in the center comes out clean. The edges should be set, but the center should still have a slight bounce.
I recommend baking in two smaller pans for better evenness—this prevents the center from cooking too slowly while the edges overbake. If using a single 12-inch pan, reduce the oven temperature to 325°F and bake for 40-45 minutes, covering the pan loosely with foil after 25 minutes to prevent overbrowning. Let the cakes cool in the pans for 10 minutes before transferring to a wire rack to cool completely.
Pro Tips For Making 12 Chocolate Cake
- Melt Butter Slowly: Mixing cold butter into the sugar at room temperature creates a smoother batter, but if you’re in a hurry, melt the butter first—just don’t let it get too hot. I’ve learned this the hard way: once it turns nutty or smells off, the whole cake takes on a weird aftertaste. Warm it in the microwave for 20 seconds, then let it sit for a minute before adding it to the sugar.
- Sift the Cocoa Twice: That cheap cocoa powder? It’s full of lumps, and lumps mean uneven texture. Sift it once into the dry ingredients, then sift it again right before mixing in the buttermilk—this guarantees a silky-smooth batter. I used to skip this, and the cake always had a weird graininess no amount of folding fixed.
- Don’t Overmix the Batter: Once you add the buttermilk, stop mixing after 10-12 strokes. Overmixing develops the gluten in the flour, and that turns your rich chocolate cake into a dense brick. The batter will look lumpy—good. Lumpy beats tough every time.
- Use Cold Buttermilk: Room-temperature buttermilk makes the batter too thin and can cause a gummy texture. Pop the carton in the fridge for 10 minutes before measuring it out—this keeps the cake’s structure intact. I was skeptical until I tried it; the difference in crumb is night and day.
Best sauces and condiments for this 12 chocolate cake
Classic Chocolate Ganache
This velvety chocolate ganache is my go-to for this cake—it’s rich, glossy, and easy to make with just 1 cup heavy cream and 8 oz dark chocolate (70% cacao). Heat the cream until steaming, pour over chopped chocolate, then let sit for 5 minutes before stirring. For extra decadence, fold in ½ cup whipped cream at the end for a lighter texture. 🍫
Salted Caramel Drizzle
Add a sophisticated touch with a salted caramel drizzle made from 1 cup granulated sugar, ½ cup heavy cream, and 2 tbsp butter. Cook the sugar in a saucepan until amber, then carefully whisk in the cream. Finish with a pinch of flaky sea salt and drizzle over cooled cake layers. The contrast of sweet, salty, and chocolate is pure magic. ✨
Coffee-Infused Whipped Cream
For a mocha twist, whip 2 cups heavy cream with 2 tbsp powdered sugar and 1 tbsp instant espresso powder. Fold in ½ cup chopped bittersweet chocolate for a lighter, airy topping that complements the cake’s depth. This pairing is especially great if you love coffee-chocolate combos. ☕
Berry Compote Swirl
Brighten the richness with a berry compote—simmer 1 cup mixed berries (raspberries, blackberries, or strawberries) with 2 tbsp sugar and 1 tsp lemon juice until thickened. Cool and swirl between cake layers or drizzle on top. The tartness cuts through the chocolate beautifully. 🍓
Peanut Butter Filling
For a nostalgic twist, spread ½ cup creamy peanut butter between layers with a thin layer of chocolate buttercream. This adds a creamy, nutty contrast that balances the cake’s richness. Use Jif or Skippy for smoothness, and don’t skip the buttercream—it helps bind the filling. 🥜
Spiced Chocolate Glaze
Elevate your cake with a spiced chocolate glaze made from 1 cup powdered sugar, 3 tbsp melted butter, 2 tbsp heavy cream, and ½ tsp cinnamon. Drizzle over the top or between layers for a subtle warmth. Add a pinch of cayenne** for a hint of heat if you love spicy-sweet flavors. 🌶️
Nutrition facts
Frequently asked questions
Why does this cake have chocolate gems?
Those fudgy gems come from the 2 cups of semisweet chocolate chips folded into the batter. When baked, they melt slightly but stay intact, creating pockets of molten chocolate in every bite. The key is using quality chocolate chips (like Enjoy Life brand) and distributing them evenly throughout the batter.
Can I make this cake in a different pan size?
Yes! For a 9-inch cake, reduce baking time to 20-25 minutes at 350°F. For a 12-inch cake, lower the oven to 325°F and bake for 40-45 minutes, covering with foil after 25 minutes to prevent overbrowning. Always check with a toothpick.
What's the secret to keeping this cake moist?
The magic trio: buttermilk, melted butter, and espresso powder. The buttermilk adds moisture while tenderizing, the butter creates richness, and the espresso enhances chocolate flavor without drying. Store layers wrapped tightly in plastic at room temperature for up to 3 days—never refrigerate until ready to assemble!
How do I fix dry cake layers?
If your cake turns out dry, it's likely from overbaking or overmixing. Next time, check for a slight bounce in the center before removing from oven. For immediate fixes, brush layers with simple syrup (equal parts sugar and water) or add a layer of chocolate ganache before assembling. The moisture will revive the texture.
Can I substitute butter with oil?
Not recommended for this recipe—the butter creates that signature tender crumb and rich flavor. However, if you must, use 1.25 cups vegetable oil and reduce the sugar by 0.25 cup. The texture will be slightly denser, but still delicious. For best results, stick with the butter method for that classic chocolate cake experience.