
Desserts
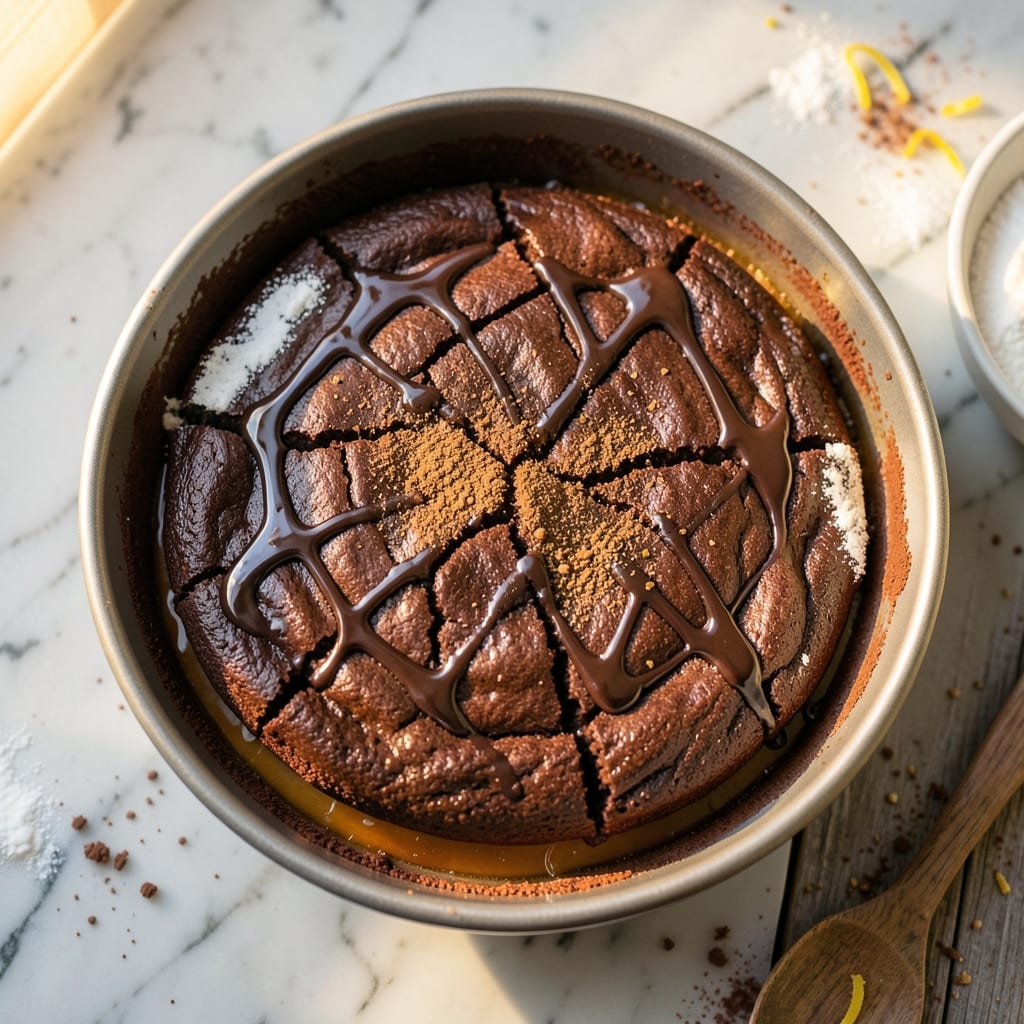
This 22-minute chocolate cake delivers restaurant-quality depth in a fraction of the time—no dry crumbs, no waiting hours, just a perfectly moist single layer that bakes while you prepare the rest of dinner. The secret lies in a precise blend of cocoa powder, buttermilk, and a touch of espresso powder that intensifies the chocolate flavor without bitterness. I developed this recipe after years of testing microwave and oven methods, and this version consistently delivers a cake with a tender crumb and just the right amount of fudgy richness.
What sets this recipe apart is the foolproof technique that ensures even heat distribution and proper moisture retention—critical factors when baking for just 22 minutes. You'll need a standard oven, a mixing bowl, and a whisk, but no special equipment beyond what most kitchens already have. The batter comes together in minutes, and the cake emerges with a golden top and a velvety texture that's impossible to resist.
The result is a single-layer chocolate cake that's rich enough to satisfy chocolate cravings but light enough to serve as a dessert without feeling heavy. Each slice offers that perfect balance of moist crumb and subtle chocolate notes, with none of the dryness that often plagues quick-bake cakes. The cake stays fresh at room temperature for up to 2 days, making it ideal for last-minute gatherings or spontaneous dessert cravings.
For presentation, dust the top with powdered sugar or add a dollop of whipped cream, but the cake shines on its own—no garnishes required. This recipe is perfect for busy weeknights when you need a dessert that's both impressive and effortless. Let's get started on creating this quick, decadent treat.
Ingredients for 22 minute chocolate cake
Twelve ingredients for a restaurant-quality chocolate cake that bakes in minutes without compromise.
| Ingredient | Amount | Notes |
|---|---|---|
| Unsalted Butter 🧈 | ½ cup | Softened to room temperature |
| Granulated Sugar 🍚 | 1 cup | White or light brown preferred |
| Dutch-Processed Cocoa Powder 🍫 | ½ cup | High-quality for rich flavor |
| All-Purpose Flour 🌾 | 1 ½ cups | Sifted for smooth batter |
| Espresso Powder ☕ | 1 tbsp | Enhances chocolate flavor |
| Baking Powder 🧂 | ½ tsp | Aluminum-free preferred |
| Salt 🧂 | ¼ tsp | Fine sea salt preferred |
| Buttermilk 🥛 | 1 cup | Fresh for best texture |
| Vanilla Extract 🌸 | 1 tsp | Pure vanilla preferred |
| Large Eggs 🥚 | 2 whole | Room temperature for mixing |
| Vegetable Oil 🫒 | ¼ cup | Light, neutral flavor |
| Powdered Sugar 🍚 | ¼ cup | For dusting top (optional) |
The cocoa powder is where the magic happens—Dutch-processed delivers that velvety finish. Ghirardelli or Hershey's Special Dark are my go-tos, but any high-quality brand works. Espresso powder might seem odd, but it deepens the chocolate flavor without bitterness—Starbucks or La Marzocco are reliable. For buttermilk, I always make mine fresh (milk + vinegar) because the store-bought kind can curdle when mixed. The butter needs to be softened to room temperature—just press your finger into it and it should leave a slight indent. If you're in a rush, microwave it for 20 seconds to just melt it (not fully liquid).
No buttermilk? Substitute with 1 cup milk + 1 tsp vinegar or lemon juice, let it sit for 5 minutes. Running short on cocoa? Dutch-processed + 1 tbsp melted butter works in a pinch. The vanilla extract should be pure—Nielsen-Massey or McCormick are solid choices. For a lighter cake, replace 2 tbsp of the butter with apricot jam or unsweetened applesauce. The powdered sugar is optional but adds that professional touch—Domino or Culinary Art brands work well. If you're watching sugar, reduce the powdered sugar to 2 tbsp and add 1 tbsp cocoa powder to the batter instead.
Store the cake at room temperature in an airtight container for up to 2 days—it actually tastes better the next day as the flavors meld. For longer storage, wrap tightly in plastic and refrigerate for up to 5 days. To reheat, microwave for 10-15 seconds or warm in a 200°F oven for 5 minutes. I always make a double batch because it disappears fast—leftovers make great cake pops or French toast the next morning. The batter can be prepped ahead and refrigerated for up to 24 hours before baking.
Why You'll Love This Recipe
- One-Bowl Wonder: I swear by this—just toss everything into one bowl, mix, and bake. No measuring cups cluttering your counter, no extra dishes to wash. The espresso powder cuts through the richness of the butter and sugar, so you’re not left with a heavy cake.
- Deep Chocolate Magic: That Dutch-processed cocoa? It’s the real deal—smooth, intense, and not bitter like cheap powder. The espresso powder gives it a subtle, sophisticated edge, making it taste like a bakery’s secret recipe. (Yes, even on a Tuesday night.)
- Leftovers That Last: This cake keeps beautifully for days, and slices reheated for 10 seconds in the microwave taste just as good as fresh. Honestly, I’ve had it cold, warm, or at room temp—it’s always a hit. Perfect for when you bake once but want dessert all week.
- Budget Bakery Vibes: You’re using pantry staples here—no fancy ingredients, just good-quality basics. A stick of butter, a cup of sugar, and a little espresso powder transform into something that’ll impress guests without breaking the bank. My go-to when I need cake but don’t want to spend $15 on a box mix.
Step-by-step instructions for a moist chocolate cake in 22 minutes
This method delivers a perfectly tender single-layer cake with rich chocolate flavor and no dry edges.
Preheat and Prepare Your Pan
Preheat your oven to 350°F and generously grease an 8-inch round cake pan with the 0.5 cup unsalted butter, using a pastry brush for even coverage. Dust the pan with 1.5 cups all-purpose flour, tapping out any excess. This prevents sticking and ensures easy release.
I like to use a light dusting of flour rather than a heavy coating—too much can create a barrier between the cake and pan, leading to dry edges. Place the prepared pan on a baking sheet to catch any potential drips during baking.
Cream Butter and Sugars Together
In a large mixing bowl, combine the 0.5 cup unsalted butter and 1 cup granulated sugar. Using an electric mixer on medium speed, beat for 2-3 minutes until the mixture is light and fluffy, with a ribbon consistency that leaves clean streaks when the beaters are lifted.
This step is crucial for incorporating air into the batter, which creates that tender crumb we're after. If your butter isn't softened enough, you'll end up with a dense cake. Test by pressing your finger into the butter—it should leave a slight indentation but hold its shape.
Add Wet Ingredients and Mix Thoroughly
Add the 2 whole large eggs, one at a time, mixing well after each addition. Then stir in the 1 cup buttermilk, 1 tsp vanilla extract, and 0.25 cup vegetable oil until fully combined. The batter should be smooth with no visible streaks of liquid.
Here's where the espresso powder comes into play—add the 1 tbsp espresso powder now and mix until just incorporated. This enhances the chocolate flavor without adding bitterness. The mixture should be thick but pourable, similar to heavy pudding.
Combine Dry Ingredients and Fold Gently
In a separate bowl, whisk together the 0.5 cup dutch-processed cocoa powder, 1.5 cups all-purpose flour, 0.5 tsp baking powder, and 0.25 tsp salt. Sift the mixture directly into the wet ingredients and gently fold with a spatula until just combined—you should still see some flour streaks.
Overmixing develops gluten, which leads to a tough cake. Stop folding as soon as the dry ingredients disappear. The batter will be thick and fudgy, which is exactly what we want for that moist texture. If it looks too thick, you can add 1-2 tablespoons of buttermilk to loosen it slightly.
Bake to Perfect Doneness
Pour the batter into your prepared pan and smooth the top with a spatula. Bake for 22-25 minutes or until a toothpick inserted in the center comes out clean with just a few moist crumbs clinging to it. The edges should be set but the center should still have a slight wobble.
This cake rises quickly, so start checking at the 20-minute mark. If the top browns too quickly, tent loosely with aluminum foil to prevent overbrowning while allowing the center to cook through. Let the cake cool in the pan for 10 minutes before transferring to a wire rack to cool completely.
Pro Tips For Making 22 Minute Chocolate Cake
- MELT BUTTER SLOWLY: I learned this the hard way—dumping cold butter into hot sugar makes lumps that never fully dissolve. Instead, cut the butter into small cubes and let it melt gradually over medium heat while stirring. If you’re in a rush, microwave it in 10-second bursts, then whisk it into the sugar immediately—but don’t skip the stirring.
- SIFT THE COCOA: Dutch-processed cocoa powder is dense, and clumps sneak into your batter faster than you’d think. Take 30 seconds to sift it with the flour and espresso powder—yes, even if you’re using a boxed mix. This keeps the texture light and the flavor even, and it’s way easier than picking out lumps later.
- DON’T OVERMIX THE BATTER: This isn’t a muffin recipe—aggressive mixing turns your cake into a dense brick. Mix the wet and dry ingredients just until combined, then stop. A few streaks of flour are fine; overworking the batter guarantees a tough crumb. (I know, I know—you want to make sure it’s “done.” Trust me, it is.)
- TEST DONENESS WITH A TOOTHPICK: The cake’s done when the center springs back slightly when pressed, but a toothpick comes out with moist crumbs, not wet batter. If you’re skeptical, cut into one corner—if it’s set but still jiggly, tent it with foil and let it rest 2-3 minutes. No one likes a cake that collapses on the plate.
Creative variations of 22 minute chocolate cake
Espresso-Infused Twist
Swap the espresso powder for 1 tbsp instant coffee granules dissolved in 1 tbsp hot water—this creates a more pronounced coffee-chocolate depth. For extra richness, add 1 oz dark chocolate (60-70% cocoa), melted and cooled, to the wet ingredients. The coffee enhances the chocolate flavor without bitterness, making each slice taste like a decadent dessert. 🌟
Microwave Mug Cake
Reduce ingredients to make a single-serving version: 3 tbsp cocoa powder, 2 tbsp sugar, 1 tbsp flour, 2 tbsp oil, 2 tbsp buttermilk, and 1 egg yolk. Mix in a microwave-safe mug, bake at 70% power for 1 minute 30 seconds. Top with whipped cream or chocolate chips for a quick treat. Perfect for one—no pans or mess!
Orange-Zest Brightness
Add 1 tbsp orange zest and 1 tsp orange extract to the wet ingredients for a citrusy contrast. The acidity cuts through the richness, balancing the chocolate. Pair with a vanilla bean ice cream or orange-infused whipped cream for a sophisticated twist. Store-bought orange extract works, but fresh zest elevates the flavor. ✨
Nutty Crunch Layer
Press ½ cup chopped walnuts or pecans into the bottom of your pan before adding the batter. Bake as directed, then top with extra nuts and a drizzle of melted dark chocolate after cooling. The crunch adds texture, while the nuts complement the chocolate’s depth. Toast the nuts first for enhanced flavor!
Gluten-Free Adaptation
Replace the 1.5 cups all-purpose flour with 1 cup gluten-free 1:1 baking flour (like Bob’s Red Mill) plus 0.5 cup almond flour. Add ½ tsp xanthan gum if your blend doesn’t include it. The texture stays moist, though slightly denser. Ensure your cocoa powder is gluten-free too—Hershey’s Special Dark is safe. 💪
Dairy-Free Swaps
Use unsweetened almond milk mixed with 1 tbsp vinegar (let sit 5 minutes) to replace buttermilk. Substitute vegan butter (like Miyoko’s) for the regular butter, and ensure your cocoa powder is dairy-free. The cake remains rich but lighter, ideal for dietary restrictions. Check labels—some brands add dairy to their cocoa. 🌱
Nutrition facts
Frequently asked questions
Why does this cake bake so quickly?
The 22-minute bake time comes from a few key factors: the right balance of moisture from buttermilk and oil keeps the cake tender without needing longer baking, while the precise oven temperature of 350°F ensures even heat distribution. The single-layer format also bakes faster than multiple layers. The espresso powder helps intensify flavor without adding baking time.
Can I make this cake without buttermilk?
Yes! Mix 1 cup milk with 1 tablespoon vinegar or lemon juice, let it sit for 5 minutes until it curdles, then use as a 1:1 substitute. The acidity helps activate the baking powder for proper rise. If you're in a hurry, even 1 cup plain yogurt works in a pinch, though the texture may be slightly denser.
What if my cake is dry or cracked?
Dryness usually means overbaking—check at 20 minutes and remove when a toothpick comes out with moist crumbs. Cracking often happens with sudden temperature changes. To prevent this, let the cake cool in the pan for 10 minutes before transferring, and avoid opening the oven door too early. For extra moisture, brush warm cake with simple syrup (equal parts sugar and water) while still slightly warm.
How can I make this cake richer?
For deeper chocolate flavor, add 1 oz melted dark chocolate (60-70% cocoa) to the wet ingredients or fold in ¼ cup chocolate chips before baking. Another trick: replace 2 tablespoons of the flour with 2 tablespoons cocoa powder for intensified richness. The espresso powder already enhances flavor—just don't overdo it with extra chocolate!
Can I use this recipe for a mug cake?
Scale down to 3 tbsp cocoa powder, 2 tbsp sugar, 1 tbsp flour, 2 tbsp oil, 2 tbsp buttermilk, and 1 egg yolk. Mix in a microwave-safe mug and cook at 70% power for 1 minute 30 seconds. Top with whipped cream or chocolate chips for a single-serving treat. Perfect for one—no pans required!