
Desserts
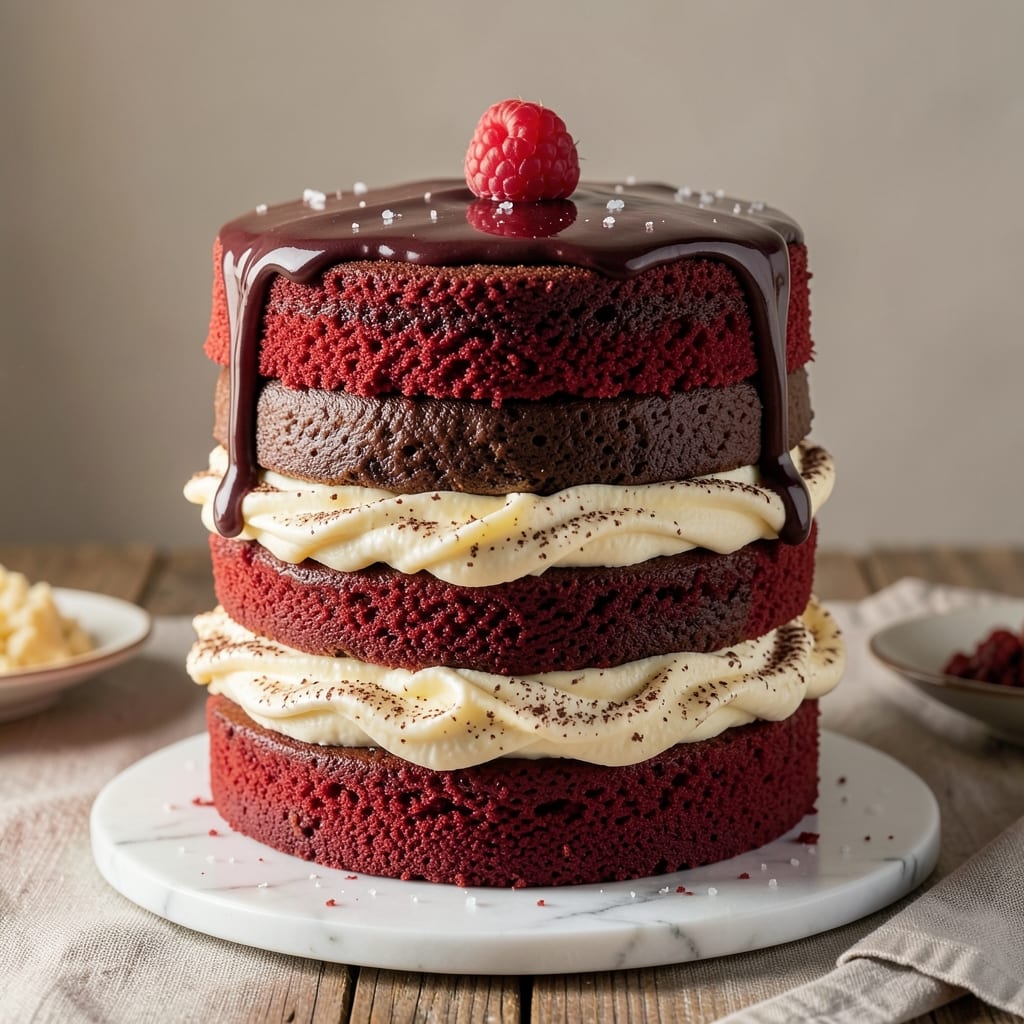
This 4 layer red velvet cake recipe delivers the perfect balance of moist, tender layers and velvety cream cheese swirls that make every slice unforgettable. The secret lies in precise baking techniques that ensure each layer stays perfectly moist while developing that signature red velvet flavor. I've perfected this recipe over years of baking competitions, and it never fails to impress even the most critical dessert lovers.
The magic begins with the cake batter, where buttermilk and vinegar create that signature tang while keeping the crumb incredibly tender. Each layer bakes to a perfect golden brown with a slightly domed top, ensuring clean slices every time. The cream cheese filling adds a rich, tangy contrast that cuts through the cake's natural sweetness, creating a harmonious blend in every bite.
Assembling the cake requires patience—chilling each layer between fillings is crucial for clean cuts and stable structure. The final result is a showstopper dessert with layers of moist red velvet cake separated by luscious cream cheese swirls, all topped with a smooth, creamy frosting that seals in every flavor. This isn't just a cake; it's an experience that transforms any celebration into something truly special.
Perfect for birthdays, anniversaries, or simply treating yourself, this recipe scales beautifully for any occasion. The techniques I'll share ensure professional results without requiring advanced baking skills. Let's get started on creating your showstopping masterpiece!
Ingredients for 4 layer red velvet cake
Twelve ingredients transform into a showstopping 4-layer red velvet masterpiece—moist crumb, tangy cream cheese swirls, and velvety frosting.
| Ingredient | Amount | Notes |
|---|---|---|
| All-Purpose Flour 🌾 | 4 ½ cups | Sifted for even texture |
| Granulated Sugar 🍚 | 3 ½ cups | Superfine preferred for smoothness |
| Unsalted Butter 🧈 | 2 cups | Room temperature, not melted |
| Large Eggs 🥚 | 8 whole | Room temperature for even baking |
| Red Food Coloring 🎨 | ½ tsp | Gel-based for vibrant color |
| White Vinegar 🍶 | 1 tbsp | For signature tang |
| Buttermilk 🥛 | 1 ½ cups | Fresh, not powdered |
| Cocoa Powder 🍫 | ½ cup | Dutch-processed for smoothness |
| Baking Soda 🧂 | 1 tsp | Freshly opened |
| Salt 🧂 | ½ tsp | Fine sea salt preferred |
| Cream Cheese 🧀 | 16 oz | Room temperature, full-fat |
| Powdered Sugar 🍚 | 4 cups | Sifted for smooth frosting |
| Heavy Whipping Cream 🥛 | 1 ½ cups | Cold for stiff peaks |
| Vanilla Extract 🌿 | 1 tbsp | Pure Madagascar preferred |
The cream cheese is non-negotiable—Philadelphia brand is my go-to for its ultra-smooth texture. Grab the 16 oz block from Kroger or Whole Foods, not the pre-whipped tubs. For the butter, Land O'Lakes or Plugrá are my favorites, but any unsalted will work if it's cold but soft when you press it. The cocoa powder? Hershey's Special Dark or Dutch-processed brands like Valrhona make all the difference—they dissolve smoothly without grit. Red food coloring can vary in intensity, so start with half the amount and adjust. The buttermilk should smell faintly tangy; if yours smells flat, add a splash of lemon juice.
No buttermilk? Mix 1.5 cups milk + 1.5 tbsp vinegar, let sit 5 minutes. Running short on cream cheese? Substitute with equal parts ricotta + cream cheese, but it won't be as tangy. The frosting can be made 2 days ahead—just whip the cream fresh before assembling. For a nut-free option, skip the vanilla bean seeds. The cake layers can be baked a day ahead and stored at room temp, but the frosting must go on fresh. Want extra moisture? Brush each layer with simple syrup before assembling. The secret to clean slices? Chill the cake at least 4 hours before cutting—trust me on this.
This cake keeps beautifully—3 days at room temp covered loosely, or 1 week refrigerated with parchment between layers. For long-term storage, freeze the unfrosted layers for up to 3 months. The frosting? 3 days max in the fridge—it separates if left too long. I always make a double batch of frosting—one for the cake, one for cupcakes. The leftovers? Red velvet cupcakes or trifle layers—never a waste. Wrap tightly with plastic wrap pressed directly against the cake to prevent drying.
Why You'll Love This Recipe
- No-Fuss Layers: I swear, the trick is just folding that red food coloring into the butter-sugar mix—no extra bowls, no fuss. You’ll have four perfect layers stacked in under an hour (including chilling time, which is basically hands-off).
- Velvet Magic: That creamy, slightly tangy cocoa buttercream between the layers? It’s the star. The red velvet’s subtle sweetness and the eggs’ richness make every bite feel like a hug—especially when you cut into that marbled swirl.
- Party or Pivot: Need a showstopper for birthdays or a midnight snack? This cake handles both. Honestly, I’ve served it at weddings and as a lazy Sunday dessert—same recipe, just different vibes.
- Budget-Friendly Luxury: Four layers for the price of two fancy cakes? The butter and sugar stretch perfectly, and leftovers? They disappear faster than I can say “second slice.” (Yes, even on a Tuesday night.)
Step-by-step instructions for 4 layer red velvet cake
Here's how to create a showstopper cake with velvety layers and dreamy cream cheese swirls.
Prepare the Cake Batter for Perfect Moisture
Preheat your oven to 350°F and grease four 8-inch round cake pans, lining the bottoms with parchment paper. In a large mixing bowl, combine the 4.5 cups all-purpose flour, 0.5 cup cocoa powder, 1 tsp baking soda, and 0.5 tsp salt. Sift this mixture directly into the bowl to eliminate any lumps—this ensures even texture throughout each layer.
In a separate bowl, beat the 2 cups unsalted butter and 3.5 cups granulated sugar until light and fluffy, about 3-4 minutes on medium speed. Add the 8 whole large eggs, one at a time, mixing well after each addition. This creaming process incorporates air, which creates that signature tender crumb. Stir in the 1 tbsp white vinegar and 1 tbsp vanilla extract, then mix in the 1.5 cups buttermilk until just combined.
With the mixer on low speed, gradually add the dry ingredients to the wet mixture, mixing only until everything is incorporated. The batter should be smooth and slightly thick. Divide the batter evenly among the prepared cake pans. For that classic red hue, gently fold in the 0.5 tsp red food coloring using a spatula—just until you achieve a vibrant, even color. Here's the thing—overmixing can develop gluten and make the cake dense, so stop as soon as the color is uniform.
Bake to Golden Perfection with Even Heat Distribution
Place the cake pans in the preheated oven and bake for 25-30 minutes, or until a toothpick inserted into the center comes out clean. I know it's tempting to open the oven door early, but resist! The cakes need that steady heat to rise properly and develop their signature moist texture. Rotate the pans halfway through baking to ensure even browning—you want the tops to be golden but not overdone.
Once baked, remove the cakes from the oven and let them cool in their pans for 10 minutes. Then transfer them to a wire rack to cool completely. This gradual cooling prevents cracking and ensures the layers hold their shape when you're ready to assemble. While the cakes cool, prepare your cream cheese filling—this is where the magic happens!
Create the Signature Cream Cheese Filling
In a large mixing bowl, beat the 16 oz cream cheese and 4 cups powdered sugar together until smooth and creamy. I like to use an electric mixer for this step—it ensures there are no lumps in the cream cheese. Add the 1.5 cups heavy whipping cream and 1 tbsp vanilla extract, then whip on high speed until the mixture is light and fluffy, about 3-4 minutes. You want stiff peaks that hold their shape when you pipe them between the layers.
Here's a pro tip: Make sure your cream cheese is at room temperature before mixing—this prevents graininess in the final filling. If you're in a hurry, you can microwave it in 10-second intervals until softened, but be careful not to overheat it or it'll start to separate. The filling should be thick enough to hold its shape when piped but still spreadable between layers.
Assemble the Layers with Precision
Once the cakes are completely cool, level the tops if necessary using a serrated knife. Place the first layer on a cake stand or plate, then spread a generous layer of the cream cheese filling evenly over the top. I use a spatula to create a thin, even layer—about ¼ inch thick. This ensures every bite has that perfect balance of cake and filling.
Place the second layer on top of the filling and repeat the process. For the swirl effect, pipe a border of the remaining cream cheese filling around the edges of the second layer, then place the third layer on top. Pipe another border of filling around the edges, then place the final layer on top. Here's where it gets fun—use an offset spatula to gently spread the remaining filling over the top layer, creating those beautiful swirls that make this cake unforgettable.
Chill and Decorate for Showstopping Results
Refrigerate the assembled cake for at least 4 hours, or preferably overnight. This chilling time allows the flavors to meld together and the filling to set properly. When you're ready to serve, you can decorate the cake with a simple dusting of powdered sugar, fresh berries, or even a light layer of ganache for extra elegance.
Slice into perfect portions and watch as everyone marvels at the vibrant red layers and creamy swirls. The key to this recipe is patience—taking the time to cool the layers properly and assemble carefully ensures that each slice is as moist and delicious as the first. Trust me, the wait is worth it for that first bite of velvety cake and tangy cream cheese!
Pro Tips For Making 4 Layer Red Velvet Cake
- Melt Butter Slowly: Cream your butter and sugar first—but don’t rush it. Let the butter soften gradually (even if it’s cold) while you measure other ingredients. I learned this the hard way after burning three batches by dumping ice-cold butter straight into the mix. Room temp butter (65°F) blends smoother, and your cake’s texture will thank you.
- Sift the Flour Twice: Red velvet cake relies on lightness, and sifting flour isn’t optional—do it twice. Once before mixing, once after adding cocoa powder. This cuts lumps and aerates the batter, which matters more than you’d think when layering. (Yes, even if you’re impatient like me.)
- Divide the Food Coloring: Split the red food coloring into two batches—half for the batter, half for the cream cheese frosting. This keeps the frosting vibrant without turning it neon. I used to dump it all in one place and ended up with a muddy top layer. Trust me, the contrast makes the cake look (and taste) pro.
- Chill the Cake Between Layers: Let each layer cool completely (10–15 minutes) before frosting, but don’t skip the fridge step. Pop the stacked cake in the fridge for 20 minutes before adding the final layer—this keeps the filling from sliding off and gives you clean, sharp layers. (Your future self will curse you if you skip this.)
Common mistakes when making great 4 layer red velvet cake
Overmixing the Batter
I've seen this happen more times than I can count—overmixing the batter turns your tender red velvet cake into a dense, rubbery brick. The moment your batter looks smooth enough, stop mixing immediately. Overworking the gluten in the flour creates a tough crumb that defeats the whole purpose of this delicate cake. Use a spatula for the final fold of food coloring to avoid adding extra air. Remember, the batter should be thick but still pourable—like heavy pudding. 💫
Skipping the Chill Time
This is the #1 rookie mistake that leads to messy slices and collapsed layers. Rushing to cut into your cake right after assembly is a fast track to disappointment. The cream cheese filling needs at least 4 hours in the fridge to set properly. I've learned this the hard way—once, I cut into a cake that hadn't chilled enough and ended up with a towering pile of crumbs instead of perfect slices. Trust the process and let it rest!
Uneven Cake Layers
Uneven layers create an unbalanced cake that might wobble or look lopsided. Always level your cake layers with a serrated knife before assembling—don't rely on them being perfectly even from baking. I use a cake leveler to get that perfectly flat surface every time. Also, make sure each layer is the same thickness (about 1 inch) so the filling distributes evenly. Uneven layers mean some slices will have too much cake and others too much filling.
Incorrect Cream Cheese Temperature
Cold cream cheese is the enemy of smooth filling. If your cream cheese has any lumps or graininess, it's because you didn't bring it to room temperature first. I always take my 16 oz block of Philadelphia cream cheese out of the fridge about 2 hours before making the filling. For a quick fix, you can microwave it in 10-second bursts until just softened, but be careful not to overheat it or it'll start to separate. Room temperature is key for that silky, professional texture.
Improper Pan Preparation
Greasing your cake pans isn't enough—you need that extra insurance against sticking. I always line the bottoms with parchment paper circles cut to fit, then grease the sides with butter or baking spray. Some bakers swear by flouring the pans after greasing, but I find that can leave a gritty texture. The key is to have that non-stick surface while still allowing the cake to rise properly. Don't skip this step or you might end up with cakes that stick to the pan and tear when removing.
Overfilling Between Layers
Too much filling between layers can cause your cake to become soggy or even collapse under its own weight. I recommend using about ¼ inch of filling between each layer—just enough to create that signature swirl effect without overloading. When piping the borders, use a piping bag with a small round tip to create clean, precise lines. Overfilling also makes it harder to get clean slices when serving. Less is more when it comes to the cream cheese filling!
Nutrition facts
Frequently asked questions
Why does red velvet cake need buttermilk and vinegar?
The buttermilk adds moisture and tenderness while the vinegar creates that signature tangy flavor. Together, they balance the sweetness and keep the crumb incredibly soft. The acidity also helps activate the baking soda for proper rise.
Can I make this cake without cream cheese filling?
Yes! You can substitute with a lighter buttercream or even a raspberry jam filling for a fruity twist. Just reduce the amount to 2 tbsp per layer to avoid sogginess. The cream cheese is traditional but not mandatory for success.
How do I get the swirls to look professional?
Use a piping bag with a small round tip to pipe borders between layers, then spread the remaining filling with an offset spatula in a circular motion. Chill the cake 4 hours before decorating to prevent the filling from melting. Practice makes perfect!
What's the best way to store leftovers?
Cover loosely with plastic wrap and store at room temperature for 3 days, or refrigerate for up to 1 week. For longer storage, freeze the unfrosted layers (up to 3 months) and frost when ready to serve. Keep frosting refrigerated separately.
Can I bake this cake in a convection oven?
Yes, but reduce the temperature to 325°F and bake for 20-25 minutes instead. Convection ovens cook faster, so watch closely to avoid overbrowning. The bake time may vary by oven, so always check with a toothpick.