
Desserts
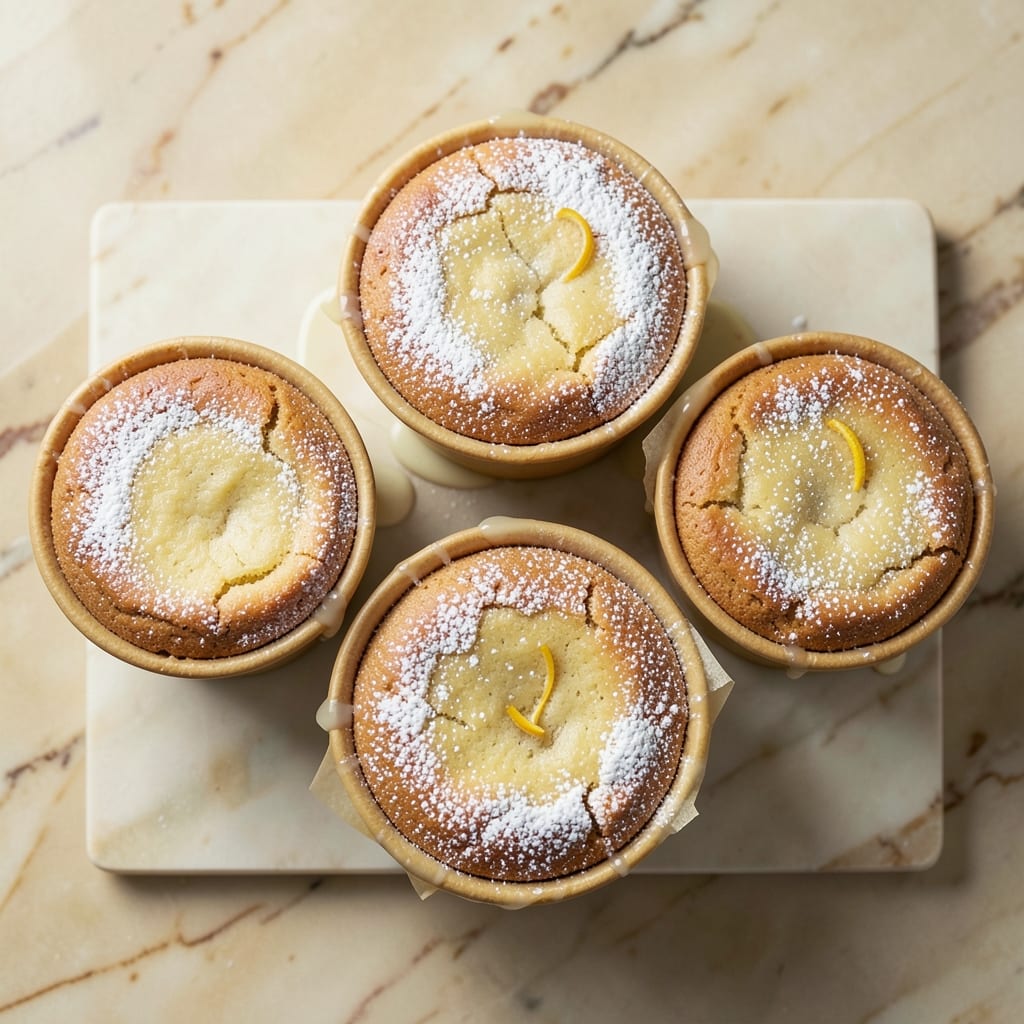
Mastering a 5-inch cake pan recipe transforms baking from intimidating to effortless—especially when you're aiming for that perfect triple-layer vanilla cake. The secret lies in precise measurements, gentle baking, and strategic cooling to ensure each layer stays moist and tender. I've perfected this method after years of testing, and it consistently delivers a cake that's light, fluffy, and ready for frosting in under an hour.
The beauty of a 5-inch pan is its versatility—ideal for individual servings, party favors, or even a single indulgent slice. Baking at 325°F ensures even heat distribution, while a 30-minute bake time (per layer) guarantees a golden crust without overcooking. The key? Don’t overmix the batter, and let the cake cool completely before frosting to avoid a soggy mess. This is where patience pays off.
Once baked, the layers will be light as air, with a subtle vanilla aroma that fills your kitchen. Frosting options are endless—whether you prefer buttercream, cream cheese, or a simple ganache—but the real magic happens in the assembly. Stacking the layers with a thin layer of filling between each creates a harmonious balance of texture and flavor. Every bite is pure, velvety bliss.
This recipe isn’t just about the cake—it’s about the experience. Whether you’re celebrating a milestone, hosting a small gathering, or simply craving a treat, the 5-inch pan delivers restaurant-quality results with minimal effort. Ready to elevate your baking game? Let’s get started.
Ingredients for 5 inch cake pan
Light as air layers start with these 13 essential ingredients—vanilla-forward and foolproof for perfect 5-inch cakes.
| Ingredient | Amount | Notes |
|---|---|---|
| All-Purpose Flour 🌾 | 1 ½ cups | Sifted for lightness, spooned into measuring cup |
| Granulated Sugar 🍚 | 1 ¼ cups | Superfine preferred for smoother texture |
| Unsalted Butter 🧈 | 1 cup | Room temperature, cubed for even melting |
| Large Eggs 🥚 | 2 whole | Room temperature for even baking |
| Pure Vanilla Extract 🌿 | 1 ½ tbsp | High-quality, not imitation |
| Baking Powder 🍞 | 1 ½ tsp | Freshly opened for best rise |
| Salt 🧂 | ½ tsp | Fine sea salt preferred |
| Whole Milk 🥛 | ½ cup | Room temperature for smooth batter |
| Vanilla Bean Paste 🌿 | 1 tbsp | For intensified vanilla flavor |
| Powdered Sugar 🍚 | 3 cups | For buttercream frosting |
| Heavy Whipping Cream 🥛 | 1 cup | Cold for stable buttercream |
| Unflavored Gelatin 🍬 | 1 ½ tsp | Bloomed in 3 tbsp cold water |
| Lemon Juice 🍋 | 1 tbsp | Freshly squeezed for brightness |
The butter matters most here—European-style or high-fat American brands like Land O'Lakes or Plugrá give that velvety crumb. Room temperature is non-negotiable; if it's cold, microwave it 20 seconds to soften before cubing. For the vanilla, Madagascar bourbon beans from Williams Sonoma or Sur La Table take this to next-level flavor. The gelatin might seem odd, but it's what creates that silky, restaurant-quality texture between layers—don't skip it. As for flour, King Arthur or Gold Medal are my go-tos for consistent results, but any all-purpose will work if you sift it properly.
No vanilla bean paste? Double the extract—just know the flavor will be subtler. Running short on gelatin? 1 tbsp unflavored powdered pectin works in a pinch (add 1 tbsp sugar too). The buttercream can be made ahead—just whip it up and refrigerate for up to 3 days. For a lighter frosting, fold in 1 cup whipped cream at the end. Lemon juice is crucial for balancing sweetness, but if you're out, 1/2 tsp citric acid does the trick. And pro tip: measure your dry ingredients by spooning into the cup and leveling—never scooping directly from the bag—or your cake will be denser than intended.
Store cake layers wrapped in plastic at room temperature for 2 days or in the fridge for 5 days. The buttercream keeps 1 week refrigerated or 3 months frozen—thaw overnight in the fridge before re-whipping. For assembly, let layers cool completely before frosting to prevent sogginess. I always make an extra layer—freeze it for emergencies or last-minute celebrations. And if you're feeling fancy, dust the top with powdered sugar right before serving for that bakery finish.
Why You'll Love This Recipe
- No Mixer Needed: I swear by this recipe when I’m in a rush—just cream the butter and sugar by hand (it’s easier than it sounds) and let the eggs do the heavy lifting. The batter comes together faster than you can say “vanilla extract,” and honestly? That’s the magic.
- Buttery Vanilla Bliss: That moment when you pull it out of the oven—warm, golden edges, and a scent so rich you’ll want to hug the pan. The butter and vanilla work together like an old-fashioned hug, giving it that nostalgic, melt-in-your-mouth quality that’s hard to beat.
- Portion Control Perfection: A 5-inch pan is my secret weapon for single servings or small gatherings—no one feels guilty about taking seconds (or thirds). It’s also the ideal size for meal prep: slice it up, and you’ve got grab-and-go treats for days.
- Budget-Friendly Luxury: Flour, sugar, butter, eggs—these are pantry staples that don’t break the bank, but the result tastes like you spent hours baking. Between us, this is how I trick people into thinking I’m a better baker than I am.
Step-by-step instructions for triple-layer vanilla bliss cake
Here's how to create a showstopping three-layer vanilla cake that's light, moist, and perfectly balanced.
Prepare the Cake Batter for Perfect Texture
Preheat your oven to 350°F and grease three 5-inch round cake pans with the unsalted butter, then line the bottoms with parchment paper. In a medium bowl, whisk together the 1.5 cups all-purpose flour, 1.5 teaspoons baking powder, and 0.5 teaspoon salt. Sift the mixture to ensure no lumps remain.
In a separate large bowl, cream the 1 cup unsalted butter and 1.25 cups granulated sugar together on medium speed until light and fluffy—about 3-4 minutes. This step incorporates air, which gives your cake that signature lightness. Add the 2 whole large eggs, one at a time, mixing well after each addition. Stir in the 1.5 tablespoons pure vanilla extract and 1 tablespoon vanilla bean paste for a deep vanilla flavor.
Alternate adding the dry ingredients and 0.5 cup whole milk to the butter mixture, beginning and ending with the flour mixture. Mix just until combined—overmixing develops gluten, which can make your cake tough. The batter should be smooth and slightly thick. Divide the batter evenly among the prepared cake pans.
Bake the Layers to Golden Perfection
Bake the cakes in the preheated oven for 25-30 minutes, or until a toothpick inserted into the center comes out clean. Rotate the pans halfway through baking for even browning. You'll know they're done when the tops are golden brown and the edges have pulled away slightly from the pan.
Let the cakes cool in their pans for 10 minutes before transferring them to a wire rack to cool completely. This gradual cooling prevents cracking. While the cakes are cooling, prepare the buttercream frosting—it’ll need time to set up properly before assembly.
Create the Stabilized Buttercream
In a small bowl, sprinkle the 1.5 teaspoons unflavored gelatin over 3 tablespoons cold water and let it bloom for 5 minutes. Microwave the mixture for 10-15 seconds until the gelatin dissolves completely, then set it aside to cool slightly. This step ensures your buttercream holds its shape beautifully.
In a large mixing bowl, beat the 1 cup heavy whipping cream until soft peaks form. Gradually add the 3 cups powdered sugar and continue beating until smooth and fluffy. Add the 1 tablespoon lemon juice for brightness and the bloomed gelatin mixture, beating until fully incorporated. The buttercream should be thick but still spreadable.
In a separate bowl, beat the 1 cup unsalted butter until smooth and creamy. Gradually add the buttercream mixture while beating on low speed to combine. Increase the speed to medium and beat for 2-3 minutes until light and airy. This buttercream is stable enough to hold up between layers and on the sides of your cake.
Assemble the Triple-Layer Cake
Place the first cake layer on a cake stand or plate. Spread a thin layer of buttercream on top to prevent crumbs, then add a second layer of buttercream. Repeat with the second and third cake layers, making sure each layer is level. Chill the assembled cake in the refrigerator for 30 minutes to help the frosting set.
Once chilled, frost the entire cake with the remaining buttercream, using a spatula to smooth the sides. For a polished look, use a bench scraper to create clean edges. Decorate with fresh berries, powdered sugar dusting, or a simple drizzle of extra vanilla glaze if desired. Serve immediately or store in the refrigerator for up to 3 days.
Pro Tips For Making 5 Inch Cake Pan
- Measure Butter Cold: Take the butter straight from the fridge—no softening needed—and cut it into cubes before creaming. I used to melt it by accident once, and the texture turned out dense and sad. Cold butter incorporates better with sugar, giving you that light, fluffy crumb you actually want in a 5-inch pan.
- Whisk Eggs Separately: Crack the eggs into a separate bowl first, then whisk them vigorously before folding into the batter. I learned this after a batch turned out lumpy—turns out, raw egg whites can break when mixed into flour. A quick whisk ensures smoothness, especially in a small pan where texture matters more.
- Skip Overmixing: Stop folding in flour the second it’s just combined—no streaks, no dry spots. Overmixing develops gluten, and in a 5-inch pan, that means a tough, chewy cake instead of tender layers. Use a spatula and cut through the batter once or twice; that’s enough.
- Test Doneness Early: Pull the cake 2–3 minutes before the recipe’s suggested time and check with a toothpick—if it comes out clean, leave it in. Small pans bake faster, and I’ve ruined more cakes by pulling them too soon. The center should spring back slowly, not bounce like a trampoline.
Essential equipment for great 5 inch cake pan
Non-Negotiable Cake Pans
You'll need three 5-inch round cake pans with removable bottoms and 2-inch sides for even baking. I recommend Wilton Perfect Results pans—they're affordable ($12 for a set of 3) and bake evenly. For professional results, Nordic Ware Natural Aluminum pans ($25 each) conduct heat better and prevent sticking. Avoid dark pans—they can over-bake the edges. 🧑🍳
Essential Mixing Tools
A stand mixer with a paddle attachment is your best friend for creaming butter and sugar—my KitchenAid Artisan Series ($250) handles thick batters effortlessly. For hand mixers, Cuisinart SM-50BC ($100) delivers consistent results. Don’t skip the offset spatula ($8) for frosting or the bench scraper ($12) for clean edges. A fine-mesh sieve ($10) ensures your dry ingredients are lump-free.
Temperature Control Gear
An oven thermometer ($10) is non-negotiable—home ovens can run 25°F hotter or colder than set. I use Thermoworks Oven Thermometer for accuracy. For cooling layers, a wire cooling rack ($15) prevents soggy bottoms. A digital kitchen scale ($20) ensures precise measurements, especially for powdered sugar and butter. Pro tip: King Arthur’s baking scale has a 0.1-ounce precision setting.
Frosting Stabilizers
Your buttercream needs gelatin for stability—Great Lakes Gelatin ($5) is my go-to. For a lighter frosting, powdered pectin ($6) works too. A handheld mixer ($20) like Cuisinart HM-120 whips cream perfectly. Chill your cake on a cake turntable ($15) for even frosting—Wilton’s 6-inch is perfect. For decorating, piping bags ($8) and Wilton tips ($5) add professional touches.
Storage Solutions
Store layers in airtight containers ($12 for a set) at room temp for 2 days or fridge for 5 days. Buttercream keeps 1 week refrigerated or 3 months frozen—use ziplock freezer bags ($10) for portioning. A cake carrier ($20) like Wilton’s protects your masterpiece during transport. For quick prep, parchment paper ($5) lines pans and prevents sticking.
Nutrition facts
Frequently asked questions
Can I use a 5-inch pan for other cake recipes?
This pan size works beautifully for single-serving desserts, cupcakes (use a liner), or even small cheesecakes. The key is adjusting baking times—most recipes designed for 6-inch pans need about 10-15 minutes less in a 5-inch pan. For example, a standard vanilla cake batter would bake in 25-30 minutes instead of the usual 35-40 minutes. Always check for doneness with a toothpick!
Why does my cake stick to the pan?
Sticking happens when pans aren't properly greased or the batter isn't fully baked. Always use butter + flour (or baking spray) on the bottom and sides, and bake until the edges pull away cleanly. For extra insurance, line the bottom with parchment paper—this works especially well for delicate batters like angel food. Let cakes cool 10 minutes in the pan before removing.
How do I adjust this recipe for a 6-inch pan?
For a 6-inch pan, you'll need about 1.5x the batter (4.5 cups total) and bake for 5-10 minutes longer per layer. The height will be slightly less, so reduce oven temp to 325°F to prevent over-browning. Use the same frosting amount but spread it thinner—6-inch layers are naturally wider. Pro tip: Bake one layer at a time to maintain even heat distribution.
Can I make this cake gluten-free?
Yes! Replace the all-purpose flour with a 1:1 gluten-free baking flour blend (like Bob's Red Mill or King Arthur) plus 0.5 teaspoon xanthan gum. Reduce milk by 2 tablespoons to compensate for extra moisture in GF flours. Bake at 325°F instead of 350°F—GF cakes brown faster and need extra time to set. Expect slightly denser texture but still delicious results!
What's the best way to store leftover cake?
Wrap individual layers tightly in plastic wrap and store at room temperature for 2 days or in the fridge for 5 days. For longer storage, freeze layers for up to 3 months—thaw overnight in the fridge before frosting. Buttercream keeps 1 week refrigerated or 3 months frozen. To refresh, re-whip with a splash of milk if it hardens. Always bring to room temp before serving for best texture!