
Desserts
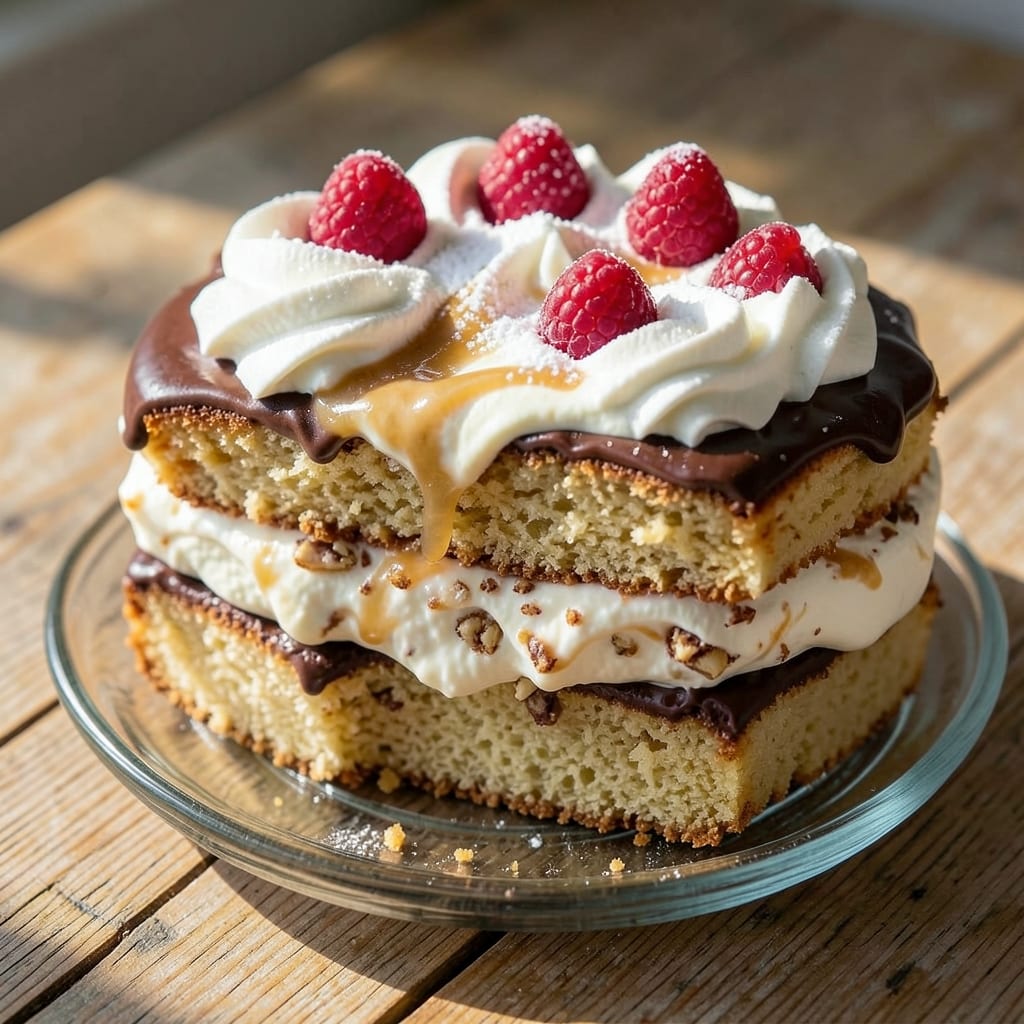
This 5-minute ice cream cake recipe delivers restaurant-quality dessert with zero baking, just one bowl, and layers of indulgence. The secret lies in combining store-bought cake, your favorite ice cream, and a quick whipped frosting that comes together faster than you can say "dessert time." No oven, no mess, and no waiting—just pure, satisfying sweetness in record time.
What makes this recipe truly special is its foolproof assembly method. You'll use a simple whipped frosting that acts as both glue and decoration, holding layers together while creating that classic ice cream cake texture. The best part? You can customize it endlessly with flavors, toppings, and mix-ins—think crushed cookies, caramel drizzle, or fresh berries—without sacrificing speed or simplicity.
By the time you're done, you'll have a no-bake masterpiece that looks impressive but takes less than five minutes to assemble. The cake stays sturdy (thanks to proper chilling), the ice cream stays creamy, and the frosting creates that perfect balance between sweet and airy. It's the kind of dessert that turns a simple craving into an instant celebration.
Perfect for last-minute gatherings, date nights, or satisfying that late-night sweet tooth, this recipe proves you don't need fancy techniques to create something extraordinary. Let's get started—your taste buds are waiting!
Ingredients for 5 minute ice cream cake
No-bake magic starts with these simple, crowd-pleasing ingredients—just one bowl and five minutes.
| Ingredient | Amount | Notes |
|---|---|---|
| Store-Bought Cake (Funfetti, Chocolate, or Vanilla) 🍰 | 1 whole | 8x8-inch pan size preferred |
| Vanilla Ice Cream 🍦 | 1 ½ cups | Any flavor works (chocolate, strawberry, etc.) |
| Heavy Whipping Cream 🥛 | 1 cup | Cold for best whipping results |
| Powdered Sugar 🍚 | 1 cup | Sifted for smooth texture |
| Vanilla Extract 🍃 | 1 tsp | Pure, high-quality preferred |
| Unsalted Butter 🧈 | ½ cup | Room temperature for easy mixing |
| Crushed Cookies (optional) 🍪 | ½ cup | Any flavor (Oreos, graham crackers) |
| Fresh Berries (optional) 🍓 | ½ cup | Sliced strawberries, raspberries, or blueberries |
| Chocolate Syrup (optional) 🍫 | ¼ cup | For drizzling on top |
| Whipped Cream (optional) 🥛 | ¼ cup | Store-bought for topping |
| Parchment Paper 📄 | 1 sheet | For easy assembly and chilling |
| Plastic Wrap 🎀 | 1 piece | For sealing layers during chilling |
The cake is your sturdy base, so pick one with good structure—Funfetti or chocolate work perfectly. Trader Joe's or local bakeries often have the best store-bought options, but any boxed cake mix will do in a pinch. The ice cream should be cold but not rock-hard—let it sit at room temperature for 5 minutes before assembling if it's frozen solid. For the whipped frosting, cold heavy cream is non-negotiable—skip the pre-whipped kind, trust me. If you're short on time, pre-whipped topping works for the final garnish, but homemade frosting makes all the difference.
No vanilla ice cream? Any flavor works—chocolate, strawberry, or even mint chip. Want to skip the butter? Coconut oil works in a bind, but it changes the texture slightly. The crushed cookies add crunch, but if you're feeling fancy, toasted nuts or candy pieces are game-changers. For the berries, fresh is best, but frozen works if you thaw and drain them first. And that chocolate syrup? Hershey's or Godiva both do the trick—just don't overdo it, or the cake gets soggy. The key is keeping everything chilled until assembly.
This dessert is all about timing—chill the cake layers for 10 minutes before adding frosting, and freeze for 30 minutes after assembly if you're not serving immediately. The frosting will firm up nicely in the fridge, but bring it to room temperature 10 minutes before serving so it's soft and spreadable. Leftovers? Store in an airtight container for up to 3 days, but honestly, it disappears faster than that. Pro tip: Double the frosting if you're making this for a crowd—everyone wants seconds.
Why You'll Love This Recipe
- Here’s the best part: this cake keeps perfectly for days. Stash it in the freezer, and when you’re craving something sweet but don’t want to bake, boom—dessert’s ready. Plus, it’s cheaper than takeout and way healthier than most frozen treats. (Yes, even on a Tuesday night.)
- No-Bake Magic: I swear, this is the kind of dessert that makes me feel like a baking genius—no oven, no mess, just layering cake and ice cream like a lazy (but brilliant) dessert architect. The trick with the whipped cream frosting? It’s lighter than store-bought but takes zero skill—just whip, dollop, repeat.
- Creamy Crunch Combo: That first bite where the cake’s crumb meets the cold ice cream? It’s like a hug for your taste buds. I’ll be honest: the powdered sugar whipped cream is my favorite part—it’s sweet but not cloying, and the vanilla extract gives it that just-made bakery vibe without tasting artificial.
- Party in a Bowl: Between us, this is my go-to for last-minute gatherings. Need a birthday dessert? Done. Bringing something to a potluck? Covered. Funfetti cake + ice cream screams celebration, but chocolate or vanilla works just as well—so it’s foolproof for any crowd, even picky eaters.
Step-by-step instructions for no-bake ice cream cake magic
Here's how to transform a simple cake into a dreamy, no-bake dessert in minutes—no oven required!
Prepare the Cake Base
Begin by placing the whole store-bought cake (funfetti, chocolate, or vanilla) on a flat surface. I like to cut it horizontally into two even layers using a serrated knife. The top layer should be slightly thicker than the bottom for stability. This creates a perfect foundation for your ice cream filling.
Lay the parchment paper on your work surface and place the bottom cake layer on top. If you're using crushed cookies or fresh berries, sprinkle them evenly over the cake layer now—they'll add texture and flavor between the cake and ice cream. Press down lightly to help them adhere.
Create the Dreamy Frosting
In a large mixing bowl, combine the 1.5 cups vanilla ice cream, 1 cup heavy whipping cream, 1 cup powdered sugar, and 1 tsp vanilla extract. Using a hand mixer or stand mixer, whip everything together on medium-high speed for 2-3 minutes until smooth and fluffy. The mixture should thicken noticeably and become pale in color.
Here's the thing—this is where the magic happens. The cold heavy whipping cream and ice cream work together to create a silky, frosting-like consistency. If the mixture seems too thick, add 1-2 tablespoons of cold milk (not in the ingredients list, but you likely have it) to loosen it slightly. You want it spreadable but still thick enough to hold its shape.
Assemble the Ice Cream Cake
Spread half of the frosting mixture evenly over the cake layer on the parchment paper. Be generous but not messy—you want complete coverage. Then carefully place the top cake layer on top, pressing down gently to create a seal. This prevents any ice cream from leaking out during chilling.
Now spread the remaining frosting over the top layer, creating a smooth, even surface. If you're using chocolate syrup or whipped cream, set them aside for topping later. The key here is to work quickly—ice cream melts fast, so keep everything cold and move efficiently. Wrap the entire cake tightly with the plastic wrap, sealing it completely to prevent any melting.
Chill and Set
Place the wrapped cake in the freezer for at least 30 minutes, but I prefer 1 hour for best results. This chilling time is crucial—it allows the frosting to firm up and the layers to bond properly. The cake should feel solid to the touch when you remove it, with no soft or sticky spots.
Once chilled, carefully unwrap the cake and slide it onto a serving plate. If you're using chocolate syrup, drizzle it over the top in a zigzag pattern. For a final touch, pipe whipped cream around the edges or sprinkle with extra crushed cookies. Serve immediately while the frosting is still slightly soft for the best texture—every bite should be cool, creamy, and perfectly balanced between cake and ice cream.
Pro Tips For Making 5 Minute Ice Cream Cake
- Chill the Cake First: Take the store-bought cake out of its packaging and pop it in the freezer for 10-15 minutes before slicing. I learned this the hard way—warm cake gets soggy when you press it into the pan, and nobody wants a mushy base for their ice cream cake.
- Soften the Ice Cream: Don’t use rock-hard ice cream straight from the freezer—let it sit at room temperature for 2-3 minutes until it’s just soft enough to scoop but still holds shape. This makes spreading it even and prevents meltdowns while you work.
- Whip the Cream Fast: Whip the heavy cream and powdered sugar just until soft peaks form—overmixing turns it buttery, and you’ll end up with a cake that tastes like frosting. Stop when it’s light and airy, not stiff.
- Layer Like a Pro: Use a spatula to spread the ice cream thinly in the pan first, then press the cake slices in gently. Top with another thin layer of ice cream, then repeat—this keeps the texture creamy all the way through, not icy at the bottom.
Pro cooking tips for this recipe
Frosting Consistency
Your frosting is the glue that holds this cake together, so getting the texture right is everything. Whip the mixture until it's light and fluffy—think soft peaks, not stiff buttercream. If it's too thick, add 1 tablespoon cold milk at a time until it's spreadable but still holds its shape. I've ruined a few cakes by over-whipping, so keep an eye on it: 2-3 minutes max on medium-high speed. The frosting should look like thick pudding, not liquid. 🥛
Layer Stability
Prevent soggy layers by chilling the cake for 10 minutes before adding frosting. This firms up the cake slightly so it doesn't crumble when you spread the ice cream mixture. When assembling, press the top layer down firmly to create a seal—this stops any ice cream from leaking out during chilling. For extra insurance, place the assembled cake on a parchment-lined tray before freezing. It makes sliding it onto plates later much easier. ❄️
Temperature Control
Cold ingredients are your best friend here. Keep your ice cream cold but not frozen solid—it should be scoopable but still firm. The heavy whipping cream should be straight from the fridge, and your butter should be room temperature but not melted. If your kitchen gets warm, work quickly and keep all ingredients in a cooling bowl with ice while you assemble. This ensures your frosting stays stable and the cake doesn't melt prematurely. 🌡️
Chilling Time
Don't rush the 30-minute freeze—this is when the magic happens. The frosting needs time to firm up so it holds its shape when you slice. If you're in a hurry, try freezing for 20 minutes, but I find the cake often slides on the plate better after the full hour. For best results, let it sit at room temperature for 5 minutes before serving so the frosting softens slightly and is easier to cut. 🕒
Quick Fixes
Frosting too runny? Pop the cake back in the freezer for 10-15 minutes to firm it up. If your cake layers are crumbling, brush them lightly with thinned powdered sugar syrup (mix 2 tbsp powdered sugar with 1 tbsp water) before adding frosting. For a last-minute touch, dust the top with powdered sugar using a fine-mesh sieve—it adds professional flair without extra effort. 💫
Make-Ahead Magic
Assemble the cake completely (including toppings) and freeze it for up to 24 hours before serving. When ready, let it sit at room temperature for 10-15 minutes to soften the frosting slightly. This is perfect for parties or when you want to avoid last-minute stress. Just be sure to wrap it tightly in plastic wrap to prevent freezer burn. 📅
Nutrition facts
Frequently asked questions
Can I use homemade cake instead of store-bought?
Just make sure your homemade cake is fully cooled and has a sturdy structure. For best results, chill it for 15 minutes in the freezer before cutting into layers. Homemade cakes often have more moisture, so you might need to brush the layers lightly with powdered sugar syrup (mix 2 tbsp powdered sugar with 1 tbsp water) before adding frosting to prevent sogginess.
How do I keep the ice cream from melting too fast?
Work quickly and keep everything cold! Scoop ice cream directly from the freezer into your mixing bowl, and chill your mixing bowl in the freezer for 5 minutes before whipping. If your kitchen is warm, place the assembled cake on a tray with ice packs while it freezes. Also, use the plastic wrap technique tightly to create an airtight seal during chilling.
What if I don't have heavy whipping cream?
No problem! You can substitute with 1 cup cold whipping cream concentrate (the canned kind) plus 1 cup cold milk. Whip it for 3-4 minutes until it reaches the same fluffy consistency. For a lighter option, try 1 cup Greek yogurt mixed with 1 cup powdered sugar, though the texture will be slightly different but still delicious.
Can I make this cake without a mixer?
Yes, but it'll take more elbow grease! Use a whisk and arm strength to whip the frosting mixture for 5-7 minutes until it's light and fluffy. Keep the bowl cold by placing it in a larger bowl with ice while you work. For best results, chill the mixture for 5 minutes between whipping sessions to help it thicken faster.
How do I make this look fancy for a party?
Start with a clean plate and add artistic touches! Use a piping bag with a star tip to create swirls of whipped cream around the edges. Sprinkle crushed cookies or candy pieces in a decorative pattern, or pipe chocolate ganache in zigzags. For extra flair, dust the top with powdered sugar using a fine-mesh sieve, or add fresh berries in a circular design.