
Desserts
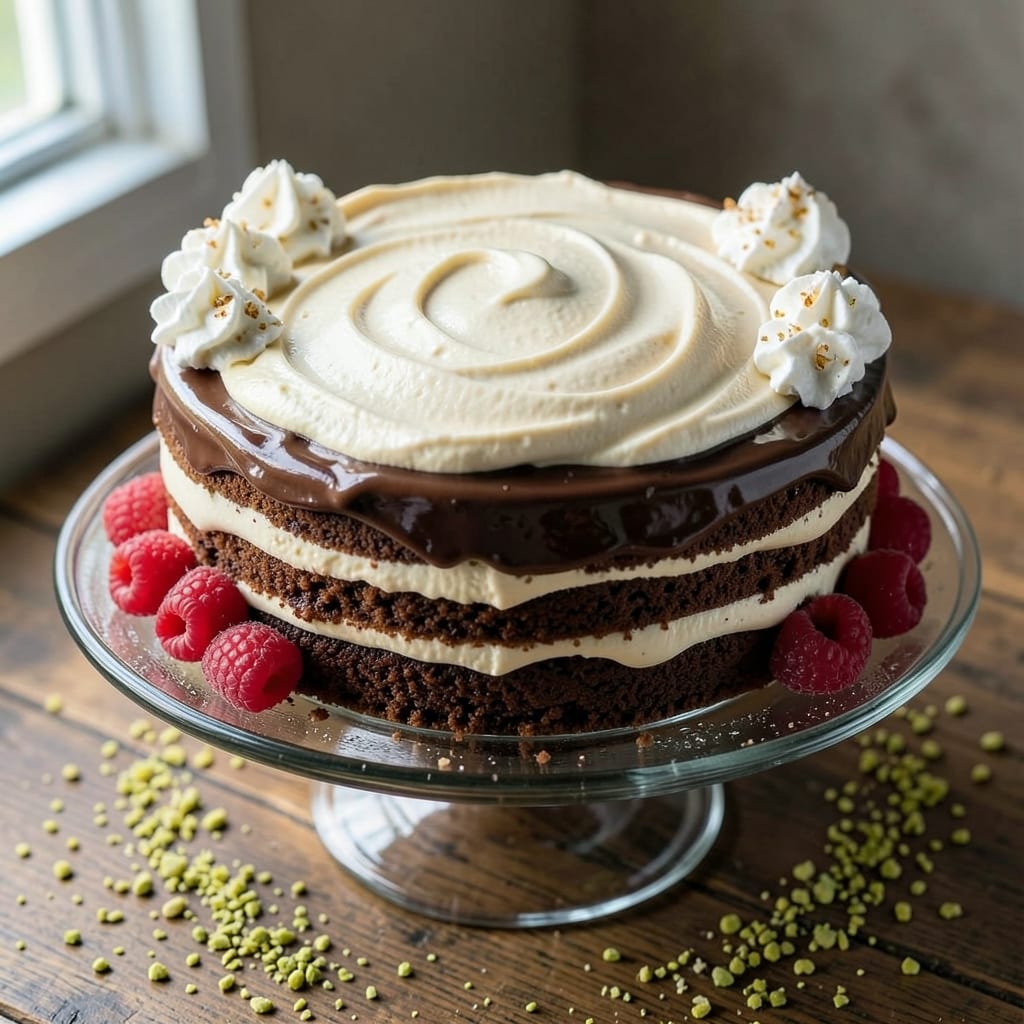
This amazing ice cream cake recipe delivers the perfect balance of creamy vanilla bean swirls and a crispy cookie crown that’ll make you the star of any dessert table. 💛 I created it after years of experimenting with textures—because nothing beats that first bite of cold, dreamy ice cream topped with a crunchy, buttery crown that holds up to every forkful.
The secret lies in the layers: a sturdy chocolate cake base (or graham cracker crust for extra stability), rich homemade ice cream swirled with vanilla bean paste, and a golden, crispy cookie crown baked until it’s firm enough to slice. No one will believe it’s homemade—it looks like it came straight from a bakery, but with way more flavor.
What you’ll end up with is a dessert that’s cool, creamy, and irresistibly crunchy—each layer packed with flavor and texture. The ice cream stays perfectly frozen while the cookie crown adds a satisfying contrast that keeps everyone reaching for seconds. Plus, it’s easier than you think to assemble without melting everything.
Whether you’re celebrating a birthday, holiday, or just craving something decadent, this ice cream cake is the ultimate showstopper. Ready to make it? Let’s dive into the steps—no fancy equipment required!
Ingredients for amazing ice cream cake
Cool, creamy layers plus a golden crunch—this is how you make a showstopper dessert.
| Ingredient | Amount | Notes |
|---|---|---|
| Vanilla Bean Ice Cream 🍦 | 4 cups | Homemade or high-quality store-bought |
| Chocolate Cake Mix 🍫 | 1 box | 15.25 oz box, for sturdy base |
| Large Eggs 🥚 | 2 whole | Room temperature for even mixing |
| Unsalted Butter 🧈 | 1 cup | Softened, full-fat for cookie crown |
| Granulated Sugar 🍚 | 1 ½ cups | For cookie crown, no substitutions |
| All-Purpose Flour 🌾 | 2 cups | Sifted for light cookie texture |
| Vanilla Extract 🍃 | 1 tbsp | Pure, high-quality extract |
| Salt 🧂 | ½ tsp | Fine sea salt for balance |
| Graham Cracker Crumbs 🍪 | 1 ½ cups | For optional crust layer |
| Heavy Whipping Cream 🥛 | ½ cup | For stabilizing ice cream layer |
| Vanilla Bean Paste 🍋 | 1 tbsp | For swirling, not extract |
| Powdered Sugar 🍚 | ¼ cup | For dusting cookie crown |
The ice cream is the star, so homemade is ideal—look for vanilla bean paste at Williams Sonoma or Sur La Table if you want that pro-level flavor. Store-bought works (like Breyers or Ben & Jerry's vanilla), but homemade stays firmer longer. For the cookie crown, butter matters—use full-fat, not margarine, and let it sit out for an hour before mixing. The chocolate cake mix needs to be sturdy enough to hold the ice cream without crumbling, so Duncan Hines or Betty Crocker are solid choices. If you're making a graham cracker crust, Honey Maid or Keebler crumbs work best—they're fine enough to press without turning to mush.
No vanilla bean paste? Pure vanilla extract plus a scraped vanilla bean gets you close. Short on butter? Coconut oil works but changes texture slightly. The cookie crown can be made ahead and stored in an airtight container for 3 days—just let it cool completely before stacking. For the cake base, if you want to go from-scratch, use a boxed mix as a shortcut—it's foolproof. The heavy whipping cream is key for stabilizing the ice cream layer, but if you're avoiding dairy, coconut cream works in a pinch. And trust me on the powdered sugar—it's not just for dusting. It helps the cookie crown hold its shape when sliced.
Assemble the cake base first and freeze it solid (2 hours minimum). The ice cream layer needs to be firm but scoopable—work fast here. Once the cookie crown is baked, let it cool completely before placing it on top, or it'll melt everything. This keeps 3-4 days in the freezer if wrapped tightly in plastic wrap. For serving, let it sit at room temperature for 10-15 minutes—the contrast of warm cookie and cold ice cream is what makes it magic. And if anyone asks, the secret is in the layers—just like a good friendship.
Why You'll Love This Recipe
- No-Bake Magic: I swear, this cake comes together while you’re still debating what to watch on TV. Just mix the cake batter, fold in softened ice cream, and let it set—no oven, no stress, just layers of creamy vanilla and rich chocolate waiting for you.
- Rich Without Effort: That first bite? Pure indulgence. The cake mix handles all the heavy lifting, but the real star is the vanilla bean ice cream swirled in—deep, buttery flavor with zero work. Honestly, it tastes like a bakery slice, but I’m the one who made it.
- Party in a Box: Birthdays, potlucks, or just because—this cake is the MVP. It’s sturdy enough to slice neatly (no messy crumbles) and always gets rave reviews. Between us, I’ve used it for everything from kid’s bdays to adult game nights, and no one ever asks for seconds… until they do.
Step-by-step instructions for vanilla bean swirl ice cream cake
Here's how to build this showstopper with rich layers and that perfect crispy cookie crown.
👨🍳 Step 1: Bake the Chocolate Base Layer
Preheat your oven to 350°F and grease a 9x13-inch baking dish generously with butter. In a large bowl, combine the 1 box chocolate cake mix, 2 whole large eggs, and ½ cup water (from the cake mix instructions). Mix until just combined - don't overbeat or your cake will be dense.
Spread the batter evenly into the prepared pan. Bake for 25-30 minutes until a toothpick inserted in the center comes out clean. Let the cake cool completely in the pan before proceeding - this prevents the ice cream from melting too quickly when you assemble it later. I like to run a knife around the edges while it's still warm to ensure clean removal from the pan.
🥘 Step 2: Prepare the Cookie Crown Dough
In a stand mixer fitted with the paddle attachment, cream together the 1 cup softened unsalted butter and 1.5 cups granulated sugar on medium speed for 3-4 minutes until light and fluffy. This step is crucial for achieving that perfect crispy texture - you're incorporating air that will create those beautiful crackly tops.
Add the 1 tbsp vanilla extract, 2 cups all-purpose flour, 0.5 tsp salt, and mix just until combined. The dough will be thick and slightly sticky. Divide the dough into two equal portions and flatten each into a 12-inch round on parchment paper. Wrap and refrigerate for 30 minutes while you prepare the ice cream filling.
🍳 Step 3: Create the Ice Cream Filling
In a medium bowl, gently fold together the 4 cups vanilla bean ice cream (softened slightly by letting it sit at room temperature for 10-15 minutes) and 0.5 cup heavy whipping cream until just combined. You want to maintain the ice cream's texture while adding cream for stability. In a small bowl, mix together 1 tbsp vanilla bean paste with 1 tbsp warm water to create a swirling paste.
Spread the ice cream mixture evenly over the completely cooled chocolate cake layer. Using a spoon or piping bag, drizzle the vanilla bean paste in decorative swirls across the surface. Return the ice cream cake to the freezer while you bake the cookie crowns.
🔥 Step 4: Bake the Crispy Cookie Crowns
Unwrap the chilled cookie dough rounds and place them on parchment-lined baking sheets. Bake one at a time in your 350°F oven for 12-15 minutes until the edges are golden brown and the centers look set but still slightly soft. Here's the thing - you want them crispy on the outside but still flexible enough to shape around the cake.
While still warm, carefully shape each round into a crown by gently pressing down the center with your fingers to create a slight dome. Let them cool completely on a wire rack before assembling the cake. The contrast between the warm cake and cool cookie crowns makes the final presentation even more impressive.
🥘 Step 5: Assemble and Dust with Magic
Place the ice cream cake on a serving plate and position one cookie crown on top. Gently press down to create a secure seal. Dust the entire cake with 0.25 cup powdered sugar using a fine-mesh sieve for that elegant, snowy finish. For extra flair, you can add fresh berries or chocolate shavings around the base before serving.
Serve immediately for the perfect texture contrast - creamy ice cream, sturdy chocolate base, and that irresistible crispy cookie crown. If you need to prepare ahead, assemble the cake without the cookie crown and freeze for up to 2 hours before adding the final crispy top. The cookie crown stays freshest when added just before serving.
Pro Tips For Making Amazing Ice Cream Cake
- CHILL THE ICE CREAM FIRST: Pop that vanilla bean tub in the freezer for 30 minutes before assembling—it’ll be firmer and hold its shape better when you layer it. I learned this the hard way when my first attempt turned into a sad, melted puddle halfway through baking.
- USE ROOM-TEMP EGG BUTTER: Let your eggs and butter sit out for 30 minutes before mixing—the batter will blend smoother and the cake will bake more evenly. Cold butter? Your cake’s layers will fight you every step of the way.
- DON’T OVERMIX THE BATTER: Mix just until the dry ingredients disappear—about 20 seconds past that point is plenty. Overmixing makes the cake dense, and nobody wants a brick disguised as dessert.
- LAYER FAST, BUT NOT CARELESSLY: Work quickly to keep the ice cream from softening, but still spread the cake batter evenly—uneven layers mean uneven bites. A warm spatula helps smooth the batter faster without melting the ice cream.
Common mistakes when making your amazing ice cream cake
Overworking the Cake
Mixing the chocolate cake batter too much creates a dense, rubbery texture that can’t support the ice cream layer. I’ve ruined more cakes than I’ll admit by overbeating—just combine the ingredients until just smooth, about 30 seconds after they’re fully incorporated. A toothpick inserted in the center should come out with a few moist crumbs, not wet batter. 💫
Melting the Ice Cream
The ice cream layer needs to be firm but scoopable when assembling. If it’s too soft, it’ll slide around or melt too quickly. Let the ice cream sit at room temperature for only 10-15 minutes before mixing—no longer! Work fast once it’s out of the freezer, and keep everything chilled until assembly. I keep my bowl and spoon in the freezer for 5 minutes before scooping to help maintain stability.
Skipping the Chill
Never skip chilling the cookie crown dough or the cake base. The dough needs 30 minutes in the fridge to firm up, or it’ll spread too much in the oven, ruining that perfect crown shape. The cake base must be completely cooled before adding ice cream, or it’ll soften and turn mushy. I’ve learned this the hard way—trust the process! ❄️
Underbaking the Cookie Crown
If the cookie crown isn’t baked long enough, it’ll be soft and bendy, unable to hold its shape or provide that satisfying crunch. Bake until the edges are golden brown and the center is just set—about 12-15 minutes. The key is flexibility: it should hold its shape but still be pliable enough to press into a crown while warm. Overbaking dries it out, so keep an eye on it!
Assembling Without Prep
Rushing the assembly is a recipe for disaster. Let the cake base freeze solid for at least 2 hours before adding ice cream, and let the cookie crown cool completely before placing it on top. If you’re in a hurry, pop the whole cake back in the freezer for 30 minutes after assembly to help everything set. Patience here makes all the difference—no one wants a soggy bottom! 🍦
Ignoring the Powdered Sugar
That final dusting of powdered sugar isn’t just for looks—it helps stabilize the cookie crown and adds a delicate, elegant finish. Use a fine-mesh sieve and tap it gently over the cake for even coverage. If you skip it, the cookie crown might crumble when sliced, and the cake loses that bakery-fresh touch. A little goes a long way! ✨
Nutrition facts
Frequently asked questions
Can I make this ice cream cake ahead of time?
Assemble the cake base with ice cream and freeze it for up to 24 hours before adding the cookie crown. Keep the cookie crown separate until serving—it stays freshest when added just before eating. The ice cream will maintain its texture perfectly when frozen properly. For best results, wrap the assembled cake tightly in plastic wrap and place it back in the freezer for 1 hour before serving to help everything set.
What's the best way to keep the ice cream from melting?
Work fast and keep everything chilled! Use a cooling tray or place your mixing bowl in the freezer for 5 minutes before scooping ice cream. Assemble the cake in a cool environment (like a chilled pantry) and avoid handling the ice cream with warm hands. If the ice cream starts to soften during assembly, pop the whole cake back in the freezer for 10-15 minutes to firm it up.
Can I substitute the chocolate cake base?
Yes! For a lighter option, use a graham cracker crust (press 1.5 cups crumbs mixed with 1/3 cup melted butter into a pan). For a from-scratch cake, bake a vanilla sponge cake or pound cake—just ensure it's sturdy enough to hold the ice cream. The key is a completely cooled, firm base that won't crumble when sliced.
How do I make the cookie crown extra crispy?
Bake the cookie crowns at 375°F instead of 350°F for the last 2-3 minutes to get a deeper golden color. Brush the warm crowns with a tiny bit of melted butter while they cool—they'll crisp up even more as they sit. For extra crunch, chill them in the freezer for 10 minutes after baking before shaping into crowns. Store in an airtight container to maintain crispness.
Can I make this recipe without an oven?
For the cookie crown, you can use a cookie press with pre-made cookie dough (like Toll House) and bake them in a toaster oven or air fryer at 350°F for 8-10 minutes. The chocolate cake base would need to be made separately—try a no-bake cheesecake layer or use store-bought cake layers. The ice cream portion remains the same, but you'll need to adjust baking methods for all components.