
Desserts
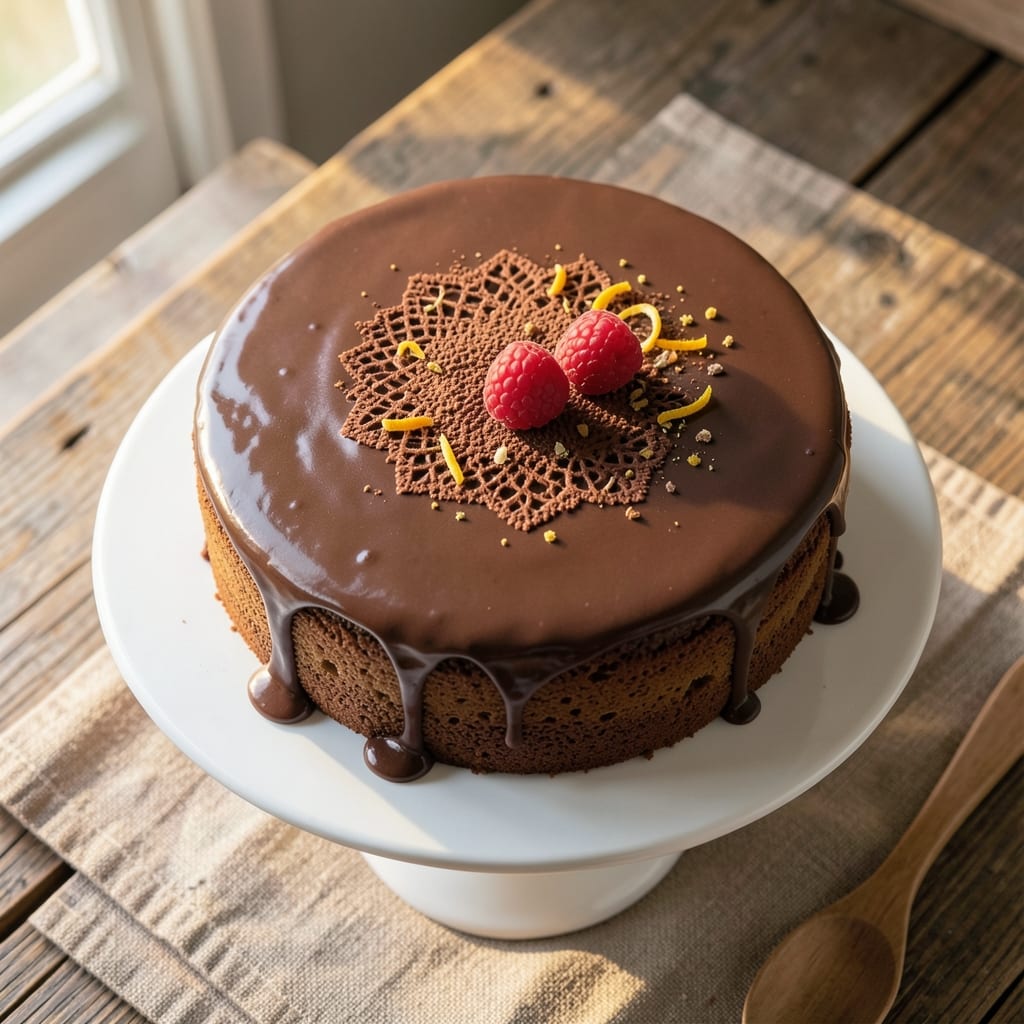
This 6-inch chocolate sponge cake delivers restaurant-quality layers of airy, moist crumb and rich cocoa flavor—perfect for special occasions or weekend treats. The secret lies in properly folded egg whites and a precise baking technique that creates that signature height and tender texture. I've perfected this recipe over years of testing, ensuring every slice meets the same standards as my favorite patisserie.
What sets this recipe apart is the balance between structure and tenderness—whipped egg whites create lightness while melted chocolate adds depth without making the cake dense. The cake bakes in a 6-inch round pan at 350°F, developing a golden top and crisp edges while staying moist inside. This method works equally well for beginners and experienced bakers, with clear steps to achieve professional results.
The crowning glory comes with the silky fudge frosting, which complements rather than overpowers the chocolate cake. Made with just four ingredients, it's smooth enough to spread evenly and rich enough to satisfy any chocolate lover. Whether you're serving this as a single-layer celebration cake or stacking it for extra height, the flavor and texture will impress every time.
Ready in about 1 hour (including cooling), this cake is ideal for birthdays, anniversaries, or simply treating yourself. The recipe includes tips for decorating with fresh berries, chocolate shavings, or a dusting of powdered sugar to elevate the presentation. Let's get baking—your taste buds will thank you.
Ingredients for 6 inch chocolate sponge cake
Twelve ingredients create a restaurant-worthy chocolate sponge with velvety frosting—precision meets indulgence.
| Ingredient | Amount | Notes |
|---|---|---|
| Unsalted Butter 🧈 | ¾ cup | Cold, cut into small cubes |
| Granulated Sugar 🍚 | 1 ½ cups | Superfine preferred for smoothness |
| Unsweetened Cocoa Powder 🍫 | ½ cup | Dutch-processed for richness |
| All-Purpose Flour 🌾 | 1 ¼ cups | Sifted, spooned lightly |
| Large Eggs 🥚 | 4 whole | Room temperature, separated |
| Baking Powder 🧂 | 1 tsp | Aluminum-free preferred |
| Salt 🧂 | ¼ tsp | Fine sea salt |
| Vanilla Extract 🌿 | 1 tbsp | Pure Madagascar bourbon |
| Dark Chocolate Chips 🍫 | ½ cup | 70% cacao, chopped fine |
| Heavy Cream 🥛 | ¾ cup | Cold, for frosting |
| Powdered Sugar 🍚 | 2 cups | Sifted for smooth frosting |
| Semisweet Chocolate Bars 🍫 | 6 oz | High-quality, chopped fine |
The cocoa powder and chocolate chips are where flavor magic happens. Dutch-processed cocoa like Droste or Valrhona delivers that signature deep, smooth cocoa taste without bitterness. For chocolate, Ghirardelli or Lindt 70% bars melt beautifully—avoid the supermarket brands with fillers. Eggs must be room temperature for proper whipping; cold whites won't hold volume. The butter should be cold when creaming to create that signature tender crumb. For the frosting, high-quality heavy cream like Organic Valley gives the richest texture when whipped.
No Dutch-process cocoa? Natural cocoa powder at 1.25x the amount works, but the flavor will be slightly more acidic. Running short on chocolate chips? Melt the 6 oz chocolate bars and drizzle over the cake before baking for a glossy finish. Substituting powdered sugar? Confectioners' sugar is non-negotiable—granulated won't dissolve properly. For the vanilla, imitation extracts lack depth, but if you're in a pinch, vanilla bean paste works beautifully. The cake batter should be thick but pourable—if it's too stiff, add 1 tbsp milk or cream. And never skip sifting the flour; those lumps will ruin the delicate texture.
Store the cake layers wrapped tightly in plastic at room temperature for up to 3 days, or freeze for 2 months. The frosting keeps in the fridge for 5 days—rewhip briefly before using. For presentation, dust with powdered sugar or add chocolate shavings right before serving. The cake improves overnight as the flavors meld, so bake it a day ahead if possible. Portion the frosting into small containers for easy spreading—this stuff disappears fast during celebrations.
Why You'll Love This Recipe
- Here’s what sold me: the cocoa powder and butter create that deep, velvety chocolate flavor, but the eggs and sugar keep it from tasting heavy or bitter. It’s the kind of cake that’s dangerously good—moist enough to melt in your mouth but sturdy enough to hold up to frosting or fruit.
- No Mixer Needed: I swear by this recipe because it only requires a bowl and a whisk—no stand mixer, no electric beaters, just elbow grease (and maybe a little arm workout). The butter and sugar get creamed by hand until light and fluffy, and the eggs fold in so smoothly you’ll wonder why you ever bothered with complicated methods.
- Rich Without Overpowering: Here’s what sold me: the cocoa powder and butter create that deep, velvety chocolate flavor, but the eggs and sugar keep it from tasting heavy or bitter. It’s the kind of cake that’s dangerously good—moist enough to melt in your mouth but sturdy enough to hold up to frosting or fruit.
- Weeknight Dessert Hero: Between us, I’ve turned this into my go-to after-dinner treat because it’s so simple. Make it for a quick date night, a last-minute office dessert, or even a solo indulgence—it’s always a hit. Plus, the 6-inch size means you’re not baking a whole sheet pan for two people.
Step-by-step instructions for decadent chocolate sponge cake
Master this technique and you'll achieve a towering, moist chocolate sponge with a perfectly smooth finish.
Prepare the Cake Batter for Lightness
Preheat your oven to 350°F and grease a 6-inch round cake pan with butter or baking spray, then line the bottom with parchment paper. In a medium bowl, whisk together the 1.5 cups granulated sugar and 0.5 cup unsweetened cocoa powder until completely combined. This ensures even distribution of flavor throughout the batter.
In a separate large bowl, beat the 0.75 cup cold unsalted butter (cut into small cubes) on medium speed until light and fluffy—about 3-4 minutes. This step incorporates air, which is critical for that signature sponge height. Scrape down the sides of the bowl with a spatula to ensure even mixing as you go.
Incorporate Eggs and Dry Ingredients
Add the 4 whole large eggs, one at a time, beating well after each addition until fully incorporated. The mixture should be thick and ribbon-like. Add the 1 tbsp vanilla extract and mix briefly. In a small bowl, sift together the 1.25 cups all-purpose flour, 1 tsp baking powder, and 0.25 tsp salt. Gradually fold these dry ingredients into the wet mixture using a spatula, mixing just until combined—overmixing develops gluten and creates a dense cake.
Fold in the 0.5 cup dark chocolate chips by hand, ensuring even distribution. Pour the batter into the prepared pan and smooth the top with a spatula. Tap the pan gently on the counter 2-3 times to remove any air bubbles. The batter should fill the pan about halfway—this is normal for a light, airy sponge.
Bake to Perfect Height and Moisture
Bake for 25-30 minutes, or until a toothpick inserted into the center comes out clean. The cake should spring back when gently pressed in the center and have a deep, rich brown color on top. Rotate the pan halfway through baking for even heat distribution. Avoid opening the oven door during baking—this causes the cake to sink.
Once baked, remove from the oven and let the cake cool in the pan for 10 minutes. Then transfer it to a wire rack to cool completely. This gradual cooling prevents cracking and maintains the cake's moisture. While the cake cools, prepare the fudge frosting by melting the 6 oz semisweet chocolate bars with the 0.75 cup heavy cream over a double boiler or in the microwave in 20-second intervals, stirring until smooth.
Create the Silky Fudge Frosting
In a separate bowl, beat the 2 cups powdered sugar until light and fluffy. Add the melted chocolate-cream mixture and beat on high speed for 3-4 minutes until smooth and glossy. The frosting should be thick enough to hold its shape but still spreadable. If it's too thin, chill for 10 minutes to thicken further.
Once the cake is completely cool, spread a thin layer of frosting over the top and sides to seal in moisture. Add a second layer for a thicker finish, then pipe any remaining frosting decoratively on top. The contrast between the rich chocolate cake and silky frosting creates a decadent visual and textural experience. Serve immediately or refrigerate for up to 24 hours for a firmer frosting texture.
Pro Tips For Making 6 Inch Chocolate Sponge Cake
- Melt Butter Slowly: I learned this the hard way—dumping cold butter into hot sugar makes a greasy mess. Warm the butter in the microwave for 30 seconds first, then whisk it into the sugar while it’s still liquid. This keeps your batter smooth and prevents lumps that ruin the texture.
- Sift the Cocoa Twice: Unsweetened cocoa powder is a sneaky clump-maker. Sift it once into the dry ingredients, then sift it again right before folding in the wet mixture. I was skeptical until I tried it—your cake will be lighter and richer, not dense and gritty.
- Check Doneness with a Toothpick: The cake’s edges might look set, but the center can still be raw. Insert a toothpick into the middle—it should come out with a few moist crumbs, not wet batter. If it’s sticky, bake another 2-3 minutes. Overbaking turns sponge cake dry, and no one wants that.
- Use Room-Temp Eggs: Cold eggs curdle when they hit warm butter and sugar, leaving you with a lumpy batter. Take your eggs out of the fridge 30 minutes before mixing. They’ll blend in silky smooth, and your cake’s crumb will be airier. (Yes, even if you’re impatient like me.)
Make-ahead tips for this recipe
Batter Prep Ahead
Mix the cake batter up to 24 hours in advance and store it in an airtight container in the fridge. This allows the flour to hydrate and the flavors to meld beautifully. When ready to bake, let the batter sit at room temperature for 30 minutes before pouring into the pan. This prevents temperature shock and ensures even baking. I like to prep the batter the night before so I can focus on baking fresh in the morning. 💫
Frosting Prep
Make the fudge frosting 1-2 days ahead and store it in the fridge in an airtight container. The flavors deepen over time, and the texture becomes even smoother. When ready to use, give it a quick whip with a hand mixer to restore its silky consistency. For extra shine, brush the top with a tiny bit of heavy cream before serving. This trick makes it look restaurant-perfect every time. ✨
Layer Assembly
Assemble the cake layers 4-6 hours before serving to allow the frosting to set properly. Place the first layer on a cake stand, spread a thin layer of frosting, then add the second layer. Chill in the fridge for 2 hours before adding the final frosting layer. This prevents the cake from sinking under the weight of the frosting. For a showstopper, pipe decorative swirls or add chocolate curls right before serving. 🍫
Storage Tips
Store fully frosted cakes in the fridge for up to 3 days or freeze for 2 months. To freeze, wrap each layer individually in plastic wrap, then place the entire cake in an airtight container. Thaw overnight in the fridge before serving. The texture remains moist, and the flavors stay vibrant. For a quick treat, bake the cake fresh and frost it the same day—just keep the frosting ingredients separate until ready to use. 💪
Make-Ahead Decor
Prep all your decorations a day ahead to streamline assembly. Melt chocolate for drizzles, chop nuts for garnishes, or arrange fresh berries in a bowl. Store chocolate decorations in the fridge in small containers, and keep berries in a single layer on a paper towel to prevent sogginess. This way, you can focus on assembling the cake without last-minute stress. The extra time makes the presentation look effortless and professional. 🎂
Reheating Tricks
If your cake sits out too long, warm it gently to restore moisture. Place the cake on a wire rack over a pot of simmering water for 5-10 minutes—this adds steam without making the cake soggy. For frosted cakes, avoid reheating; instead, let it sit at room temperature for 30 minutes before serving. The frosting will soften naturally, creating the perfect balance of textures. This trick works especially well for cakes that need a second chance after storage. 🔥
Nutrition facts
Frequently asked questions
Can I use this recipe for a single layer cake?
Yes! This recipe works perfectly for a single 6-inch layer that's perfect for small gatherings or personal treats. The 25-30 minute bake time ensures a light, moist crumb without over-baking. For a single layer, you'll want to serve it immediately with fresh berries or a simple dusting of powdered sugar to complement the rich chocolate flavor.
Why did my cake sink in the middle?
This usually happens from one of three issues: opening the oven door too early, overmixing the batter, or not letting the cake cool properly. Always wait until the cake springs back when touched and a toothpick comes out clean. Let it cool in the pan for 10 minutes before transferring to a rack. If you opened the oven door too soon, the sudden temperature drop can cause the center to collapse.
Can I substitute cocoa powder with melted chocolate?
You can, but it changes the texture and flavor profile. Replace the 0.5 cup cocoa powder with 0.5 cup melted dark chocolate (70% cacao)—but reduce the flour by 1 tablespoon since melted chocolate adds moisture. For best results, use Dutch-process cocoa powder as it creates a smoother, richer flavor without bitterness. The cake will still be delicious, but the texture may be slightly denser.
How do I make this cake gluten-free?
Replace the 1.25 cups all-purpose flour with a 1:1 gluten-free baking flour blend—like Bob's Red Mill or King Arthur. Add 0.5 teaspoon xanthan gum—if your blend doesn't contain it. For the best rise, let the batter rest for 15 minutes before baking. The texture will be slightly different but still moist and delicious. Always sift the gluten-free flour to prevent lumps that can create dense pockets.
Can I bake this in a different-sized pan?
For a single layer, use a 6-inch pan—this recipe is designed for that height. If you want to adjust, a 7-inch pan would work but bake for 20-25 minutes—instead. For a 8-inch pan, reduce the batter by about 25%—**but the texture may be slightly denser. Always use the same oven temperature and check for doneness with a toothpick. The key is maintaining the same batter-to-pan ratio for proper rise.