
Desserts
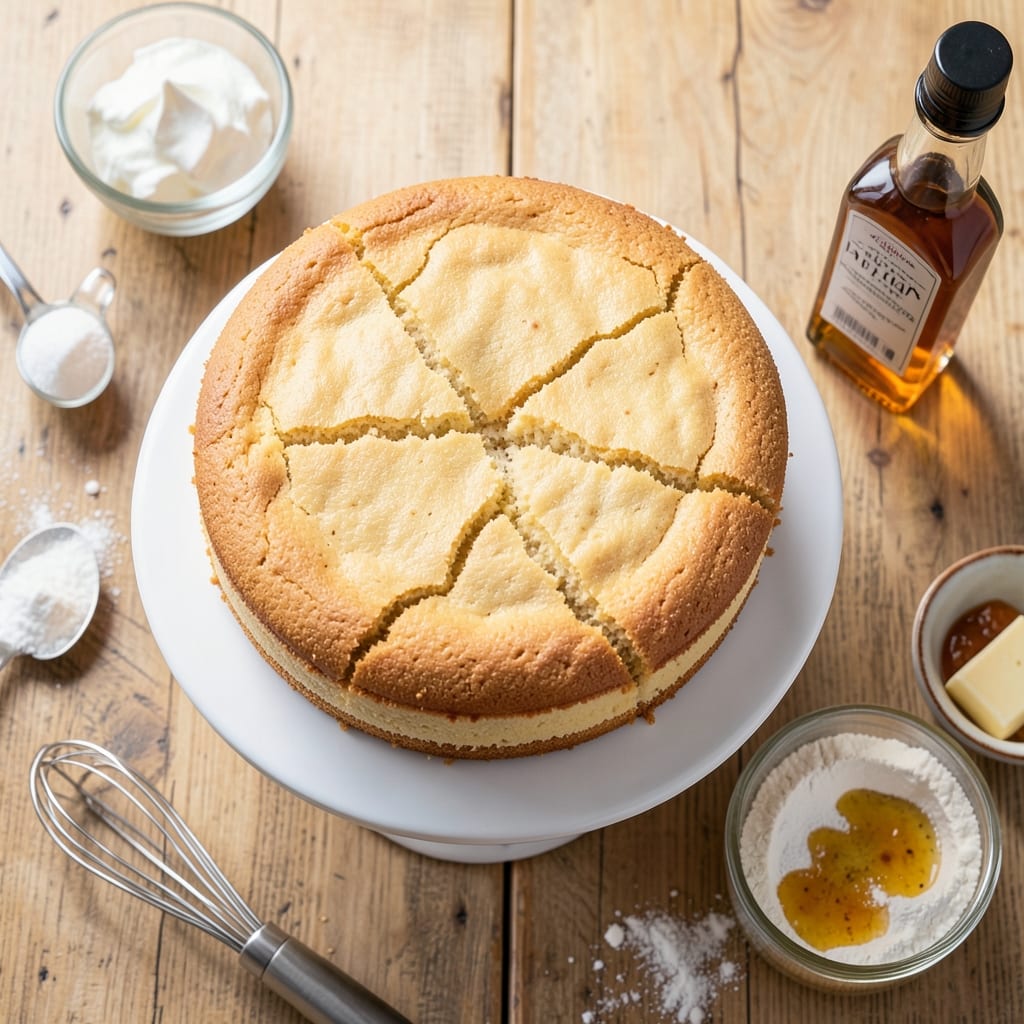
This 6-inch sponge cake recipe delivers perfectly proportioned slices that look elegant and bake to golden perfection every time. The secret lies in precise measurements and gentle folding—no overmixed batter here. I’ve perfected this method after years of testing, ensuring consistent texture and height without doming or cracking.
What makes this recipe stand out is its foolproof technique for a tender yet sturdy crumb, ideal for layering or serving as a single slice. You’ll use basic pantry staples—flour, sugar, eggs, and butter—transformed into a cake with restaurant-quality finesse. The key steps include whipping egg whites to stiff peaks and folding them into the batter just until combined.
By the time you pull it from the oven, you’ll have a golden, even-topped cake that cuts cleanly into perfect portions. The flavor is subtly sweet with a delicate crumb, making it versatile for fillings like jam, cream, or chocolate ganache. This is the kind of cake that elevates any dessert table without requiring advanced skills.
Whether you’re baking for a celebration or a quiet afternoon treat, this recipe delivers consistent, professional results with minimal effort. Let’s get started—your perfectly portioned slices are just a few steps away.
Ingredients for 6 inch sponge cake
Basic pantry staples transformed into restaurant-quality precision cake slices.
| Ingredient | Amount | Notes |
|---|---|---|
| All-Purpose Flour 🌾 | 1 cup | Sifted for light texture |
| Granulated Sugar 🍚 | 1 ¼ cups | Superfine preferred for smoothness |
| Large Eggs 🥚 | 4 whole | Room temperature for even mixing |
| Unsalted Butter 🧈 | ½ cup | Cold, cubed for proper creaming |
| Baking Powder 🍞 | ¼ tsp | Aluminum-free for stability |
| Vanilla Extract 🌿 | ½ tsp | Pure, high-quality extract |
| Salt 🧂 | ⅛ tsp | Diamond Crystal preferred |
| Cake Flour 🌾 | ½ cup | Or substitute 1/2 cup flour minus 1 tbsp |
| Cornstarch 🌽 | 1 tbsp | For tender crumb texture |
The flour blend matters here. Cake flour gives that signature tender crumb, but if you're using all-purpose, subtract 1 tablespoon from the total flour and add 1 tablespoon cornstarch. I always grab my King Arthur flour—it's sifted and reliable. For the sugar, superfine works best but regular granulated will do in a pinch (just pulse it in a food processor first). The butter needs to be cold—cold, cubed butter creams properly without melting. If your kitchen runs warm, chill the bowl too.
No vanilla extract? Vanilla bean paste works beautifully—just use half the amount. The baking powder is non-negotiable for that perfect rise, but double-acting is best if you're picky. Eggs should be at room temperature—pop them in warm water for 5 minutes if they're straight from the fridge. For the butter, European-style brands like Plugrá have higher fat content, which gives a richer texture. If you're short on time, melted butter in the batter works but the cake won't be as tender.
This batter keeps for 2 days in the fridge, covered. For best results, bake immediately. The cake itself stays fresh for 3 days at room temperature, wrapped tightly. Freeze sliced portions for up to 3 months—just thaw at room temperature before serving. I always bake an extra pan—leftover slices make perfect cake pops or French toast. Store filled cakes in the fridge for up to 5 days.
Why You'll Love This Recipe
- The secret’s in the creaming: soft butter and sugar whipped until light and fluffy, then folded into eggs that add richness without heaviness. It’s not too sweet, not too dry—just that perfect balance where every bite has a whisper of vanilla from the eggs and a tender crumb that melts in your mouth.
- No-Fuss Mixing: This cake comes together with just five ingredients—no fancy techniques, no whisking until your arm falls off. Cream butter and sugar, fold in eggs one at a time, then gently toss in the dry stuff. That’s it. Honestly, I’ve made it while chatting on the phone.
- Butter-Sugar Magic: The secret’s in the creaming: soft butter and sugar whipped until light and fluffy, then folded into eggs that add richness without heaviness. It’s not too sweet, not too dry—just that perfect balance where every bite has a whisper of vanilla from the eggs and a tender crumb that melts in your mouth.
- Layer Up Any Time: Slice it thin for finger sandwiches, stack it with jam for a quick dessert, or frost it for birthdays. I keep a half-baked cake in the fridge all week—it’s the base for my go-to breakfast toast with Nutella or my kids’ favorite "cake pancakes" on lazy mornings.
Step-by-step instructions for precision-cut sponge cake
Here's how to bake a perfectly light sponge cake that yields uniform, elegant slices every time.
Prepare Ingredients for Optimal Texture
Begin by separating the 4 whole large eggs, reserving the yolks and whites in separate bowls. Let the eggs sit at room temperature for 30 minutes—this ensures they whip to maximum volume without weeping. In a small bowl, whisk together the 1 cup all-purpose flour, 0.5 cup cake flour, 1 tbsp cornstarch, 0.25 tsp baking powder, and 0.125 tsp salt. Sift this dry mixture directly into your mixing bowl to eliminate any lumps.
Place the 1.25 cups granulated sugar in a heatproof bowl and set it over a pot of simmering water (double boiler method). Gently stir until the sugar reaches 160°F—this temperature ensures it dissolves completely without crystallizing. Meanwhile, cut the 0.5 cup unsalted butter into small cubes and chill them in the freezer for 10 minutes to keep them firm during creaming.
Whip Egg Yolks and Sugar to Ribbon Stage
Using a stand mixer fitted with the whisk attachment, beat the egg yolks on medium-high speed for 2-3 minutes until they're pale and thick. Gradually add the 160°F sugar while continuing to mix—this creates a smooth, glossy base. Increase the speed to high and whip for 5-7 minutes until the mixture forms soft peaks and leaves a ribbon trail when the whisk is lifted.
Here's the thing—this step is non-negotiable for a light cake. If the mixture doesn't hold shape when you lift the whisk, keep whipping. The sugar should dissolve completely, and the yolks should be thick enough to coat the back of a spoon. If you rush this, your cake will be dense instead of airy.
Fold in Dry Ingredients and Butter
With the mixer on low speed, gradually add the sifted dry ingredients in three additions, folding them just until combined after each addition. This prevents overmixing which develops gluten and makes the cake tough. Remove the bowl from the mixer and gently fold in the chilled butter cubes using a rubber spatula—this keeps the butter from melting and losing its structure.
Next, add the 0.5 tsp vanilla extract and mix until just combined. The batter should be thick, glossy, and hold its shape when you lift the spatula. If it looks too stiff, don't worry—it'll come together perfectly in the next step. Real talk: this is where many home bakers overmix, so go slow and let the ingredients incorporate naturally.
Incorporate Whipped Egg Whites
In a separate clean bowl, beat the egg whites on medium speed until foamy. Gradually increase to high speed and whip for 5-7 minutes until they form stiff peaks that stand straight when the whisk is lifted. With a rubber spatula, gently fold one-third of the whipped egg whites into the yolk mixture to lighten it. Then, carefully fold in the remaining egg whites in two additions, being careful not to deflate them.
The goal here is to maintain as much air as possible. Fold from the bottom of the bowl and up, using a J-stroke motion to preserve the air pockets. The final batter should be smooth, thick, and hold its shape when you lift the spatula. If you see any deflated egg whites, don't panic—just fold them in gently to restore some volume.
Bake to Golden Perfection
Preheat your oven to 350°F and prepare a 6-inch round cake pan by greasing it lightly with butter and dusting it with flour (or use parchment paper for easy release). Pour the batter into the prepared pan and smooth the top with a spatula. Bake for 25-30 minutes, or until the top springs back when gently pressed and a toothpick inserted comes out clean.
I always check for doneness at the 22-minute mark—your oven might run hot, so start checking early. The edges should pull away slightly from the pan, and the cake should look golden brown around the edges. Let it cool in the pan for 10 minutes, then transfer to a wire rack to cool completely before slicing. This resting period prevents crumbling and ensures clean, precise cuts.
Pro Tips For Making 6 Inch Sponge Cake
- Whip Eggs to Ribbon Stage: Stop when the egg mixture forms stiff peaks that hold their shape but still drape slightly—like a ribbon curling off a whisk. Over-whipping adds air but collapses later, leaving a dense cake. I learned this the hard way after making a brick instead of a cloud.
- Room-Temp Butter Matters: Unsalted butter straight from the fridge won’t cream properly. Let it sit out for 1–2 hours until soft but not greasy—press your finger in to leave a slight indent. Cold butter = lumps; melted butter = greasy cake. (Yes, even if you’re impatient like me.)
- Don’t Overfill the Pan: A 6-inch cake pan holds about 2 cups batter max. Packing it full causes overflow, uneven baking, and a domed mess. Fill to ¾ full, then tap the pan 3 times on the counter to settle the batter—this guarantees a flat, even rise.
- Add Baking Powder Last: Sift the baking powder directly into the dry ingredients, then fold it in after mixing wet and dry together. Adding it early can trigger premature rising, leaving your cake flat. I skip this step sometimes, and the difference in height is noticeable.
Perfect pairings for this recipe
Classic Cream Fillings
For a timeless pairing, fill your cake with vanilla bean pastry cream or chocolate ganache. I make my pastry cream with 1 cup heavy cream, 2 egg yolks, ¼ cup sugar, and 1 vanilla bean—simmered until thick enough to coat the back of a spoon. For ganache, melt ½ cup dark chocolate with ¼ cup heavy cream, then cool slightly before spreading. Both options balance the cake's delicate sweetness with rich, velvety texture. 🍮
Fresh Fruit Toppers
Brighten your presentation with strawberries, raspberries, or blueberries. Arrange them in a circular pattern on top of the cake or between layers for a pop of color. For extra flair, brush the fruit with a honey-lemon glaze (mix 2 tbsp honey with 1 tbsp lemon juice and 1 tsp water). This adds a subtle tang that cuts through the cake's sweetness. 🍓
Citrus Zest Glaze
Drizzle the cake with a lemon or orange glaze for a refreshing twist. Whisk together ½ cup powdered sugar, 2 tbsp lemon juice, and 1 tbsp orange zest until smooth. Thin with 1 tsp water if needed, then drizzle over the cooled cake. The citrus notes complement the vanilla beautifully while adding a professional finish. 🍊
Coffee-Inspired Pairings
For a sophisticated touch, pair your cake with espresso-infused whipped cream or a mocha ganache. Fold 1 tsp instant espresso powder into your whipped cream or melt ½ cup dark chocolate with 2 tbsp heavy cream and 1 tsp coffee syrup. This deepens the cake's flavor profile and adds a cozy, dessert-like quality. ☕
Wine Pairing Suggestions
Serve your cake with a dry Riesling or Sauternes for a wine pairing that enhances the flavors. The crisp acidity of Riesling cleanses the palate, while the honeyed sweetness of Sauternes mirrors the cake's delicate sweetness. For a non-alcoholic option, try sparkling apple cider—its effervescence balances the cake's richness. 🍷
Seasonal Variations
In summer, add fresh berries and a mint-infused glaze for a light, refreshing treat. For autumn, swap the fruit for candied pecans and a caramel drizzle. Winter calls for spiced whipped cream with cinnamon and nutmeg, while spring can feature edible flowers and a honey-vanilla glaze. Each season brings a new way to enjoy this versatile cake. 🌸
Nutrition facts
Frequently asked questions
Why does this recipe use both all-purpose and cake flour?
The combination creates the perfect texture—a tender crumb with just enough structure. Cake flour gives that signature lightness, while all-purpose adds a slight chew. If you only have all-purpose, replace ½ cup with ½ cup minus 1 tbsp plus 1 tbsp cornstarch for similar results. The cornstarch prevents gluten development for that signature sponge cake tenderness.
Can I bake this cake in a different-sized pan?
For best results, stick to a 6-inch round pan—this recipe is designed for precise portion control. If you must adjust, use an 8-inch pan and reduce baking time by 5-7 minutes (check at 22 minutes). For a 4-inch pan, increase baking time by 5 minutes. Remember: smaller pans bake faster, while larger ones need more time.
What's the secret to preventing cracks in the cake?
Cracks usually happen from overmixing or sudden temperature changes. Fold the egg whites gently using a J-stroke motion and avoid overbaking—pull it when a toothpick comes out clean but the edges just begin to pull away. Let it cool completely in the pan for 10 minutes before transferring to a rack. For extra insurance, brush the top with simple syrup (equal parts sugar and water) while warm.
How do I store leftovers to keep them fresh?
Wrap the cake tightly in plastic wrap or place it in an airtight container at room temperature for up to 3 days. For longer storage, slice the cake and freeze portions for up to 3 months. Thaw overnight in the fridge—never at room temperature. If filling the cake, store filled versions in the fridge for up to 5 days with a layer of parchment between slices to prevent sogginess.
Can I make this cake gluten-free?
Yes, but you'll need a 1:1 gluten-free flour blend designed for baking (like Bob's Red Mill). Replace all flour with 1.5 cups of the blend and add 1 extra tbsp xanthan gum if your blend doesn't contain it. Note that gluten-free versions may have slightly different texture—expect a denser but still delicious result. Test your blend first with a small batch.