
Desserts
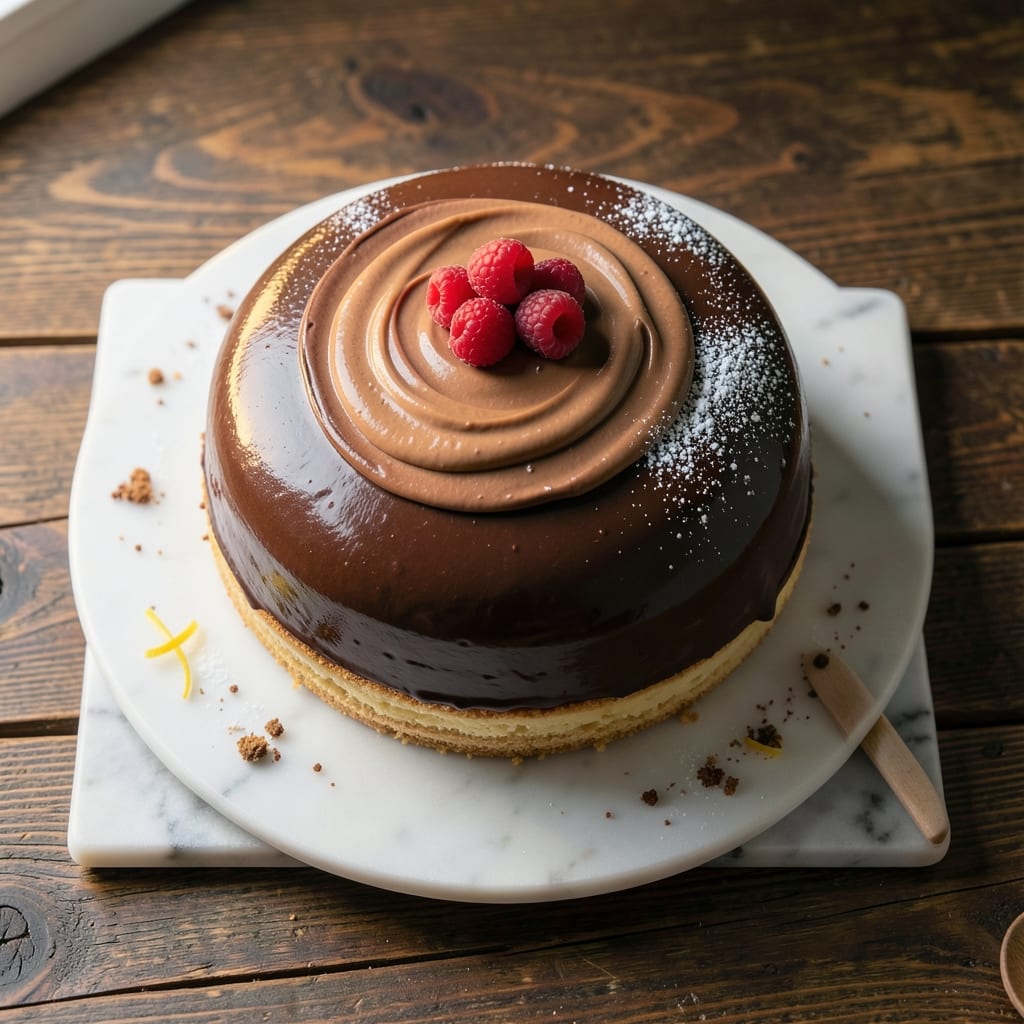
An 8-inch hemisphere cake isn't just dessert—it's a showstopper that transforms any celebration into an elegant affair. This three-layer vanilla masterpiece features decadent buttercream swirls that make every slice feel luxurious, yet the recipe stays approachable for home bakers. The secret to that perfect dome shape? A simple dome mold or freeform technique that requires no special skills—just patience and precision.
What sets this recipe apart is its balance of foolproof technique and restaurant-quality results. Baked at 350°F for 25-30 minutes per layer, the cake emerges tender yet sturdy enough to hold its shape when filled and frosted. The vanilla extract infuses every bite with warmth, while the buttercream—whipped to pipeable perfection—adds a velvety contrast that melts on the tongue.
Whether you're decorating for a birthday, anniversary, or just because, this cake delivers golden layers and a flawless hemisphere form without the fuss. The recipe includes tips for achieving clean edges and smooth swirls, so even beginners can create a dessert that looks like it came from a patisserie. Ready to elevate your baking game?
Perfect for special occasions or everyday indulgence, this cake adapts easily to dietary preferences—just swap out ingredients as needed. Let’s get started on creating your masterpiece.
Ingredients for 8 inch hemisphere cake
Elegant layers and velvety swirls start with these precise ingredients for a showstopping 8-inch dome cake.
| Ingredient | Amount | Notes |
|---|---|---|
| All-Purpose Flour 🌾 | 3 cups | Sifted for light texture |
| Unsalted Butter 🧈 | 2 cups | Room temperature, European-style preferred |
| Granulated Sugar 🍚 | 2 cups | Superfine for smooth batter |
| Pure Vanilla Extract 🌿 | 2 tbsp | Bourbon-based for depth |
| Large Eggs 🥚 | 6 whole | Room temperature, separated |
| Whole Milk 🥛 | 1 cup | Room temperature |
| Baking Powder 🧂 | 2 tsp | Aluminum-free preferred |
| Salt 🧂 | ½ tsp | Fine sea salt |
| Powdered Sugar 🍚 | 4 cups | For buttercream, sifted |
| Heavy Whipping Cream 🥛 | 1 ½ cups | Cold, 35% fat minimum |
| Vanilla Bean Paste 🌿 | 1 tbsp | For buttercream flavor |
| Cornstarch 🌾 | 1 tbsp | For buttercream stability |
| Food Coloring 🎨 | 1 tsp | Optional, vanilla or gold hue |
| Parchment Paper 📄 | 1 sheet | For cake layers |
| Dome Mold 🎂 | 1 piece | 8-inch hemisphere shape |
The butter and sugar are non-negotiable for that tender crumb and rich flavor. European-style butter has higher fat content, which yields a more luxurious texture. For the vanilla, Madagascar bourbon vanilla from Lalique or McCormick delivers the deepest aroma. Sift your flour and powdered sugar together to eliminate lumps—this makes all the difference in the final texture. Eggs should be separated carefully, and yolks should be at room temperature to prevent curdling. If you're using a dome mold, Wilton's 8-inch hemisphere mold is the gold standard for beginners.
Substitutions are possible, but precision matters here. Vegetable shortening can replace butter for a lighter crumb, though it lacks richness. For vanilla, imitation vanillavegan butter and plant-based milk will work, though the texture may be slightly denser. The baking powder must be fresh—test it by mixing with water; if it fizzes, it's good to go. For the buttercream, meringue powder can replace cornstarch, though it has a slightly different texture. Always use powdered sugar that's been sifted to avoid graininess in your frosting.
Store cake layers in an airtight container between parchment paper for up to 2 days at room temperature. The buttercream can be made 1 day ahead and stored in the fridge, then rewhipped to fluffy perfection. For the dome shape, chilling the cake layers for 30 minutes before filling ensures clean slices. If using a mold, grease it lightly with butter to prevent sticking. The completed cake keeps for 4 days in the fridge, though it's best enjoyed fresh. For a showstopping presentation, dust with powdered sugar or add edible gold leaf just before serving.
Why You'll Love This Recipe
- No Mixer Needed: The creaming method here is so forgiving—just a bowl and a wooden spoon. I’ve made this with my hands tied behind my back (okay, maybe not that bad), and the butter and sugar still come together light and airy. That vanilla? It’s the star, cutting through the richness like a whisper.
- Butter-Sugar Magic: This isn’t your dry, crumbly cake. The high ratio of butter to sugar gives it that luxe crumb—tender, moist, and with just enough snap to hold a fork. Honestly, the first time I bit into a slice still warm from the oven, I nearly dropped my fork. That’s how good it is.
- Slice-and-Serve Flexibility: Make it for a birthday, a potluck, or just because you’re craving cake at 3 PM. The 8-inch size is perfect for sharing (or not—no judgment here), and it reheats beautifully. I’ve even served it chilled with ice cream when I’m feeling fancy. Works every time.
- Pantry Staple Power: You’re already using things you own: flour, butter, sugar, eggs. No weird ingredients, no last-minute grocery runs. The recipe scales too—double it for a crowd, halve it for a single-serving treat. Between us, this is the kind of cake that makes you feel like a baking genius without the stress.
Step-by-step instructions for creating an 8-Inch hemisphere cake
Mastering this dome-shaped cake requires precision in layering and baking techniques.
Prepare the Cake Batter for Three Layers
Preheat your oven to 350°F and grease three 8-inch round cake pans with the 2 cups unsalted butter, reserving a small amount for later. Line the bottoms with the parchment paper for easy removal. In a large mixing bowl, cream together the 2 cups granulated sugar and the 2 cups unsalted butter on medium speed until light and fluffy—about 3-4 minutes. This step is crucial for achieving the airy texture that defines this cake.
Add the 6 whole large eggs, one at a time, mixing well after each addition. Incorporate the 2 tbsp pure vanilla extract and the 1 cup whole milk into the mixture. Sift in the 3 cups all-purpose flour, 2 tsp baking powder, and 0.5 tsp salt together, then gently fold into the wet ingredients using a spatula until just combined. Overmixing can lead to a dense cake, so stop as soon as the dry ingredients are fully incorporated.
Bake the Cake Layers to Perfect Doneness
Divide the batter evenly among the three prepared cake pans, filling each about two-thirds full. Bake in the preheated oven for 25-30 minutes or until a toothpick inserted into the center comes out clean. Rotate the pans halfway through baking to ensure even browning. Allow the cakes to cool in the pans for 10 minutes before transferring them to a wire rack to cool completely.
Once fully cooled, remove the cakes from the pans and level the tops if necessary using a serrated knife. This ensures each layer will fit perfectly into the 8-inch dome mold later. The cakes should be moist but not sticky, with a fine crumb texture that will hold up well to the buttercream filling.
Create the Decadent Vanilla Buttercream
In a large mixing bowl, combine the 4 cups powdered sugar, 1 tbsp cornstarch, and 1 tsp food coloring (if using) and sift together for a smooth texture. In a separate bowl, whip the 1.5 cups heavy whipping cream to stiff peaks. Gradually add the powdered sugar mixture to the whipped cream while mixing on low speed until fully incorporated.
Add the 1 tbsp vanilla bean paste and mix until smooth. The buttercream should be thick enough to hold its shape but still pipeable. If it’s too thin, chill for 15-20 minutes to firm up. This buttercream is the star of the cake, providing that signature swirl and rich flavor that complements the vanilla cake layers.
Assemble the Cake in the Dome Mold
Place the first cake layer onto the base of the 8-inch dome mold, ensuring it sits flat and level. Spread a thin layer of buttercream over the top, then add the second layer, repeating the buttercream process. Finally, place the third layer on top and spread a generous layer of buttercream over the entire surface. Use an offset spatula to create smooth, even swirls across the top of the cake.
Once the cake is fully assembled, cover it with plastic wrap and refrigerate for at least 4 hours or overnight. This chilling time is essential for the buttercream to set properly and for the cake to hold its shape within the dome mold. The result should be a stunning, semi-spherical cake with flawless layers and a professional finish.
Unmold and Serve with Confidence
To unmold the cake, gently run a thin knife around the edges of the dome mold to loosen it. Place a large serving platter upside down over the mold and carefully flip the entire setup to release the cake. Lift the mold away to reveal your perfectly shaped hemisphere cake. The layers should hold together beautifully, with no signs of collapse or unevenness.
Slice the cake using a serrated knife dipped in hot water for clean cuts. Serve immediately to enjoy the perfect balance of moist cake and velvety buttercream. This technique ensures every slice delivers the same impressive presentation and delicious flavor.
Pro Tips For Making 8 Inch Hemisphere Cake
- Measure Butter Cold: Scoop your unsalted butter straight from the fridge—no softening needed. I used to melt it by mistake, and the cake turned out dense instead of light. Cold butter creates pockets for air, which is key for that airy hemisphere texture.
- Sift the Flour Twice: Don’t skip the second sifting, even if the recipe doesn’t say it. I learned this after a cake collapsed mid-bake—turns out, clumps in the flour weigh it down. Sift once into the bowl, then again after mixing wet and dry ingredients.
- Rotate the Pan: Swap the oven rack halfway through baking to even out the dome. The top of an 8-inch hemisphere cake can dry faster than the edges, and rotating it (front to back, not side to side) guarantees a smooth rise all around.
- Room-Temp Eggs Only: Crack those eggs into a separate bowl first, then let them sit for 10 minutes at room temp. Cold eggs curdle when mixed with warm butter, and that’s a fast track to a gummy cake—trust me, I’ve seen it happen.
Best sauces and condiments for 8 inch hemisphere cake
Classic Vanilla Buttercream
The vanilla buttercream in this recipe is the star—its velvety texture and rich flavor make every bite feel luxurious. I use 4 cups powdered sugar, 1.5 cups heavy whipping cream, and 1 tbsp vanilla bean paste for depth. The cornstarch stabilizes it perfectly, ensuring it holds its shape without being too stiff. For a pro touch, chill the buttercream for 15-20 minutes if it’s too soft, then rewhip to fluffy peaks. 🥄
Citrus Curd Swirl
Brighten up your hemisphere cake with a lemon or orange curd swirl between layers. Mix ½ cup lemon juice, ½ cup sugar, 3 egg yolks, and ¼ cup butter until thickened. Cool completely before spreading between cake layers—it adds a tangy contrast that cuts through the richness. For extra flair, drizzle a thin layer of curd over the buttercream before chilling. 🍋
Chocolate Ganache Drizzle
A dark chocolate ganache elevates this cake to next-level elegance. Heat ½ cup heavy cream and pour over 8 oz chopped dark chocolate, stirring until smooth. Let it cool slightly before drizzling over the assembled cake or piping decorative swirls. For a white chocolate version, use 10 oz white chocolate and ¼ cup cream. The ganache adds a glossy finish and deepens the flavor profile. 🍫
Berry Compote Topping
Fresh or frozen berries—like raspberries, strawberries, or mixed berries—make a stunning topping. Simmer 1 cup berries with 2 tbsp sugar and 1 tsp lemon juice for 5-7 minutes until thickened. Strain seeds if desired, then cool before spreading over the cake. The natural sweetness pairs beautifully with vanilla, and the vibrant color adds visual appeal. 🍓
Caramel Drizzle
For a sweet and salty twist, drizzle salted caramel over the buttercream. Heat ½ cup sugar in a saucepan until melted, then add ¼ cup heavy cream and ¼ cup butter, simmering until thickened. Drizzle in zigzags over the cake or pipe small rosettes. The caramel’s buttery richness complements the cake’s vanilla notes perfectly. 🍯
Coffee Syrup Glaze
Infuse the cake with espresso or coffee syrup for a sophisticated touch. Simmer ½ cup water, ½ cup sugar, and 2 tbsp instant coffee until dissolved, then cool. Brush lightly over the cake layers or drizzle over the buttercream. This adds a subtle depth that pairs wonderfully with vanilla and chocolate. ☕
Nutrition facts
Frequently asked questions
Do I need a special dome mold for this cake?
Not necessarily! While an 8-inch hemisphere mold creates the perfect shape, you can achieve a similar effect with freeform techniques. Stack your three layers on a round cake board, then use a serrated knife to trim the edges at a slight angle. For extra support, chill the assembled cake for 4 hours before unmolding.
Can I make this cake without a stand mixer?
Use a hand mixer or even a whisk for the buttercream and batter. For the buttercream, whip the heavy cream to stiff peaks first, then gradually add the powdered sugar mixture. The key is patience—mix in 30-second bursts to avoid overworking the ingredients.
Why did my cake layers crack or collapse?
This usually happens when layers aren't fully cooled before stacking or if the buttercream is too soft. Let each layer cool completely on a wire rack, then refrigerate for 30 minutes before assembling. Also, ensure your buttercream is chilled to 65°F before piping—this prevents it from spreading too much.
How do I store leftover cake?
Wrap the cake tightly in plastic wrap and store at room temperature for up to 2 days. For longer storage, refrigerate for up to 4 days—just bring it to room temperature before serving. The buttercream may soften slightly in the fridge, so let it sit for 10 minutes before slicing.
Can I substitute vanilla extract with vanilla sugar?
Yes, but adjust the measurements carefully. Replace 2 tbsp vanilla extract with 2 tbsp vanilla sugar plus an extra ½ tsp milk to maintain moisture. For the buttercream, use 1 tbsp vanilla sugar instead of the paste—it adds subtle sweetness and depth.